Super fast and easy recipe for this Cheesy Chicken Enchilada Pie with fresh red chili and cinnamon sauce.
Layer the tortilla on top of sauce. Place chicken and cheese and tortilla. Sauce chicken cheese tortilla sauce. Last layer is cheese on top of tortilla with sauce.
Ingredients
Chicken 🐓 cut into 1/4” small pieces
Tillamok mixed Mexican 🧀 cheeses
Corn Tortillas
Avocado
Blend all these ingredients together
20 Red chilis 🌶️
1 tablespoon Cinnamon
1 teaspoon Salt 🧂
1 teaspoon Sugar
1 teaspoon ground Cumin 🌱
1 onion Onion 🧅
1 Garlic 🧄
1 Tomato 🍅
1 tablespoon Olive oil 🫒
1 teaspoon Lime 🍋🟩 juice
Place all this in blender. Place in sauce pan. Bring to full boil on medium heat. Boiled down to a thicker sauce about 20 minutes. Remove from heat and let cool down 1 hour.
Cheesy Chicken Enchilada Pie with fresh red chili and cinnamon sauce.
Micro shards of plastic are being found in the human brain. So this starts a question of how these microplastics are getting … Continue reading Plastic Brain???→
Micro shards of plastic are being found in the human brain. So this starts a question of how these microplastics are getting into the brains of … Continue reading Plastic Brain???→
Micro shards of plastic are being found in the human brain. So this starts a question of how these microplastics are getting into the brains of humans? … Continue reading Plastic Brain???→
Enjoy your very own fermented garlic. Very easy to achieve a wonderfully bold and full of flavor after just a few days.
#HomemadeFermentedGarlic #orgnatlifecom
Super easy recipe.
INGREDIENTS
1 cup Water filtered purified
3/4 teaspoon Sea Salt
This makes 1 cup of brine
Instructions
• Peel the garlic cloves, cut the stem end off. (hard end)
HomemadeFermentedGarlic #orgnatlifecom
• Place them in a clean jar. Fill the jar 3/4 full.
• Make your brine in a glass bowl or large jar. Exactly how much brine you’ll need will depend on the size of jar. You will need ¾ teaspoon of salt for each cup of filtered purified water.
HomemadeFermentedGarlic #orgnatlifecom
• Tighten the lid down. I use regular masón jars. And burp them every other day
HomemadeFermentedGarlic #orgnatlifecom
• Allow the jar to ferment for 5 days to 4 weeks.
• You will need to open the jar to allow the garlic to “burp” every couple of days to release the gases that build. You can check the water level at the same time to make sure that the water which forms the seal hasn’t evaporated.
• The color will change to a tan color. This is normal.
HomemadeFermentedGarlic #orgnatlifecom
• Make sure to taste it during the fermentation process. When it reaches a flavor that you like put it in the refrigerator. Use for all your special recipes and snacks.
This recipe leaves your rolls nice and moist. Adding a little brown sugar to the recipe can really change the structure of your dough.
Yeast Breads are Quick and Easy to make
For Bread Machine
Level: Simple / Easy
Prep Time: 2.5 hours
Video Below
Not only did I change the sugar. I also used evaporated milk instead of water. These rolls are slamming good. Your name will be having a thank you behind it.
For this recipe I will be using evaporated milk. It produces a moist, tender golden brown crust. You can use evaporated, whole, low-fat or skim milk based on your preference. You can also use nonfat dry milk instead of fresh milk and add water for the required liquid.
Reminder: Adjusting your liquid depending on the type of flour you use. If you will be using bread flour you will have to add 1/4 cup more liquid.
Dough Ingredients
1 can Evaporated Milk
1/4 cup Water
3 tablespoons Butter
4 cups Bread Flour
2 tablespoons Brown Sugar
1 1/2 teaspoon Salt
2 teaspoons Yeast
Dough Directions
Set your machine on “DOUGH” and go do something else.
Once your timer goes off on your bread machine to signal your “DOUGH” is finished, remove pan of dough from machine and place it at work station.
On your work surface place your pans that you will use to cook your rolls.
Butter your pans lightly and add the honey.
Coat the sides with the honey
Remove a ball of dough place on table and roll the dough out very thin. If it’s to thick it will come out bread like. So thin is best.
Cover the dough in butterSprinkle some sugarSprinkle the cinnamon onAdd the nuts if you want them. Chopped finely Roll the doughCut the dough halfway through for fancy look.
Cut 2” pieces for the rolls. Place your rolls 1\4″ apart in pan.
Set in warm area to rise for 25 to 45 minutes. Check after 25 minutes. Best if at least twice to 3 times original size or more.
Place the rolls in the pansRolls are rising
Remove from proofing. Preheat your oven to 350 degrees if convection and 375 regular.
Place your pan in the oven on the center rack. Cook for 25 to 30 minutes or until light brown tops.
Do Not Over Cook… Check through glass door of oven after 25 minutes see if tops are brown then remove them. If not, check at 30 minutes.
Remove from oven
Remove and let cool at least 10 minutes.
After 10 minutes slowly flip the pan onto another pan. Cinnamon rolls flipped onto trayFlip the rolls overSpoon the hot honey on for 10 minutes
As you gain more confidence at baking bread you will be able to lightly knock on bread and rolls. Easy way to know they are done…
When the timer goes off knock lightly with your finger tip nail on top of rolls “FLICK” it in the center. They will be crispy on the crust. You will hear a clear tone when they are done.
Cooking is amazing once you get going. So every time you bake bread. Keep baking, you will see…
You can also freeze any extra dough. Just make the size of dough lay them on a cookie sheet and freeze and remove place in a baggie and take them out of freezer as you want. Easy simple.
3 pieces Bacon crispy and chopped into small pieces.
Parmesano Cheese finely shredded
8 tablespoons Butter
1 teaspoon Salt
1 teaspoon Pepper
2 teaspoons Italian Seasoning
1/2 cup assorted Veggies (per person)
Pasta (your choice, I prefer a long thin noodle)
Steam your vegetables to al dente’. Remove and cool. Best if you have an ice bath to put the colander of hot vegetables in for 3 to 5 minutes. Remove and let drain completely.
#Creamy Garlic Chunky Vegetable Pasta with Shrimp
Peel your garlic. Smash and mince. I smash my garlic with my knife first and the skin comes off easily.
#garlic#mincedgarlic
Cook your bacon till crispy. I cook my bacon in the microwave between paper towels. Chop into small pieces. Add 2/3 to sauce and 1/3 for finished garnish.
#choppedbacon
Start your pasta water add 1 teaspoon salt to water and bring to boil add pasta, cook to al dente, drain and place to the side.
#orgnatlifecom
Add 5 tablespoon butter to pan and turn heat on to medium.
Add garlic to melted butter and stir well to coat. Continue stirring, turn fire to low. Sauté the garlic. For 10 minutes. Add a pinch of salt and continue cooking on low for 15 minutes. You will smell the flora aroma of the garlic. It’s finished.
Roasted garlic
Add the remaining 3 tablespoons of Butter and 2 teaspoons of Italian Seasoning. Stir well.
Heavy whipping cream
Add cream, salt and pepper. Stir well on medium high heat until boils. Turn heat to medium. Turn heat to low as cream thickens. Continue reducing until you bring it to a creamy consistency. Remove from heat.
Garlic sauce
Quickly add the pasta to the hot creamy garlic sauce. Combine gently. Add pasta with sauce to the bowl of vegetables. Garnish with bacon.
Creamy Garlic Chunky Vegetable Pasta with Shrimp
You can choose to add chicken, shrimp or steak for protein.
Another great treat recipe the doggies ordered. It’s healthy and nutritious.
Blueberry Peanut Butter Oatmeal Doggie Treats
Blueberry Peanut Butter Oatmeal cookies
INGREDIENTS
2 cups Oatmeal (soaked)
1/2” inch Water cover above oats
2 cups Blueberries (whole or smashed)
1/2 cup Peanut butter
2 cups All Purpose Flour
1 Tablespoon Olive oil
DIRECTIONS
Place 2 cups oatmeal in container and cover 1/2 inch water over the top. Leave that set until almost all the water has been absorbed. About 1.5 hour
2 cups Oatmeal 1/2” inch water to cover oatmeal 1/2 “ inch water over oatmeal soaking 1 to 1.5 hours or until most if not all the water has been soaked up.
Heat oven to 350’ degree F. Grease 1” x 15”x 21” cookie sheet with the olive oil
Place the blueberries, peanut butter and oatmeal into the bowl.
Stir / Cream the ingredients together. Make sure all the blueberries are mixed in good. You might want to mix the blueberries prior to adding to the mix depends on your dogs. I have a smaller older dog so I smash them up.
After getting those ingredients mixed time to add the flour.
Place the dough onto the cookie sheet and smooth out to thin layer.
Sorry I forgot to take the photo!!!! Oops so we will use this as an example… LOL
Place in oven on center rack for 30 minutes. take out of oven. The sides should be pulled away from pan. Get the pizza cutter and cut your squares.
Pretending again .. but great example
Turn oven off and put the pan back into the oven and let bake until cool. You can make the size of the cookie fit your dog. I have 4 dogs in various sizes. From 85 to 15 pounds. So my cookies are various sizes.
Ahh finally I remembered to take the picture.
Cut your squares and put them back into the oven until completely cool.
Remove from oven after completely cool. Put into an airtight container and refrigerator. I have 4 dogs and this last one week. You can also freeze them and just take out what you need.
Your dogs will love them until the last cookie…
You can adjust this recipe to your dogs taste or yours. I ate one and i could barely taste the peanut butter. I did a second recipe with 1 cup of peanut butter. I can taste the peanut butter and my dogs could really smell their treats baking and waited by the kitchen door.
If you would like to make these human consumable just add 1 teaspoon Baking Powder, 1/2 cup Sugar, 1/2 teaspoon Salt and one egg. Baking powder is not good for your dogs so please don’t feed the human recipe to the dogs.
The approximate cost for the cookies is very low. So if you can spare about an hour of time your pups will have a tasty treat.
VIDEO BELOW
INGREDIENTS
5 cups Oatmeal (regular old fashion)
4 cups Water
2 cups Carrots diced
1 cup Beets (16 ounce) diced
3 Eggs
3 tablespoons Honey
3 tablespoons Turmeric Powder
1 tablespoon Fresh Ground Black Pepper
1/4 cup Virgin Olive Oil
4 cups All Purpose Flour
Read the ingredients on all food you give to your dog. Real sugar only if you have to. Do not use any LOW calorie products ever. They contain ingredients that can KILL your dog.
Dangerous food and their ingredients that will kill your dog.
Directions
Grease a 1” x 15” x 21” sheet / cookie pan
Cover oatmeal in water. Soak the oats until almost all the water is absorbed. Approximately 1 to 2 hours.
Clean and cook the carrots for 15 minutes, let cool and dice. You can do these the day ahead of time.
Cook the carrotsDiced carrots
Rinse the beets well with cold water this will get a lot of sugar out. A 16 ounce can or jar of beets equals 1 cup diced. If you have all natural or cooked fresh beets are even better.
Store bought beets must be rinsed in cold water
Put the ingredients into bowl except flour and mix.
Mix the ingredients together Mix the ingredients
Slowly add the flour while mixing.
Pour your dough onto the 1” x 15” x 21” sheet / cookie pan and smooth out completely from edge to edge equally. It might be a little sticky, so wet your spoon or spatula with water. Make sure you shake off excess water from the spatula.
Heat oven to 350’ degrees
Bake at 350’ degrees for 45 minutes.
Bake at 350 degrees
Remove from oven and cut into squares quickly with a pizza cutter. They will still be a little wet inside.
Return cookies to oven for 10 minutes. Check and see if they are drier. If not return to oven for 5 min.
Remove from oven if you would like a softer cookie. Have to remember our senior family members.
OR
If you want a super crispy cookie. Turn off the oven and leave it to cool inside. Approximately 3 hours in my oven. Then they are like rocks. But you actually cook the goodness out. Softer cookies retain more nutrients.
I make small cookies. I have various sized dogs. Choose the size that fits your needs.
2” x 2” inch cookies
Place cookies into containers. Your choice of sizes. If you only have one dog you might want to put them in several containers or baggies to freeze and take out as needed.
This is 60 cookies at 2” x 2” inch size
Keep a container of cookies in the refrigerator and take out what you’ll use daily.
My favorite pudding recipe. It’s rich and creamy texture deserves a special mention.
Ingredients
1/2 cup White Sugar
3 tablespoons Unsweetened Cocoa Powder
1/4 cup Cornstarch
1/8 teaspoon Salt
2 3/4 cup Milk
2 tablespoons Butter
1 teaspoon Vanilla
Directions
Place dry ingredients in pan and mix together
Add milk, stir and leave it for 5 mins
Place pan on stove and turn heat to medium high and constantly stir until pudding is bubbling, turn heat to medium and continue stirring until pudding thickens
Remove from heat and add butter and vanilla and stir until ingredients are combined well
Add orange juice, banana, frozen strawberries and frozen blueberries to the blender in that order. Turn it to smoothie setting if you have. If not pulsate the blender on and off. After a few minutes turn on medium and stop it. Turn on to high until smooth.
Just trying out some new recipes for the fur babes. They love these cookies. So this week changing the fruit to apples. It’s healthy and nutritious.
Apple Peanut Butter Cookies
Apples, Peanut Butter Oatmeal cookies
INGREDIENTS
2 cups Oatmeal (soaked)
1/2” inch Water cover above oats
1 medium Green Apple
1 cup Peanut butter
2 cups All Purpose Flour
2 Tablespoon Turmeric Powder
1 teaspoon Black Pepper
1/4 to 1/2 cup Water (add slowly to thin mix batter out if needed)
DIRECTIONS
Place 2 cups oatmeal in container and cover 1/2 inch water over the top. Leave that set until almost all the water has been absorbed. About 1.5 hour
2 cups Oatmeal 1/2” inch water to cover oatmeal 1/2 “ inch or middle of the thumb of water over the oatmeal, leave soaking for 1 to 1.5 hours
Heat oven to 400 degree F. Grease 1” x 15”x 21” cookie sheet with the olive oil
Slice apples into small 1/2” inch pieces
Stir / Cream the ingredients together. Make sure everything is mixed together.
Add 1 cup Peanut Butter to the Oatmeal
Place the sliced apples in the bowl
Add 1 1/2 cups Sliced Apples
After getting those ingredients mixed time to add the flour.
Add 2 cups FlourAdd extra water as needed to thin out batter
Place the dough onto the cookie sheet and smooth out to thin layer.
Smooth out evenly
Place in oven on center rack for 30 minutes
After 30 minutes remove the pan from the oven. The sides should be slightly pulled away from the pans edge and golden brown in color.
Get the pizza cutter and cut your squares. Wait until cookies are cool to touch.
Take the pizza cutter wheel and cut into squares
You can make the size of the cookie fit your dog.
Cut into 1” to 2” inch pieces
Remove from pan after completely cool.
Cookies can be removed from the pan after completely cooled
Put into an airtight container and place in the refrigerator or freezer. I have 4 dogs and this last 3 weeks. I also just take out what I need.
Place cookies in the air tight container
You can adjust this recipe to your dogs taste or yours. I ate one and I could taste the apples and peanut butter. My dogs on the other hand could really smell their treats baking and waited by the kitchen door in utter excitement. They smell something new.
I only have dogs so I would love some feed back on the recipe.
Kitty Kat Meow’s
Ingredients:
1 4-oz can of tuna in water
1/4 cup tuna water
1 egg
1/4 cup cornmeal
1/2 cup whole wheat or spelt flour
Instructions:
Pre-Heat Oven to 350’F
Lightly grease pan
Shred tuna fine, add egg and mix well. Add tuna water and mix well. Add cornmeal and mix till. If balls are not forming, add a small amount of water to get the balls to stick together if not sticking.
Spoon out ½ Teaspoon roll into a ball, Place pieces on greased baking sheet smash with fork to 1/4-inch thick
Bake at 350’F oven for 15-20 minutes or until light brown
Cool to room temperature, place in an air-tight container, and store in the refrigerator or the freezer. They will keep well in the fridge for up to 1 week and in the freezer for up to 3 months. Serve at room temperature.
Kitchen Appliance: Stove, Oven, knife, Slap-Chopper, Frying pan for oven use.
Onion rings with a Western Scramble in center
Ingredients
12 Eggs scrambled
Ham
Green, Red and Yellow Peppers
12 or more Onion Rings (medium size)
Butter
Cheese
Salt and Ground Pepper to taste
Directions
Cut your onion rings to 1″
Onions cut into 1” inch pieces
Cut Green, red and yellow sweet peppers into smal cubes
Lay them on paper towel to collect the liquid
Green, Red, Yellow and orange sweet peppers
Cut ham into small cubes
Cut ham into cubes
Crack 12 eggs and gently scramble in a bowl
Scramble eggs
Melt your butter in frying pan on medium heat
Place the 1″ cut onion rings in your pan
Place the onion rings on pan and heat to medium
Flip onion rings over after a few minutes, put 1 tablespoon of butter in pan and flip back up.
Turn the onion rings over and add more butter
Place a scoop of egg in center of onion ring, add ham, green, red and yellow peppers and cheese.
Add by scooping egg into ring. It will leak out. Make sure your pan is hotPut in oven
Slide into the 400′ degree oven, bake for 5 minutes remove and add cheese. Put back in oven for 5 minutes, shake and test, if it jiggles put back in for 3 to 5 minutes, remove add salt and pepper.
Add cheese and place in oven for 5 minutes or less Yummy 😋 Western O-Rings
Now that everyone is blindly making treats for their pets. Sadly we must check human ingredients to make sure there are not any things that will harm them.
We are not checking the ingredients that companies are using.
Please educate yourself so your dog stays alive!!!
Please, it’s just not chocolate that can harm and possible cause death. There is a long list of ingredients you need to be aware of. Some you would never think would. I was shocked myself the first time I read it.
You could be creating other injuries to their organs by using these ingredients.
Xylitol
Avocado seed, skin, leaves
Grapes and raisins
Garlic?
Macadamia nut
Chocolate
Cooked bones
Caffeine
Leeks and onions
Alcohol
Salt
Baking soda
Baking powder
Citrus oil cold pressed
Essential oils
Dairy – like whip cream in a can
Cat Food
Bacon
Tobacco – Cigarettes – Cigars
Gelatin
Butylated Hydroxyanisole (BHA)
Butylated Hydroxytoluene (BHT)
Ethoxyquin (“Fish Meal”)
Propylene Glycol
Food Dyes
Rendered Fat
Pam / Vegetable sprays aerosols
Wheat Gluten
Meat By-products
Nutmeg
Peaches pits
Mustard
Raw dough
Unsweetened organic applesauce
If your going to use store bought applesauce please read the ingredients. The are 3 ingredients in this brand. Apples, water and ascorbic acid. This is perfect. No unknown hard to pronounce words.
Store bought ingredients sometimes have harmful ingredients. Most times not good ingredients for your dog.
If you don’t know if it’s ok for your dog as google or the internet. “Is it ok to give my dog Xylitol”.
Take your leftover strawberry compote and turn it into something new.
Homemade Fresh Strawberry Shortcake Compote
You’ll find just how easy it is to make your own strawberry jam without all the extra sugar and junk your body does not need.
Yes trust me when I say less sugar and no preservatives does a body good.
I had some leftover frozen strawberries from this past season. So I added the frozen strawberries to my compote and 1” inch of water above the strawberries and turn on the heat under my pan to high.
Bring to a full boil and reduce the heat to a slow simmer. It’s more about the flavors you are bringing out with the slower simmer.
At this point the house is smelling like a strawberry field at picking time. The sweet undeniable smells of hot summer days come rushing through my senses. I just want to throw open the windows and let the world have a whiff.
Once your strawberries puff up (15 to 20 minutes) you can remove the lid and smash the strawberries with a fork or potato masher. Depending on how chunky you want your jam.
Make sure you continuously stir and watch the pot as they say. Jams are hard to clean up. Plus at this point you shouldn’t be using any heat that is going to make a boil. Simmer is tiny bubbles. Just like you see in champagne.
Tiny bubbles like champagne
Continue cooking without the lid on low heat to reduce the fluid. This might take up to an hour.
Still to much fluid. Keep reducing
During this time you need to taste it for sweetness. You can add sugar or vanilla at this time if needed. Depending on how sweet your strawberry short cake compote was.
Once it is semi thick and sticks to your spoon with just a little bit of slide to it. It’s ready, you can turn the heat off and let it rest. It will continue to thicken on its own.
Strawberry jam is sticking to the spoon. Remove from heat.
Believe it or not strawberries have a natural pectin. So it will thicken all by its self.
Strawberry Jam is cooling down
Add the cooled jam to your containers.
I put all my jams in 3 ounce containers with lids and I freeze them. That way I can have fresh strawberry jam or any other flavor anytime I want.
Great beginner level and a healthy option to fried foods. This recipe uses 1 tablespoon of healthy olive oil.
1 tablespoon Olive Oil coat entire pan. This pan is extra large cookie sheet type.
Turn on oven to 400’ degrees Fahrenheit. If you have a confection oven use that setting.
Defrost your chicken tenders
Cut your potatoes up and place in a bowl. Drizzle 1 teaspoon olive oil, 1 teaspoon garlic, 1/8 teaspoon salt and mix well. Place on your greased pan. I use the frozen Garlic cubes.
1 egg, 1 teaspoon garlic and scramble.
Scramble and scramble with fork.
Add 1/4 of Heavy Cream and mix well.
Roll your chicken in the flour, place in the egg wash and place in bread crumbs. Place on greased pan. Your fingers will get messy. You can use chop sticks or two forks and keep your hands clean.
Place the chicken tenderloins in the flour
Place the chicken tenderloins in the egg wash and coat the chicken really good with the egg wash. Place the chicken in the bread crumbs and place on the pan.
Place chicken on pan
Place the pan on the middle rack for 20 minutes or until crispy brown. Remove from the oven.
Dish it up and add powered Parmesan cheese and salt to the fries.
Enjoy your easy oven fried chicken tenderloins and fries.
A little something about Karen Shaw Becker . She is the most followed veterinarian in the world, and for good reason. Dr Becker believes in a deliberate, common sense approach to creating and maintaining vibrant health for companion animals and an unconventional, integrative approach to addressing disease and re-establishing wellbeing in ill pets. This refreshing, proactive approach that intentionally focuses on creating or restoring wellbeing has been embraced by millions of pet lovers around the world.
We are excited to introduce Dr. Becker’s Forever Dog Bites. This unique one-of-a-kind treat was crafted by years of research that can be found in the newly released book, “The Forever Dog.”
We are using spices and veggies instead of ketchup to flavor our yummy kid friendly and adult pleasing yummy homemade sloppy joes. No preservatives.
Add 1/4 of each green, red and yellow peppers 🫑 cut up into your choice of size and 1 onion. If your making this for kid’s you may want to dice the peppers and onion’s into very small pieces. I like 1” inch piece’s for adults. You can also purée in the blender for a smoother texture.
While the meat 🥩 is cooking cut up your veggies 🥗 and onions 🧅 .. Cook your meat 🥩 down and drain the grease.
Add your onion 🧅 and 🫑 peppers. Add 1 teaspoon salt.
Add 2 Teaspoons of garlic. I use 2 of the frozen 5 gram cubes. ( 1 Teaspoon each cube ). Continue cooking
Cook down until soft and onion’s are translucent.
1 pound Hamburger
1 teaspoon Salt
1 tablespoon White Sugar
1 teaspoon Celery Salt
1/2 cup Brown Sugar
1 tablepoon All Spice
1 can Tomato Paste 6 oz
1 1/2 cups Water
Adding water 1/2 cup at a time. Mix it up until all the water is gone.
Simmer for 45 minutes
You can adjust the serving size by increasing all the ingredients. This makes approximately 6 to 8 sandwiches.
Yummy ready to go
I toasted some fresh baked garlic pepper Jack cheese bread. It paired wonderfully. So buns for the kids and add cheese or a different bread for the adults.
SPAM® Figgy Pudding brings a blend of warm spices and seasonal ingredients that will be the star in many wintertime recipe favorites. With notes of cinnamon and nutmeg combined with fig and orange flavors, you’ll taste true holiday comfort that will have you caroling all season long.
Now here’s a recipe with multiple uses. This can be used for jam on your toast, ice cream and cake poté filling.
I only make small batches. One pound of strawberries and half the sugar of other recipe’s. Big chunks of strawberries simmered to perfection. Low in sugar. No pectin.
Strawberry Shortcake
INGREDIENTS
1 pound Strawberry
1/2 cup Sugar
1/2 Teaspoon Vanilla
2 Tablespoon Lemon Juice
Water to cover berries by 1”inch
DIRECTIONS
Take the tops off the strawberries and clean under water.
Cut strawberries up into chunks.
Place the strawberries in a medium sauce pan with the water.
Add sugar and lemon juice
Turn the fire on to medium and bring to a full boil. Turn the heat down so it simmers.
Continue to stir as it thickens.
When the jam is thick enough that it sticks to the spoon when turned on side. Remove from fire.
Add vanilla and stir really well.
Add to mason jar and completely cool. Put it in refrigerator.
2 Red Chilies soaked in 1/2 cup water over night (wear gloves when you handle the chilies) remove seeds and dice chilies thinly. Add the 1/2 cup of the chilie water to the pan.
1 Onion Large diced
2 Tablespoon Garlic minced
1 cup Dark Brown Sugar
1/4 cup White Sugar
3 tablespoons Vinegar
2 (6 ounce cans) Tomate Paste
1 Tablespoon Worshire Sauce
1 Tablespoon All Spice
1 Teaspoon Salt
1/4 cup Honey
DIRECTIONS
Wash and cut up your vegetables into small pieces
In a Large Pot 1 tablespoon Olive Oil bring to medium heat
Place the vegetables and sautee on medium heat until vegetables are wilted and soft. Add the garlic for the last 5 minutes. Stir frequently and dont burn them. Approxamently 20 minutes
Add the chicken broth bring to a boil reduce heat to simmer
Add tomatae paste and stir until dissolved
Add vinegar, brown sugar, white sugar, worshire, all spice, salt and honey
Stir until all is mixed together
Cover pan with lid slightly crocked to let steam out.
Cook down until very thick
2- 16 ounce wide mouth mason jars. Fill each one and leave at least 2″ from the top. Put the lid and seal on quickly so it will seal down good.
Let the BBQ sauce cool completely.
Put one in the freezer and the other you can refrigerate for up to 3 weeks.
*You can use a Slow Cooker or Multicooker with the Jam setting if you have. It’s easier and you dont have to worry bout burning it. You just use the brown/sautee setting for cooking vegatables and bring to boil.
Just what my doggies ordered. They love these cookies. It’s healthy and nutritious.
Banana, Peanut Butter Oatmeal cookies
INGREDIENTS
2 cups Oatmeal (soaked)
1/2” inch Water cover above oats
1 cup Banana
1/2 cup Peanut butter
2 cups All Purpose Flour
1 Tablespoon Olive oil
DIRECTIONS
Place 2 cups oatmeal in container and cover 1/2 inch water over the top. Leave that set until almost all the water has been absorbed. About 1.5 hour
2 cups Oatmeal 1/2” inch water to cover oatmeal 1/2 “ inch water over oatmeal soaking 1 to 1.5 hours
Heat oven to 350’ degree F. Grease 1” x 15”x 21” cookie sheet with the olive oil
Frozen bananas to peelPeel banana’s Golden banana’s from my trees
Place the banana, peanut butter and oatmeal.
Stir / Cream the ingredients together. Make sure all the bananas are mixed in good. You might want to mix the bananas prior to adding to the mix.
After getting those ingredients mixed time to add the flour.
Place the dough onto the cookie sheet and smooth out to thin layer.
Place in oven on center rack for 30 minutes. take out of oven. The sides should be pulled away from pan. Get the pizza cutter and cut your squares. Turn oven off and put the pan back into the oven and let bake until cool. You can make the size of the cookie fit your dog. I have 4 dogs in various sizes. From 85 to 15 pounds. So my cookies are various sizes.
After 30 minutes remove from the oven
Cut your squares and put them back into the oven until completely cool.
Remove from oven after completely cool. Put into an airtight container and refrigerator. I have 4 dogs and this last 3 weeks. You can also freeze them and just take out what you need.
Your dogs will love them until the last cookie…
You can adjust this recipe to your dogs taste or yours. I ate one and i couldn’t taste the peanut butter. I did a second recipe with 1 1/2 cups of peanut butter. I can taste the peanut butter and my dogs could really smell their treats baking and waited by the kitchen door.
Another mouth watering recipe for your Latin Food file.
My recipe is a combination of of 5 different meat filling recipes. I made them until I found one that I really liked. Now I have my wonderful creation. The masa recipe is off the back of the Tamal Mesca bag. Simple easy. The only difference is I tan and use my Lard, Manteca or Tallow warm to enhance the flavor of the masa. Instructions down below.
A tamale is a traditional Mesoamerican dish, made of masa or dough, which is steamed in a corn husk or banana leaf. The wrapping can either be discarded prior to eating or used as a plate. Tamales can be filled with meats, cheeses, fruits, vegetables, chilies, chocolate or any thing your heart desires, and both the filling and the cooking liquid may be seasoned with what ever your main ingredient is in your tamale..
If you are trying to decide what to make for a special occasion, holiday or Christmas we think you might enjoy a little spice and sweetness instead.
The secret to a good tamale is moisture. Lard and broth are key ingredients to achieve a smooth creamy flavorful masa.
There are several variations of the tamale. From breakfast, lunch, dinner or dessert. The tamale base masa is like a white bread recipe that you make your own by adding your favorite ingredients. Use your imagination and be creative.
Today we will be making:
Red Chili Pork Tamales
There are a few ways to Cook the Tamales. You can use a Pot with a wire rack to hold tamales out of water, Multi Cooker or Rice Cooker with a wire rack (45 min to 60 min) or a Crock Pot/ Slow Cooker function with wire rack (takes about 2 hours +or-). I use the “Steam” function on my Multi-Cooker by Crock-Pot for no less then 45 minutes to 80 minutes.
Prepare the Corn Husks by soaking them in a large pot with warm water. Make sure to separate each husk and clean thoroughly before you place them in the pot of warm water.
Preparing your filling is just as important as the masa. You need to pre cook your ingredients. Make sure you add enough moisture to your red chili sauce. This can be made ahead of time. I have made it when I had leftover pork and I just freeze it until I have time to make tamales.
RED CHILI PORK INGREDIENTS
Pork better if mixed parts like the butt, chops or loin ( fat and lean meats mixed)
1/2 cup water
1 can 10 oz. Enchilada sauce
10 dried red chili’s chopped in blender
1 Teaspoon cumin
1 Tablespoon salt
1 whole clove of garlic
1 onion
1 small bunch fresh cilantro (leaves only)
Rub pork with cumin and salt. Place all the ingredients in the multi cooker and stir. Select meat on the pressure cooker function. Cook until the pork is tender, approximately 90 minutes. Using slow cooker or pot on the stove method to cook your meat, at least 2- 3 hours until tender.
Open the multi cooker or pot and mix all ingredients together, break the meat down. Pork is broken down and shredded.
Place lid back on and slow cook for 2 hours.
After 1 hour check to make sure you have plenty of moisture if not add another cup of water and mix together.
Preparing Your Masa Its important to remember your liquid to dry ingredient ratio. It will be better if the masa is a little moist than dry.
VIDEO BELOW
Lard, Manteca or Tallow oil must be tanned to bring out the flavor. By heating the Lard, Manteca or Tallow over medium heat for approximately 15 to 20 minutes. Make sure you watch the lard closely so it does not burn or start on fire. Be very careful handling the hot oil.
As you slowly heat the melted lard up to it will start to turn colors. From a clear liquid to a golden brown. Burn point is 420 degrees so watch it closely. The scent will become more appealing, It will actually smell like a tasty piece of meat. Just remember this aroma is the flavor to your masa. So if the aroma makes your mouth water for a juicy steak, it’s ready. Let it completely cool down to luke warm before using.
Speaking of your liquids. You can use the juices from your boiled meats after removing the fat content, which can be achieved by placing the cooled broth into the refrigerator for a few hours. You can also make your own vegetable or fruit broth to be used for your other tamales.
MASA INGREDEINTS
2 cups Tamal masa mix
2/3 cup Lard, Manteca or Tallow
1 1/3 cup Broth (beef, pork, chicken vegetable) your choice
1 teaspoon baking powder
1 teaspoon salt
DIRECTIONS
Mix your dry ingredients together (maseca flour, salt and banking powder) in a separate bowl and set to the side.
Add your lukewarm Lard, Manteca or Tallow to a separate large bowl for mixing. Slowly add 1/3 of maseca to the warm oil while gently stirring so the oil doesn’t splash. Continue adding 1/3 of the dry mix until it is mixed well and it is fluffy and light in texture. Cover with damp cloth or saran wrap for 15 minutes. It’s always better to use a larger bowl
After 15 to 20 minutes your masa should be fully hydrated and ready to spread on your corn husks that have been soaking for an hour or longer in warm water.
Gather all your ingredients husks, pork, masa and (extra sauce if needed). Make sure to pre-make your ties from smaller husks that wont be used to make the tamales. No waste here.
You need to line your pan in this order, #1 water, #2 wire rack and #3 moistened corn husks or banana leaf are last. The water should be right under the rack and not cover the rack or touch the tamales. Less is best and refill when needed. You can put a quarter or spoon in the bottom of the pan so when the water gets low it will sound the alarm so you can add more water. If you need to add water during cooking make sure to pour down the side of the pan so you don’t pour any water on your tamales. Make sure you put the husks or leaf back on top of the tamales. Close the lid and reset your time to finish them.
Making the Tamale. Place a corn husk on the plate. Place1 1/2 tablespoon of masa and place baggie or saranwrap over and gently even the dough out. Remove the plastic. Place 1 1/2 tablespoon of meat filling in the center and even it out on the masa. Place one side of the husk over the edge of meat and gently pull the husk away and place the other side of the masa on the edge of other and fold the other husk across and fold the bottom up and tie off. Place it in your pot and your on the way to a delicious meal you have created.
Place the tamales in the pan until full, place moist corn husks or banana leaf over the top. Place in Multi-Cooker or Rice Cooker and set to steam for 45 to 60 minutes or until masa has cooked all the way through. Test by taking one out and see if the masa is firm and easily pulls away from the corn husk. If not put the lid back on and cook for another 15 minutes and check again. Always add only 15 minutes each time you add time. If you are using a pan on the stove you just have to add more water at different intervals and watch it.
Disfruta de tu comida… Man`gia… Enjoy… Bon Appetit
1/2 cup butter room temperature (1 Stick Butter or 4 ounces) 1 cup sugar 1 teaspoon vanilla extract 2 eggs 1 3/4 cups all-purpose flour 2 teaspoons baking powder 1/2 teaspoon salt (you can omit if you used salted butter) 1/2 cup water 2 tablespoons powdered sugar (to sprinkle on cake before serving)
Preheat the oven to 375°F Grease 9″ x 9 cake pan with vegetable oil and flour Cream the butter, sugar and vanilla together in a large bowl. Add the eggs, one at a time, beating well after each addition. Add the water make sure it is at room temperature. Add the flour, baking powder and salt. Mix all together beating well. Spread a layer of the batter evenly into the pan. (use 3/4 of the batter) Spread the cinnamon apple fillings on top of the batter. Spread the left over batter on top of filling.
Bake 25 to 35 minutes. Test with tooth pick at 30 minutes Remove from oven cool on rack for at least 30 minutes Cut the length of cake and then cut your cake into 12 squares
Make a powder sugar glaze or lightly sprinkle powder sugar over top right before serving.
When I say ULTIMATE I mean only 3/4 cup Brown Sugar and NO vegetable oil.
This recipe is the best banana nut bread I have tested lately. In the past year I have made 11 banana nut bread recipes.
This recipe is so full of natural flavor without all the sugar. You can taste the hint of cinnamon and vanilla.
There is no Rancid vegetable oil in this recipe either. I am switching out all vegetable oils for animal fat rich butter, lard and what ever else I can try.
This is a very dense, but fluffy quick bread
This slideshow requires JavaScript.
Prep Time: 20 to 30 minutes
Cook Time: 60 to 65 minutes
Total Time: 95 minutes
Yield: 8 servings +
Skill Level: Beginner / Easy
Kitchen Appliance: Food Processor, Mixer or by hand and Oven
Ingredients
2 cups all-purpose flour or what ever flour you want to use
1 teaspoon baking soda
1/4 teaspoon salt
1/2 teaspoon ground cinnamon
1/2 cup (1 stick) unsalted butter, softened to room temperature
3/4 cup packed light or dark brown sugar
2 large eggs, at room temperature
1/3 cup plain sour cream
2 cups mashed bananas (about 4 large ripe bananas)
1 teaspoon pure vanilla extract
optional: 3/4 cup (100g) chopped pecans or walnuts
Instructions
Adjust the oven rack to the lower third position and preheat the oven to 350°F (177°C).
Grease a 9×5-inch loaf pan. Set aside.
Whisk or stir the flour, baking soda, salt, and cinnamon together in a large bowl.
Using a mixer, whisk or a really good spoon, cream the butter and brown sugar together until smooth and creamy, about 4 minutes.
Add the eggs one at a time, stirring well after each addition.
Stir in the yogurt, mashed bananas, and vanilla extract on medium speed until combined.
Slowly mix the wet ingredients into the dry ingredients until no flour pockets remain.
Do not overmix.
Fold in the nuts, if using.
Spoon the batter into the prepared baking pan and bake for 60-65 minutes.
Loosely cover the bread with aluminum foil after 30 minutes to help prevent the top and sides from getting too brown.
A toothpick inserted in the center of the loaf will come out clean when the bread is done.
Remove from the oven and allow the bread to cool completely in the pan set on a wire rack.
Cover and store banana bread at room temperature for 2 days or in the refrigerator for up to 1 week.
Banana bread tastes best on day 2 after the flavors have settled together.
You can finish this recipe off with butter, cream cheese frosting or Ice Cream.
Preheat oven to 450 degrees F (230 degrees C). Confection Oven lower temp by 20 degrees.
In a large bowl, combine flour, baking powder, sugar and salt.
This slideshow requires JavaScript.
Cut the butter into cubes and start cutting the butter into the flour mixture with a fork. Smash the butter and flour until small pieces start to make a crumble.
Stir in water, just until moistened.
Drop batter on a lightly greased cookie sheet by the tablespoon.
Bake in preheated oven until golden on the edges, about 10 to 15 minutes. Serve warm
You can also substitute different types of flour. Rice, Coconut, or Red Mills gluten free flour mix.
Prep Time: 30 minutes Cook Time: 60 minutes Total Time: 90 minutes Yield: 6 servings + Skill Level: Easy Kitchen Appliance: Multi – Cooker or slow cooker
Leftover Turkey In A Pot with Tortellini Pasta.
Famous Left Over Turkey In A Pot
This is a wonderful recipe for all that left-over turkey. Turn it into something warm for a cold rainy day. Throw everything into the Crock-Pot or Multi-Cooker and go about your day. You can have this on a Baked Potato, Pasta or Rice.
Bake some fresh rollsto go with this delicious meal. Spice it up and add some minced serrano pepper (Deseeded). Make sure you wear gloves when handling the peppers. The more seeds from the pepper you add the hotter the dish.
INGREDIENTS
1 3/4 cup Turkey Brooth made with the turkey carcass. If not use a large can or box of chicken broth
3 1/2 tablespoons tomato paste
1/2 teaspoon ground black pepper
1 teaspoon dried oregano
1 teaspoon salt
1 clove garlic, minced
3 cups sliced carrots
2 cups green beans french sliced
2 cups thinly sliced celery
2 cups diced onion
2 cups fresh sliced mushrooms
4 cups boneless Turkey
Directions
In the pot, combine the broth, tomato paste, ground black pepper, oregano, salt, garlic. Mix well and then add the veggies.
Mix in the mushrooms
Add turkey and mix together
Cover and set the correct temperature for the multi cooker – slow cooker Approximately 3 hours or multi-cooker 45 minutes using the pressure cooker mode.
You can also make a paste with the raisins and walnuts. It becomes a very smooth buttery experience for the thinner pastry dough.
Dough Ingredients
1 cup Water
3/8 cup Milk (Whole)
3/4 Stick Butter (chopped into tiny pieces and evenly placed in the pan)
1 and 3/4 teaspoon Salt (on the Left side top corner of the pan)
4 cups Flour (in the center place a shallow divot to place yeast ans a little sugar)
2 tablespoons Sugar (on the bottom right corner and a small sprinkle in the divot maybe 1/4 teaspoon)(Real Sugar, No Substitute)( Trust me, it won’t hurt you)
2 and 1/4 teaspoons Active Dry Yeast ( place in pivot on top of sprinkled sugar)(NO QUICK YEAST) Old Fashion kind…
While your bread machine makes the dough get all your other ingredients together.
Soak the cup of raisins in 1/4 cup of warm water for at least 45 minutes. I just let them soak until my dough is ready. Drain and set aside. If you are using the raisin paste its better to make the paste a day ahead. Remove from refrigerator at least 2 hours prior. Must be at room temperature.
Prep Time: 10 minutes Cook Time: 10 minutes Total Time: 20 – 30 minutes Yield: 1 servings + Skill Level: Easy Kitchen Appliance: Food Processor, Stove, sauce pan and spatula
Raisin paste is always a good match for thinner dough, thumbprint cookies or cinnamon rolls if the dough is thinly rolled and its more of a delicate pastry. The raisin paste is great for Filo, buttery, croissant Doughs.
Ingredients
1 Cup Raisins
1/4 to 2/3 cup Water (enough to cover raisins)
1/2 stick Butter
2 tablespoons Sugar
2 tablespoons Cinnamon
Directions
Add the Raisins and water into the saucepan and place on stove
Bring to a boil and turn down fire.
Simmer for 10 minutes
Remove from heat and add the butter, cinnamon and sugar.
Stir until the sugar dissolves
Use you spatula to remove everything and place into the food processor.
Make sure it processes to a smooth texture.
Take your spatula and remove all the paste into a container with a lid.
Set in refrigerator until ready to use.
Its better to make the paste a day ahead or even a few days. Remove from refrigerator at least 2 hours prior to use. Must be at room temperature so it spreads evenly like butter. This is awesome on toast in the morning.
It seems appropriate that today, my Dear Dad’s birthday, I have spent much of the day making marmalade. Dad was the marmalade maker in our house and I used to help him when I was quite young. The smell of the oranges boiling is so evocative of lovely times. I spent the rest of the […]
Prep Time: 5 minutes Yield: 2 o 6 pie crust tops Skill Level: Easy Beginner Kitchen Appliance: Manual Fork
Add egg wash or you get dull pastries like this
Image on left with egg wash, on the right no egg wash.
Egg products, such as egg whites or egg yolks, supply coating, gloss or finishing to foods within the baking category. Consumers expect a certain appearance on the outside of baked goods, such as color or finish. Food color overall is an indicator of quality, including the color of finished baked products. The proper coating or finish not only aids with appearance but can also help extend shelf life by sealing in moisture.
Slightly beaten liquid egg products can serve as a coating or glaze on baked goods, with different variations of the egg mixture according to the desired appearance and texture of the final product. A baker might select either egg yolk, egg white or whole eggs for varying results.
The white is the primary source of proteins in an egg. When whites alone are used as a coating the proteins coagulate and draw moisture from the product, with eventually evaporates, resulting in a crisp surface. An egg wash can also give the baked product a finished, slightly glossy look. Protein browns when exposed to heat, so the addition of an egg wash helps give baked goods a bronzed sheen, in addition to the gloss.
Slightly beaten yolk or eggs, brushed onto surface of unbaked good helps prevent crust from drying out and lends a glossy look. Added at a certain stage in the baking process, the egg wash can help prevent overbrowning. However in order to seal in moisture, yolks must be used in the egg wash.
An egg wash application is common not just for bread, but also different types of pastries or pies, to promote browning, create a glossy shine or both. A variety of other ingredients added in different proportions to the selected egg product (whole egg, egg white or egg yolk), will supply different levels of browning, shine and even texture to the crust surface
INGREDIENTS
1 Tbsp heavy cream, half and half, milk or water
1 large egg yolk or egg white
Beat egg yolk with cream and brush on the surface of the pie with a pastry brush.
Time: 20 Minutes Skill Level: Easy Suggested age: 6 months and up
Ingredients:
1 cup prunes
2/3 Cups Water
Combine prunes and 2/3 cup water in a small saucepan and bring to a boil. Lower heat to medium-low, cover and simmer until very soft, about 10 minutes.
Carefully transfer prune mixture to a food processor and purée until smooth.
The purée will keep refrigerated in an airtight container for up to 3 days or in the freezer for up to 3 months.
Yummy Sweet apples and cinnamon. Great for making pies, party appetizers or handy snack size for Apple pie ice cream ala mode.
Apple Filling Instructions
Ingredients
9 medium apples, peeled, cored and sliced
3 tablespoons lemon juice
1/2 cup water
8 tablespoons salted butter (1 Cube/ Stick)
4 tablespoons cornstarch
1 cup granulated sugar
2 1/2 teaspoons ground cinnamon
PEEL APPLESAPPLE CORERREMOVE THE APPLE CORESLICE IN HALF MAKE SURE ALL SEEDS AND CORE ARE REMOVED1/4″ SLICES1/4″ CUBESMELT 1 STICK OF BUTTERFRESH LEMON IS ALWAYS BEST IF YOU CANJUST USE THE PEELER TO MAKE A SLITSQUEEZE 3 TABLESPOONS OF LEMON JUICEADD INGREDIENTS ADD MORE INGREDIENTS AND STIRLET INGREDIENTS STAND FOR ABOUT 5 TO 10 MINUTESONCE INGREDIENTS ARE MIXED you can place them in pie shell or go to the next step cooking for 10 minutes for empanadas or small tarts.PLACE POT ON THE STOVE FOR 10 MINUTES AND REMOVE AND LET COOL
Peel apples and remove core. Cut in Half and slice length wise 1/4″ thick,, after cut into 1/2 inch pieces.
Melt butter in saucepan remove pan from heat
Add lemon juice, sugar, cinnamon, cornstarch and water. Stir together until all is mixed. I let it sit for about 10 minutes so the cornstarch and sugar have a chance to dissolve really good.
At this pointif you are baking a pie just add the apple mixture into the pie shell and cover with top crust, pinch, make your slits and bake.Continue for empanada or small tarts that only bake for 10 to 20 minutes only.
Bring covered pot to a boil and turn to medium heat. Simmer for 10 minutes while stirring frequently or until apples are al dente soft. Still Firm
Remove from heat and let cool. At least 2 hours, better if over night.
You can make this a few days ahead and refrigerator. Great to prepare and can it.You can also freeze the cooked mixture.
This pie crust can be used for sweet or savory pies. Its light and flakey.
2 1/2 cups all-purpose flour, plus extra for rolling
1 cup (2 sticks or 8 ounces) unsalted butter, very-cold, cut into 1/2 inch cubes
1 teaspoon salt
1 teaspoon sugar
6 to 8 tablespoons ice water
Mix flour, sugar, and salt: Put flour, sugar, and salt into the bowl of a food processor and pulse a couple times to mix.
Add butter, half at a time, pulsing several times after each addition: Add about half of the butter to the food processor and pulse several times. Then add the rest of the butter and pulse 6 to 8 times until the largest pieces of butter are about the size of large peas.
Slowly add ice water: Sprinkle the mixture with about 1/4 cup of ice water (make sure there are no ice cubes in the water!) and pulse again. Then add more ice water, a tablespoon at a time, pulsing once or twice after each addition until the dough just barely begins to hold together.
You know that the mixture is ready if when you pinch some of the crumbly dough together with your fingers, it holds together. Be cautious with the amount of water you add, too much and the crust will be tough.
Make two dough disks: Carefully empty the crumbly dough mixture from the food processor on to a clean, dry, flat surface. Gather the mixture in a mound.
Divide the dough mixture into two even-sized mounds. Use your hands and knead each mound just enough to form each one into a disk. Do not over-knead! Kneading develops gluten which will toughen the dough, not something you want in a pastry crust. You should just knead enough so that the dough holds together without cracks.
If you started with cold butter you should be able to see small chunks of butter speckling the dough. This is a good thing. These small bits of butter will spread out into layers as the crust cooks so you have a flaky crust!
Sprinkle each disk with a little flour, wrap each one in plastic wrap, and refrigerate for one hour or up to 2 days.
4 Remove dough from refrigerator and let sit for a few minutes: Remove one crust disk from the refrigerator. Let sit at room temperature for 5-10 minutes in order to soften just enough to make rolling out a bit easier.
5 Roll out dough, place in pie dish: Roll out with a rolling pin on a lightly floured surface to a 12-inch circle; about 1/8 of an inch thick. As you roll out the dough, check if the dough is sticking to the surface below. If necessary, add a few sprinkles of flour under the dough to keep the dough from sticking.
Carefully place onto a 9-inch pie plate. Gently press the pie dough down so that it lines the bottom and sides of the pie plate.
Use a pair of kitchen scissors to trim the dough to within 1/2 inch of the edge of the pie dish.
Preheat oven to: See chart below
6 Add filling to the pie.
7 Roll out second disk, place on top of filling: Roll out second disk of dough, as before. Gently place onto the top of the filling in the pie.
Trim excess dough with kitchen shears, leaving a 3/4 inch overhang. Fold the edge of the top piece of dough over and under the edge of the bottom piece of dough, pressing together.
Flute edges using thumb and forefinger or press with a fork.
Score the top of the pie with four 2-inch long cuts, so that steam from the cooking pie can escape. You can be creative and cut small slit designs such as leaves or stars from a couple of spots or a circle.
When you are all finished make sure you always egg wash the top crust. Gives it a nice sheen and golden brown to the pies.
BAKING
Baking instructions for different types of fillings is very important. It can range depending on the type, depth of the pie, is it single or double crust? You will have to look up the directions for each one.
A traditional Mexican cake. Tasty almond flavor. Great for any occasion.
Experience Level: Easy to Moderate
Prep Time: 20 minutes
Cook Time: 40 minutes
Serves: 8
Ingredients
1-¼ cup Almonds
13 Tablespoons Unsalted Butter
1 cup Sugar
3 whole Large Eggs
1 teaspoon Vanilla Extract
1 teaspoon Almond Extract
½ teaspoons Salt
1 teaspoon Baking Powder
½ cups All-purpose Flour
¼ cups Confectioners Sugar, For Dusting
Preparation
Line the bottom of a 9″ cake round or spring-form pan with parchment paper and spray the paper and the sides of the pan with cooking spray. Preheat oven to 350 F.
Place the almonds in a food processor and pulse until the nuts are the consistency of coarse meal.
Using a stand mixer or hand mixer, cream together the butter and sugar until light and fluffy. Beat in the eggs and extracts. Set aside.
In another bowl, mix together the salt, baking powder and flour, then add it into the butter mixture and mix until just incorporated. Fold in the almond meal and pour the batter into the cake pan.
Bake in a preheated 350 F oven for approximately 40 minutes (begin checking at 30 minutes) until a cake tester inserted in the center of the cake comes out clean. Remove cake from the oven and allow it to cool before removing it from the cake pan. Dust the top with confectioners’ sugar and serve.
Try serving a scoop of Mocha or Chocolate Fudge ice cream along side a slice of Torta De Cielo.
Check the website for complete recipe and pictures.
At one time I had the good fortune to live near a remarkable Jewish Bakery. They created the most eye catching flavorful desserts I had ever seen or tasted. When I moved out of the area and realized I no longer had access to some of my favorites; I decided it was time to start creating my own. One of these fabulous treats was Prune Danish. Now many people just are not into prunes always seeing them as simply a source of fiber for regularity. However, their flavor complements the flaky pastry crust that surrounds them. Prunes are NOT just for fiber any more! And so let me entice you to try making what you see above and enjoying the aroma and flavor of your own freshly baked Prune Danish! Below are two versions you may follow. The Puff Pastry and Lekvar Prune Butter are what yielded the photo above. BUT you can also create your own prune filling and use a softer pastry as will be detailed in what follows. Mix, match and try what you will as they will still taste great. Let us begin with the Puff pastry: 2 1/2 sticks cold unsalted butter 1/2 cup cold tap (or bottled) water 1 tsp salt 2 cups all purpose flour 1/2 tsp vanilla 1/8 tsp Cardamom (ground)
Measure the water, add the salt and vanilla, stir to dissolve and set aside. Cut up butter into small size chunks ( I cut 1/2 inch pats then split those into four) Place flour and cardamom into bowl of food processor with METAL blade (not dough blade) Add about 1/2 stick’s worth of the cut up butter and pulse 12 times for one second each Add remaining butter and long pulse twice to incorporate (5 seconds each) Add water and pulse three or four times until dough forms a rough ball. Flour your work surface (I use a large wooden pastry board) and scrape dough out of processor onto the floured surface. Shape dough into a rough rectangle and place between two LARGE sheets of plastic wrap (OR you could use waxed paper). Roll dough into a 12X18 inch rectangle Peel away top plastic then invert dough onto floured work surface Peel away second plastic then fold dough in thirds on the width so as to end up with a 6X18 inch rectangle. Fold one side in then the other overlapping. Roll up dough from a six inch side making sure the end is on the bottom. Press dough into a a square, wrap in plastic and refrigerate one hour.
Pastry number two is a softer one:
1 8oz. brick of cream cheese 3 sticks of butter (salted) 3 cups all purpose flour 1/8 tsp cardamom 1 tsp vanilla
Place 3 cups flour and 1/8 tsp cardamom into food processor with metal blade Cut up butter into smaller chunks (cut 1/2 inch pats then cut each into 4) Cut up Cream cheese into rough chunks as well Add butter to processor and pulse until four and butter combine roughly Add cream cheese and vanilla and pulse until the dough comes together CAREFULLY remove from processor and work with your hands into a ball Place in a bowl and cover with plastic wrap then into the fridge for one hour.
Those are the two dough options. Both taste good.
As to the prune filling – well I really like the Simon Fischer Lekvar Prune Butter in the18oz jar. I have bought it on Amazon. It is Natural and tastes really good. I have even spread it on English muffins for breakfast. They sell the jars as a pack of 6 which is okay as they will last you a while. They also sell 17oz in a pack of 3 but you pay shipping so the six pack is a better value. Try this stuff it is REALLY good. I used to use the Solo Prune Filling in the can until my grocery store stopped carrying it. Now I realize they did me a favor as that one was nowhere near as good as Simon Fischer.
IF you feel REALLY ambitious and would rather make your own prune filling then here goes MY version.
2 cups pitted prunes 1/2 cup dark raisins 1 cup Brandy (or if you do not like using alcohol use boiling water) 3/4 cup mild honey 1/8 tsp salt 1 tsp grated Orange Peel (fresh grated or from the jar) (I use a Microplane to get very fine fresh orange and lemon peels. If you do not have one GET one – they are wonderful.)
Put prunes and raisins into a container or bowl and pour on brandy (or boiling water). Stir well and cover with container lid or plastic wrap. (Brandy gives a great flavor and the alcohol will cook out anyway). Allow fruit to soak overnight Place softened fruit into food processor with metal blade Add peel and salt and pulse three or four times Add honey and run processor until well mixed and smooth Do not worry if mixture seems thin as you are going to refrigerate this overnight and it will firm up at that time.
Notice I do NOT cook the prunes as do many recipes. I do not like the taste or texture. The alcohol in the Brandy really plumps and tenderizes the fruit. Boiling water will do okay but not as good as Brandy!
NOW whichever dough you have made you will cut into four equal parts. That is if you like your Danish LARGE with lots of filling – as I DO! If you want smaller ones then by all means divide further. The techniques are the same regardless so YOU decide.
For the Puff Pastry roll each part of dough on Floured surface until you have a 6″X6″ square. (That is for the four LARGE size as shown above) For the soft pastry instead of flour you will coat your work surface with a mixture of 1 cup confectioners sugar and 1 cu granulated sugar. Mix them up together and use like flour on work surface to roll out dough.
Puff Pastry:
For the two front danish in the photo which are the standard looking type, look at the 6X6 square from one point so you see what is like a diamond shape. I use a Tablespoon and a teaspoon to load the filling down the center of the diamond leaving an inch at either “tip”. I use quite a bit of prune in each because I like it that way and the bakery I once frequented did the same. NOW you will fold the two SIDE tips inwards so they overlap over the prune filling (just like you see in the photo above.) Also curl up the other two end points making a sort of ridge which will help keep any filling from running out. This is for the standard look. Use a large flat spatula to lift the danish from the work surface on to your baking sheet. I use a standard cookie sheet which is lined with a Silpat. You can buy Silpat (or silicone) liners on Amazon OR when they have them Costco sells a set for a LOT cheaper. I always have TWO silpat lined cookie sheets for when I make cookies.
The other fancier danish starts out the same with the square but now you look at it AS a square and load the filling down the center leaving an inch at either end. Next you will use a sharp knife to slice the dough into strips coming no closer to the filling than a half inch. Like a lattice you will fold first one “flap” then its opposing over the filling so they overlap. Just look at the picture above and you can see what I am trying to describe. I like the look of these for some reason.
Use the “square/diamond” instructions above only coat your surface with the mix of confectioners and granulated sugars. I would NOT try the overlapping strips with this softer dough. You might end up with a mess. In both cases place cookie sheet with pastries into the fridge while the oven preheats to 350. Before placing in oven either spray top surface of pastries LIGHTLY with PAM (and please use the original as it has the best taste) OR separate out an egg white and whip it up with a whisk until it is more liquid. Brush this on the tops of the pastries if you wish. I prefer the PAM as I do not like the added egg taste. Start out setting your timer at fifteen minutes and then check every five minutes after that until pastry is golden brown as above. DO NOT leave and do NOT forget to check. Every oven is different and there is no way to be exact with timing. Just go by smell and sight to judge when these are done.
Remove from oven leave ten minutes then transfer to cooling racks. Enjoy!
So there it is, another great recipe for the use of healthy prunes.
Learn about the health benefits of prunes, especially women. It’s to your advantage.
How can you just have 2… Irresistible and Good For You.
Forget the stigma about prunes. They are Yummy Plump dried plums to snack on or to make jams and syrups. We know how to use prunes in recipes! So, we’ve added a couple of our most frequently used recipes.
Nature’s sweet nutritional goodness. Prunes offer fiber, with only 100 calories per serving. On a diet? Prunes help to keep your tummy feeling full for longer.
Prunes can contribute to good health in so many ways! In fact, adding a serving (1/4 cup or 40 grams) of prunes is a healthy part of a balanced daily diet.
Prunes and Plums may have a fantastic way of protecting the heart. They have been studied for the potential to reduce blood pressure and cholesterol levels. Which as you know are major risk factors for heart disease.
Prunes are low on the glycemic index at just 291 which means they raise the glucose (sugar) levels in your blood slowly, to help avoid spikes in your blood sugar levels and keep your appetite at bay.
Prunes contain the mineral boron, which can aid in bone health and help with osteoporosis 2.
Prunes contain potassium, an important mineral that ensures proper functioning of the heart and nerve responses throughout the body.
Prunes contain vitamin A, which is essential for healthy vision.
Prunes contain manganese, iron, and plant phenolics, which may help protect the cell membranes from free radical damage.
Prunes are a good source of both soluble and insoluble fiber. Plus, they are a trusted way to support the digestive tract.
Numerous studies show that prunes support bone health in postmenopausal women. Prunes contain micronutrients including potassium – a mineral associated with a decreased risk of bone loss and osteoporosis. Prunes also contain magnesium, which is important for bone structure, and vitamin K, which plays an important role in bone mineralization. Additionally, prunes are filled with plant-based compounds called polyphenols, which promote bone health by reducing bone mineral loss.
GLUTEN FREE
NO ADDED SUGAR
Great Snack for Dieters and Diabetics
There are several brands to choose from….. Sun Maid, SUNSWEET, Mariani and most store brands are very good also.
1 egg per 3 slices of bread (Day old bread is great to use, make sure nice healthy slice.)
3 tablespoons of water
Vegetable oil
Griddle or Skillet
Heat your Griddle or Skillet to a medium heat.
Beat the eggs and water until combined.
Place each slice of bread gently into the egg bath making sure both sides are coated well.
Place on to hot greased griddle or pan and repeat.
Cook for 2 minutes and flip. Total time is about 4 minutes. Slowly cook until lightly brown on both sides. Don’t rush or you will have mushy French Toast and that’s gross.
Lightly butter each slice and serve with warm syrup or fruit.
Use you imagination for the toppings. You can also make Savory and Zesty French Toast for lunch or dinner.
I don’t put sugar or cinnmon in my egg mix. There is enough in the syrup. I’d rather add some cinnamon to the syrup and slightly warm it and serve on the side. This way you are not serving a plate of sugar. Make it so diabetics can enjoy. Make it fun and add some choices of fruit, whip cream or what ever. Simple and less sugar.
I made a loaf of bread wth the buttery dinner roll left over dough a few weeks before. I took the loaf from the freezer… This was a wise move to use this bread. This recipe just melts in your mouth.
This juicy garlic smeared Tri-Tip Roast is the perfect meat for a gracious dinner, yummy brunch sandwich’s or a burrito.
This a great recipe for the BBQ Grill or pop it in the oven.
Roasting Garlic:
Preheat oven 350.
Cut just the very tops off of garlic clove.
Put 3 teaspoons of real butter on top of each cluster of cloves or you can drizzle olive oil.
Roast Garlic for approx. 55 minutes or until skins are golden brown.
Remove from oven and wait 20 minutes or until cool to touch.
Squeeze the garlic cloves out of the skins into a bowl.
Smash the garlic with fork, this will leave the garlic soft and pliable to spread over the top of the Tri-Tip Roast.
Add salt and coarse pepper in the bowl and mix well.
Brownie Mix … Duncan Hines-Betty Crocker any one will do.
Strawberries
Whip Cream
12″ x 9″ pan
Instructions:
Bake your brownies as directed on box, cut into even squares. 2 cuts down length and 3 cuts on width of pan. Let them cool in the pan before removing them. The brownies can be made a day in advance.
Place one brownie on the bottom and layer with sliced strawberries, whip cream on top, place another brownie on top and layer with strawberries and your whip cream. Go around the edge between the 2 layers of brownies with whip cream and place a full berry on top or you can slice them. If you want to dazzle it up a little, drizzle a bit of melted chocolate over the top of the entire dessert and plate. Simple easy dessert.
During this flu season it might be a good idea to take this great remedy to keep the bug at bay.
Not only will it help you with cold viruses, but it builds your immune system to help fight off what ever comes your way. Provides Minerals and vitamins that our bodies need to fight off the Season colds and flu’s.
Many illnesses and discomforts can be solved with ACV. Constipation, indigestion, bad breath are just a few of the wonderous things Apple Cider Vinegar can do for you.
Delicious, ideal pick-me-up at home, work, sports or gym.
Perfect taken 3 times daily – upon arising, mid-morning and mid-afternoon. But if all you can handle is once a day.. Then take it everyday, once a day.
Bragg Apple Cider Vinegar Cocktail
1 to 2 tsps Bragg Organic Vinegar in 8 oz
Glass Purified Water and (optional) to taste.
1 to 2 tsps YOUR CHOICE OF ONE: Organic Honey, 100% Maple Syrup, Cane Syrup, Blackstrap Molasses or 4 drops herb Stevia.
Or if you don’t want to mix all that up. I just down my 2 teaspoons of Apple Cider Vinegar followed by 12 ounces of water. You can also buy the premixed cocktails at a store near you..
That Old Saying: An Apple A Day, Keeps The Doctor Away…
Micro shards of plastic are being found in the human brain. So this starts a question of how these microplastics are … Continue reading Plastic Brain???→
Having Vegetarian friends over and you don’t know what to cook…
VEGGIE 911 to the rescue!!!
HELP!!!!! Friday night get together with vegetarian friends and you have No Idea what to cook. Not only will you be eating pretty clean, but the health benefits of reducing meat and processed food products from your diet will help your health tremendously.
Sometimes we really need to clean our systems out and the best way I know is to go Vegetarian. Just adding a few meals a week that are meatless will improve your overall health by 35%. If you are one of those people who live off of microwave and/or boxed foods your health will improve 100% just from making your own meals from scratch.
Delicious, ideal pick-me-up at home, work, sports or gym.
Perfect taken 3 times daily – upon arising, mid-morning and mid-afternoon.
Bragg Apple Cider Vinegar Cocktail
1 to 2 tsps Bragg Organic Vinegar in 8 oz
Glass Purified Water and (optional) to taste.
1 to 2 tsps Organic Honey, 100% Maple Syrup, Blackstrap Molasses or 4 drops herb Stevia.
Bragg Favorite Health Smoothie “Pep” Drink
After morning stretch and exercises, we often enjoy this drink instead of fruit. It’s delicious and powerfully nutritious as a meal anytime: lunch, dinner, or take in thermos to work, school, sports, gym, hiking, and to the park, or freeze for popsicles.
Prepare the following in a blender (add 1 ice cube if desired colder): Choice of freshly squeezed orange juice; carrot or greens juice; unsweetened pineapple juice; or 1 1/2 cups distilled water with:
2 tsps spirulina or green powder, barley, etc.
1/2 tsp rice bran (optional)
1/3 tsp Bragg Nutritional Yeast Flakes
1 to 2 bananas, ripe
1 Tbsp flax oil (or grind Tbsp of flax seeds)
1 tsp soy protein powder
1/2 tsp lecithin granules
1 tsp almond butter (optional)
1-2 Tbsps blueberries (fresh or frozen)
2 dates or prunes, pitted (optional)
1-2 tsps dried Goji berries (optional)
1/3 cup soy yogurt or tofu
1 tsp vitamin C or emer’gen-C powder
2 tsp raw wheat germ (optional)
Optional: 4 apricots (sundried, unsulphured). Soak in jar overnight in purified distilled water or unsweetened pineapple juice. We soak enough for several days, Keep refrigerated. In summer you can add fresh organic fruit in season: peaches, papaya, blueberries, strawberries, all berries, apricots, etc. instead of bananas. In winter, add apples, kiwi fruit, oranges, tangelos, persimmons, pears, etc. If necessary try sugar-free, frozen organic fruits. Serves 1 to 2
Delicious Hot or Cold Cider Drink
Add 2 to 3 cinnamon sticks and 4 cloves to water and boil. Steep 20 minutes or more. Before serving add Bragg Vinegar and raw honey to taste. (Re-use cinnamon sticks & cloves.)
Bragg Favorite Juice Cocktail
This drink consists of all raw vegetables (please remember organic is best) which we prepare in our vegetable juicer: carrots, celery, beets, cabbage, tomatoes, watercress and parsley, etc. We also enjoy the great purifier, garlic, but it is optional.
This is Chris Wark’s recipe. He Beat Cancer and you can read all about his journey and his Success
Awesome Cancer Fighting Recipe
by Chris Wark (Chris Beat Cancer)
To strengthen your body’s ability to fight cancer, you need to eat what I ate: The biggest baddest healthiest salad on the planet!
It consists of raw organic vegetables, sprouts, seeds, nuts and homemade dressing.
This salad is super healthy, delicious and will fill you up without zapping your energy.
The Raw Vegan Diet was a huge part of my anti-cancer strategy and I ate this salad every day, sometimes twice a day, during the first few years of my Chemo-Free Cancer Battle.
I wanted to put as many vitamins, minerals, nutrients and enzymes into my body as possible and there’s no better way than Juicing and eating fresh raw organic fruits and vegetables.
There’s really no secret formula to this salad, but there are some guidelines to follow:
Absolutely no cheese, meat, or store-bought salad dressing.
It’s also a good idea to avoid fruit which can cause some indention when eaten with vegetables.
It is important that you use organic produce, which is free of toxic chemical fertilizers and pesticides.
And of course wash everything before you eat it. Then just chop it all up and throw it in a bowl!
Note: You’re might need some bigger bowls. Mine doesn’t look very big in the photo, but it holds over 6 cups. That’s six servings of vegetables! 6-10 servings per day of fruits and vegetables is ideal for cancer prevention and healing.
The Giant Cancer Fighting Salad
-Start with the most nutrient dense dark leafy greens: Kale and Spinach. (Do not exceed 10 cups per day)
-Broccoli (The best source of sulforaphane which promotes liver detoxification, and Indole-3-carbinol, an anticarcinogenic compound )
-Broccoli Sprouts (Concentrated sulforaphane & I3C. Do not exceed four cups of sprouts per day)
-Cauliflower
-Purple cabbage (cheapest source of antioxidants per ounce in the world!)
-Slice of red onion, (yellow or green onions may actually be better)
-Leeks
-Artichokes
-Red, Yellow, or Green Peppers
-Mushrooms Bella, Cremini, Shiitake, etc.
-1/2 an Avocado
-Squash
-Zucchini
-Raw Sunflower seeds (sprouted is better)
-Raw Almonds (sprouted is better)
-Sprouted Garbanzo Beans
-Sprouted Mung Beans
-Sprouted Red or Green Lentils
Then I top it off with either one of these naturally fermented foods:
-Bubbies Old Fashioned Sauerkraut
Bubbies is made with only three ingredients: cabbage, water and salt. It is fermented and cured with all natural enzymes intact and there is no vinegar added. (Bubbies Kosher dill pickles are super tasty too.)Look for it in the refrigerated section of your local grocer or health food store.
-Kimchi (Pronounced “Kim Chee”)
Kimchi is a spicy Korean version of sauerkraut typically consisting of fermented cabbage, onions, garlic, and pepper. Kim Chi has high concentrations of Vitamin C and Carotene in addition to Vitamin A, B1, B2, Calcium, Iron and beneficial lactic acid bacteria.
Recognized as one of the Top Five “World’s Healthiest Foods” by Health magazine. Also in the refrigerated section.
Fermented foods are great for digestion and repopulate your intestinal flora with beneficial bacteria essential for health.
Repeat: Absolutely no cheese, meat, fruit, or store-bought salad dressing.
I know it seems weird to exclude fruit. Here’s why:
Fruits and vegetables need different digestive juices, and when eaten together can create excess acid and indigestion. That is why it’s a good idea to eat them separately, especially if you are sick. This even includes non-sweet fruits like tomatoes and cucumbers.
My Homemade “Zesty Italian” Salad Dressing
This is hands down the healthiest salad dressing on the planet!
It’s super easy and delicious. Here’s how you make it:
-Add 1 tbsp Bragg organic extra virgin olive oil to your salad
-Add 1 tbsp Barleans cold-pressed flax oil to your salad
-Lightly drizzle Bragg Organic Apple Cider Vinegar to taste (another super healthy fermented food!)
Then shake on as much of these Four Cancer Fighting Spices as you can stand:
-Organic Oregano
-Organic Garlic Powder
-Organic Turmeric or Curry Powder
-Organic Cayenne Pepper (this will spice it up quick, go easy the first time)
I can’t tell you many times I have eaten this salad! Over a thousand I bet.
And what’s funny is I have several books filled with of raw vegan recipes, but the Giant Salad ended up being my staple meal.
Most days I ate it for lunch and dinner. I didn’t mind eating the same thing every day because it was simple and quick to prepare. I didn’t have to put any time into planning my meals. I knew exactly what to buy at the grocery store every week, and it’s so delicious and full of flavor it never got old!
One final note: The salad really doesn’t have to be “giant”, I make big ones because that’s what it takes to fill me up. Not everyone needs to eat that much. A small version is fine too. Just focus on getting as many nutrient dense vegetables in there as you can and make it big enough to satisfy your appetite.
Replace processed, fake foods with these healthier clean eating foods.
Cleaner, healthier eating
Healthy eating isn’t always easy, especially with junk foods tempting you at the grocery store, corner deli, and even the office kitchen. Though clean eating at every meal isn’t always realistic, you can take steps to limit processed food. Here, we show how common foods morph from real (i.e. apples) to highly processed (apple toaster pastries).
Has YOUR Diet been High Jacked by the manufactures? The #1 reason your belly fat won’t go away is Hidden SUGAR! Manufactures have replaced sugar with Corn Syrup, Artificial Sugar Syrup and other sugar substitutes. Read your labels. Same for sodium. Your goal: Choose from natural foods as often as possible, go with foods that are somewhat processed in a pinch, and limit your intake of highly processed items to none.
1. Apples
1st choice (natural state): Apple
2nd choice (somewhat processed): Applesauce
Limit (highly processed): Apple toaster pastry
Shopping tip: While applesauce is a healthy choice, it has fewer nutrients than a whole apple. 2. Oranges
1st choice (natural state): Orange
2nd choice (somewhat processed): 100% orange juice
Limit (highly processed): Orange drink
Shopping tip: Many fruit drinks contain high fructose corn syrup and little real juice.
3. Strawberries
1st choice (natural state): Fresh strawberries
2nd choice (somewhat processed): Strawberry preserves
Limit to NONE (highly processed): Strawberry gelatin dessert
Shopping tip: Gelatin desserts usually contain artificial strawberry flavor, not real fruit.
4. Peaches
1st choice (natural state): Peach
2nd choice (somewhat processed): Canned peaches in 100% juice
Limit (highly processed): Canned peaches in heavy syrup
Shopping tip: Fruit canned in heavy syrup has more sugar and calories than fresh fruit.
5. Figs
1st choice (natural state): Fresh figs
2nd choice (somewhat processed): Fig preserves
Limit (highly processed): Fig sandwich cookies
Shopping tip: Packaged fruit cookies may contain refined sugar and preservatives.
6. Pineapple
1st choice (natural state): Pineapple
2nd choice (somewhat processed): Canned diced pineapple
Limit (highly processed): Pineapple cocktail cup
Shopping tip: Fresh pineapple is higher in vitamins C and A and beta-carotene than canned.
7. Corn
1st choice (natural state): Corn on the cob
2nd choice (somewhat processed): Corn tortilla chips
Limit (highly processed): Cornflakes
Shopping tip: Buy tortilla chips with just three ingredients: whole corn, oil, and salt—and eat in moderation with Fresh Homemade Salsa or Pica De Gallo.
8. Spinach
1st choice (natural state): Spinach
2nd choice (somewhat processed): Bagged prewashed spinach
Limit (highly processed): Frozen creamed spinach
Shopping tip: When buying frozen vegetables, avoid those packaged with sodium-rich sauces. Buy plain and add your own light sauce. (Is spinach healthier than kale? Find out in their Health Food Face-Off.)
9. Garlic
1st choice (natural state): Garlic
2nd choice (somewhat processed): Jarred minced garlic
Limit (highly processed): Bottled garlic marinade
Shopping tip: Minced fresh garlic is cheaper and more flavorful than jarred.
You Shouldn’t Toss Sprouted Garlic out. Plant it in your garden to keep pests away.
10. Carrots
1st choice (natural state): Carrots
2nd choice (somewhat processed): Baby carrots
Limit (highly processed): Frozen honey-glazed carrots
Shopping tip: Baby carrots are healthy but more expensive than regular-size loose carrots.
11. Soup
1st choice (natural state): Soup from scratch
2nd choice (somewhat processed): Canned soup
Limit (highly processed): Dehydrated soup mix
Shopping tip: Homemade soup often has less sodium and more flavor than canned.
12. HAM
1st choice (natural state): Heritage ham
2nd choice (somewhat processed): Deli ham
Limit (highly processed): Packaged deli bologna
Shopping tip: Heritage varieties of pork are much less likely to contain hormones than factory meat is.
13. Turkey
1st choice (natural ttate): Whole turkey
2nd choice (somewhat processed): Deli turkey
Limit (highly processed): Store-bought turkey meatballs
Shopping tip: If you buy turkey and other meats at the deli counter, ask for brands free of fillers and nitrates.
14. Beef
1st choice (natural state): Grass-fed beef
2nd choice (somewhat processed): Grain-fed beef
Limit (highly processed): Frozen beef patties
Shopping tip: Grass-fed meat is higher in nutrients and lower in fat than grain-fed beef.
15. Chicken
1st choice (natural state): Fresh chicken breasts
2nd choice (somewhat processed): Deli sliced chicken
Limit (highly processed): Chicken nuggets
Shopping tip: Chicken nuggets contain very little real chicken.
16. Eggs
1st choice (natural state): Pasture-raised eggs
2nd choice (somewhat processed): Omega-3-fortified eggs
Limit (highly processed): Egg beaters
Shopping Tip: Pasture-raised eggs may have 35% less saturated fat, 60% more vitamin A, and 200% more omega-3s compared to omega-3-fortified eggs and egg beaters, which come from chickens kept in coops.
17. Cream
1st choice (natural state): Cream
2nd choice (somewhat processed): Fat-free half cream / half milk
Limit (highly processed): Flavored dairy creamer
Shopping tip: Flavored dairy creamers are often made with colorings, artificial flavors, and corn syrup.
18. Yogurt
1st choice (natural state): Organic 100% Natural Plain yogurt no sugar added with Fresh Fruit
2nd choice (somewhat processed): Flavored yogurt
Limit (highly processed): Flavored yogurt drink
Shopping tip: Buy plain yogurt and flavor it at home with honey or fresh fruit.
19. Bread
1st choice (natural state): Whole grain bread
2nd choice (somewhat processed): Wheat bread
Limit (highly processed): Fortified white bread
Shopping tip: If a whole grain isn’t the first ingredient, you’re missing out on nutrients.
20. Pasta
1st choice (natural state): Dried whole wheat pasta
2nd choice (somewhat processed): Dried white pasta
Limit (highly processed): Instant noodles, Simen, Mac & Cheese
Shopping tip: Whole grain pasta is higher in antioxidants than white or instant noodles.
21. Brown
1st choice (natural state): Brown rice
2nd choice (somewhat processed): White rice
Limit (highly processed): Flavored instant rice
Shopping tip: Brown rice, unlike white, hasn’t had its fiber-rich layers of bran and germ removed.
22. Peanuts
1st choice (natural state): Peanuts
2nd choice (somewhat processed): Natural peanut butter
Limit (highly processed): Processed peanut butter
Shopping tip: Natural peanut butter should contain only peanuts and a dash of salt.
Grown in the rich volcanic soil of Hokkaido, the cold northernmost island of Japan.
Their deep, burgundy sheen will attest to their nutritious quality and flavor.
Anko, sweet red bean paste, is used in many baked goods and sweet treats in Japan. It is usually prepared by boiling and sometimes mashing azuki beans and then sweetening the paste with sugar. The most common types of read bean paste include Tsubuan and Koshian.
Tsubuan is prepared by boiling and sweetening with sugar. Koshian is prepared by passing through a sieve to remove bean skins, and this is most commonly used for wagashi (traditional Japanese confectionery).
Other varieties of anko includes Shiroan, made from Japanese white beans and Kurian made from chestnuts.
Anko is used in Anmitsu, Daifuku, Dango, Dorayaki, Oshiruko / Zenzai, Taiyaki, Manju, and Yokan.
200g (7 oz, a little bit less than 1 cup which is 220g) Azuki beans (Today I used Hokkaido Dainagon Azuki Beans (bigger than regular azuki))
Water
200g (7 oz, 1 cup) granulated white sugar
Pinch of salt
Instructions
Soak the azuki beans overnight (8-12 hours).
Rinse azuki beans.
Use a big saucepan/pot because the amount of azuki beans will double after cooking. Put washed azuki beans in the pot and pour water till 1-2 inch above azuki beans. Turn the heat on high.
When boiling, turn off the heat and cover with lid. Let it stand for 5 minutes.
Throw away water and put the azuki beans into a sieve.
Put the azuki beans back in the pot. Add enough water just to cover the beans and turn the heat on high. Once boiling, turn down the heat to medium low and keep it simmering.
Once in a while push the azuki beans under the water with slotted spoon. Water will evaporate so you need to keep adding water to cover just above the beans. If you put too much water, the beans will move and break. If you need to leave the kitchen, make sure to turn off the heat. Cook for 1+ hour.
Pick one azuki bean and squeeze it with your fingers. If it is smashes easily, it’s done.
Turn up the heat to high and add sugar in 3 separate times. Stirring constantly. When you draw a line on the bottom of the saucepan and see the bottom for more than 2 seconds, add salt and turn off heat. Anko will thicken more when it cools.
Anko is ready to use. If you’re not using right away, put it in an airtight container to cool down. Once it’s cooled, keep in the fridge or freezer. I recommend storing it in small 100g packages. Wrap each anko in plastic wrap and store in a Ziploc Freezer bag. Homemade anko can be stored in the fridge for a week and freezer up to a month
No creamy, sugary, lactose filled, Candy Cup of coffee.
Are You A Consumer Or Connoisseur of Great Health Benefits?
Its all about what you put into that cup of coffee that makes it a “Good Thing” or “Bad Thing”. Science proves once again that coffee does have “Good” properties that help our bodies performance.
Natural detox for our bladder, kidneys, and liver.
Protection against cirrhosis of the liver. …
Lowered risk of Type 2 Diabetes. …
Lowered risk of Alzheimer’s disease. …
Reduces suicide risk and Depression. …
Protection against Parkinson’s. …
Coffee drinkers have less risk of heart disease
Dementia
Have fewer cases of certain cancers
Heart rhythm problems
Strokes
Coffee’s Surprising Health Benefits
It also packs a powerful punch of antioxidants.
In fact, you get more antioxidants from coffee than from any other food or beverage.
With just two calories per 8-ounce cup (no cream or sugar) and no fat, coffee is a pretty guilt-free way to boost your health. But don’t overdo it. More than 2 or 3 cups daily may increase your blood pressure, especially those of you with borderline or high readings.
One eight-ounce cup of regular coffee contains about:
#6 The Sunset Runner Bean has been grown in America as early as 1750, but originated in the mountains of Central America. It is a flowering heirloom bean with unique salmon-pink blossoms which can be used as an ornamental climber.
It produces flavorful beans with a distinct flavor that can be used in soups, salads and baked bean dishes.
Ingredients
2-3 cups SUNSET RUNNER BEANS
2 Tbs. extra virgin olive oil
1 medium onion, chopped
½ cup celery, chopped
2 cloves garlic, peeled and crushed
1 leek, cleaned and chopped
3 carrot, peeled and chopped
2 turnips, peeled and chopped
1 cup mushrooms, sliced (optional)
2 zucchini, sliced
3 medium potatoes, peeled and chopped
2 to 3 cans chicken or beef broth
1 Tbs. dried basil
2 Tbs. dried parsley or 3 Tbs. fresh parsley, chopped
Pinch of sage
2 cups chopped cabbage
½ cup dried pasta
salt and pepper to taste
Instructions
1. Rinse and pick over beans. In a large pot, pour three cups boiling water over beans, cover, and let sit for one hour. Drain, add fresh water to cover by one inch and simmer until tender, not mushy. Start checking the tenderness at 45 minutes. Drain cooked beans when reach desired tenderness.
2. In a large pot, heat 2 Tbs. Olive Oil and add onion, celery, garlic, leek, carrots, turnips, mushrooms (if using), zucchini, and potatoes. Sauté all vegetables over low heat until wilted.
3. Add beans to the pot and 2 to 3 cans chicken or beef broth with enough water to cover the beans by an inch or so.
4. Add dried basil, parsley and a pinch of sage. Bring to a boil, turn down to simmer and cook for 2 hours or until beans are tender.
5. Once beans are tender you can add cabbage and a handful of dried pasta and cook until pasta is tender. Salt and pepper to taste.
The alluring burgundy mottled, chestnut-flavored Christmas Lima is part of Peru’s heirloom bean lineage. One can serve cooked limas as an appetizer, side dish or main course embellished with butter, garlic and fresh parsley.
A favorite in kitchens around the world, Christmas lima beans boast a rich, mellow chestnut flavor and a firm texture.
Be sure to soak the beans before cooking. To soak overnight, place the beans in a large pot and add water to cover by 2 inches. The next day, drain the beans and cook as directed below. For a quick soak, place the beans in a large pot and add water to cover by 2 inches. Bring to a boil over high heat, remove from the heat, cover the pot and let stand for 1 hour, then drain the beans and cook. To decrease the cooking time by about half, cook the soaked beans in a pressure cooker on high pressure.
Ingredients:
2 cup dried Christmas lima beans, picked over, rinsed, soaked and drained
1/2 small yellow onion
1 carrot, cut in half crosswise
1 celery stalk, cut in half crosswise
1 fresh thyme sprig
1 bay leaf
Kosher salt and freshly ground pepper, to taste
1/4 cup red wine vinegar
1/2 cup extra-virgin olive oil
1/4 cup chopped mixed fresh herbs, such as parsley, chives, tarragon, chervil, marjoram and oregano
1/3 cup finely diced red onion
1/3 cup finely diced carrot
1/3 cup finely diced celery
Fresh lemon juice, to taste
Understanding PTSD’s Effects on Brain, Body, and Emotions. By Janet Seahorn, Ph.D
Directions:
Place the beans in a large pot and add water to cover by 2 inches. Add the yellow onion, carrot and celery pieces, thyme sprig and bay leaf. Bring to a simmer over medium-high heat, reduce the heat to medium-low and simmer, stirring occasionally, until the beans are tender, 1 to 1 1/2 hours. Season with salt and pepper, then drain the beans. Remove and discard the yellow onion, carrot, celery, thyme sprig and bay leaf. Transfer the beans to a bowl.
Meanwhile, in a small bowl, whisk together the vinegar, olive oil and chopped herbs. Season the vinaigrette with salt and pepper.
Add the vinaigrette, diced red onion, carrot and celery to the beans and stir to combine. Refrigerate for 1 hour, stirring occasionally to evenly distribute the vinaigrette. Just before serving, adjust the seasonings with salt and pepper and stir in lemon juice. Serve chilled or at room temperature. Serves 4 to 6. Williams-Sonoma Kitchen.
Sometimes we need to open the windows on our boxes and look out. If we are brave enough we can open the door and step out of the box.
We have been programmed into staying within our boxes. It’s safe and comfortable and society says it’s “the RIGHT thing to do”. With scientists revealing more treatments involving alternative medicine, it’s time we took a look outside. Every day new technology and research is being accomplished you won’t hear about in main stream news.
The struggle has been hard with Alternative Medicine research and technology being suppressed for so many years. Throughout this time we have been told to think it’s a hoax, these doctors are quacks and they are just out to take your money. Yes, in some cases I will agree. But there are real Holistic/Alternative treatments that work and honest doctors providing the treatment.
How do you think the Chinese survived for so many years? Still to this day they rely on Chinese Medicine, herbs, roots and other natural ingredients to make medicines.
If you think about it, if we all just understood how pharmaceutical companies derived their medicines. It would be a financial downfall for the pharmaceutical companies. If only we would ALL look outside that door. We could really change health care as we westerners know it.
For an example is the Medical Marijuana medicine. Big Pharmaceutical companies have lobbied against any form of legalization. They are at their wits end because they cannot patent marijuana and they cannot come up with the absolute formula that works the same as the real thing.
Marijuana is a plant that grows natural on earth and goes back in time as a healing medicine. Pharmaceutical CBD and THC therapies are synthetic.
There are plants on earth that cure illnesses. This is how Big Pharma came up with all the BIG $$$ synthetic medicine, but one drawback is Synthetics come with all the side effects… Some medicines have over 50 pages of CAUTION SIDE EFFECTS.
Natural, there is nothing like the real thing to heal the human body.
I use to be very skeptical, until I actually experienced alternative medicine work. Not cancer but other illnesses. If I would have never opened that door and stepped outside, I would have stayed closed minded to alternative remedies and cures.
I just wanted you to know my eyes are wide open and looking at things differently these days, that’s all. Let’s Explore Our World and Everything It Has To Offer…
I recommend you that you drink the Vinegar Cocktail Everyday.
Vinegar, All the Wonderful Things It Can Do!
The greatest gift that will save you from dieting grows on trees and is then fermented into a beautiful bounty of goodness for your body.
Vinegar can do everything from relieving muscle pain from exercise, balancing pH levels, soothing sore throats, and normalizing weight and helping to maintain levels of cholesterol already in the normal range.
Externally, it is effective in supporting healthy skin and hair. Use it topically to give yourself a vinegar facial for toning or clearing up non-cystic acne and exfoliating dry dull skin. Gently rub your skin with a soft cotton ball dipped in vinegar and watch your skin glow!
Use it as a soothing after-bath rinse for cats and dogs to eliminate dry skin. Just as with people, it is also helpful in older animals. The high acidity and powerful enzymes in apple cider vinegar also supports a healthy scalp. Try a rinse of apple cider vinegar after you wash your hair. It gives hair incredible shine and bounce!
It’s so easy to incorporate vinegar into your daily diet.
Get healthy and loose that extra waistline you have been carry around.
When you wake up in the morning just make a delicious cocktail using 2 teaspoons of raw, organic apple cider vinegar, and if you need a sweetener, use organic honey, 100% maple syrup, or molasses to taste. If you are diabetic, use the sweet substitute stevia. I recommend you use only distilled water.
This “Bragg Healthy Cocktail”is designed to flush out wastes that are clogging the organs of elimination, the bowels, lungs, skin, and the kidneys. Take it at least twice a day, and you will start to see changes like increased energy, soft skin, and decreased muscle and joint aches from exercise.
Make sure you use raw, organic vinegar, never dead, distilled vinegar because the natural enzymes, minerals, and nutrients are destroyed in the distilling process. Any vinegar that is clear and has no “mother” (the strand-like substance in the bottom of the bottle) has no nutritional value. Natural raw vinegar should be pungent, with a rich, brownish color and a visible “mother.”
Drinking apple cider vinegar daily, and eating a largely fresh, organic, vegetarian diet, along with following a simple fitness program, will change your life so dramatically you will never go back to your old ways! Get fit, get healthy, and live a long and happy life!
You May Ask: What is Natural Apple Cider Vinegar?
Different from the refined and distilled vinegar usually found in supermarkets, Natural Apple Cider Vinegar is made from fresh, crushed, organically grown apples and allowed to mature in tanks, which boosts its natural fermentation qualities. When mature, it contains a web-like substance, called “mother” that becomes visible when the rich brownish liquid is held to the light.
Just a few more plus’s…
Ohh My Head & Tummy Are you Hungover?
Apple Cider Vinegar is believed to help the Liver dissolve poisonous matter, like to much alcohol. It also balances the pH levels and tops up any deficiency in minerals such as potassium, calcium, magnesium, sodium and iron, which your alcohol soaked body is craving.
Are your finger nails brittle and soft?
Try Bragg Apple Cider Vinegar. It all starts from the inside. You could be missing trace minerals or your PH is off. The nutrients and acids naturally found in ACV are not only great for strengthening nails, they are also known to heal and prevent microbial infections that sometimes cause excessive breakage and yellowing. You can make one of the Bragg ACV recipes or purchase bottled Bragg Healthy cocktail mixes.
Yo-yo dieting, also known as “weight cycling,” describes the pattern of losing weight, regaining it and then dieting again.
It’s a process that causes weight to go up and down like a yo-yo. This type of dieting is common — 10% of men and 30% of women have done it.
Losing weight causes the body to increase appetite and cling to its energy storage. As a result, some yo-yo dieters gain back more weight than they lost.
The Fasting: Those diets are making your system unstable. Fasting and Starving yourself is actually making your metabolism suffer, not counting what it is doing to your organs.
Do you have 3 days that you could part with 7 minutes to get into the best shape of your life?
Start at the basic beginner and move up the ladder as far as you want. This workout is for all ages. Men and Women join us today… You are never to young or old to start living a healthy lifestyle.
You can do these exercises at home. No expense of the gym.
The High Dose Oral Vitamin C Protocol for Cancer (and Nearly Every Other Ailment)
I’m really excited about this post because I’m sharing some really cool stuff about Vitamin C that many people do not know. Or maybe I’m wrong and everyone already knows this but me… We’ll see.
This is a powerful anti-cancer protocol and even if you don’t have cancer, you can use this method to determine how much toxic stress is going on inside your body and how high doses of Vitamin C could dramatically improve your health.
Ok so we all now that Vitamin C (asorbic acid) is good for you right? The body doesn’t produce it, so it has to come from food.
You’ve probably also heard that a severe Vitamin C deficiency leads to scurvy. Early symptoms of scurvy are malaise and lethargy. That’s basically a “general feeling of being unwell” along with tiredness or exhaustion. (Does this sound like you?) After a few months comes shortness of breath and bone pain. Further down the road is muscle pain, skin sores, gum disease, loose teeth, wounds not healing, dry mouth, dry eyes, and emotional problems. In the late stages comes jaundice, edema, fever, convulsions, and eventually death.
Sounds fun right? Fortunately scurvy can be CURED with lemons, limes, oranges, and any other Vitamin C containing food.
Don’t Forget to watch the video below
Here’s where it gets interesting…
The cure for scurvy was first published in 1617 in The Surgeon’s Mate by English military surgeon John Woodall. And it was completely ignored by the medical community.
In 1753 (136 years later) naval surgeon James Lind published his discovery in, A Treatise of The Scurvy, which was also ignored. The medical establishment insisted that the testimonials of eating citrus fruit to reverse scurvy were merely “anecdotal” and not based on “scientific evidence”. Sound familiar?
Fortunately James Lind persevered and about 50 years later citrus fruit was finally accepted and used for the prevention and treatment of scurvy on sailing vessels. So, in summary:
The cure for scurvy was ignored for nearly 200 years after its discovery.
Nutrition and natural therapies are still ignored modern medicine. In fact I’d be willing to bet that if you went to see a doctor with some of the symptoms of scurvy that I listed above, you be subjected to a barrage of expensive tests, misdiagnosed, prescribed pharmaceutical drugs, and subjected to treatments for some other disease. This happens all the time. Earlier this year my good friend Tony was told that he probably had cancer or AIDS, turns out it was viral pneumonia. Can you imagine?
But I digress… Let’s get back to Vitamin C.
Here are some common whole food sources of Vitamin C:
Oranges, Kiwi, Canteloupe, Papaya, Strawberries, Brussels Sprouts, Broccoli, Cauliflower, Cabbage, Kale and Peppers.
“Super foods” with the highest concentration of Vitamin C on planet earth are:
Camu Camu Fruit, Amla (Indian Gooseberry), and Acerola Cherries. In that order.
Vitamin C supports nearly every system in your body: your adrenals, your immune system, your cardiovascular system, and more. Perhaps the most important is that it is a neutralizer of free radicals.
There’s been tons of ground-breaking research on high-dose Vitamin C’s powerful healing and anti-cancer effects by the likes of Fred Klenner MD, Irwin Stone, Linus Pauling, and Ewan Cameron. I don’t have time to get into their stories but I wanted to a least give credit where it’s due. Google them in your spare time. There’s a fascinating Vitamin C phenomenon that most of us don’t know about.
The sicker and/or more toxic you are, the more free radicals you have in your body, and as a result, the more Vitamin C your body will absorb and use. The body keeps a small reserve of Vitamin C available for use when there is increased internal demand, but when you are sick this is quickly depleted.
You may have also heard (or experienced) that if you take too much Vitamin C by mouth you get the runs, aka “chach” which is our family’s abbreviation (and code word) for
“Diarrhea Cha Cha Cha”.
A healthy person can take anywhere from 4-15 grams (4,000-15,000 mg) of Vitamin C in a 24 hour period without getting the runs, but a sick person can tolerate anywhere from 10-20 times more. I’m talking even as much as 100-200 grams per day by mouth.
Have you ever taken Vitamin C when you had a cold and it didn’t help? This is probably because you didn’t take near enough.
Here’s where it gets ridiculous… If you ate something that contained “100% of the USRDA (Recommended Daily Allowance ) of Vitamin C” that seems pretty good right?
It’s not.
The USRDA for Vitamin C is only 75 mg. That’s MILLIGRAMS. A normal healthy person can absorb and use between 4,000-15,000 milligrams per day. So the USRDA is way off on this one. 75 mg is basically what someone decided is the absolute minimum amount to keep you from getting scurvy. This is not an amount that promotes health and optimal body function.
One orange has about 150mg of Vitamin C, about 2 times more than the USRDA. And 1 teaspoon of Camu Camu Powder has about 15 times the USRDA of Vitamin C!
Even though you may not have scurvy, I think it’s safe to assume that many of us may not be getting enough Vitamin C in our diets, the lack of which could be a contributor to
a) feeling lousy or b) serious disease.
High Dose Oral Vitamin C Therapy is taking the maximum dose your body can tolerate before you get the runs. This requires finding your threshold and then backing off a little bit for your daily dose. The clinical term is “titrating to bowel tolerance”.
As some of you know, one of the therapies I used to help my body heal from cancer was Vitamin C IV Therapy, which is a common practice in the natural/alternative cancer treatment world. This involves sitting in chair in a practitioner’s office for two hours with an IV drip containing 50 grams or more of Vitamin C. And while this is a very effective method to get a massive dose of Vitamin C without reaching bowel tolerance and to promote healing in the body, it is time consuming and expensive. I was paying $120 a pop, cash money. And in order for it to be the most effective you need to do it 2-3 times per week for many weeks.
My friend Bill, who’s healing his prostate cancer naturally, turned me on to a simple do-it-yourself Oral Vitamin C Protocol that he was put on by an underground cancer treatment expert whose name I cannot use publicly. Bill initially reached bowel tolerance taking 60 grams per day. After two months his tolerance was down to less than 30 grams per day. That’s a very good sign.
The Vitamin C Toxicity Test & Protocol
This is something everyone should do. Now clearly no one wants diarrhea on purpose, but in this case it can give you some immediate feedback about your internal condition. And it’s super cheap to do!
The simple way to find your tolerance is to take 2-3 grams of Vitamin C powder or crystals (ascorbic acid) every two hours mixed in 8 oz of water. That will give you about 12-18 grams the first day. Make sure you keep track of your doses. Vitamin C powder is highly concentrated. 1 teaspoon is usually about 5 grams of Vitamin C.
The goal is to find your 24 hour limit, not your single dose limit.
The half-life of Vitamin C in the body is about 30 minutes. That means about an hour after you take Vitamin C, your body has used up most of it. So an important key to this protocol is to keep your body saturated with C all day. Dosing every 1-2 hours is ideal.
If you reach bowel tolerance in the first 24 hours, reduce the total dose by 20-25% and continue to take that amount every day as a maintenance dose (this may be for several days or weeks) until you reach bowel tolerance again at that level. Then reduce by 20% again and continue with that dose until you hit bowel tolerance, and so on.
It works the opposite of what you would expect because you don’t build up a tolerance. The healthier you become, the lower your bowel tolerance for Vitamin C will go.
If you reach bowel tolerance at 10-15 grams or less per day, you’re considered to be in very good shape health wise.
If you follow the steps above and do not reach bowel tolerance the first day, continue to up the dose each day until you get there. If you are seriously sick you may need to dose every hour or 1/2 hour as indicated in the chart below. As you get close to bowel tolerance you will get gassy and should have soft stool. That means you’re very close to your body’s limit and should reduce your dosage a bit.
Here’s a dosage chart from the late and legendary Dr. Robert Cathcart MD, who treated 9000+ patients with Vitamin C!
TABLE I – USUAL BOWEL TOLERANCE DOSES
CONDITIONGrams Per 24 HoursDoses Per 24 Hours
normal 4 – 15 4 – 6
mild cold 30 – 60 6 – 10
severe cold 60 – 100+ 8 – 15
influenza 100 – 150 8 – 20
ECHO, coxsackievirus 100 – 150 8 – 20
mononucleosis 150 – 200+ 12 – 25
viral pneumonia 100 – 200+ 12 – 25
hay fever, asthma 15 – 50 4 – 8
environmental and
food allergy 0.5 – 50 4 – 8
burn, injury, surgery 25 – 150+ 6 – 20
anxiety, exercise and
other mild stresses 15 – 25 4 – 6
cancer 15 – 100 4 – 15
ankylosing spondylitis 15 – 100 4 – 15
Reiter’s syndrome 15 – 60 4 – 10
acute anterior uveitis 30 – 100 4 – 15
rheumatoid arthritis 15 – 100 4 – 15
bacterial infections 30 – 200+ 10 – 25
infectious hepatitis 30 – 100 6 – 15
candidiasis 15 – 200+ 6 – 25
Something else worth noting in the above chart: If you are under chronic stress or engage in athletic activities like running, weight training, etc. you are likely to have an increased need for Vitamin C and your tolerance will be higher. Even if you are healthy.
Dr. Cathcart also notes that low dose vitamin c had basically no effect, but high dose vitamin c, when taken at 80-90% of bowel tolerance, produced a significant and dramatic reduction of symptoms in his patients.
Experiments
When I first tried this protocol a couple months ago I didn’t reach bowel tolerance until I got to around 34 grams. I worked my way up to taking 12 grams three times per day. I have no idea why my tolerance was that high. I workout 3-5 days per week which would increase my tolerance but perhaps I also had something going on internally… who knows?
Earlier this morning I took 7.5 grams and it produced bowel tolerance for me a couple hours later which actually interrupted my work on this post. Clearly my tolerance is down and if Dr. Cathcart is right, my internal health has improved.
Another one: My kids came home with colds from school two weeks ago. Then my wife got it. One morning I started to feel cold symptoms as well so I took 10 grams of Vitamin c. I felt great all day. Then close to bedtime I started to feel the symptoms again so I took another 10 grams. I did this every day for about a week. I would feel the symptoms in the morning, but I quickly crushed them with 10 grams of vitamin c. Some days I would take a dose around lunch time as well if I remembered. I was taking 20-30 grams per day for most of the week, I felt good, I was close to bowel tolerance, and the cold never developed. Since then, I’ve done this more times than I can count. Works every time.
What form to take?
Vitamin C comes in several different forms: pure asorbic acid and buffered with minerals.
Buffered C contains mineral salts like calcium asorbate, magnesium asorbate, and sodium asorbate. Buffered C is more alkaline but the excess minerals could be problematic if you are taking mega doses.
I compared three different types (buffered and pure asorbic acid) to see if they had different effects but my tolerance was basically the same for all three. Having said that…
Solaray Vitamin C Powder is 100% pure asorbic acid so it’s extremely tart and citric. Vitamin Shoppe Buffered C-Complex tastes chalky, not citric.
Thompson C Buffered Crystals is buffered with calcium asorbate, it’s citric but not as strong as the pure crystals.
Dr. Cathcart recommends taking pure asorbic acid for the high dose oral protocol. Dr. Thomas Levy recommends sodium asorbate. I think it makes sense to rotate between different types.
*After writing this post it was brought to my attention that most of the asorbic acid in vitamin C powder is made in China from GMO corn. If that is a concern for you, there are several brands of non-GMO vitamin C powders.
#5 The Black Calypso bean, also called yin yang for its distinctive and stunning white and black markings, is an heirloom variety which originated from the Caribbean.
It has a delightful nutty, slight onion flavor and a texture that is more crumbly than creamy. Simmer them very slowly so they do not break.
They are one of the best beans for baking and soups.
Calypso Beans, Tomato and Poblano Stew courtesy of Tyler Florence
Calypso Beans Pork and Pablano stew
Ingredients
3 tablespoons extra-virgin olive oil
1 medium onion, chopped
3 garlic cloves, chopped
1 bay leaf
1 ham hock
1 pound dried calypso beans, soaked overnight and drained
1 tablespoon ground cumin
3 canned chipotle peppers in adobe sauce
4 poblano chiles, roasted, seeded and chopped
4 tomatoes, seeded and chopped
1 bunch fresh cilantro leaves
Kosher salt and freshly ground black pepper
Lime wedges, for garnish
amazon music unlimited
Directions
In a large pot over medium-high heat olive oil. When the oil is hot add the onion, garlic, bay leaf, and ham hock; cook for 5 minutes
Add the beans and stir in the cumin, chipotles, chiles, tomatoes, and cilantro; season with salt and pepper.
Pour in enough water to cover the beans by 1-inch and bring it to a boil. Cover and cook over medium-low heat until the beans are tender, about 1 hour
Remove the bay leaf and discard; pick the meat from the ham hock, discard the bone, and return the meat to the pot
#8 Cranberry Bean Vermont Cranberry, Known As “Borlotti” Beans.
Popular in Italian cooking (where they’re better known as “Borlotti” beans). These beans have a mild, sweet and nutty flavor and satisfyingly creamy texture. This makes them a perfect ingredient in salads, soups, stews, spreads (hummus, anyone?), dips and other dishes.
Vermont Cranberry / “Borlotti” Beans can be harvested young as a green bean or allowed to dry.
Borlotti Baked Beans
Ingredients
1 pound Vermont Cranberry / “Borlotti” Beans, soaked in water overnight
¼ cup olive oil
1 cup chopped onions
½ cup pure maple syrup
½ cup canned tomato puree or crushed tomatoes
2 tablespoons molasses
1 tablespoon Dijon mustard
½ cup brown sugar
1 teaspoon salt
amazon music unlimited
Instructions
Drain beans and combine with 4 quarts fresh hot water in large pot. Bring to boil and reduce heat. Simmer, partially covered, just until tender, 1 1/2 to 2 hours. Drain, reserving cooking water. Place beans in a large, shallow baking dish.
While the beans cook, heat oil in large skillet. Sauté onions until tender. Remove from heat.
Preheat oven to 325F.
Whisk together 1 cup of reserved cooking water, maple syrup, tomato puree, molasses, mustard, brown sugar and salt in a medium bowl.
Add sautéed onion and syrup mixture to beans; stir well. Cover dish tightly.
Bake 2 1/2 to 3 1/2 hours, until beans are tender. Check periodically to make sure they have enough liquid, adding more reserved cooking water if necessary.
WORK FROM HOME in your Pajamas or Swimsuit… You Choose
Prosciutto-Wrapped Pork Tenderloin with Flageolet Ragout
and Frizzled Brussels Sprout Leaves
INGREDIENTS
1/2 cup kosher salt, plus more for seasoning
1/4 cup sugar
1/2 red onion, diced
4 cloves garlic, smashed
2 sprigs thyme
2 sprigs rosemary
2 tablespoons fennel seeds
2 tablespoons coriander seeds
2 pork tenderloins (about 1 pound total)
Freshly ground black pepper
2 tablespoons wild fennel pollen
8 slices prosciutto
2 large pieces caul fat
Olive oil, for coating the pan
1/4 cup sherry vinegar
2 cups chicken stock
2 teaspoons unsalted butter
Flageolet Ragout, recipe follows
Frizzled Brussels Sprout Leaves, recipe follows
Flageolet Ragout:
3 cups flageolets beans
2 cups chicken stock, plus more if necessary
Kosher salt
Olive oil, for cooking
3 fennel sausage links, casings removed
1/2 bulb fennel, julienned
1/2 red onion, julienned
2 cloves garlic, smashed and chopped
Pinch red pepper flakes
1/2 cup white wine, such as Chardonnay
1 tablespoon ramp seeds, chopped
Extra-virgin olive oil, for drizzling
Frizzled Brussels Sprout Leaves:
Olive oil, for coating the pan
1 clove garlic, smashed and chopped
12 Brussels sprouts, stemmed and leaves pulled apart
Kosher salt
1 sprig anise hyssop
DIRECTIONS
To make the brine: Add the salt, sugar, onion, garlic, thyme, rosemary, fennel seeds, coriander seeds and 1 1/2 quarts of cold water to a large container and stir to combine. Submerge the pork in the brine and refrigerate for 2 hours.
Preheat the oven to 400 degrees F.
Remove the pork from the brine and pat dry. Season with salt, pepper and the fennel pollen. Wrap in the prosciutto and caul fat.
Heat a large saute pan on medium-high heat and add enough oil to coat the bottom of the pan. When the oil is close to its smoking point, sear the pork on all sides until golden brown. Transfer the pork to a sheet pan and reserve the saute pan and drippings. Roast until medium well done and the internal temperature reaches 150 degrees F, about 5 minutes. Allow to rest.
Discard the excess fat in the saute pan used to sear the pork. Add the vinegar and reduce until nearly dry. Add 1 cup of the chicken stock and reduce to half. Add the remaining cup of chicken stock and reduce until about 1/3 cup remains. Remove from the heat and swirl in the butter. Season to taste.
Slice the pork on the bias and serve over the Flageolet Ragout and Frizzled Brussels Sprouts Leaves. Drizzle with some of the pan sauce.
Flageolet Ragout:
Combine the flageolets and chicken stock in a medium saucepan. Season with salt and bring to a boil. Reduce to a simmer and cook until tender, about 30 minutes. Set aside.
Add a drizzle of oil and the sausage to a large pan over medium-high heat. Brown the meat, breaking it up as it cooks. Remove from the pan and set aside.
To the same pan add the fennel, onion, garlic and red pepper flakes. Deglaze with the wine and cook until the fennel and onions begin to caramelize.
Return the cooked sausage to the pan and add the flageolets and ramp seeds.
Heat through, adding more chicken stock if necessary to keep everything moist.
Season to taste. Drizzle with extra-virgin olive oil to finish.
Frizzled Brussels Sprout Leaves:
Heat a large saute pan over medium heat and add enough oil to coat the bottom of the pan
Add the garlic and cook until aromatic and slightly golden
Add the Brussels sprouts, season with salt and saute until slightly charred but not too soft
Remove from the heat, add the anise hyssop and toss to combine.
If there is one thing I can suggest, Buy a good roasting / Casserole Pan that fits all your needs. Purchase a good brand once, not every couple of years.
Fresh Squeezed Blueberry Lemonade By Orgnatlife.com May 24, 2017
The heat index is up today and mowing the lawn calls for a special treat.
You can add all types of fresh fruit to your water. This just happens to be a favorite to replenish my energy that the sun zaps away.
I make this a day ahead of time. I like the fruit and sweetener to ferment.
Recipe is for one serving
Ingredients
1 lemon
1/2 cup Blueberries fresh
1 teaspoon honey, sugarcane syrup or your preference of sweetener.
16 ounce water
20 ounce Mason Jar
Great Little Option that I love Adding to all my Lemonade recipes. 1/8 teaspoon peeled and finely chopped Fresh Ginger.
Directions
Gather your ingredients.
Wash and Cut the Lemons end off
Cut a Cross in open end
With your juicer ream out all pulp and juice.
Add the lemon juice to your mason jars. If you don’t like pulp you can use a strainer.
Add the lemon rind to the mason jar
Adding the Blueberries, there are two ways to do this, blender or by hand. I do mine by hand, I enjoy the pulp. So mash blueberries with a fork or blenderize.
Add your Sweetener of choice
Add you water
Refrigerate over night. Or you can add Ice and drink right away
Just thinking of the sweetness of the ripe strawberries is enough to get me to make a fresh batch of strawberry jam.
I only add 1 tablespoon of sugar to 2 cups of strawberries and a squeeze of lemon to put a smart tartness.
Ingredients
2 Cups Strawberries (Fresh Or Frozen)bring strawberries to room temperature
1 Tablespoon Sugar (Sugar Cane or your sweetener of choice)
1/8 Teaspoon Fresh Lemon Juice
(If you want a tarter jam put 1/8 teaspoon Lemon Zest Also)
Directions
Place your strawberries in pan and cover Strawberries with sugar and set aside for a few hours. Let the Strawberries come to room temperature. (you can also do this over-nite in the refrigerator)
Cover Strawberries 1/2″ above berries with water on High boil for 15 minutes.
Place lid on pan, turn heat down to medium-high, continue boiling with lid on and steam vent closed on lid for 5 minutes.
Turn lid to vent steam from pan
Reduce heat to medium set timer for 10 minutes.
Remove lid
Re-Set timer every 10 minutes for the next 60 minutes. Make sure to stir each time.
Over Half of the water should be gone.
Turn your fire to very low and continue to stir the Strawberry Jam. The strawberries should be reducing quickly now.
Don’t let it burn. Watch your heat closely. If it is boiling to much turn your heat down.. You just want a very faint bubble action. Like a couple of bubbles every few seconds.
Continue with the reduction until the strawberries are to the thickness you like.
Let cool down in pan
Spoon into your mason jar.
Will keep for 14 days in refrigerator. If you want to persevere them by adding a canning method they will last over a year.
This week’s pick is, “Beans with Wild exotic names”. Not your corner supermarket staple product that’s for sure. These beans can be found online and at several stores.
This is a 10 part series on beans, so have fun and enjoy.
#2 Jacobs Cattle Beans
This bean is a Prince Edward Island heirloom. Were specific to the Maritimes and New England for many years and most certainly migrated north with the Loyalists.
Though Jacob’s Cattle beans can be eaten raw when young, they are most suited as a soup and casserole bean as the beans hold their shape under long cooking, stand up well to plenty of seasoning, and possess a rich aroma when slow cooked. Cooking times will be shorter and soaking is not required when fresh. Complimentary pairings include black beans, ham, corn, chiles, tomatoes, chicken, garlic, oregano, stewed pork, cooked eggs, cream, cilantro, melting and fresh cheeses, vinegar, roasted fish, bitter and mild greens, butter and olive oil. When cooking a pot of Jacob’s Cattle beans, it is recommended to reserve the broth, which is known as “pot liquor” and often considered to be as good as the bean itself.
BAKED BEANS
1 – 1 lb/454 g package dried Jacob’s Cattle Beans
2 tsps (10 mL) dry mustard
1/3 cup (75 L) packed brown sugar
2/3 cup (150 mL) molasses
1 tsp (5 mL) salt
¼ tsp (1 mL) freshly ground pepper
4 oz (115 g) salt pork or bacon
1 tsp (5 mL) white vinegar
1 medium onion, peeled and diced
Cover the beans with cold water and soak overnight. Alternately place beans in a large pot with 6 cups (1.5 L) water, cover and bring to a boil. Boil 5 minutes, remove from heat and let stand for 1 hour. Drain and discard water, then rinse.
Place drained beans in a large pot with 6 cups (1.5 L) water, after boiling for 5 minutes, reduce heat and simmer until beans are tender, about 30 minutes. Drain, reserving 1 cup (250 mL) of the liquid. Transfer to a slow cooker, bean pot or casserole with a lid. Combine the reserved water with mustard, brown sugar, molasses, salt, pepper, pork or bacon and vinegar.
Cook on high in a slow cooker or at 300’F (150’C) in the oven. Beans done in a slow cooker will take about 6 hours; in the oven from 4 to 6 hours. Add water during cooking as needed to keep beans moist.
This is as easy as 1-2-3. Delicious moist and very tasty. It’s actually “To Die For”.
Prep 15 minutes
Cook 30 minutes
Ready In 45 minutes
“This is a delicious and easy blueberry cake to make with things that are usually on hand. My Aunt passed this down to me. I have made it with the glaze topping which makes this cake the “bomb”.
Ingredients
2 1/2 cups all-purpose flour
1 1/2 cups white sugar
1 tablespoon baking powder
1 teaspoon salt
1 cup milk
1/2 cup vegetable oil
2 eggs, beaten
2 teaspoons vanilla extract
1/2 teaspoon Lemon Zest
2 cups fresh blueberries
2 teaspoons all-purpose flour, or as needed
2 tablespoons butter, melted
2 tablespoons white sugar, or more to taste
Directions
Preheat oven to 375 degrees F (190 degrees C). Grease and flour a 9×13-inch baking dish or bundt pan.
Sift 2 1/2 cups flour, 1 1/2 cup sugar, baking powder, and salt together in a bowl. Add milk, vegetable oil, eggs, vanilla extract and lemon zest; mix into a semi-thick batter.
Toss blueberries with about 2 teaspoons flour in a separate bowl; fold into batter. Pour batter into prepared baking dish.
Bake in the preheated oven until cake is lightly browned, 25 to 30 minutes.
These are your Last Step’s and Options:
*Brush melted butter on top of cake and sprinkle with about 2 tablespoons sugar, Continue to bake until golden brown and a toothpick inserted in the center comes out clean, 5 to 10 more minutes.
OR
Omit the sugar topping and continue cooking 28 to 35 minutes or until toothpick comes clean. Apply Glaze after cake has cooled.. Glaze
1/2 cup powdered sugar
2 Teaspoons + Fresh Squeezed Lemon Juice (not to thick and not to thin)
1/2 teaspoon Vanilla Extract
1/4 teaspoon + Fresh lemon zest (Stir in after mixing)
Mix together until super creamy. Actually I like to use my whip to make it creamier.
Drizzle over the entire cake with a spoon. It’s The “BomB”
This week’s pick is, “Beans with Wild exotic names”. Not your average corner supermarket staple product that’s for sure. Don’t fret these beans can be found online and at several stores.
This is just the start to a 10 part series on beans, so have fun and enjoy.
#1 Eye Of The Goat Beans
The Eye Of The Goat Bean (or “Ojo de Cabra” Beans) is an heirloom runner type bean related to Scarlet runner beans. Beans originated in Central and South America and began to be cultivated in Mexico over 2,000 years ago.
They are round, slightly kidney shaped with a beige-tan background and curved brown stripes. They have a creamy texture, smooth silky texture to the pallet. They keep their shape after cooking. Robust flavor balances perfectly together with your sauces or casseroles.
I used these in place of pinto beans in my Chili Recipe. Soak overnight and cook 1 hour or until tender. (Depends on your water quality). Add to your favorite recipes. The Eye of the Goat bean has a great natural flavor but still is very versatile and a perfect vehicle for bold flavors. They can be substituted for pinto, black-eyed pea, cranberry, or red kidney beans.
Chile Verde Con Cerdo (Green Chili With Pork)
Spiced with árbol and chiles, this mellow, satisfying chili compliments pork, chicken or beef and Rancho Gordo’s Ojo de Cabra (Eye of the Goat) beans.
3 dried árbol chiles, stemmed and seeded
1 dried guajillo chile, stemmed and seeded
1 ancho chile, stemmed and seeded
1 1/2 cups boiling water
1 teaspoon cumin seeds
1 teaspoon dried oregano
1 garlic clove, chopped
1 teaspoon hot pimentón de la Vera (smoked Spanish paprika)
Kosher salt or sea salt
2 pounds trimmed, boneless pork shoulder, chicken or beef, rinsed and picked over, then cut into 1-inch cubes
2 cups dried Eye of the Goat or red kidney beans (Soaked and Cooked)
1 thick slice of bacon (1 ounce), cut into 1/4-inch strips
3 tablespoons extra-virgin olive oil
1 large onion, cut into 1/2-inch dice
1 cup dark Mexican beer
2 cups chicken stock or low-sodium broth
Freshly ground pepper
Sour cream, cilantro sprigs and lime wedges, for serving
DIRECTIONS
In a heatproof bowl, soak the arbol, guajillo and ancho chilies in the boiling water until softened, about 20 minutes. Drain the chilies, reserving 1/3 cup of the soaking liquid. Coarsely chop the chilies.
In a small skillet, toast the cumin seeds over moderate heat until fragrant, about 20 seconds. Transfer the seeds to a blender. Add the chilies and their reserved soaking liquid along with the oregano, garlic, paprika and 1 tablespoon of salt. Puree until smooth. Scrape the chile puree into a large nonreactive bowl or baking dish. Add the meat and toss to coat thoroughly. Cover and refrigerate overnight.
In a large saucepan, cover the beans with 2 inches of water and soak overnight. Rinse, add water 2” over beans and bring to a boil. Simmer over low heat, stirring occasionally, until tender, about 1 hour; add more water as needed to keep the beans covered by 2 inches. When the beans are just tender but still al dente, season them with salt and let stand in their cooking liquid for 5 minutes.
Preheat the oven to 375. In a large, enameled cast-iron casserole, cook the bacon over moderate heat until the fat has rendered, about 3 minutes. Using a slotted spoon, transfer the bacon to a large plate. Add the olive oil to the casserole. Working in batches, cook the chile-meat mixture over moderately high heat, turning a few times, until richly browned all over, about 4 minutes. Transfer the browned meat to the plate with the bacon.
Add the onion to the casserole and cook over moderately low heat, stirring occasionally, until softened, about 10 minutes. Add the meat and bacon and any accumulated juices and stir well. Add the beer and boil over high heat until reduced by half, about 8 minutes. Add the chicken stock and bring to a simmer.
Cover the casserole, transfer it to the oven and bake for about 30 minutes, until the goat is tender when pierced with a fork. Add the beans and bake, uncovered, for about 10 minutes, until they are warmed through. Remove the casserole from the oven and let rest for 10 minutes. Season with salt and pepper. Transfer the chili to bowls and serve with the sour cream, cilantro sprigs and lime wedges.
Make Ahead, the chili can be refrigerated for up to 3 days. Reheat gently.
For this dish I also prepared a second recipe. I substituted Jacobs Cattle Beans in place the “Eye Of The Goat”. It complimented the dish very well. When you have several pounds of these beans, you have to experiment. Save
Makes 8 large, big-topped muffins / 10 standard muffins / 20-22 mini muffins
All you need is one bowl. This recipe is so easy when we’re in the mood for something other than cereal, we’ll skip pancakes and make these for breakfast instead.
Since most standard muffin tins have 12 muffin cups, if you plan on making the larger muffins, we recommend adding 1 to 2 tablespoons of water to the empty cups. This way the cups with water will heat up at the same rate as the cups with muffin batter, helping the muffins cook evenly.
You Will Need
1 1/2 cups (195 grams) all-purpose flour
3/4 cup (150 grams) granulated sugar, plus 1 tablespoon for muffin tops
1/2 teaspoon kosher salt
2 teaspoons baking powder
1/3 cup (80 ml) neutral flavored oil; canola, vegetable and grape seed are great
1 large egg
1/3 – 1/2 cup (80 ml – 120 ml) milk; dairy and non-dairy both work
1 1/2 teaspoons vanilla extract
6 to 8 ounces fresh or frozen blueberries; see note below about frozen berries (about 1 cup)
Directions
Prepare Oven and Muffin Cups
Heat oven to 400 degrees F.
For big-topped muffins, line 8 standard-size muffin cups with paper liners. For standard-size muffins line 10 muffin cups. Fill the remaining cups with 1 to 2 tablespoons of water to help the muffins bake evenly.
Whisk the flour, sugar, baking powder, and salt in a large bowl.
Add oil to a measuring jug that holds at least 1 cup. Add the egg then fill the jug to the 1-cup line with milk (1/3 to 1/2 cup milk). Add vanilla and whisk to combine.
Add milk mixture to the bowl with dry ingredients then use a fork to combine. Do not over mix. (The muffin batter will be quite thick — see note below for more details). Fold in the blueberries.
Divide the batter between muffin cups. (If making big-topped muffins, the batter will come to the tops of the paper liners). Sprinkle a little sugar on top of each muffin.
Bake muffins 15 to 20 minutes or until tops are no longer wet and a toothpick inserted into the middle of a muffin comes out with crumbs, not wet batter. Transfer to a cooling rack.
After muffins have cooled, place them in a plastic bag, seal, and store at room temperature for 2 to 3 days. To freeze, wrap them tightly in aluminum foil or place them in freezer bags. Freeze for up to 3 months.
Tips
You can make these with fresh or frozen blueberries – if you use frozen, do not thaw the blueberries.
For mini muffins, the baking time will be less — keep an eye on them while they bake and expect them to require 9 to 11 minutes.
Batter Thickness: The batter should be thick and “scoopable” — not runny and not dry or extra thick like dough. If the batter is too runny, add flour, a tablespoon at a time until correct consistency. If batter is dry or too thick, add milk, a tablespoon at a time until correct consistency.
Ingredients:
1 medium ripe banana
1 cup shredded carrots (see note below)
1/4 cup applesauce, unsweetened or a fresh apple pureed
1/8 cup water (you may need to add additional 1/8 cup water)
1 1/2 cups whole wheat flour
1 cup rolled oats
Instructions:
Preheat oven to 350° F
Lightly spray a baking sheet with non-stick spray.
Mash the ripe banana in a small bowl. Grate the carrots, and mix with the banana. Then pour in the applesauce and water. In a medium bowl, whisk together the flour and oats. Make a well in the center of the dry ingredients and pour in the carrot mixture. Stir until thoroughly combined. Roll into marble size balls, flatten with fork to 1/2 inch thickness. Place on the baking sheet and bake for 25 minutes. Let them cool overnight in the oven for crispy treats.
Baby It’s cold outside and I have some warm stew just for you… I think with no doubt this is one mean tasty stew. Just baked some fresh homemade bread to go with it. Make sure you have a Large Pot to cook this awesome stew in. Don’t forget to get some good chili from your neighborhood farmers market. Hope you enjoy. I sure did.
Why should you cook for your pets? by Dr. Karen Becker, VM
Feeding your pets a healthy diet is simple and easy.
It’s like cooking for yourself except your leaving out the salt and a few other ingredients. Whats great about cooking your pets meals is you know what’s exactly in there. Your using beef, chicken, turkey and lamb fresh from the store. No processed precooked meat in a can.
Human Grade Food: It’s Not Just for Humans
Unless the commercial dog or cat food you’re buying is made with human-grade ingredients, you are feeding your pet rendered protein. Rendered meat is essentially pieces and parts of this animal or that — there’s really no telling. This low quality protein is less than desirable nutrition for your pet. You don’t know what country the meat came from or if this meat came from sick, road kill or euthanized animals. . . This can be an issue since other countries do not have the same regulations for human consumption.
Unfortunately, commercial pet food made entirely with human-grade ingredients is usually at least three times as expensive as food containing crude protein. This is one of the main reasons for switching your pet to a homemade diet. You have complete control over what goes into your dog’s or cat’s mouth, and you can insure you’re feeding high quality, human-grade protein and not the crude, pieces-and-parts variety.
If you would like to read the entire article CLICK HERE
Pumpkin Rolls for Thanksgiving and Christmas… Yummy
Chef Sherrie Angel “Slam Dunks” Thanksgiving this year with her Pumpkin Dinner Rolls. Creamy smooth texture that melts in your mouth. Bite after bite you can taste every spice layered across your pallet correctly.
Let’s not forget about the star of the day. Juicy seasoned to perfection turkey with chicken sausage gravy & all the sides to complete the meal.
I made my dough in the bread maker, but i have added instructions for making it by hand.
Risen twice and then baked to perfection. But we will give the directions for old school mixing in a bowl.
Chef Sherrie Angel… Rocks the Kitchen with Pumpkin Rolls
INGREDIENTS
1/2 cup warm Whole Milk
1/4 cup Honey
1/4 cup salted Butter
2 1/4 teaspoons Active Dry Yeast
1 can (15 oz) Canned Pumpkin
1 Egg
1 1/2 teaspoon salt
5 cups Flour
DIRECTIONS
Place milk , 1 teaspoon honey and whisk together. Sprinkle yeast on top, set to the side for 5 minutes.
In a large bowl combine and mix together the remaining ingredients. Add the milk mixture and start mixing. Dough will be wet. If the dough is extremely wet you can add some flour, but the dough should remain sticky. Don’t add to much flour at once, a little at a time until you can handle to dough.
After you have the dough mixed together remove from the bowl to a floured surface so you can knead the dough. Knead for 15 minutes.
Lightly butter a bowl and place the dough inside and cover with Saran Wrap. Allow the dough to rise. It should be doubled in size. About 1 1/2 to 2 hours.
Remove dough from bowl. You can use a pastry mat / board, greased surface or parchment paper to use for your work area.
Divide the dough into 4 pieces so it’s easier to handle. Cut the dough into 24 pieces. Grease or butter your hands and roll the dough inward into balls. Place the pieces into a greased pan or pans. Depending on what you have handy.
Cover pans with a kitchen towel and allow the rolls to rise to double or triple the size. About 1 1/2 to 2 hours.
About 30 minutes before the rolls are finished rising turn the oven on to 375 degrees F.
Bake the rolls for 25 – 30 minutes or until golden.
Remove from the oven. Brush the tops of rolls with butter. Let the rolls cool in the pans for 10 minutes. Remove rolls and place on wire rack. These rolls can be served warm or at room temperature.
If needed you can make these a day ahead, so you can concentrate on all the other dinner items.
You can eat more and still lose weight. It’s that easy!
It seems natural: You want to, so you do a diet slash-and-burn, eating less and thinking about food more. The usual result also seems pretty natural: You feel denied, so you give up. Repeat as diet fads come and go. Enough already!
Why not eat more for weight loss and weight maintenance, instead of less? If your schedule does not allow you to exercise, it’s even more important to change your intake values. If your body does not recognize the food as a value, it turns it into FAT… Read through all the articles and see if it makes sense to you. Start to change the inside of you. Read the labels. This will be the most vital part about living healthy. Juicing is an excellent way to intake healthy vitamins and minerals. With the a Juicer you will be able to make healthy juices while still eating a healthy diet.


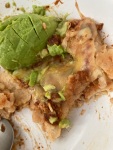


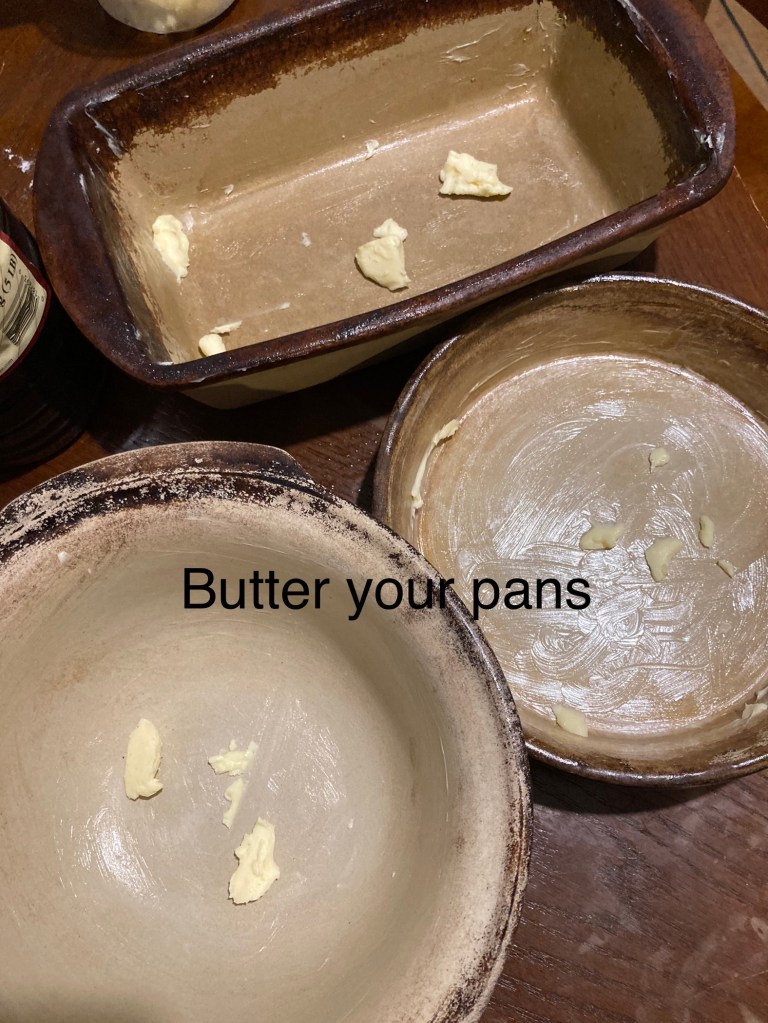
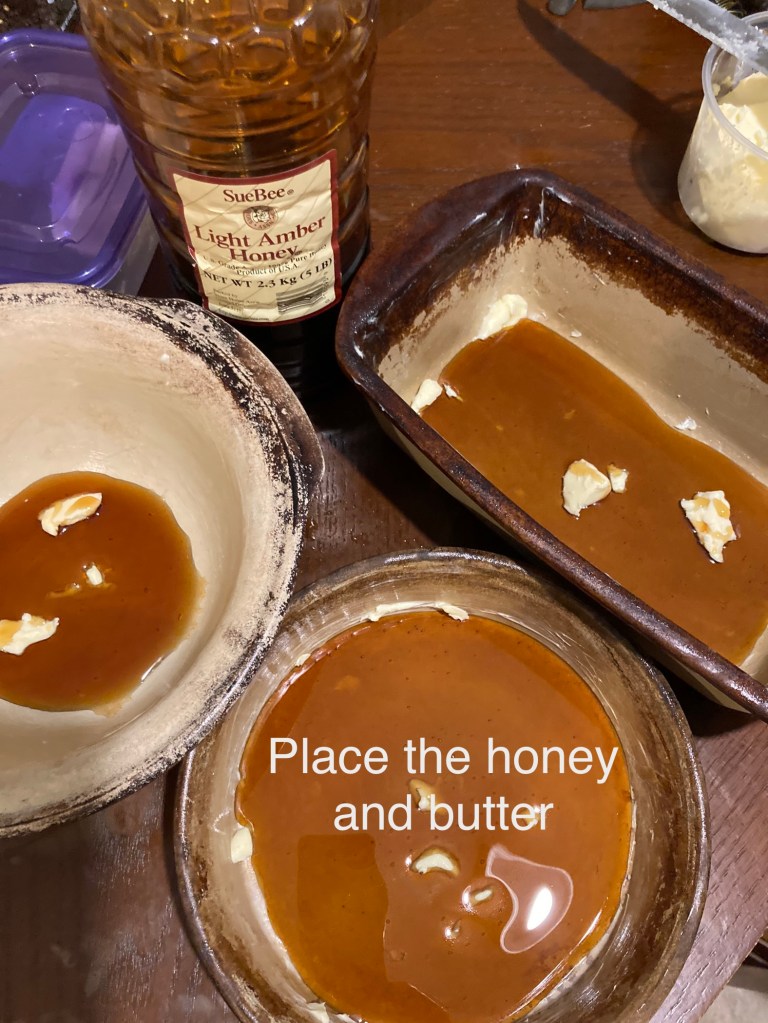
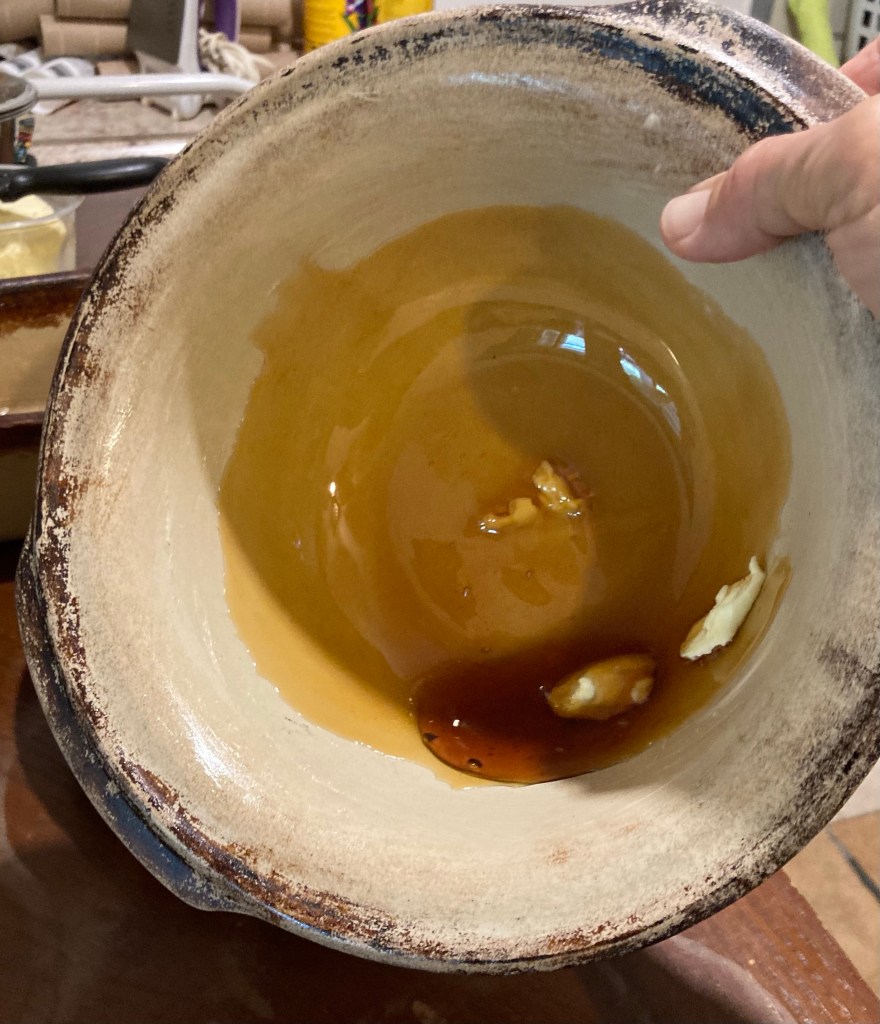


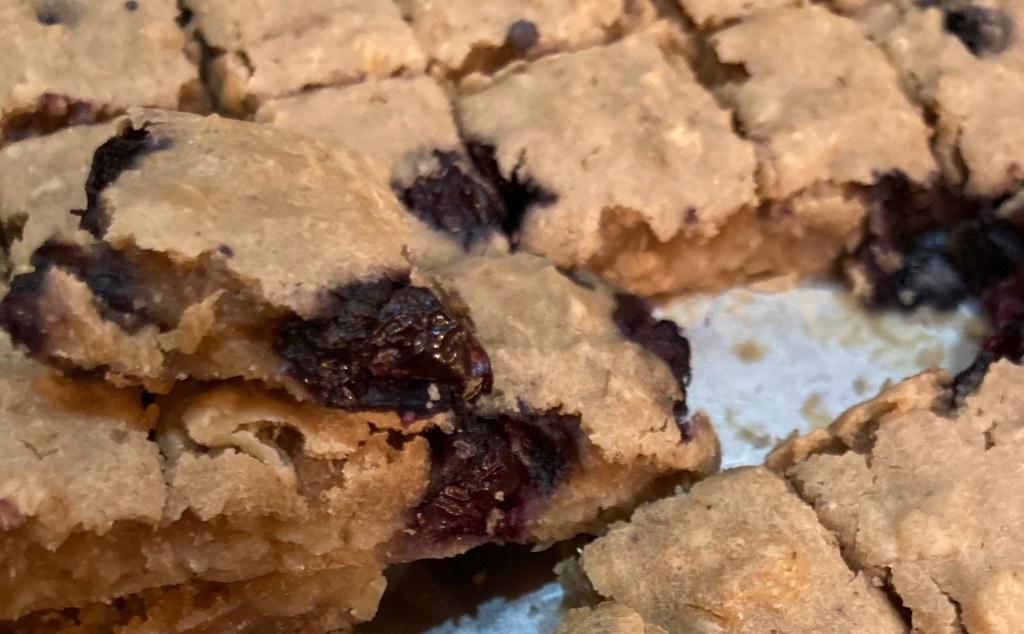
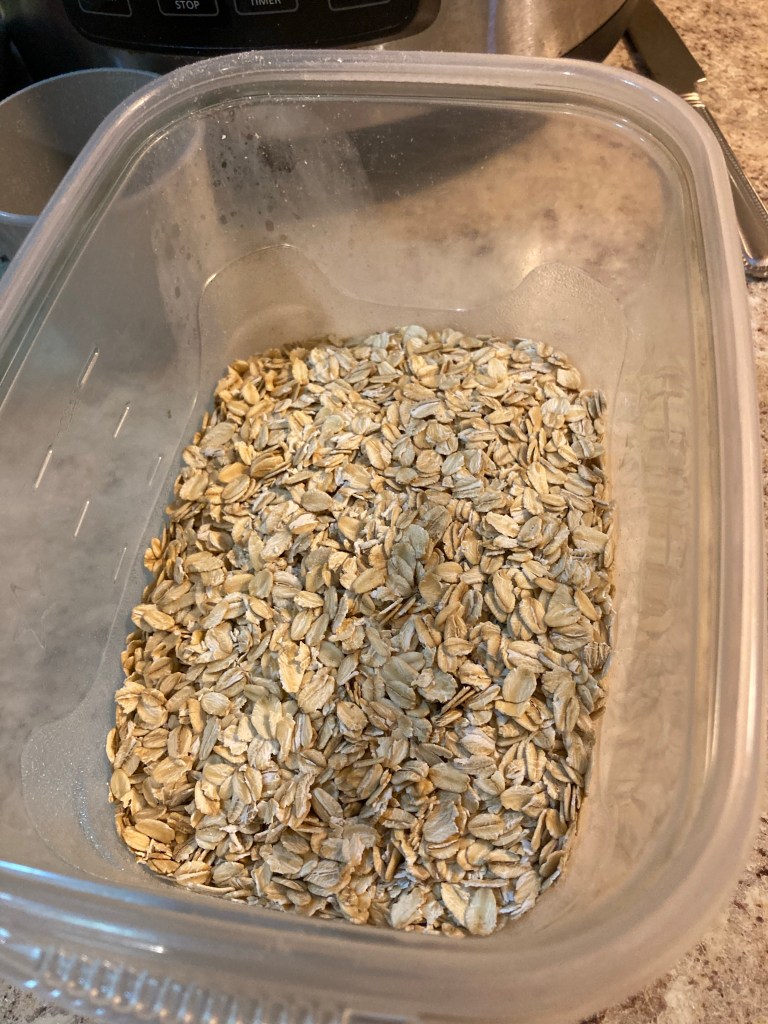
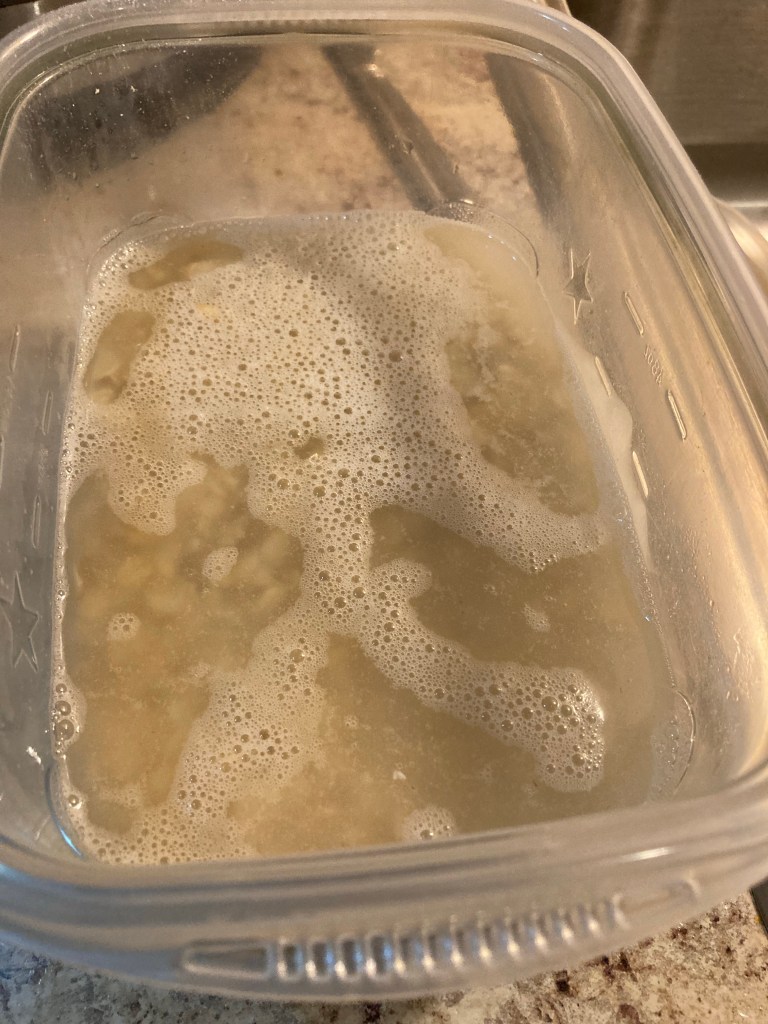

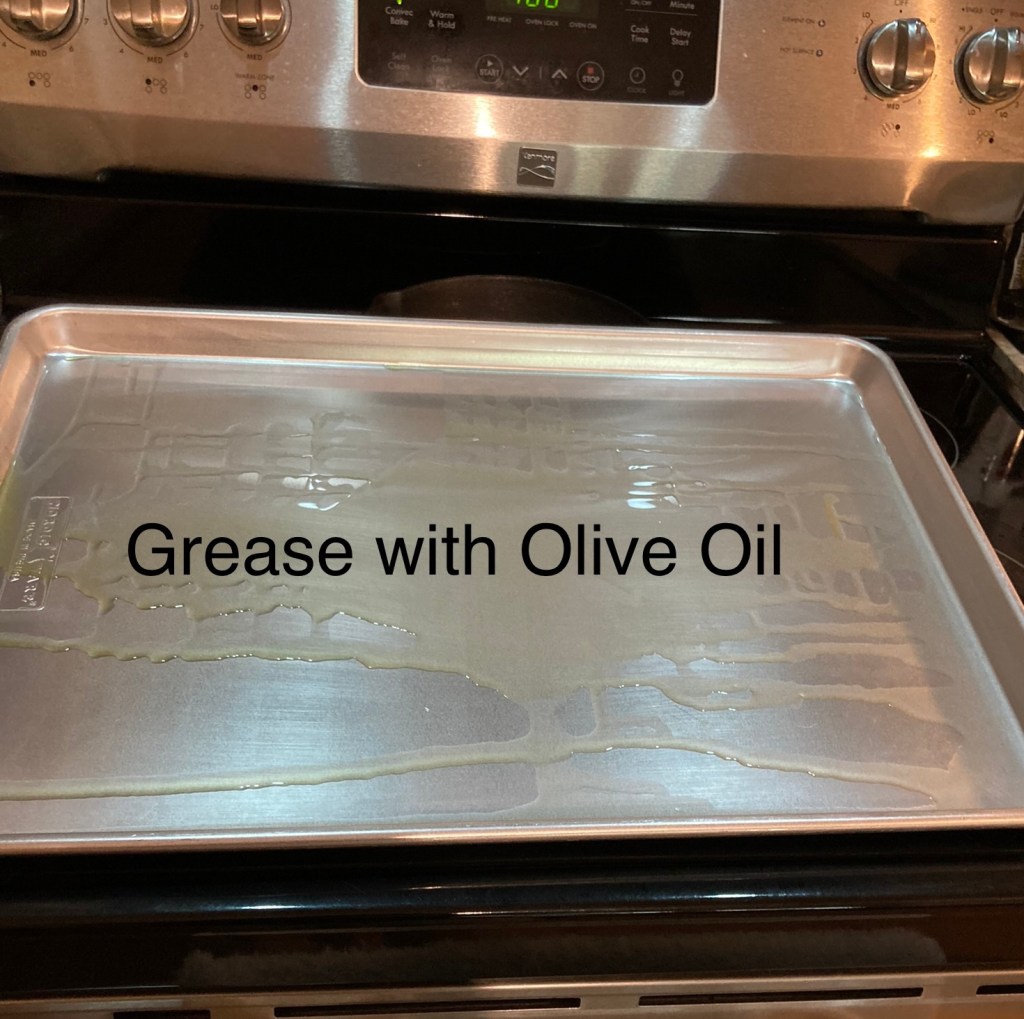

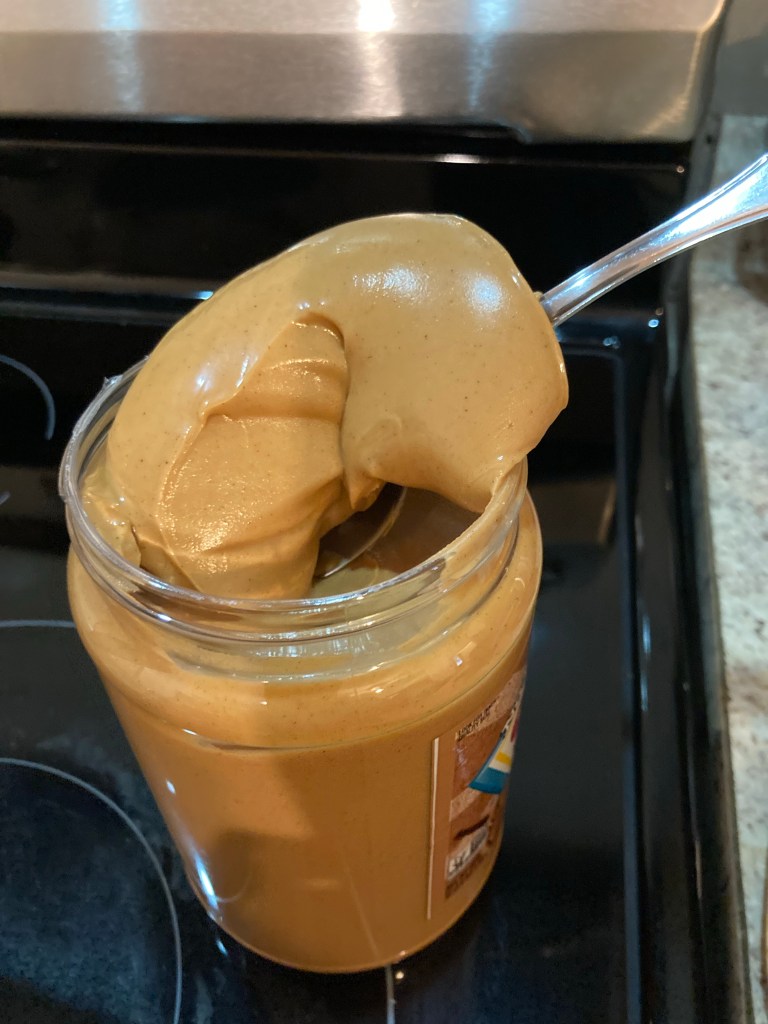


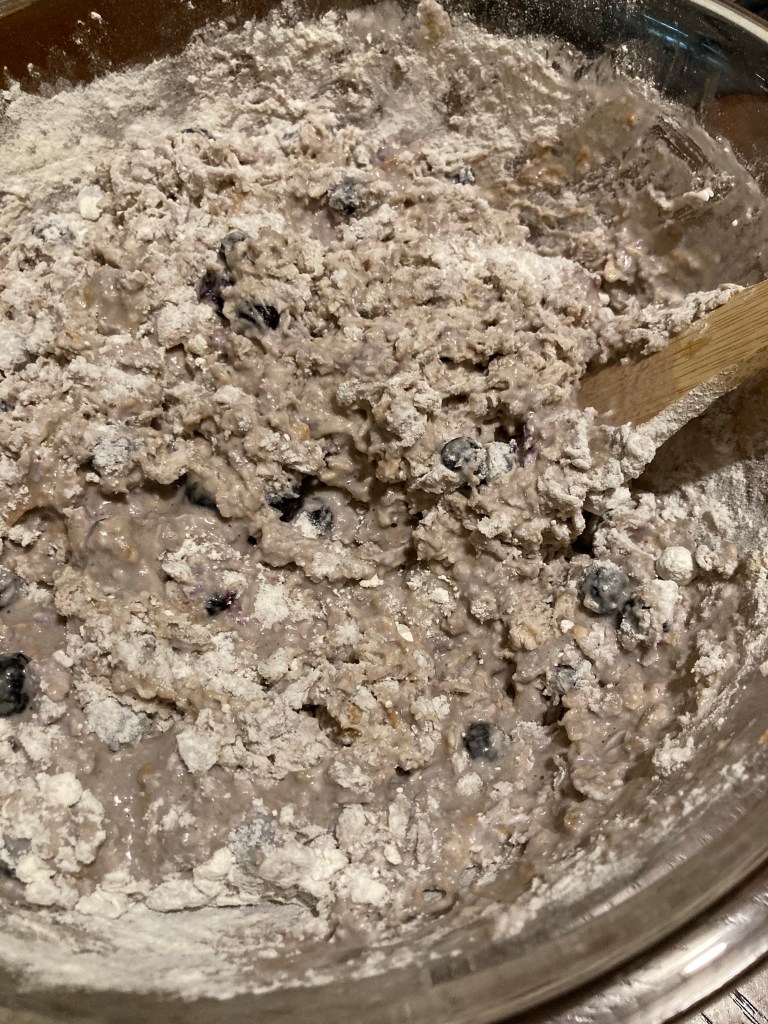
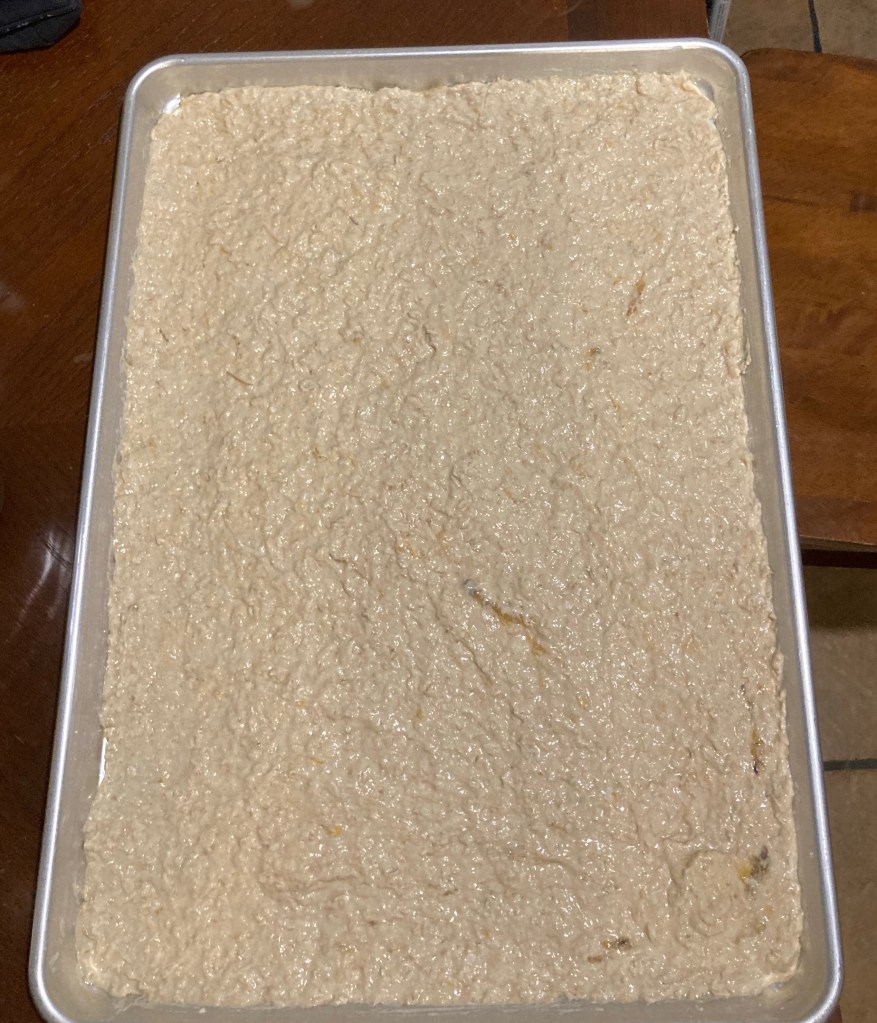


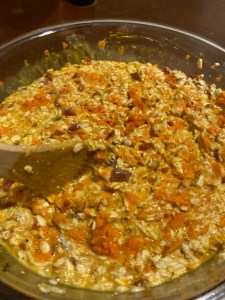


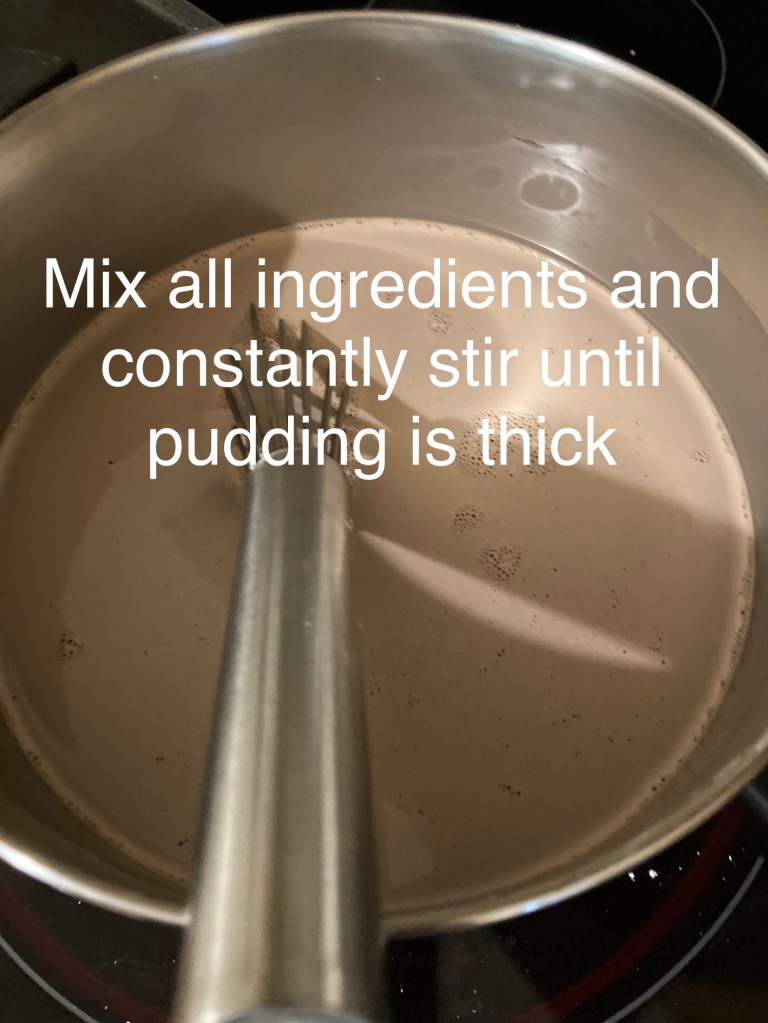

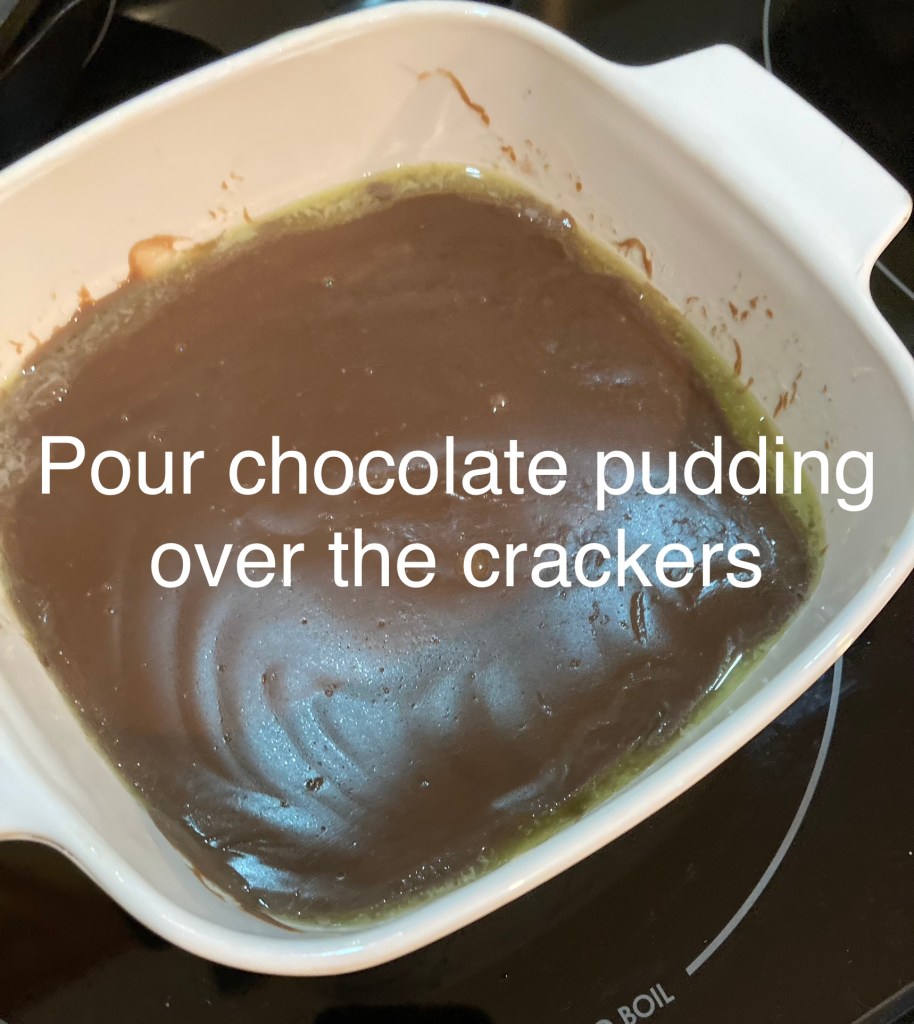
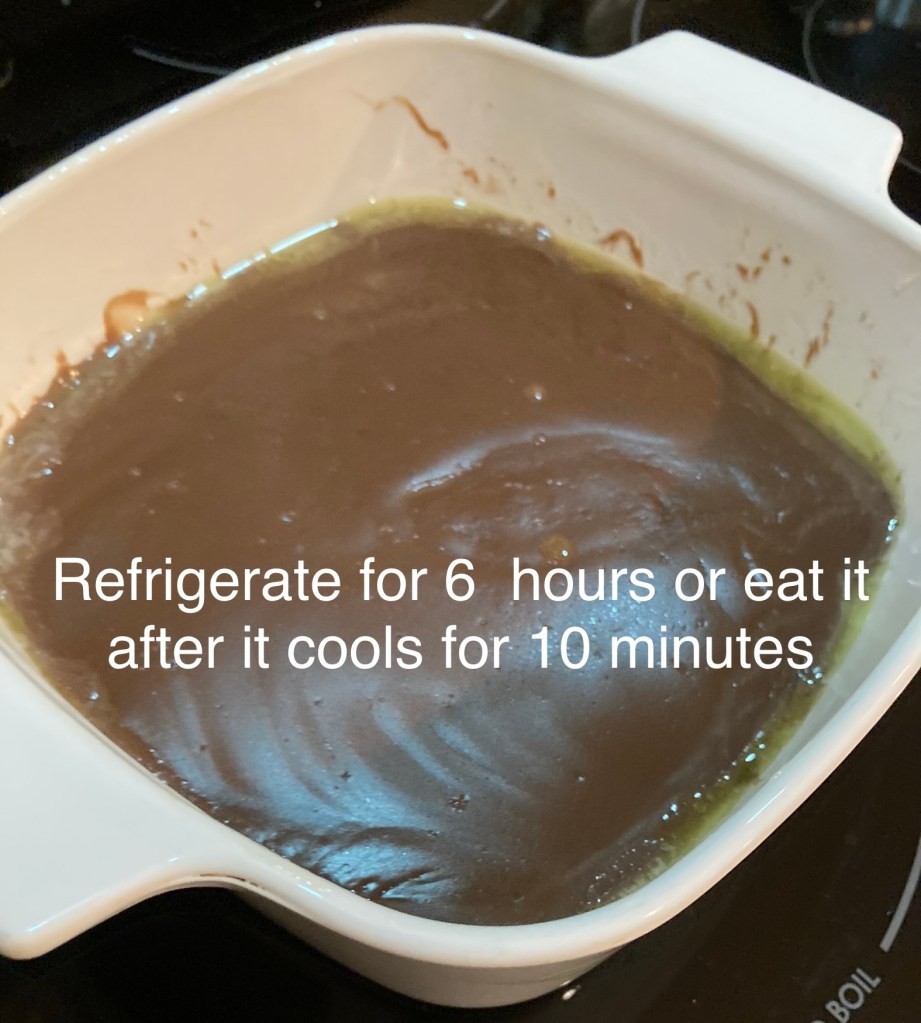


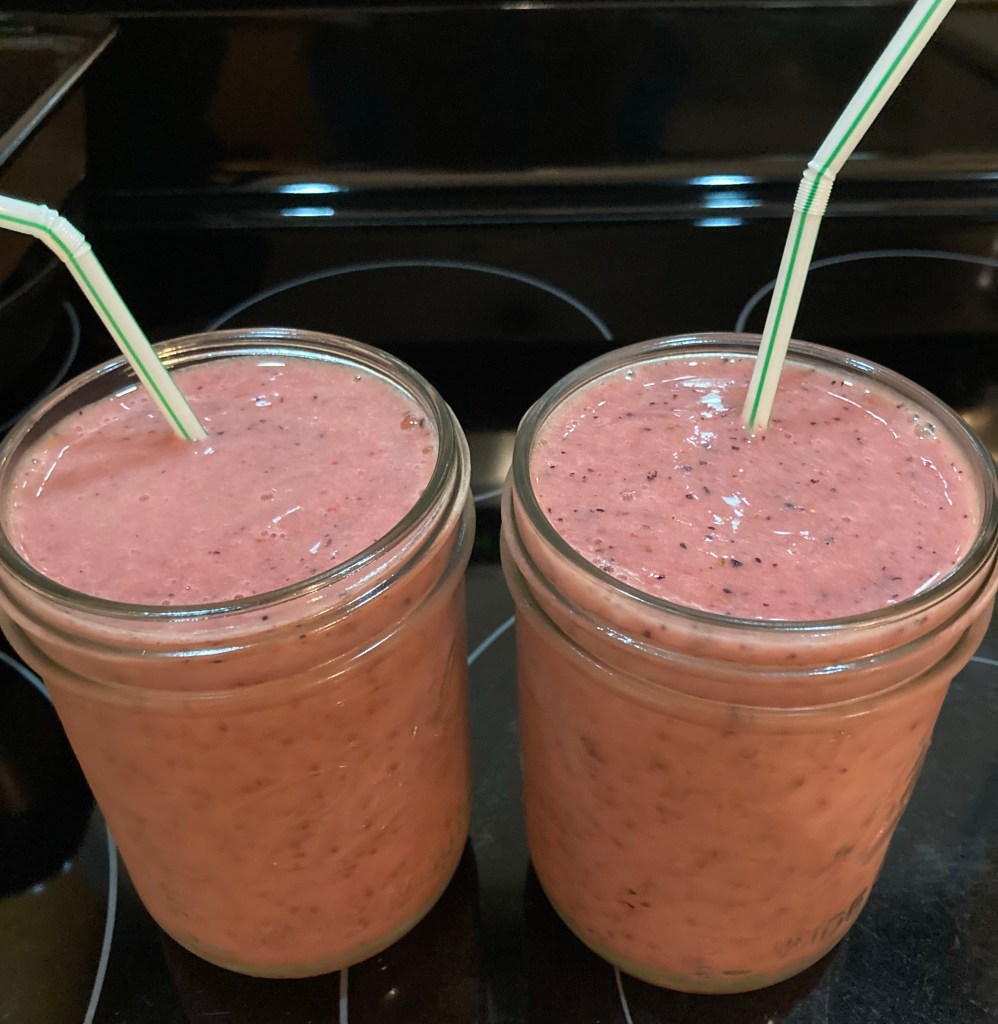


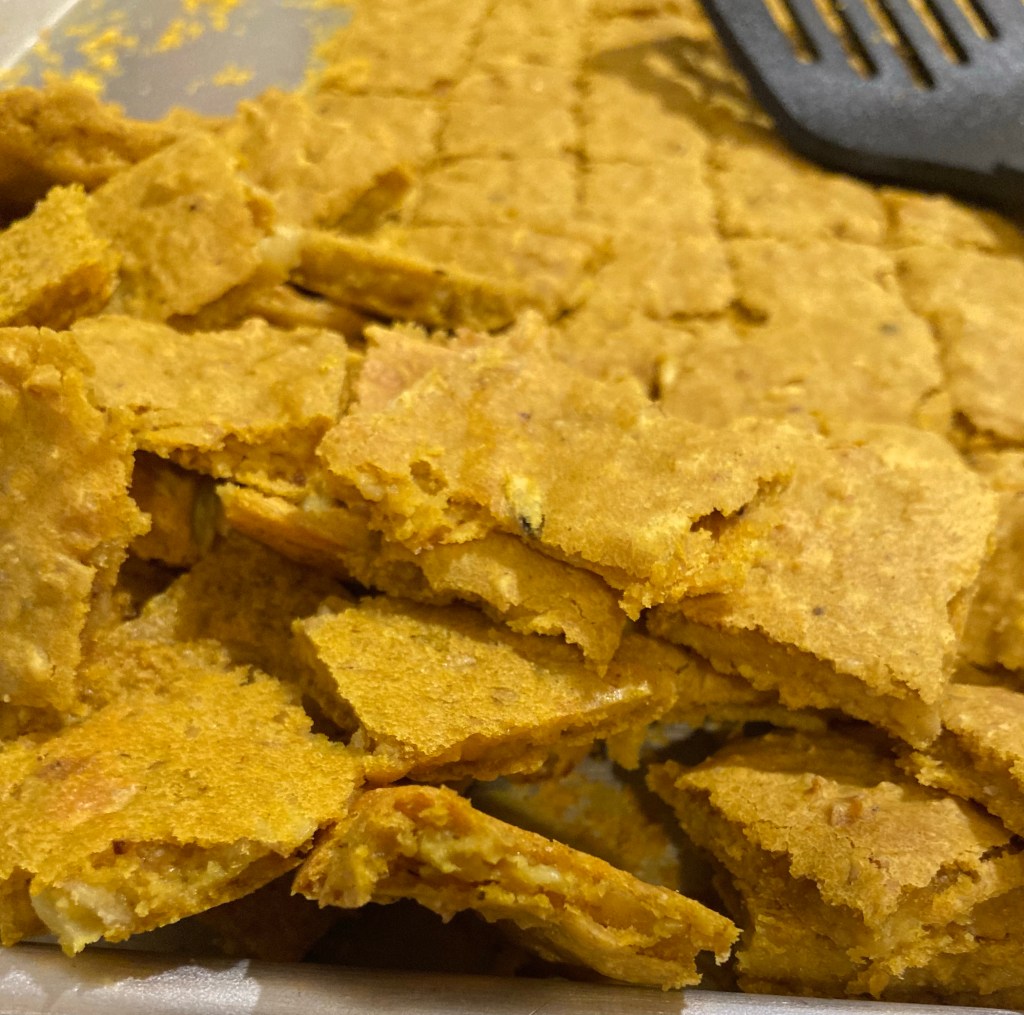


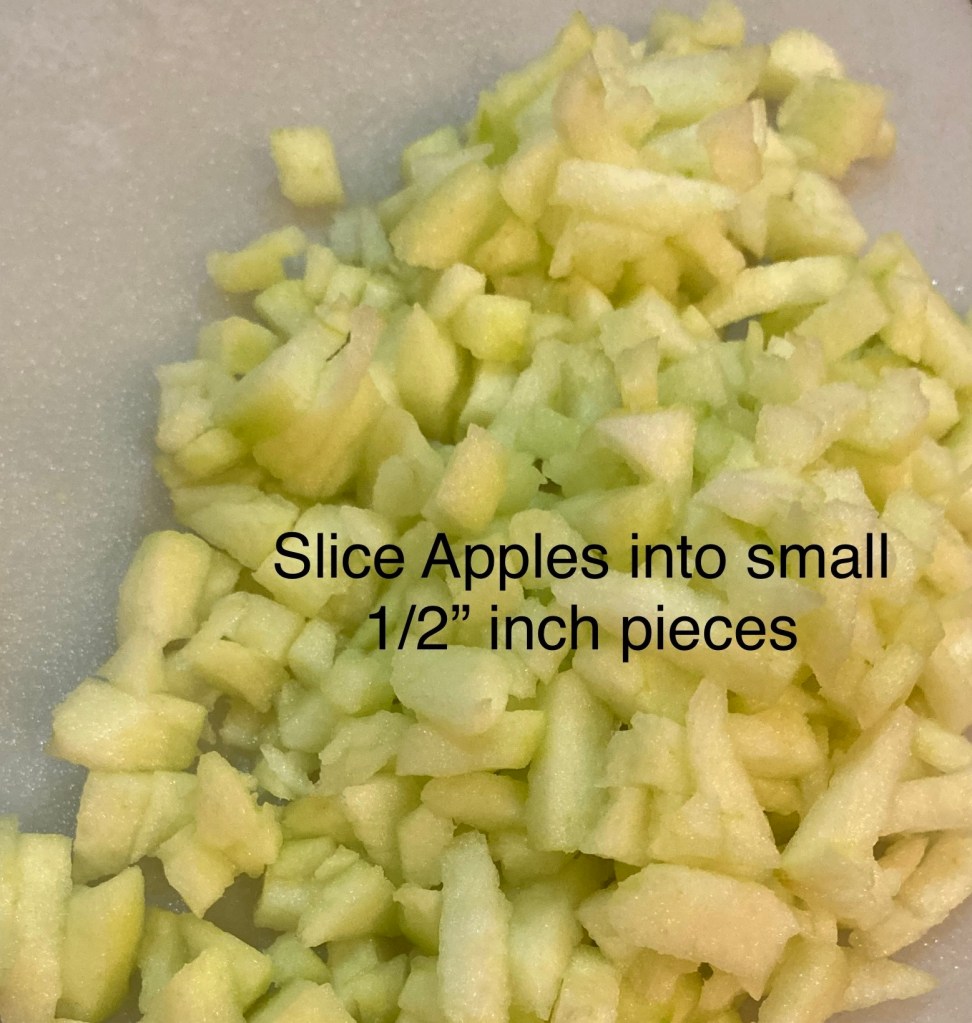

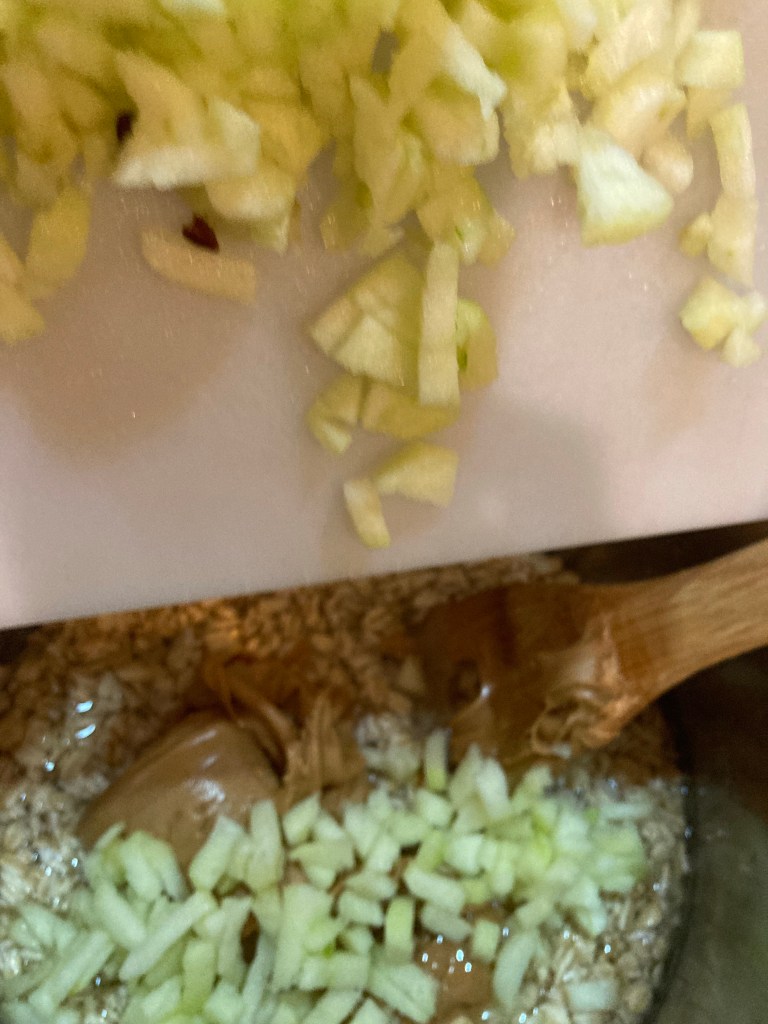


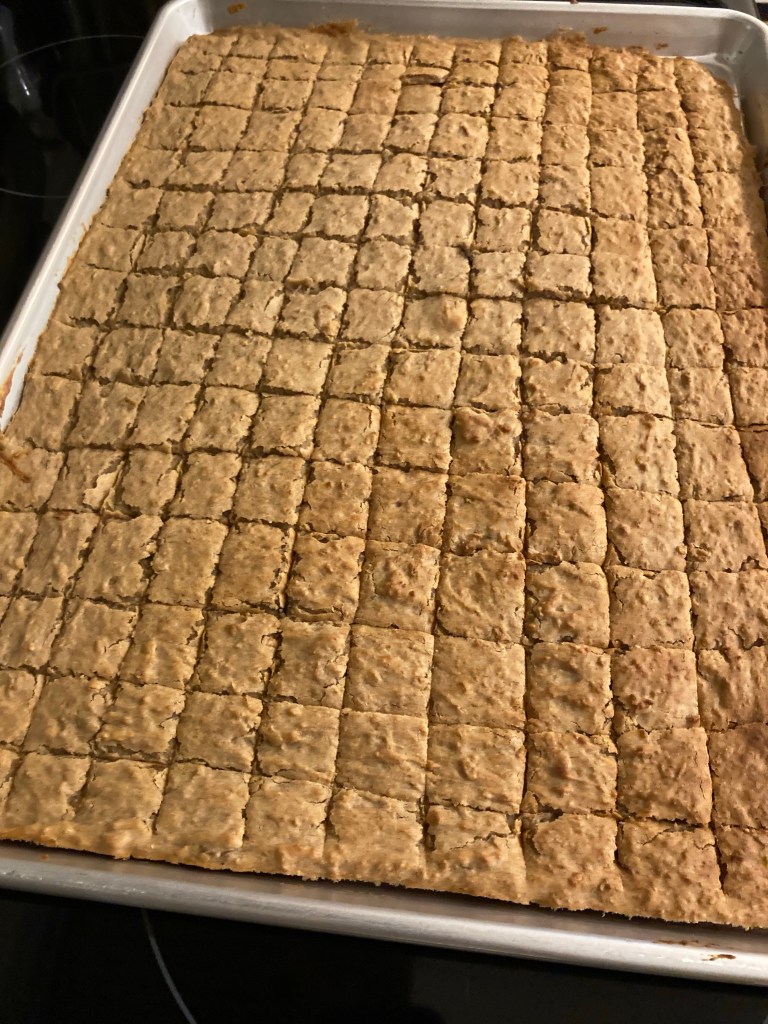


 Kitty Kat Meow’s


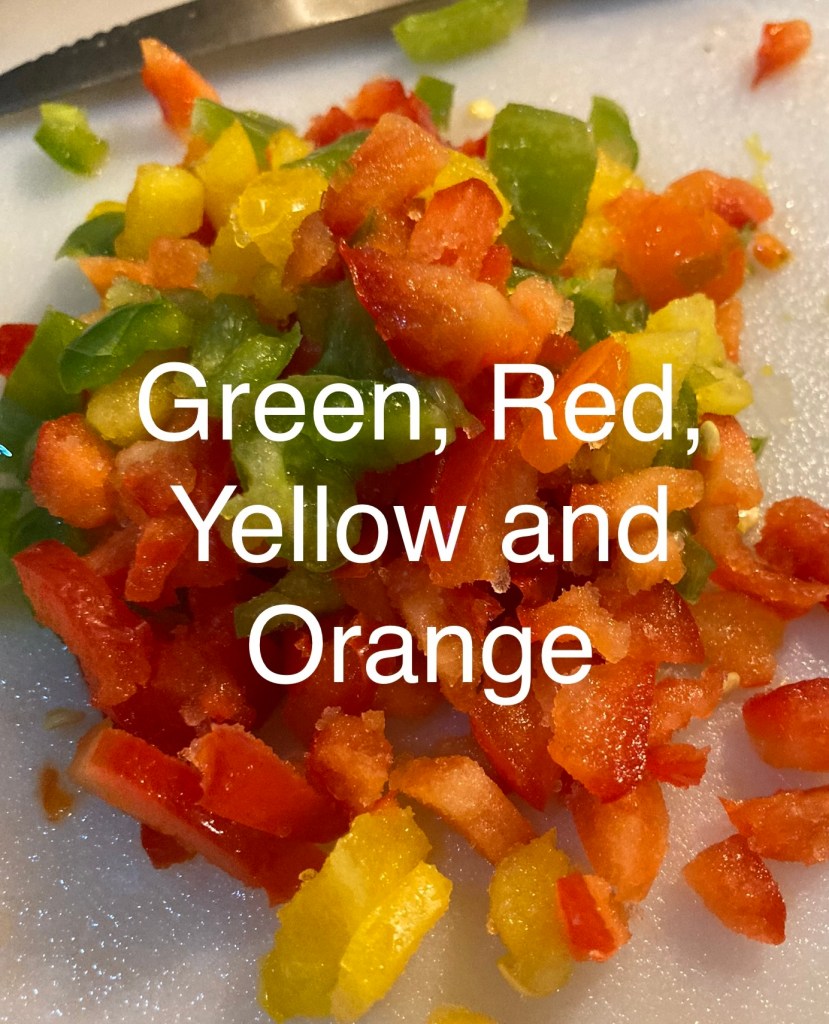


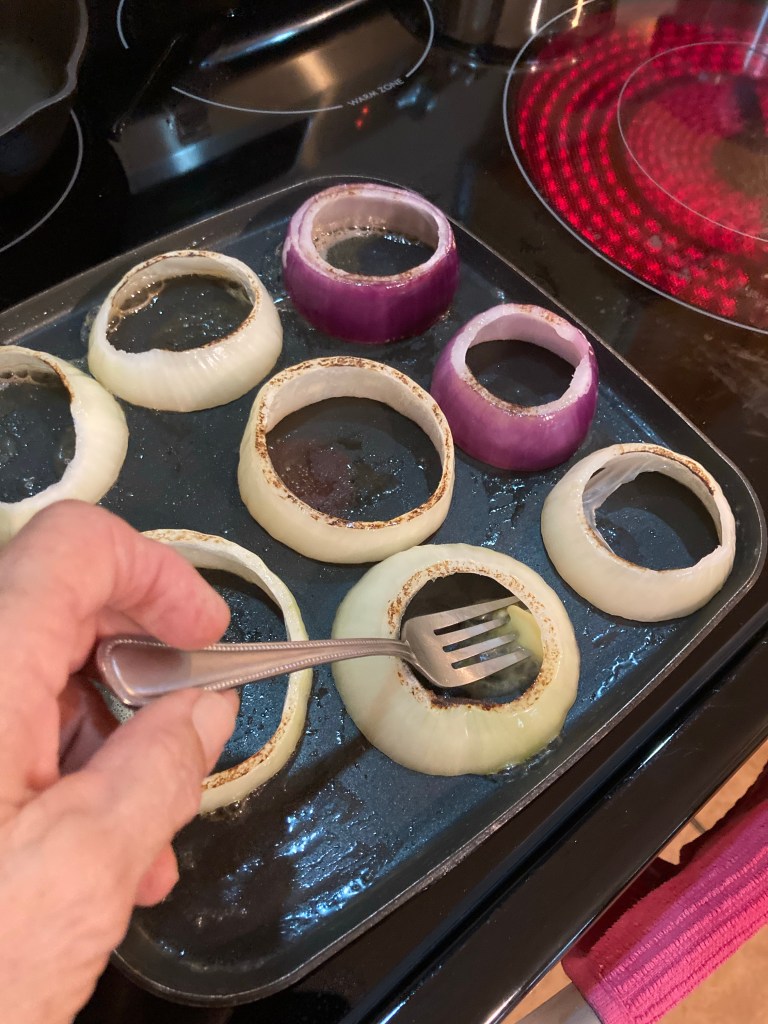


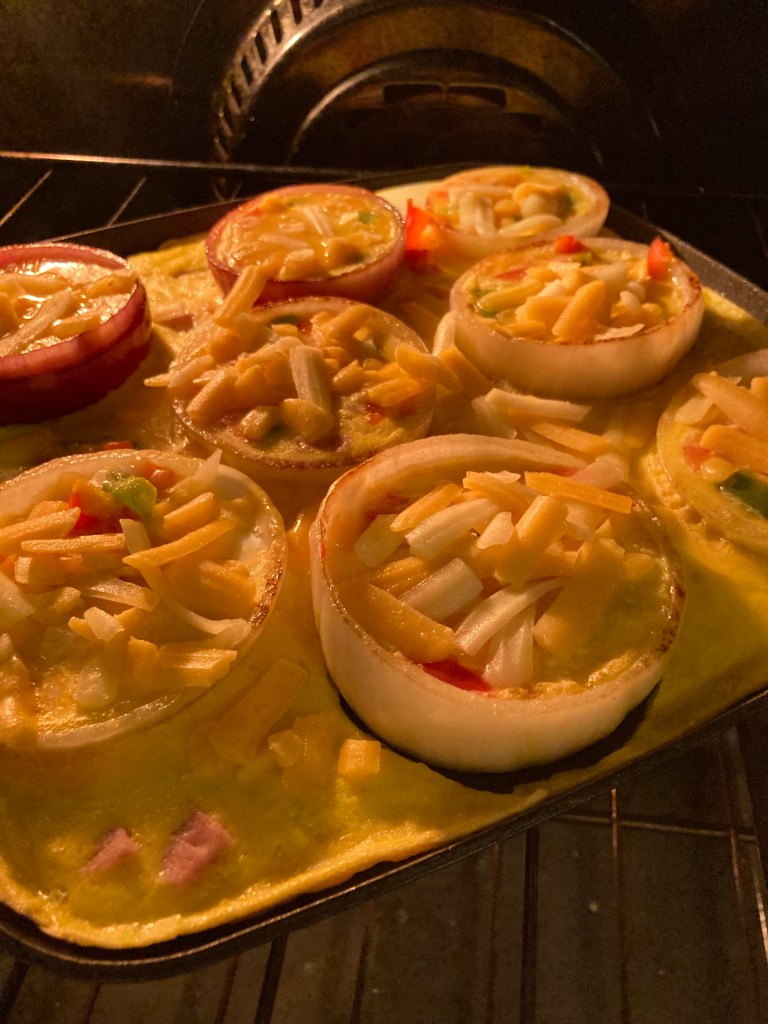


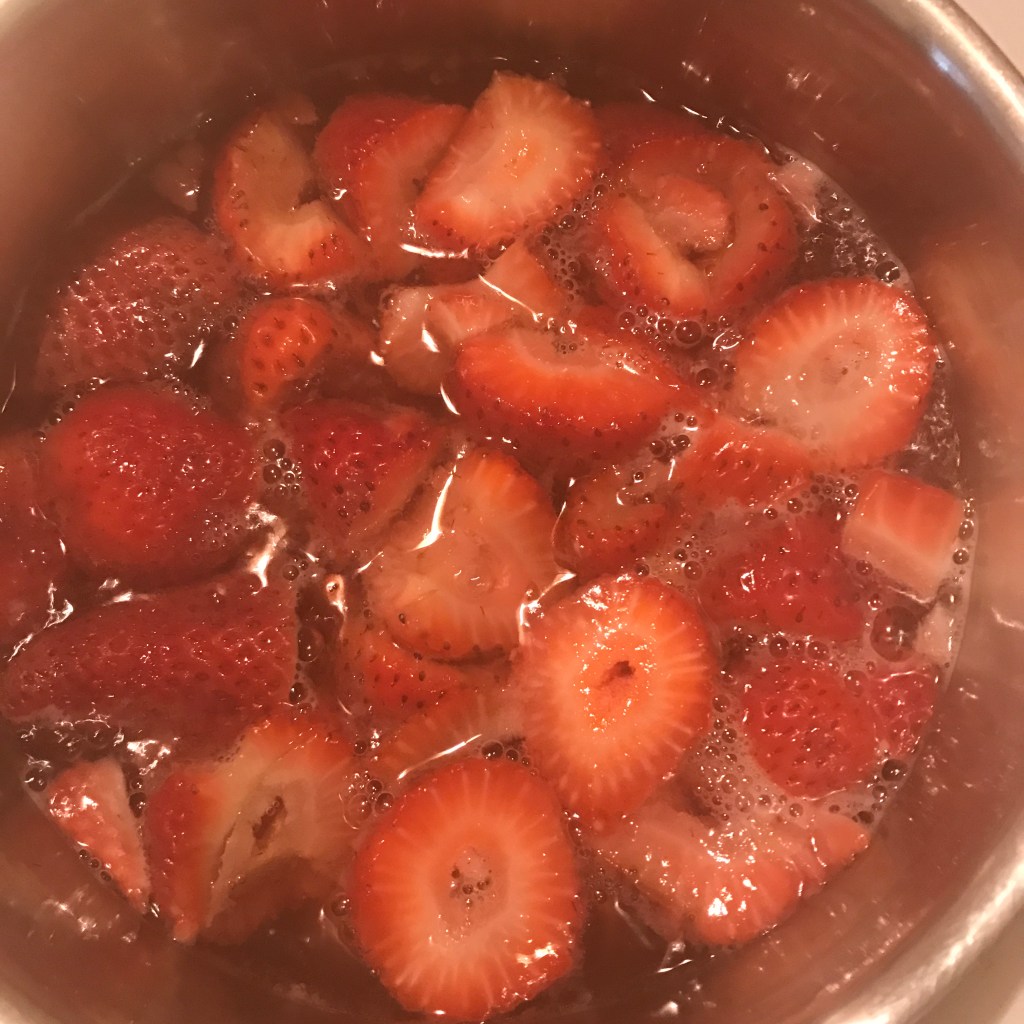

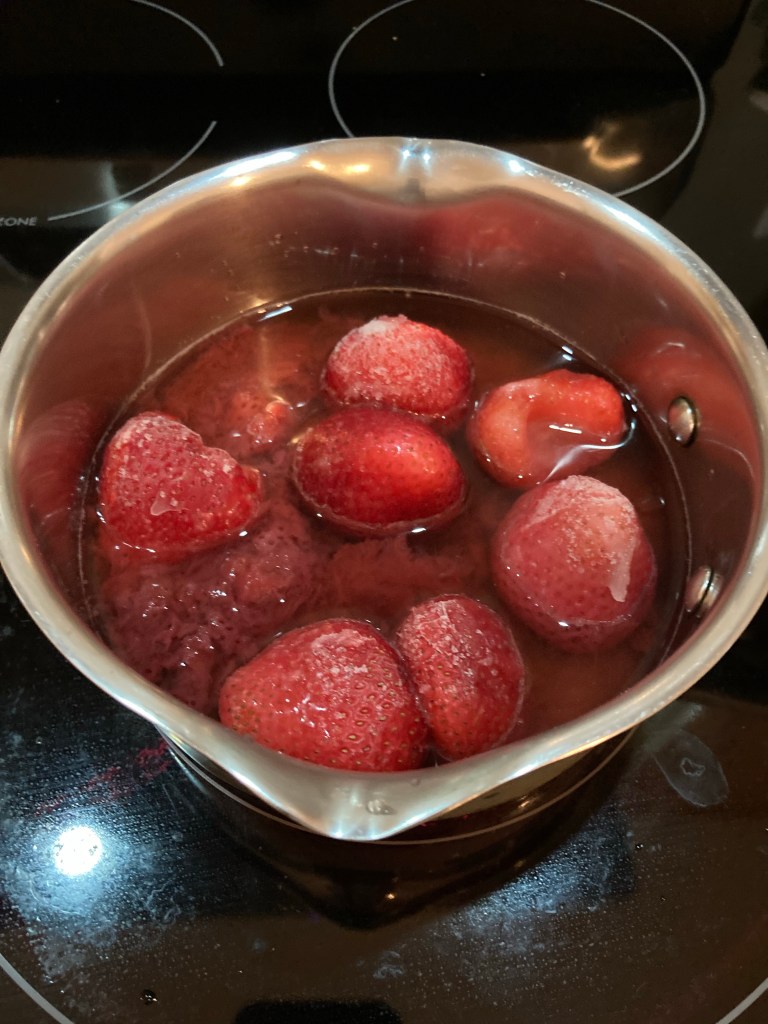
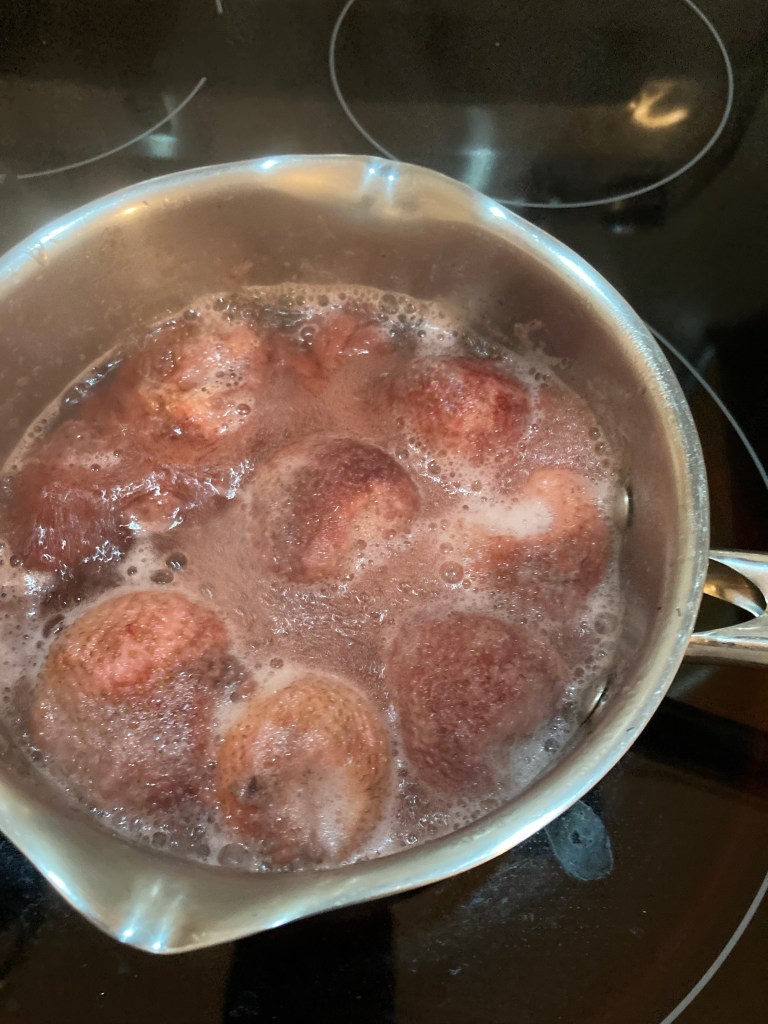

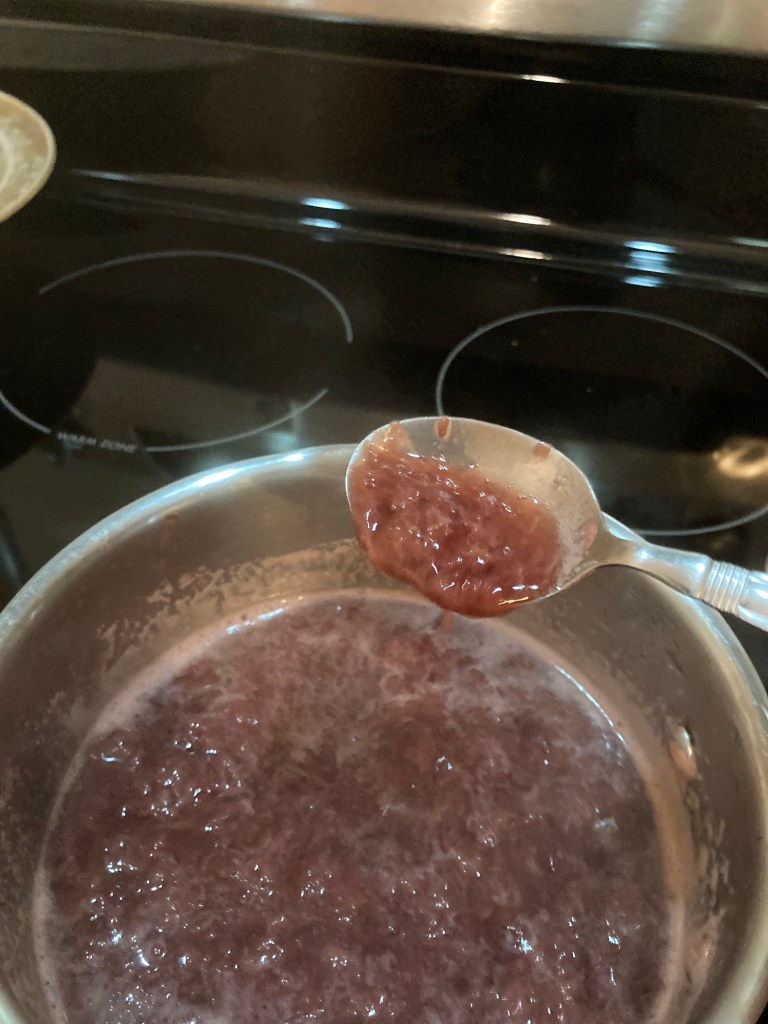
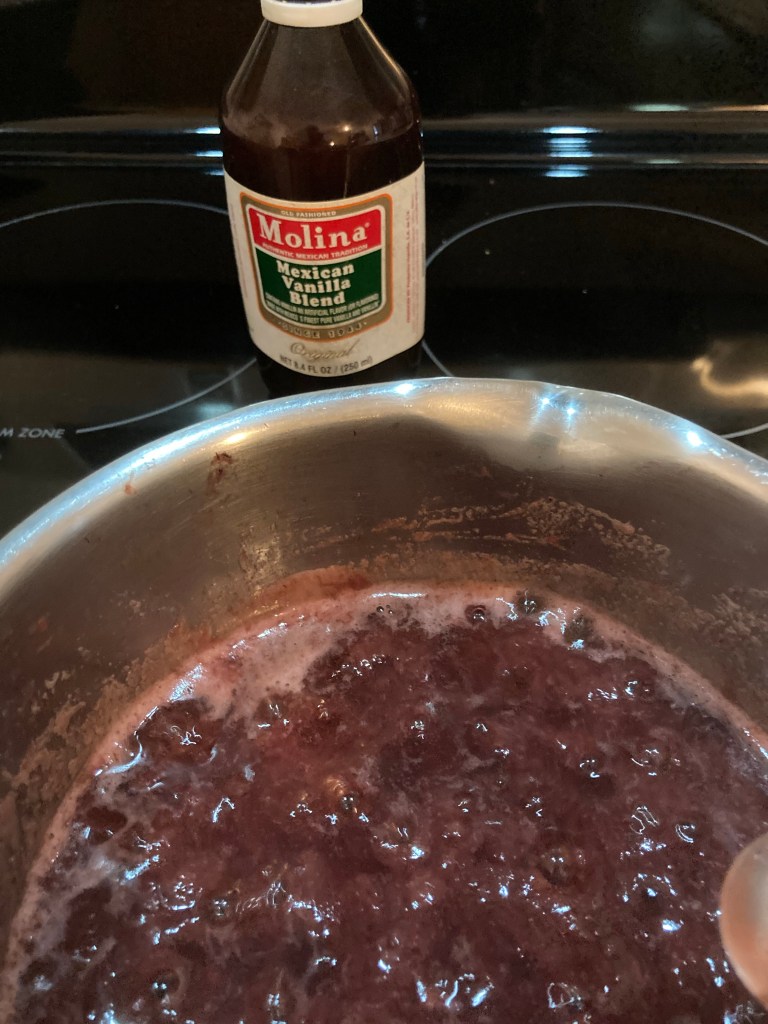


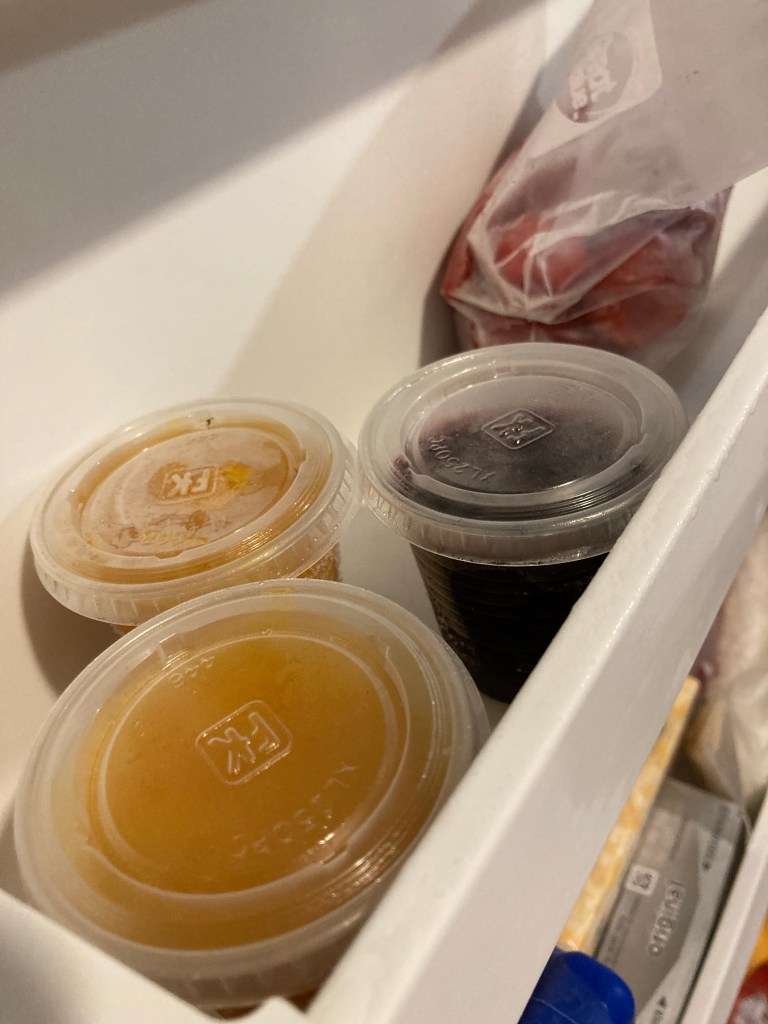
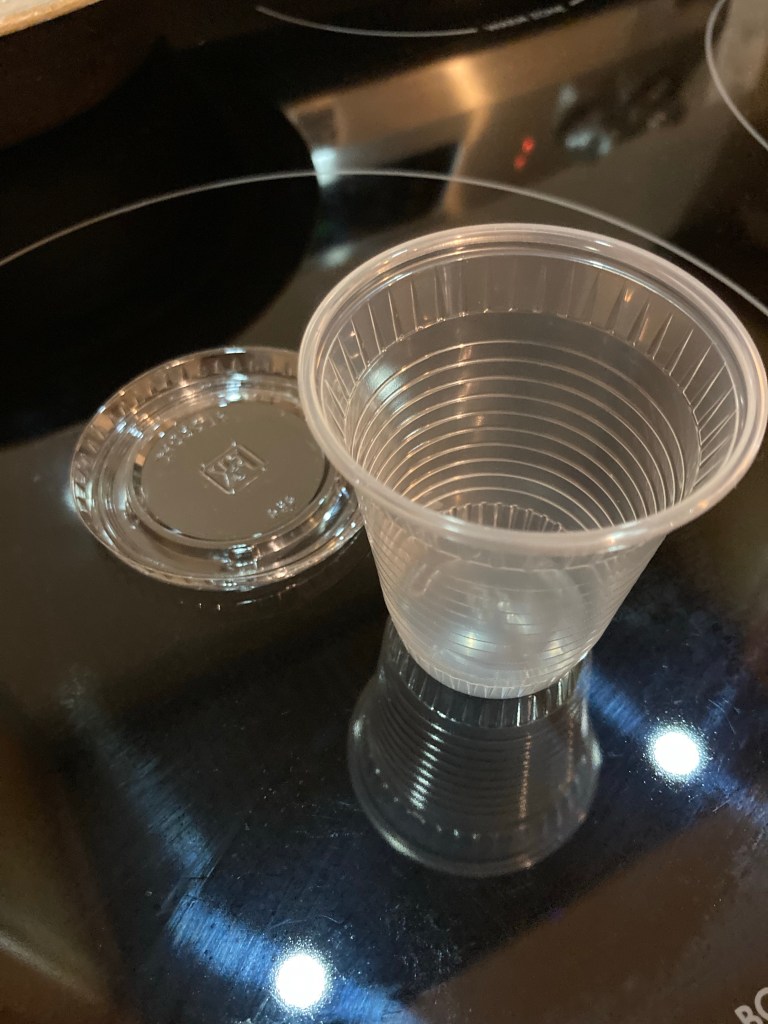


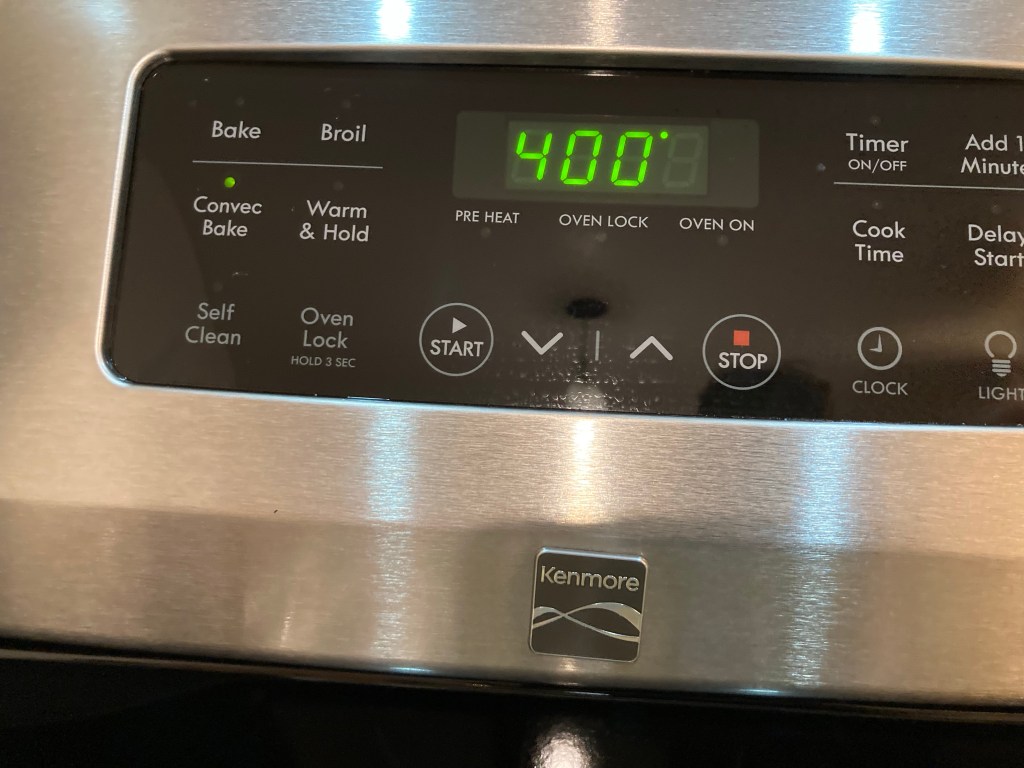


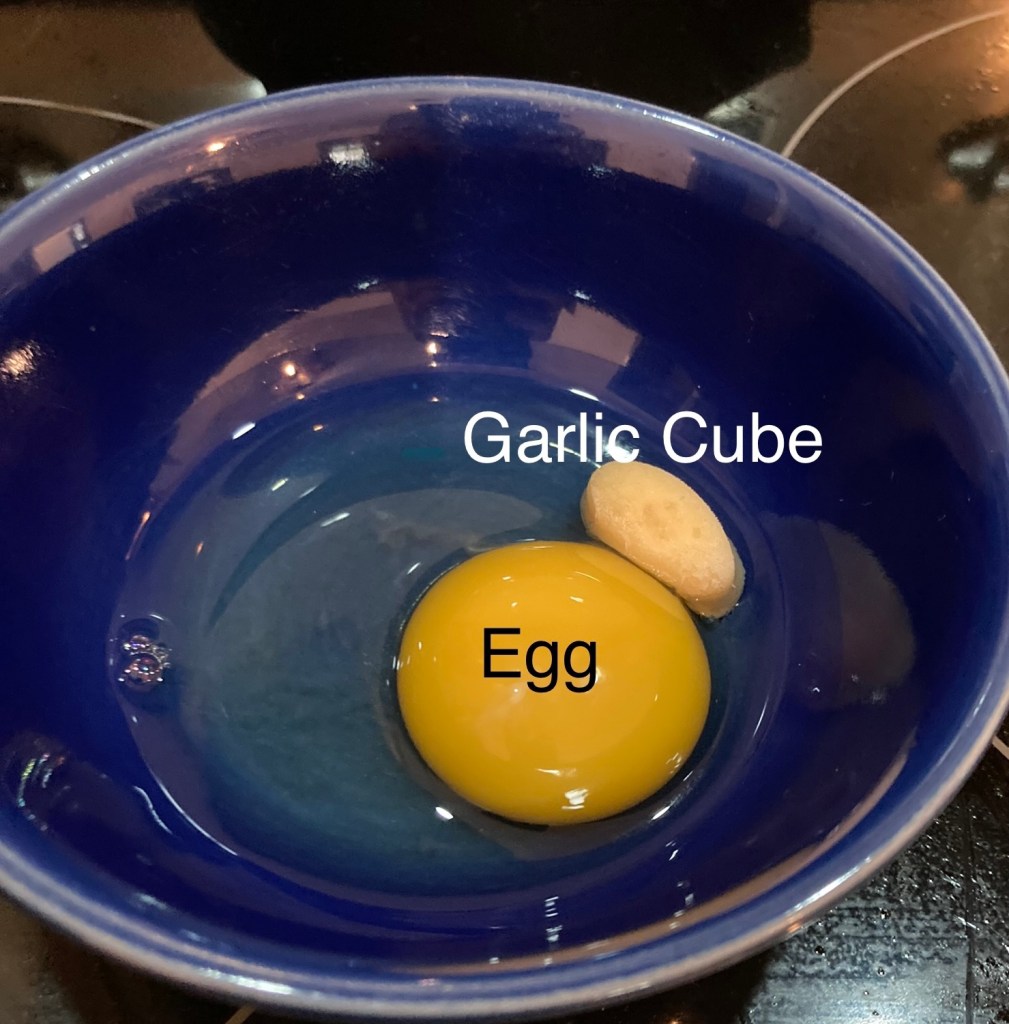


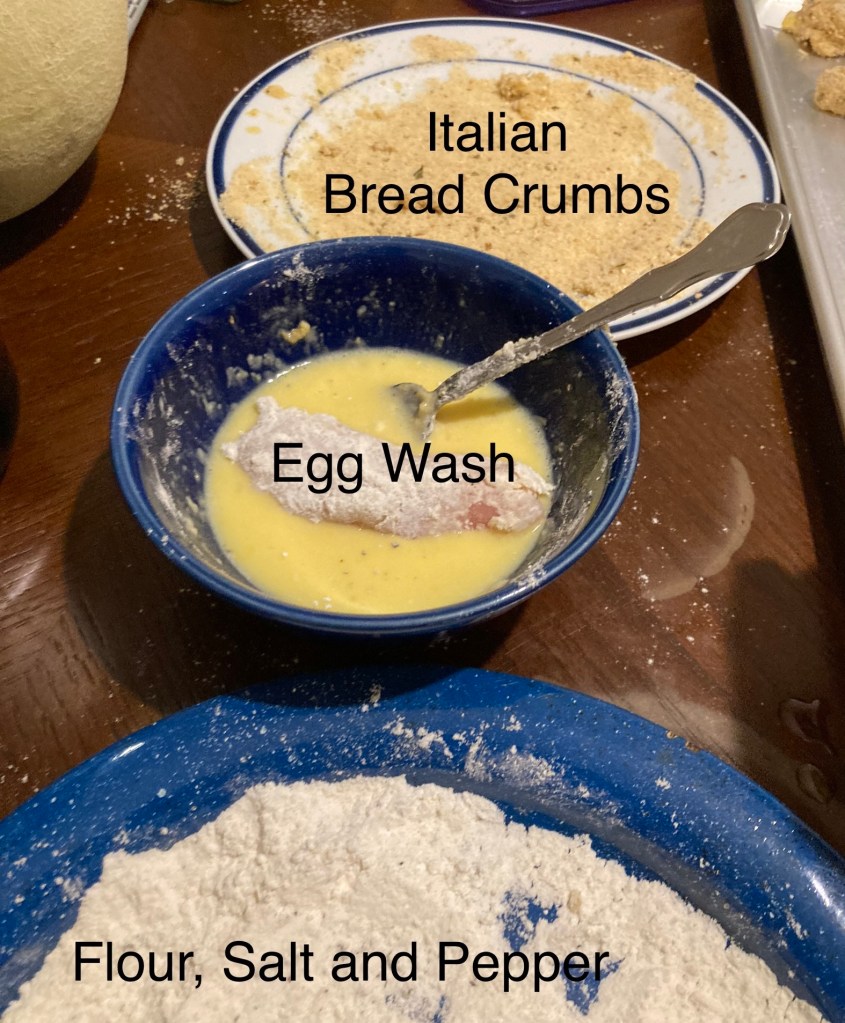


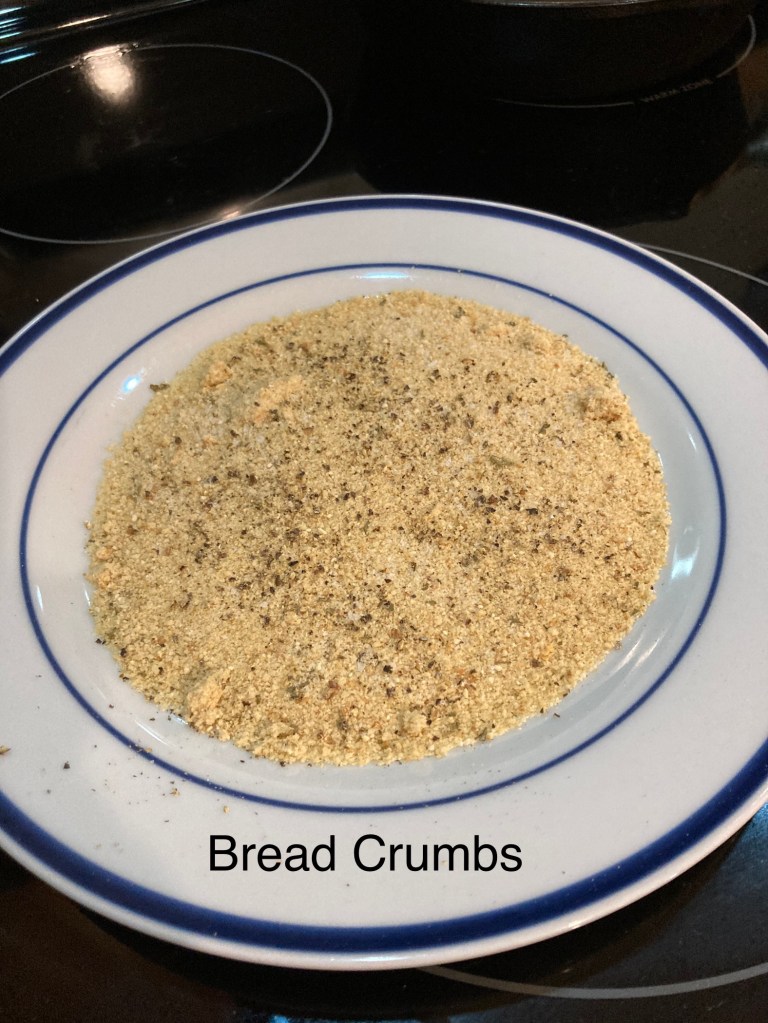
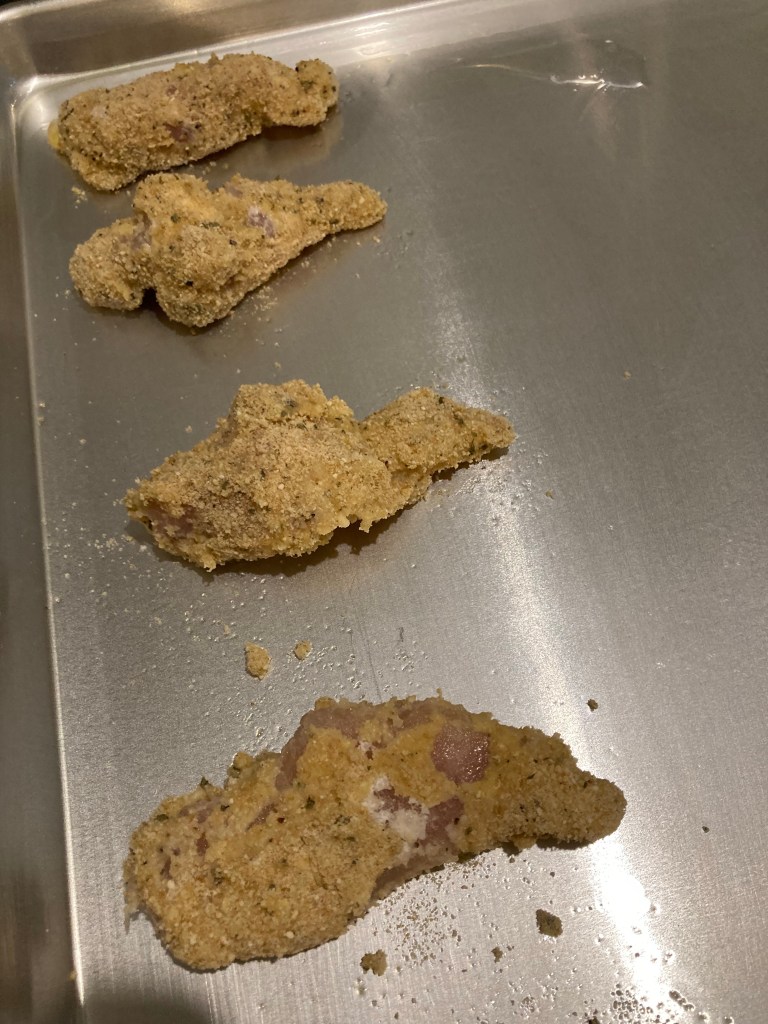

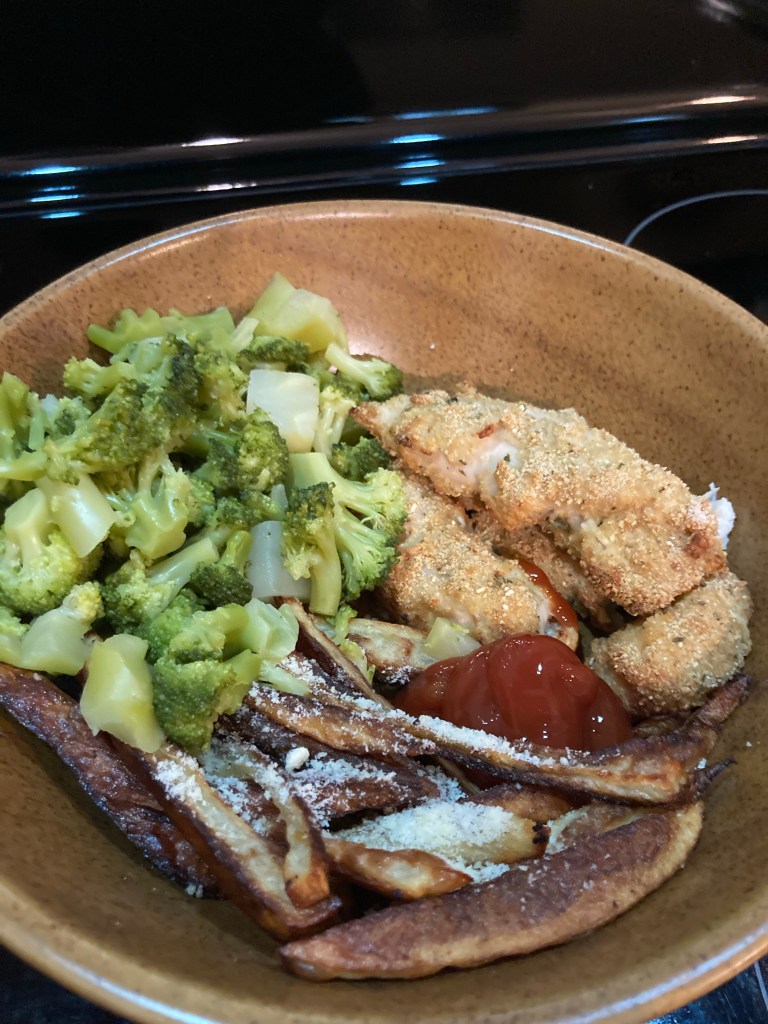


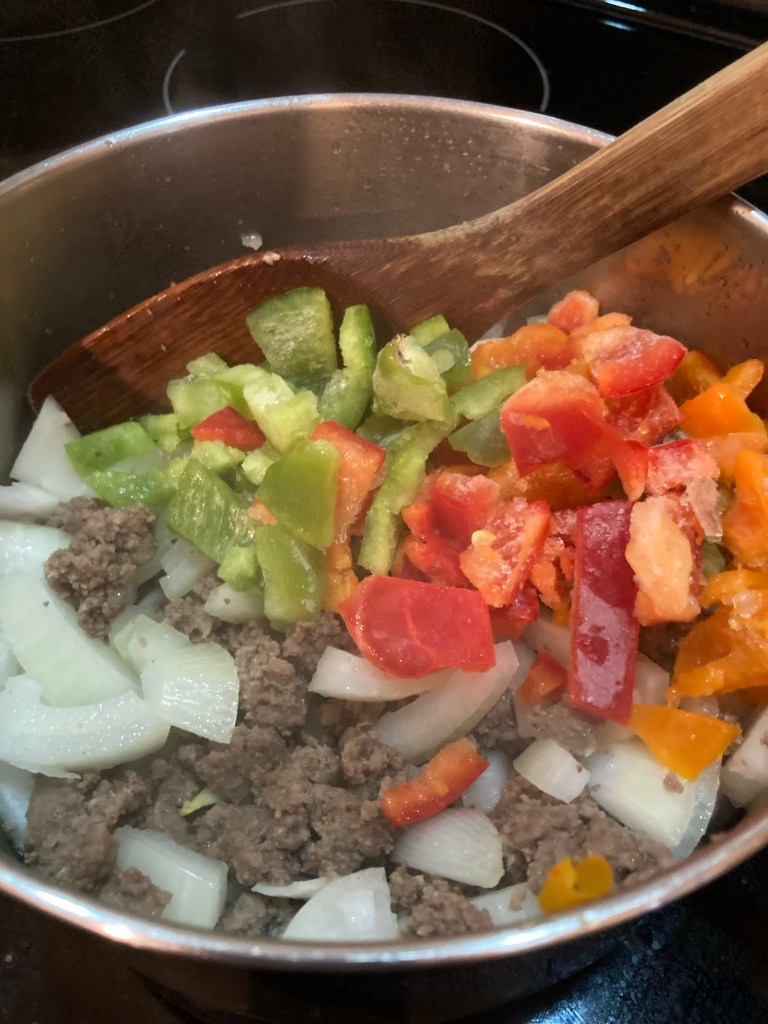
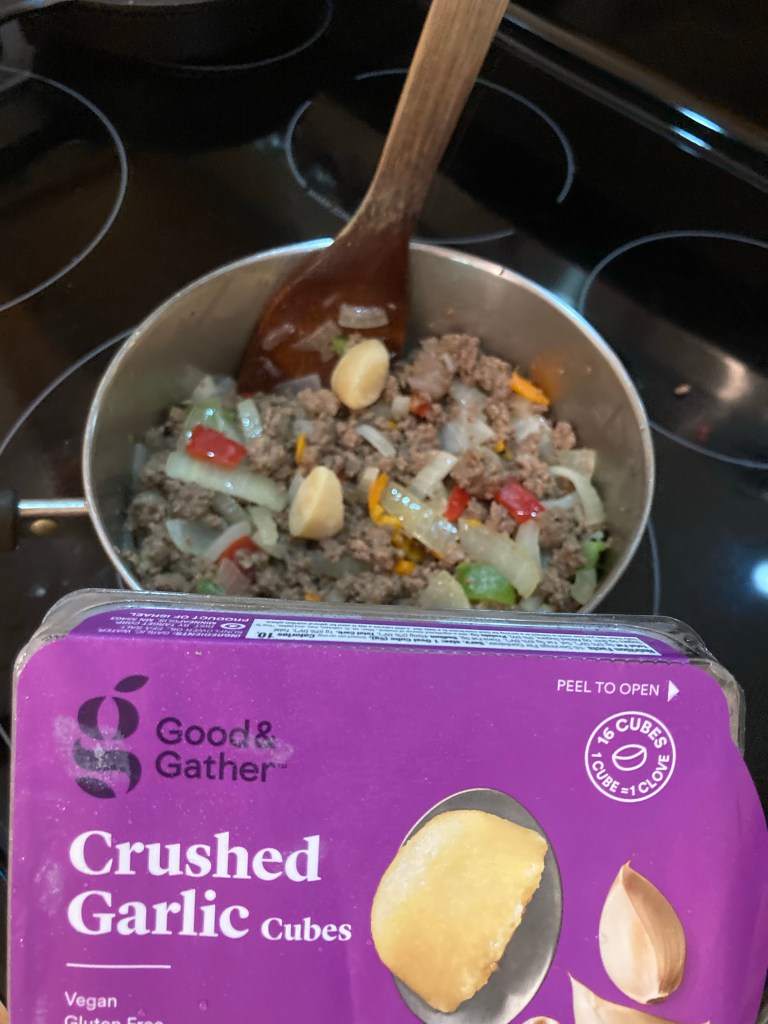


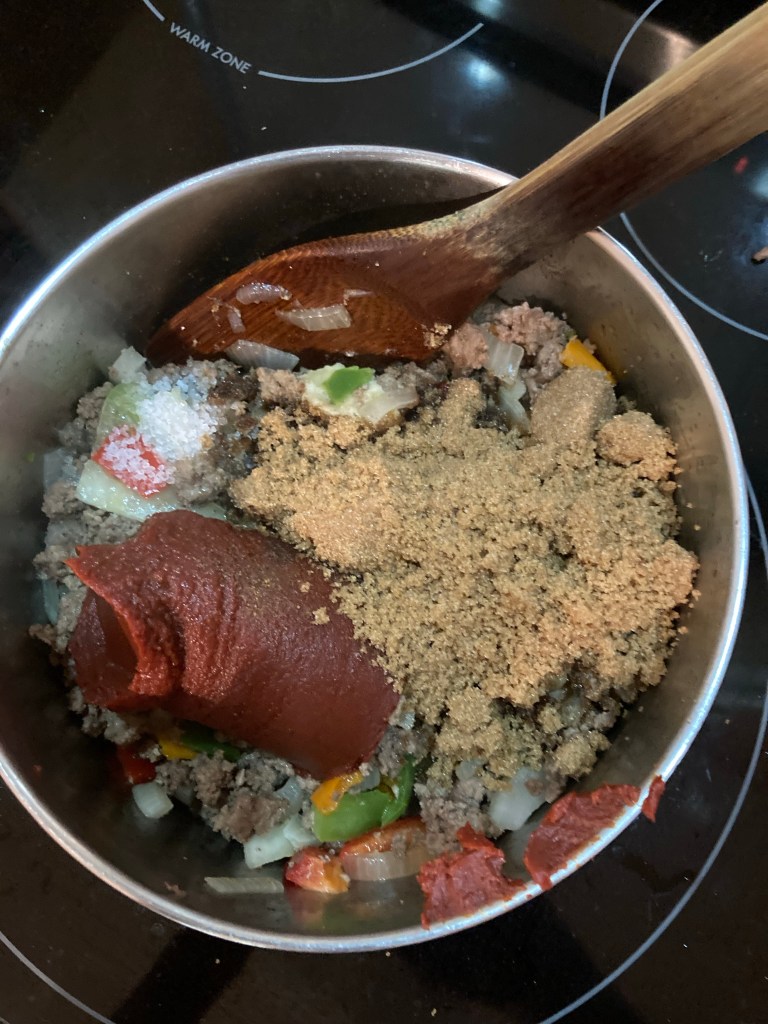


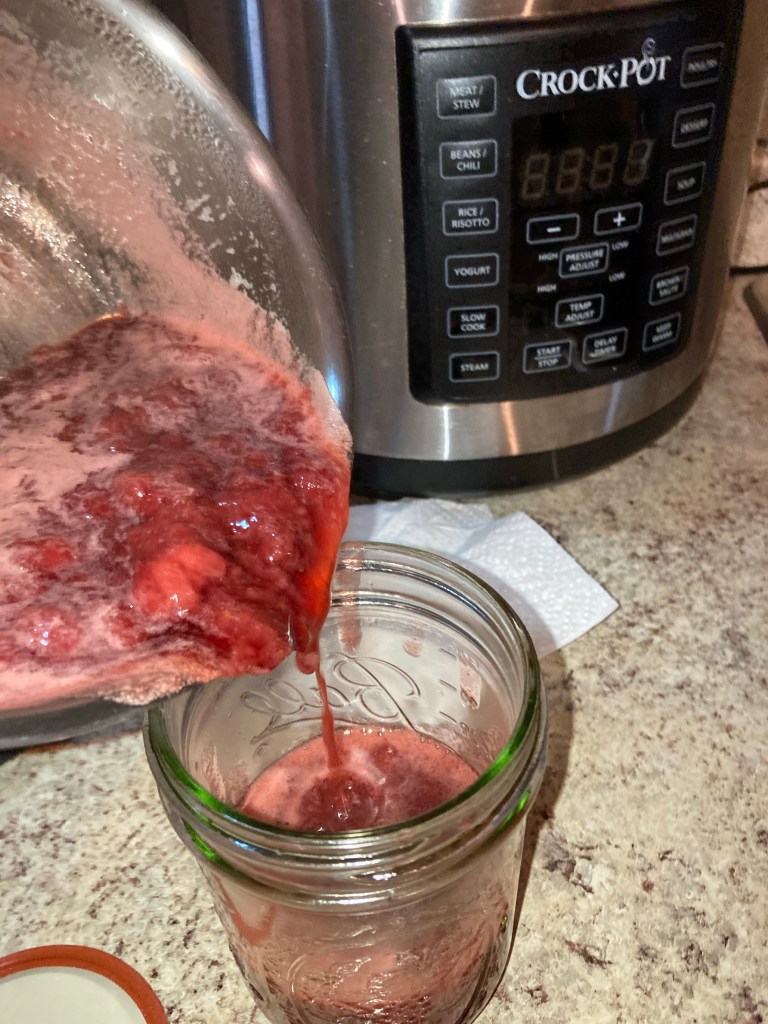


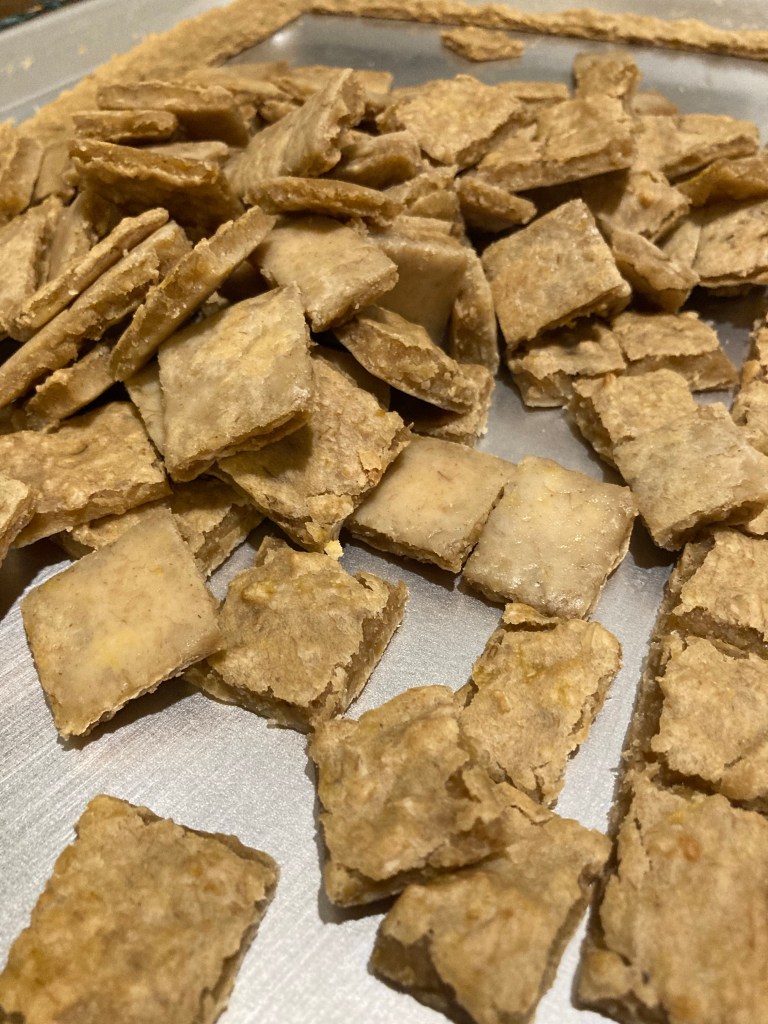


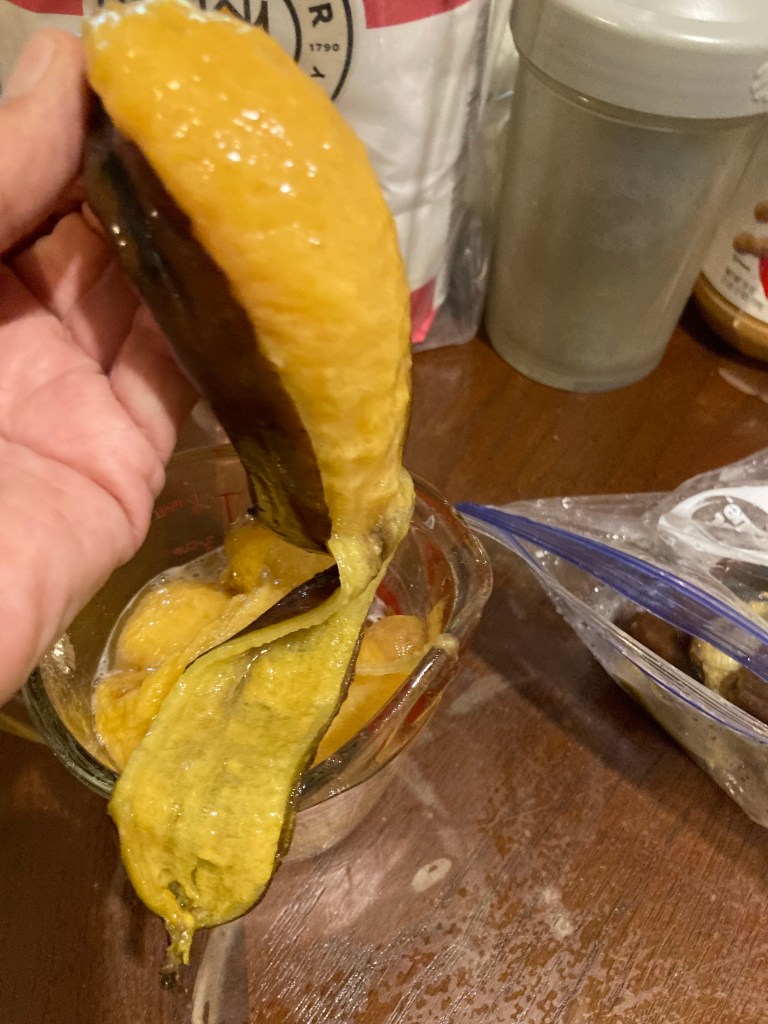

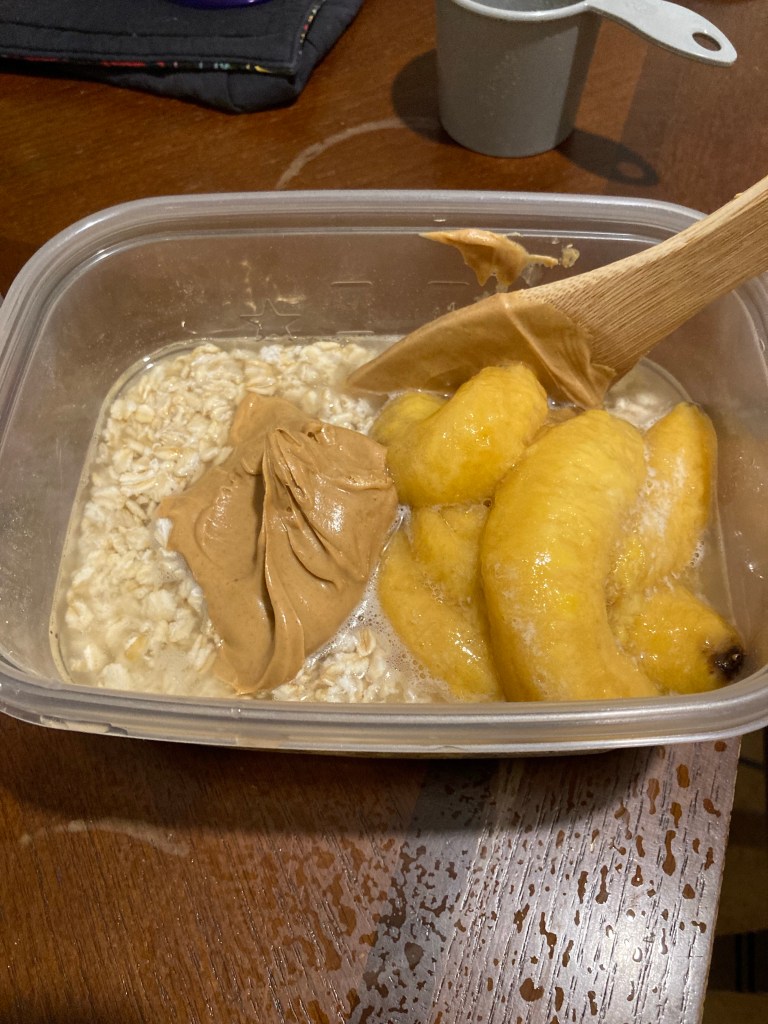
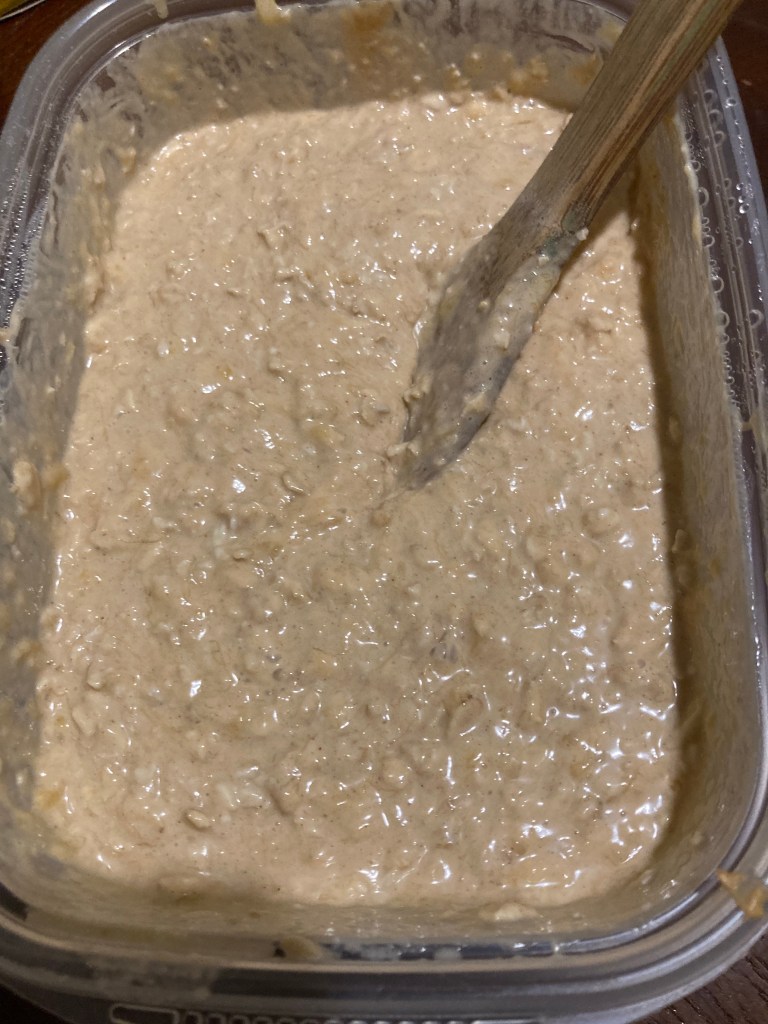
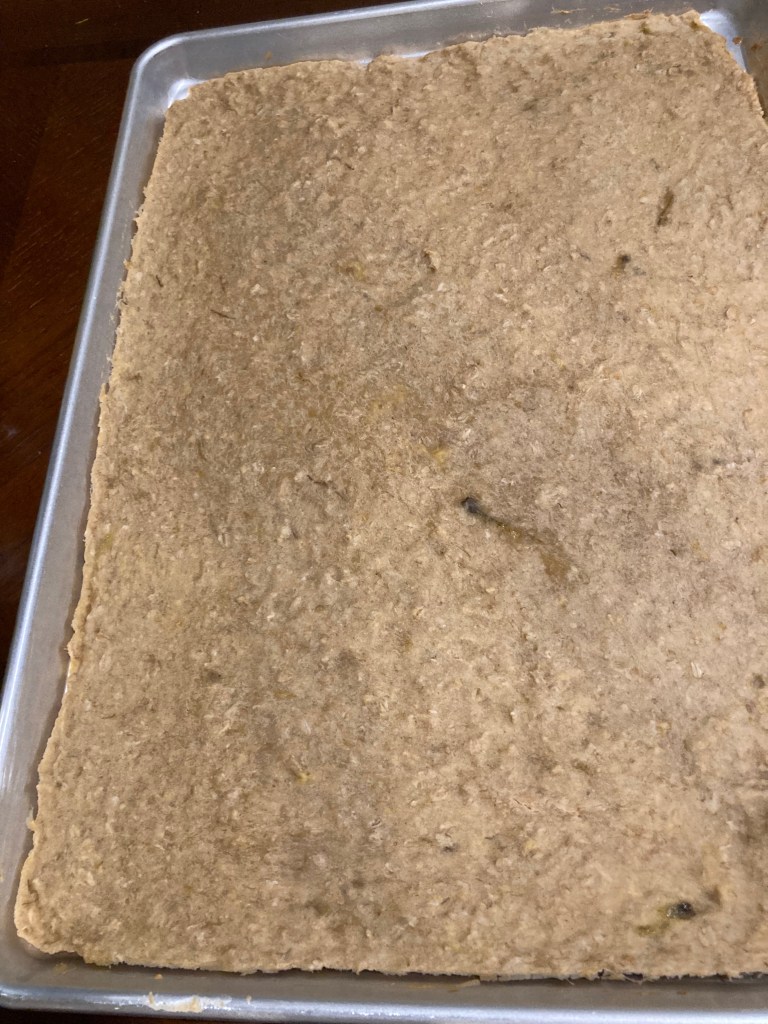


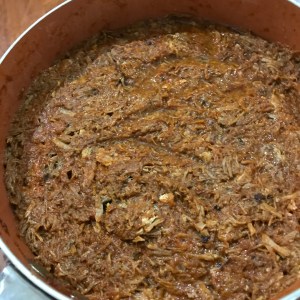


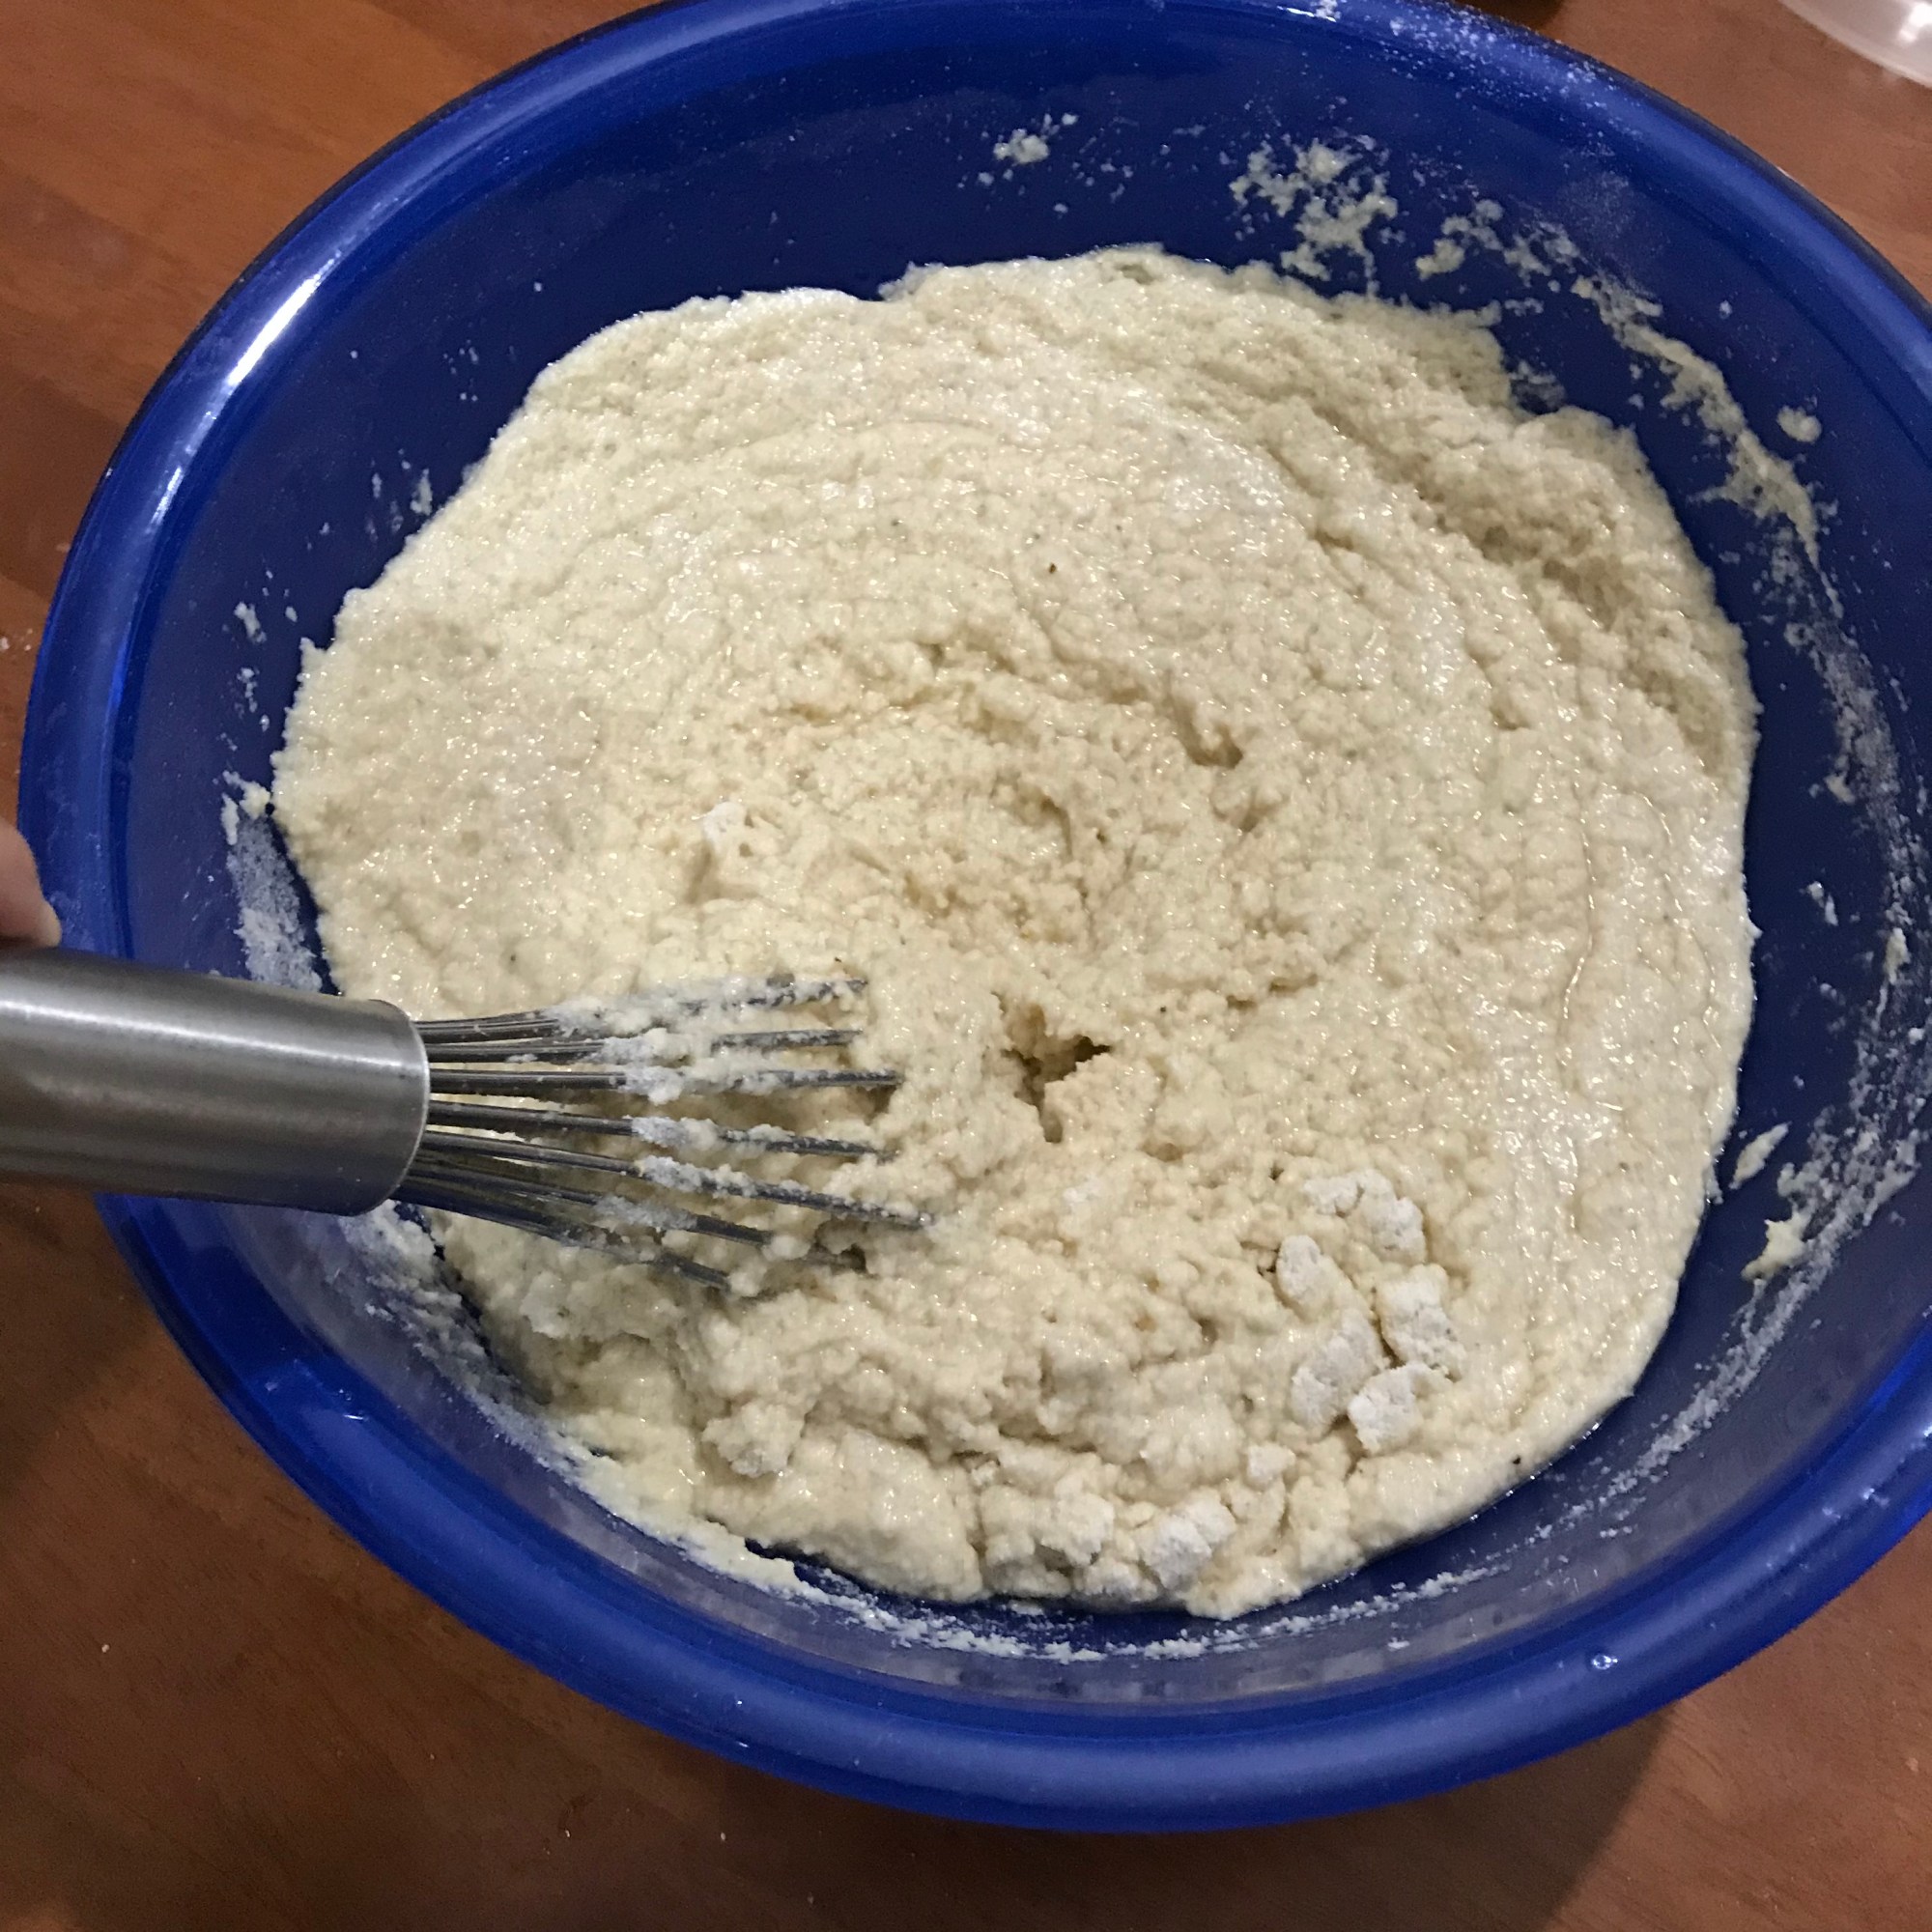
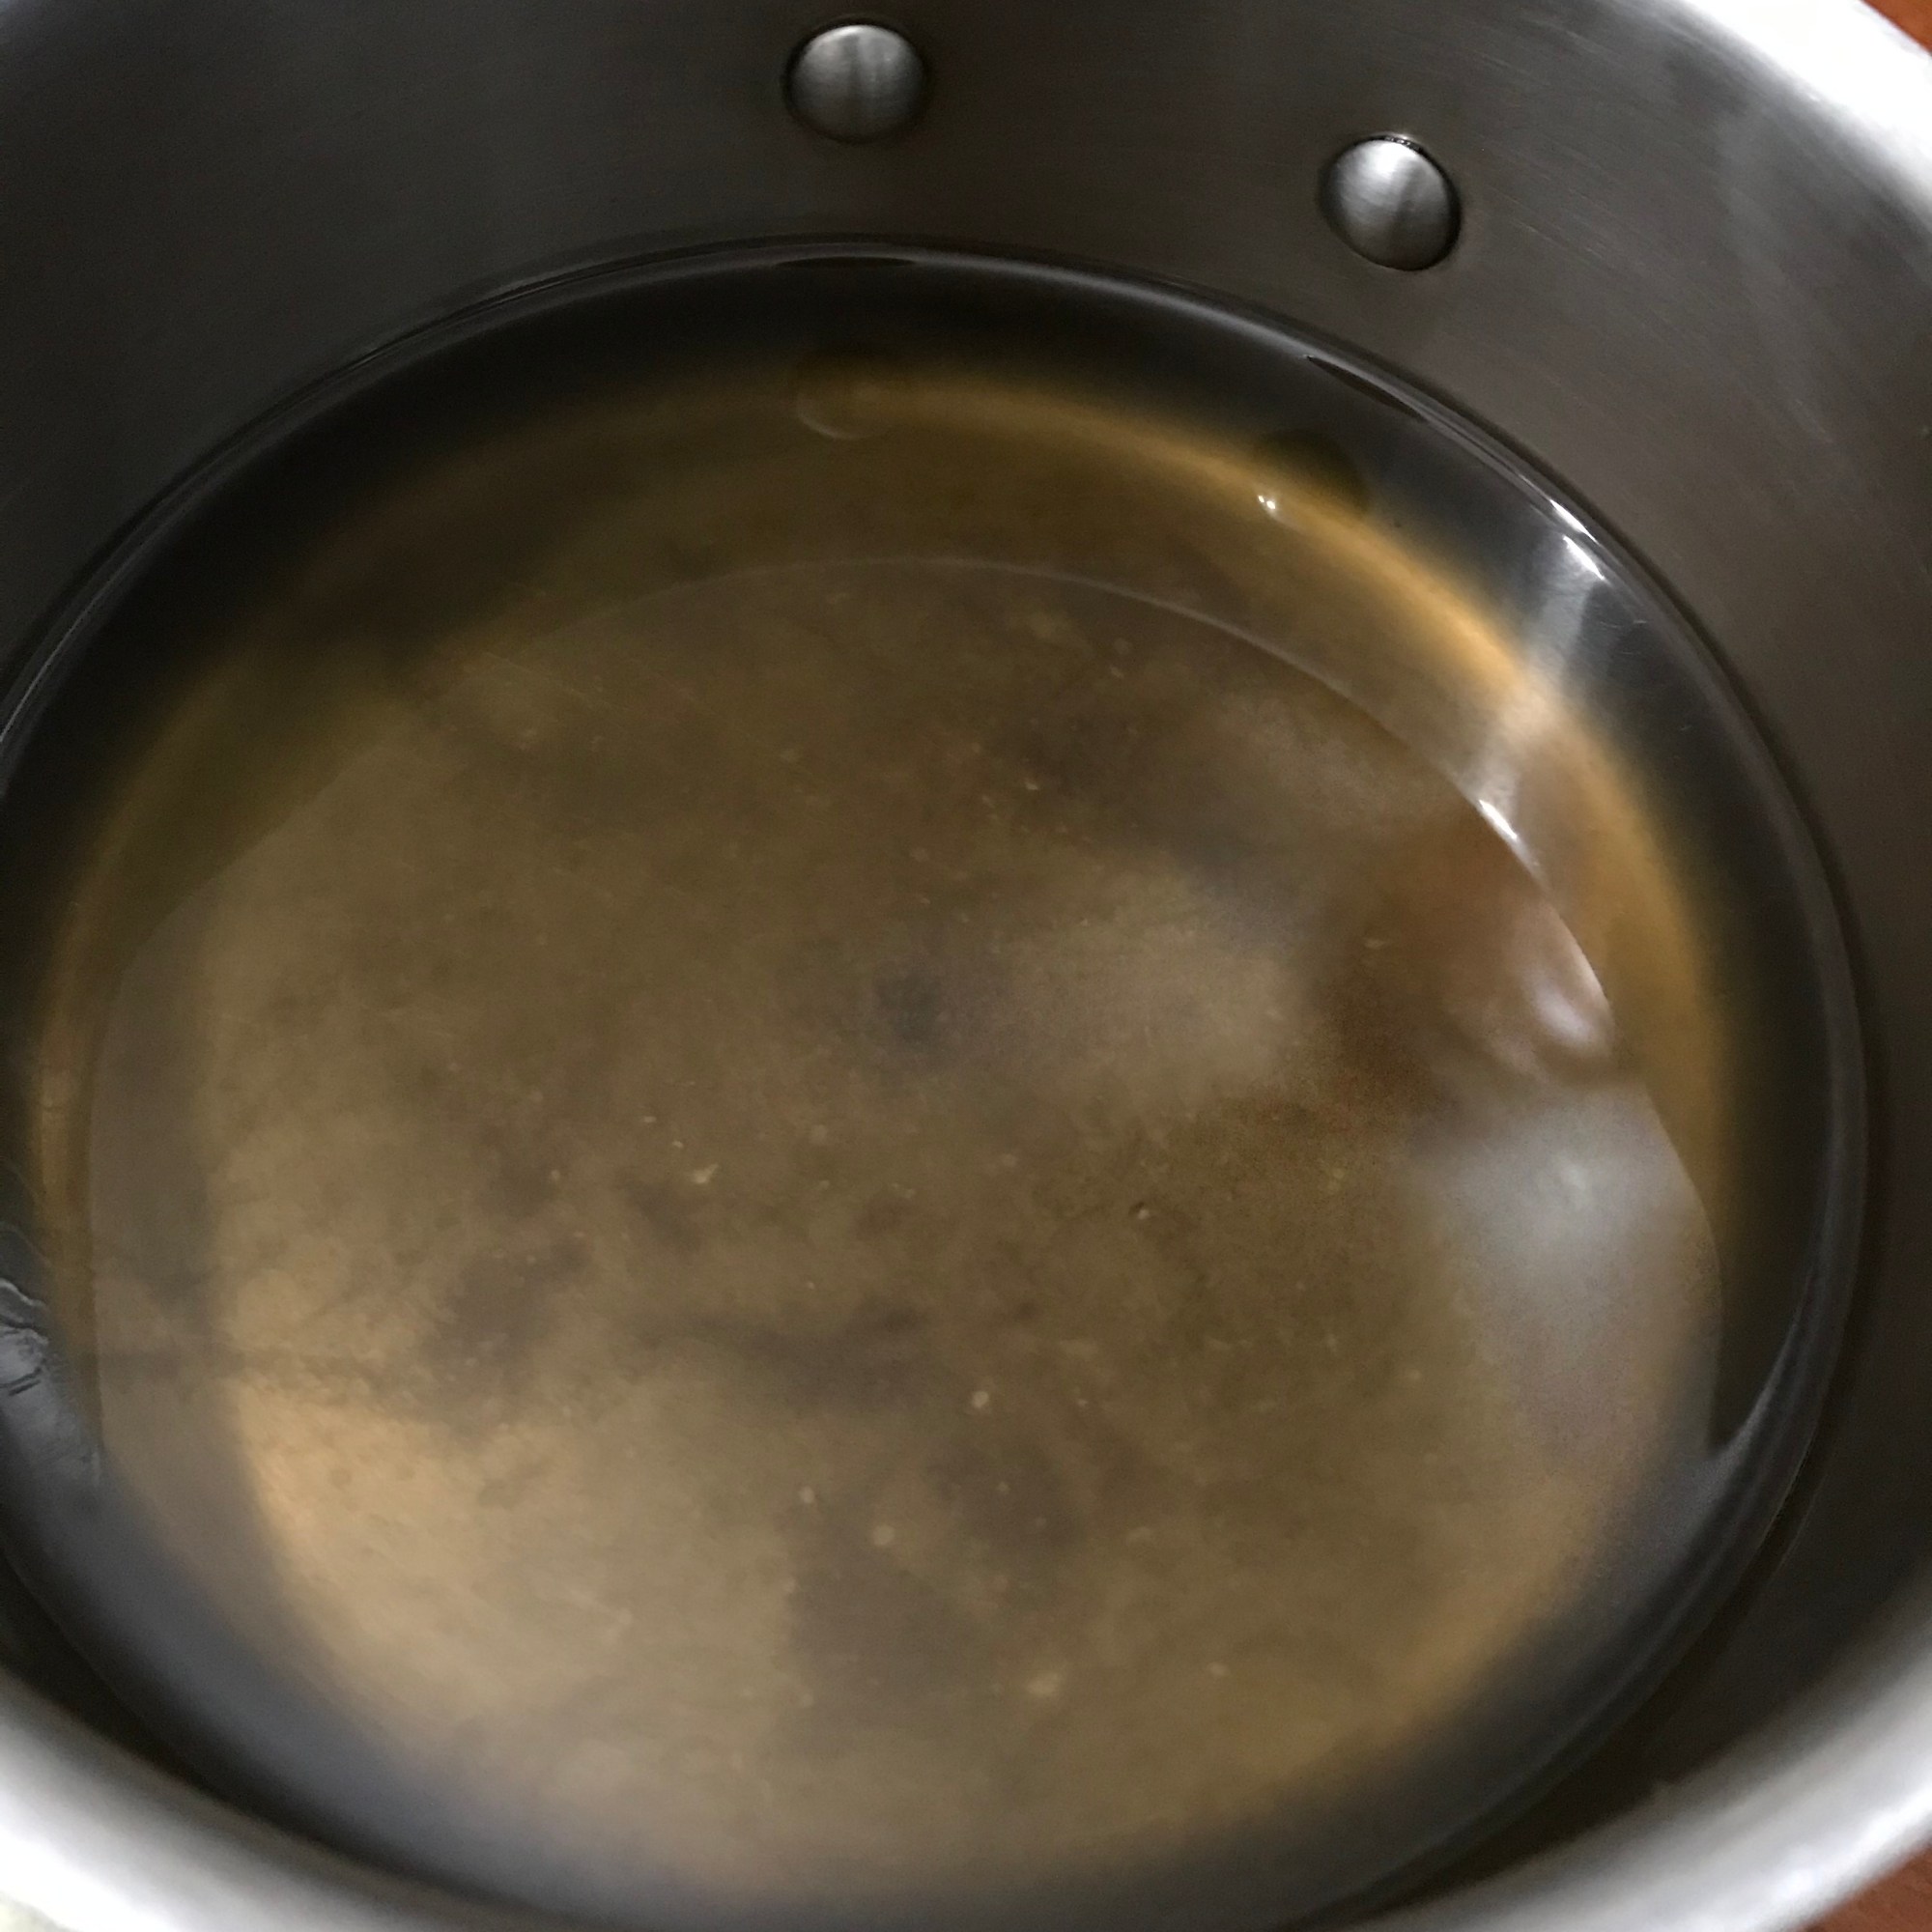

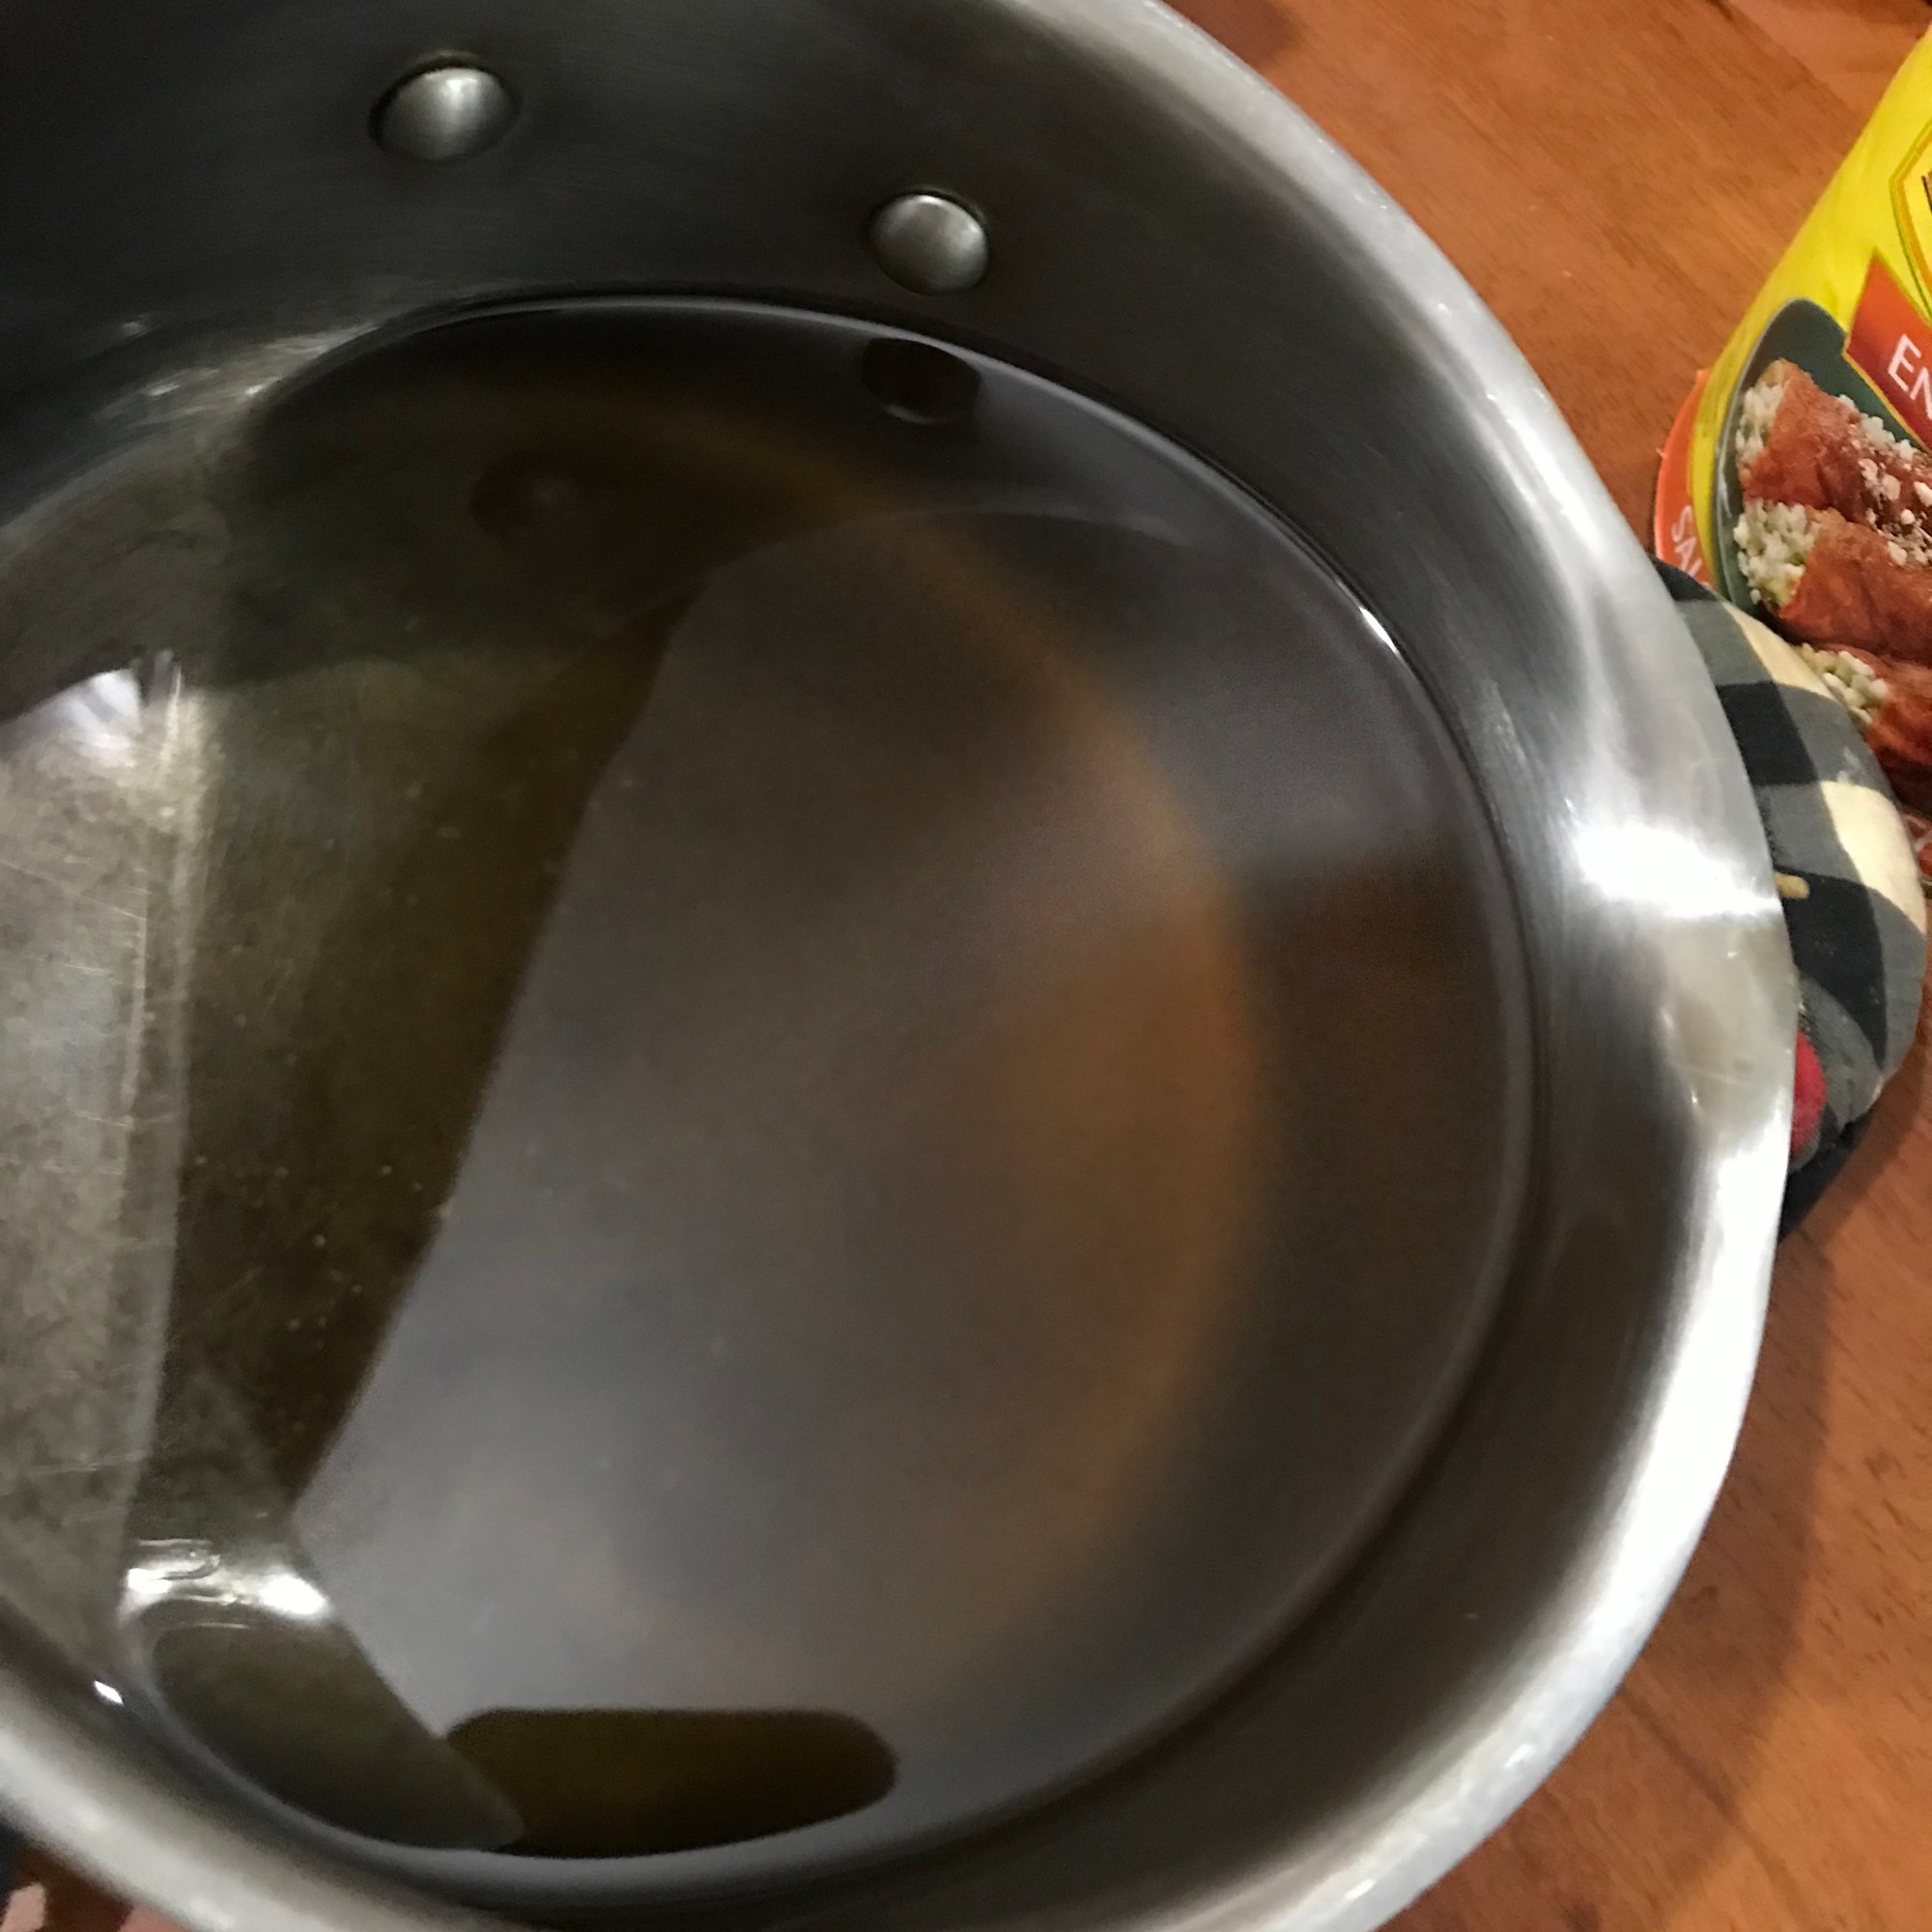
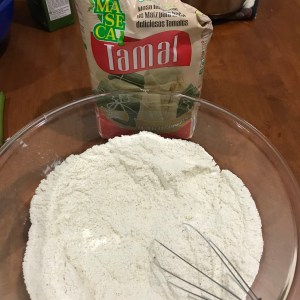


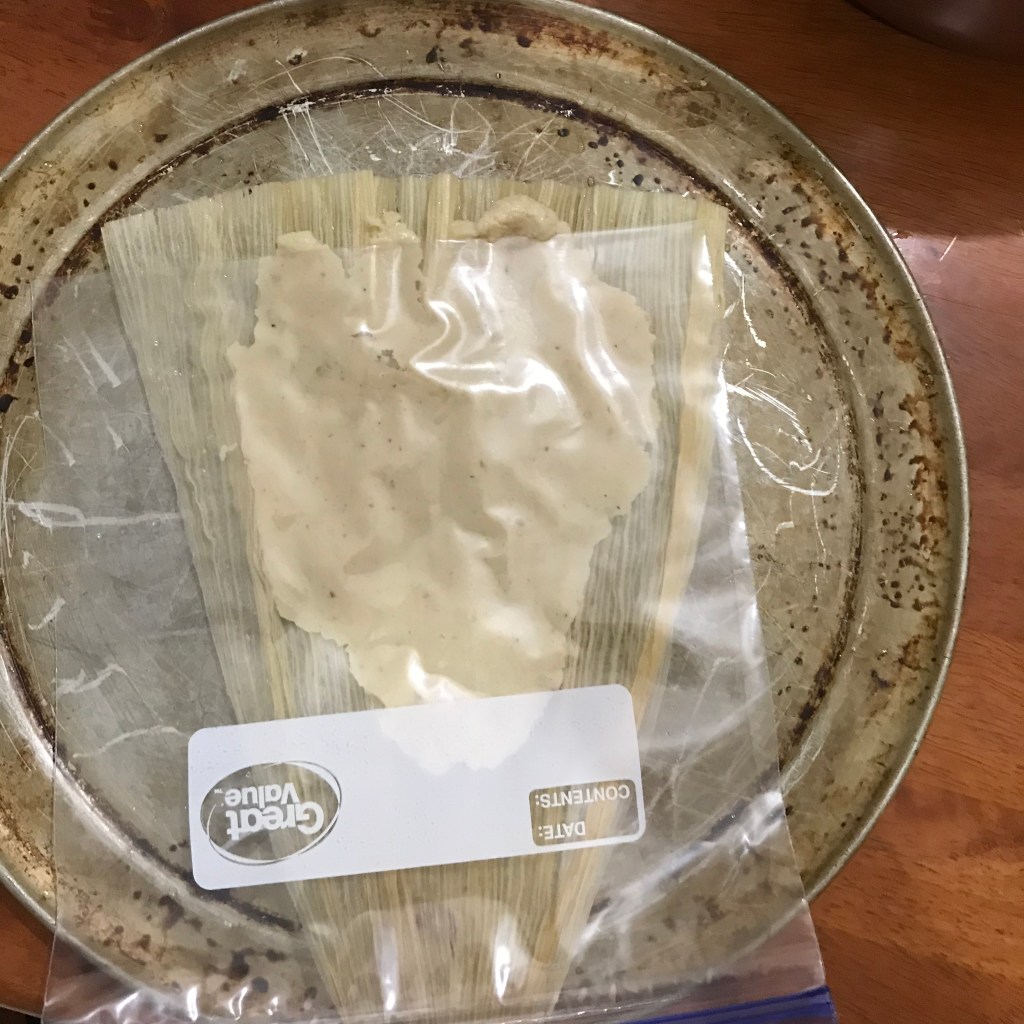
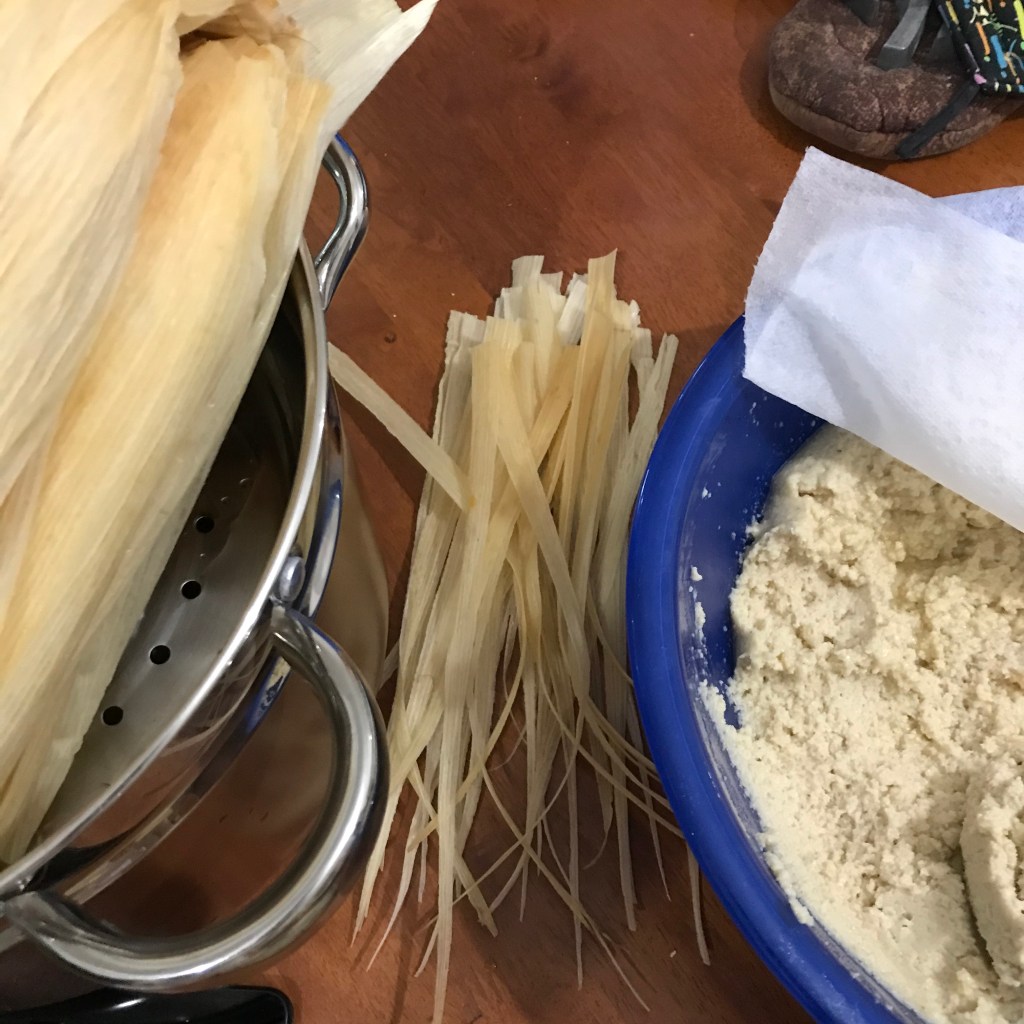
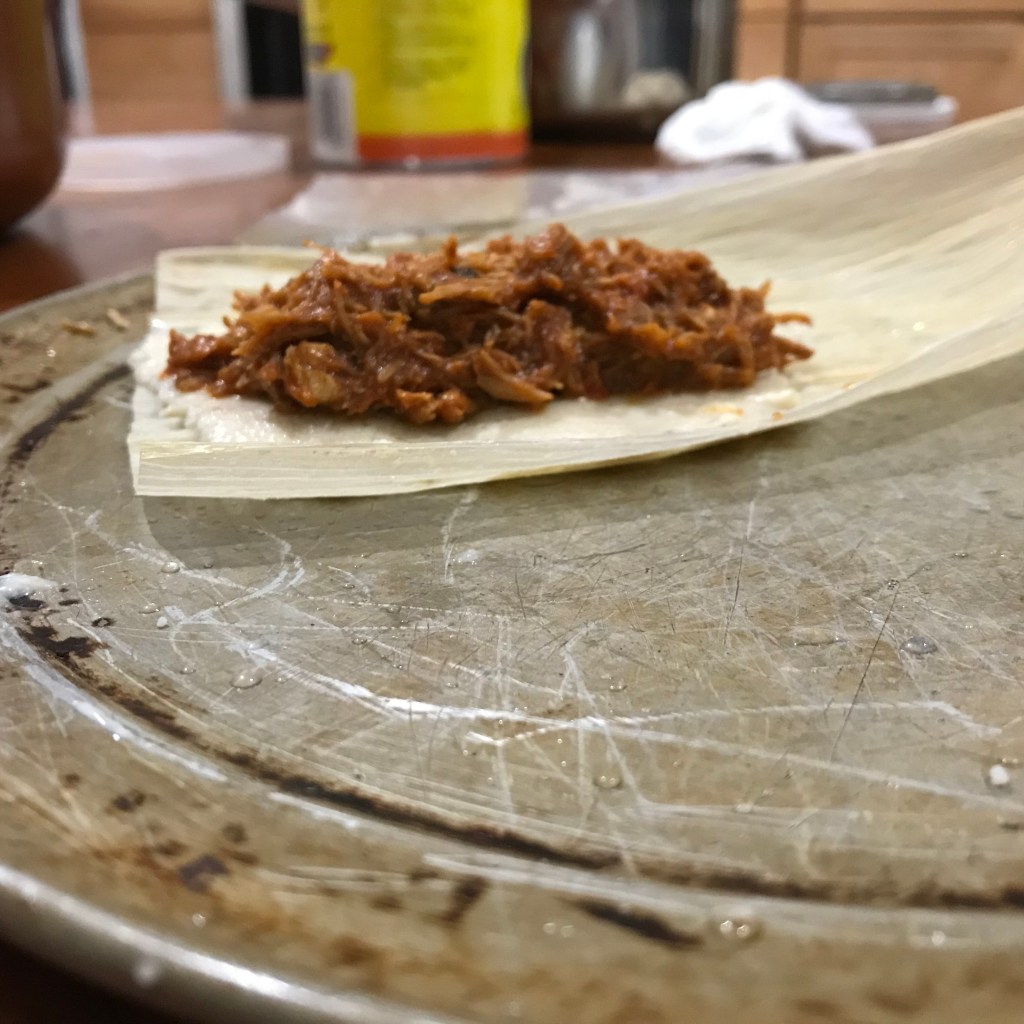

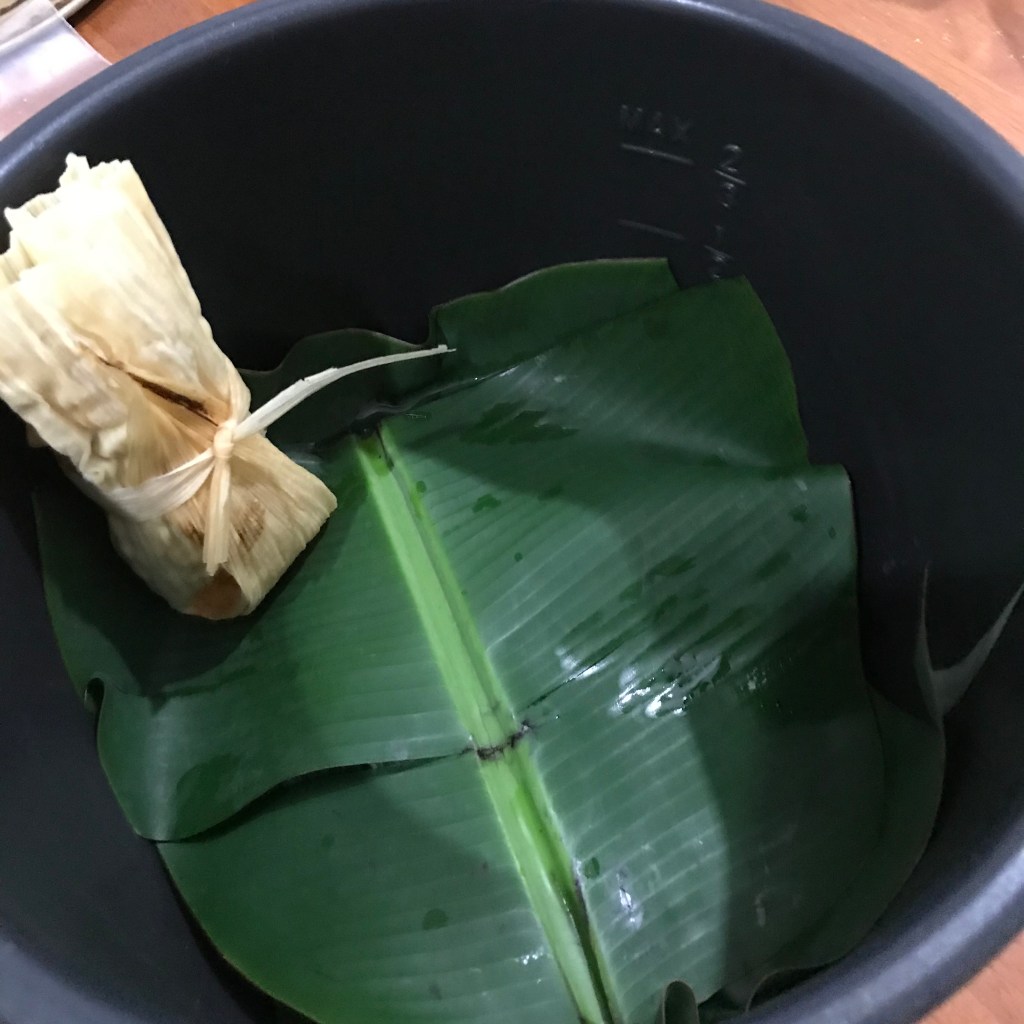


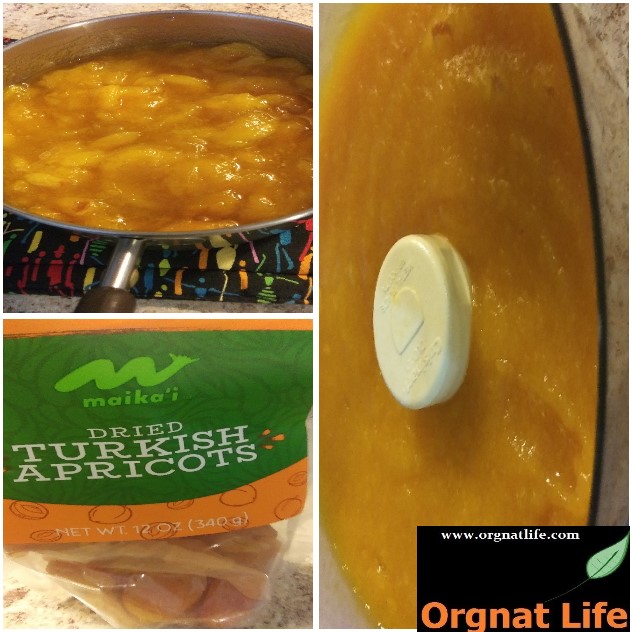


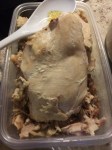


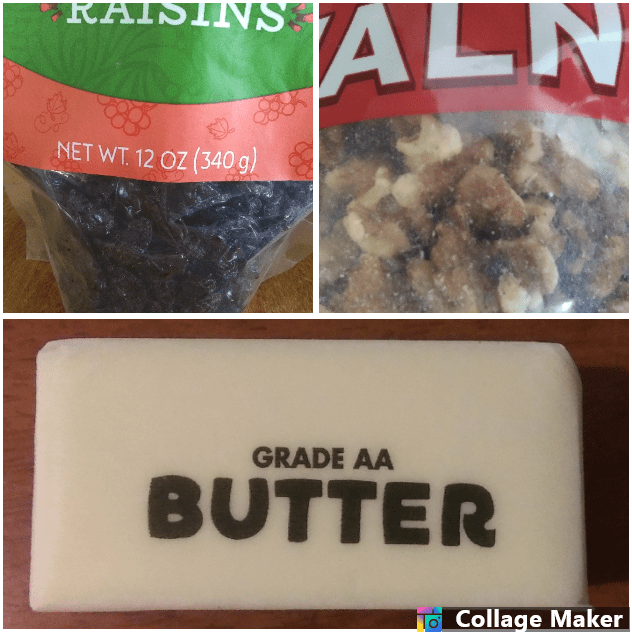


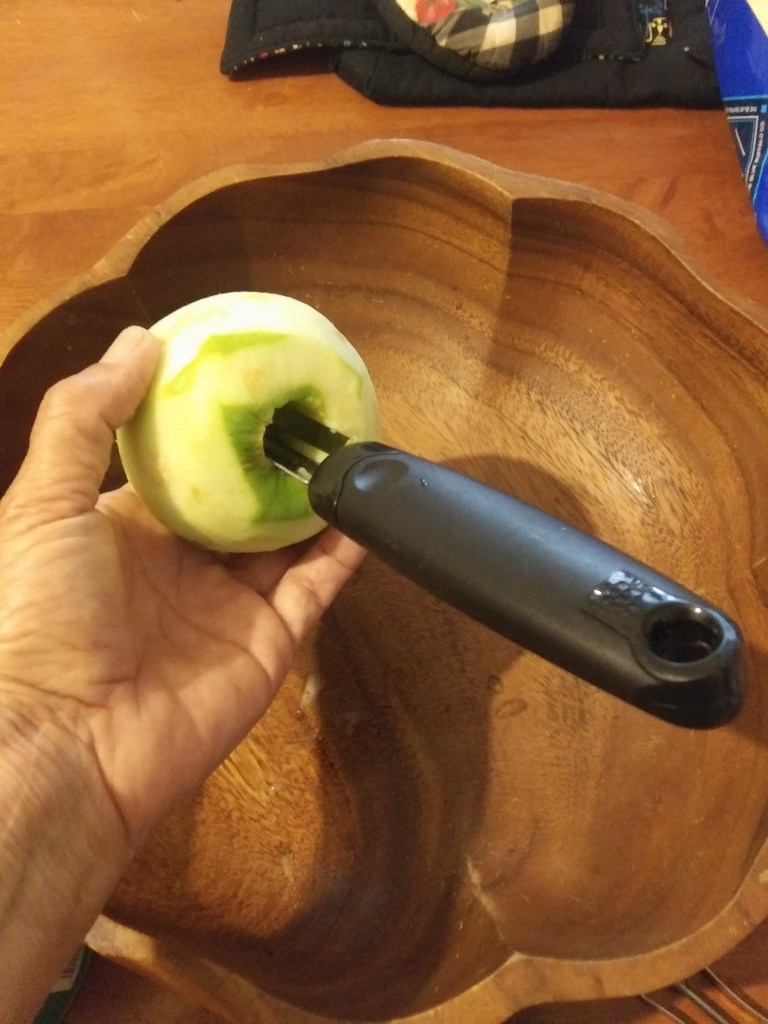


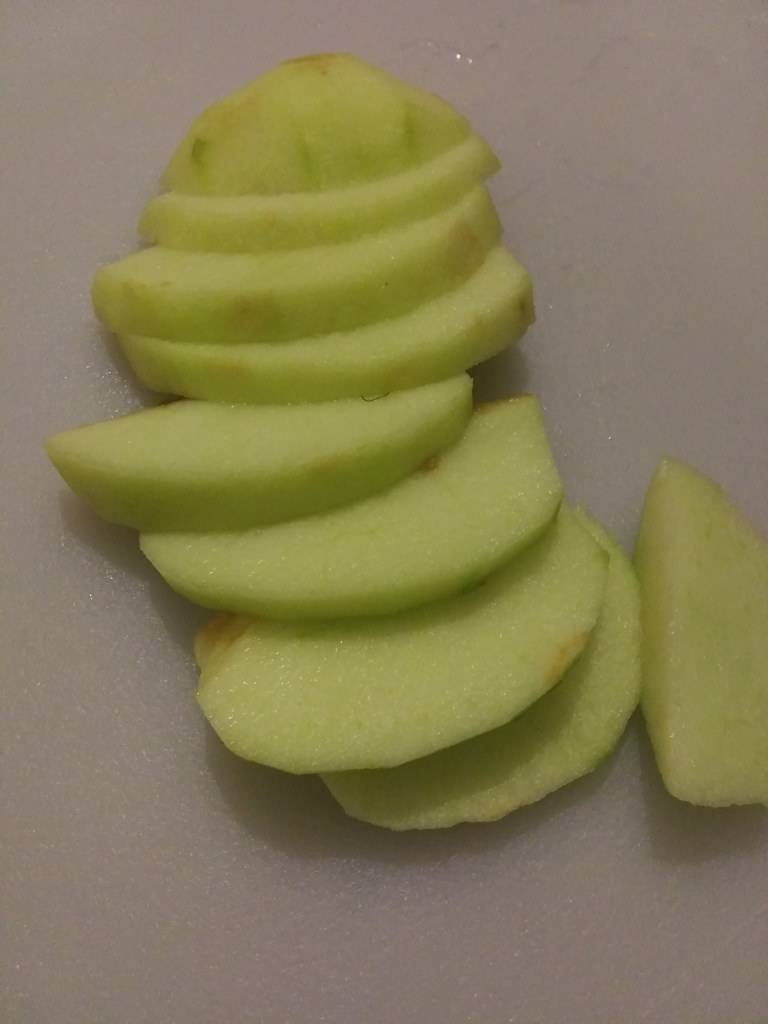
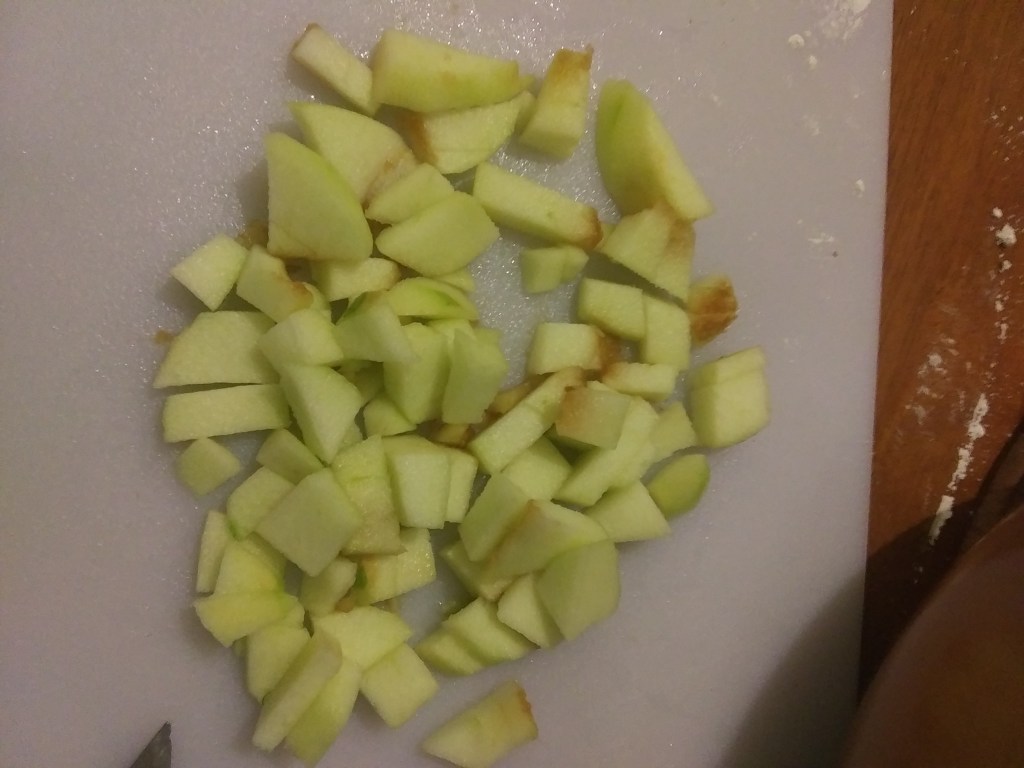
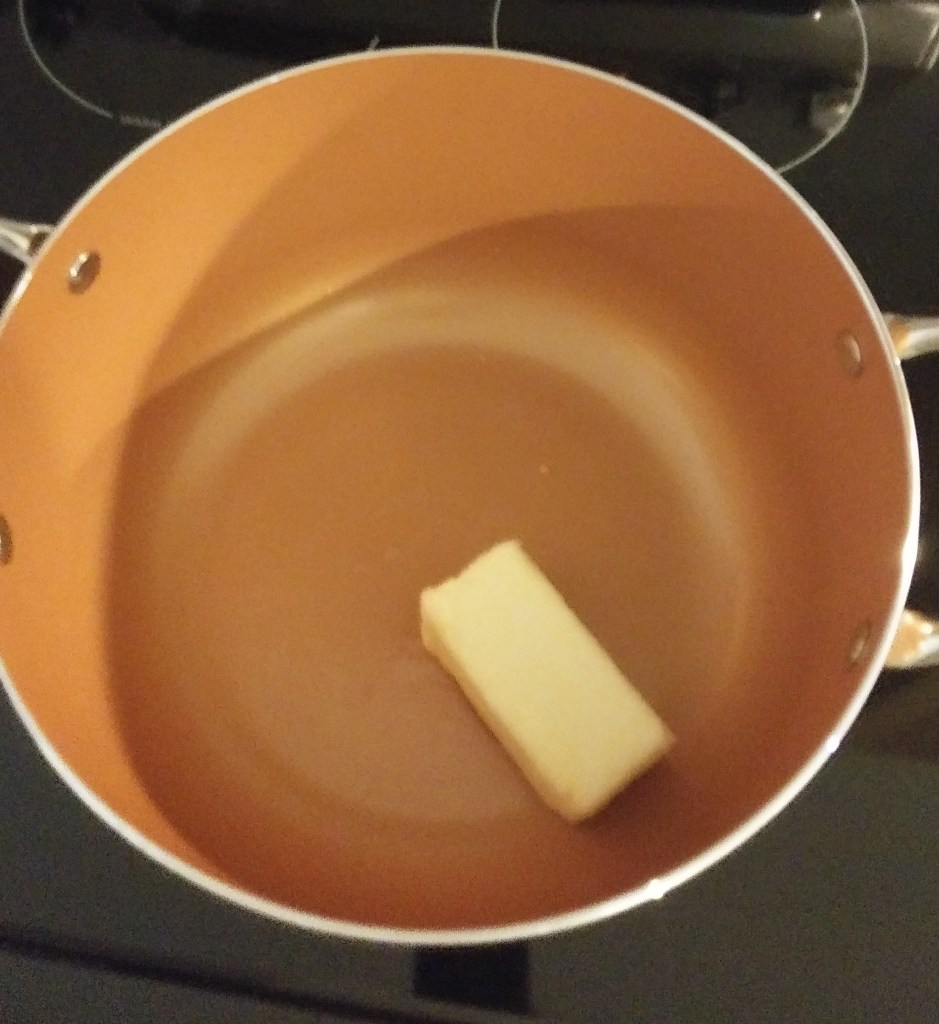


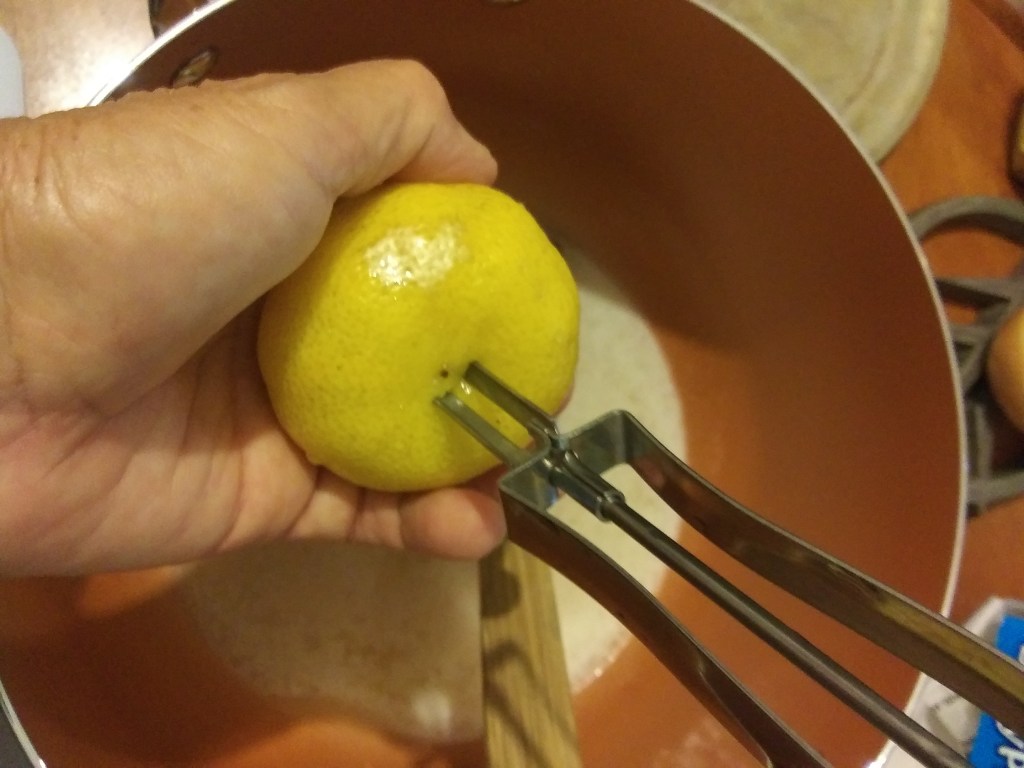


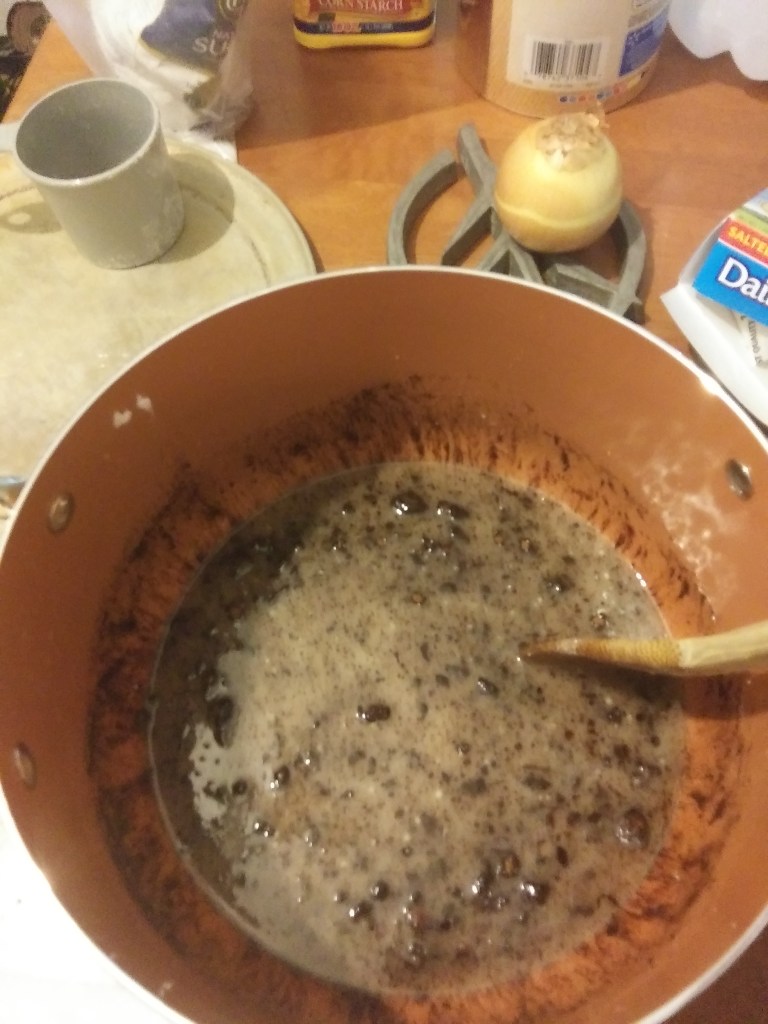
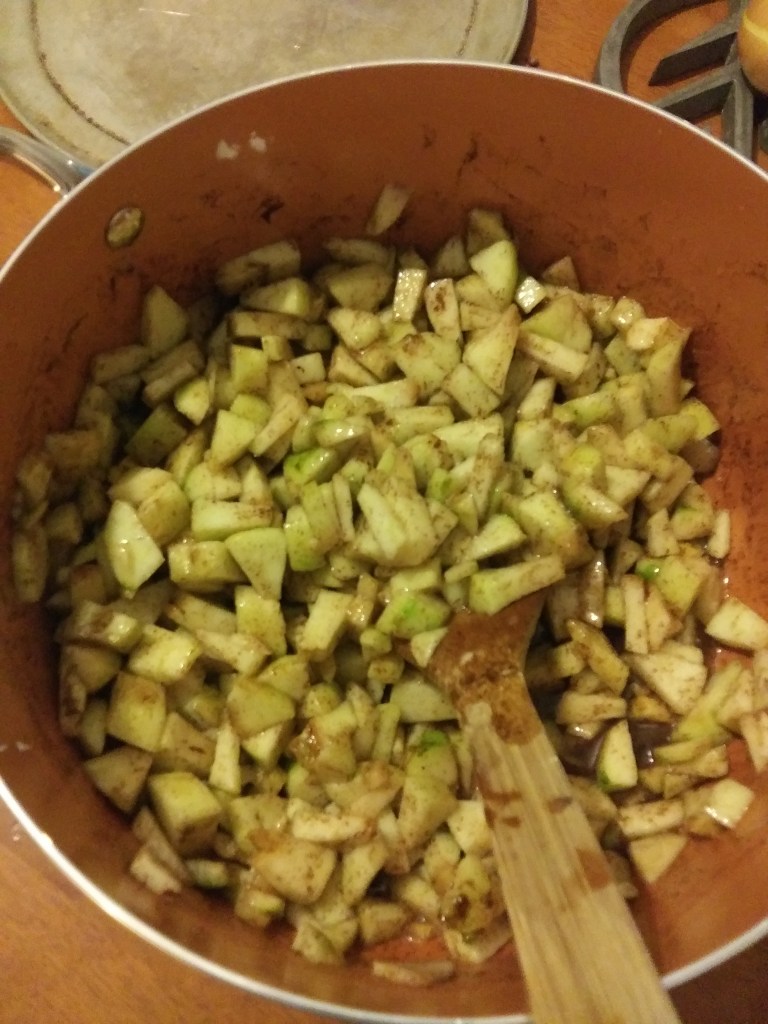
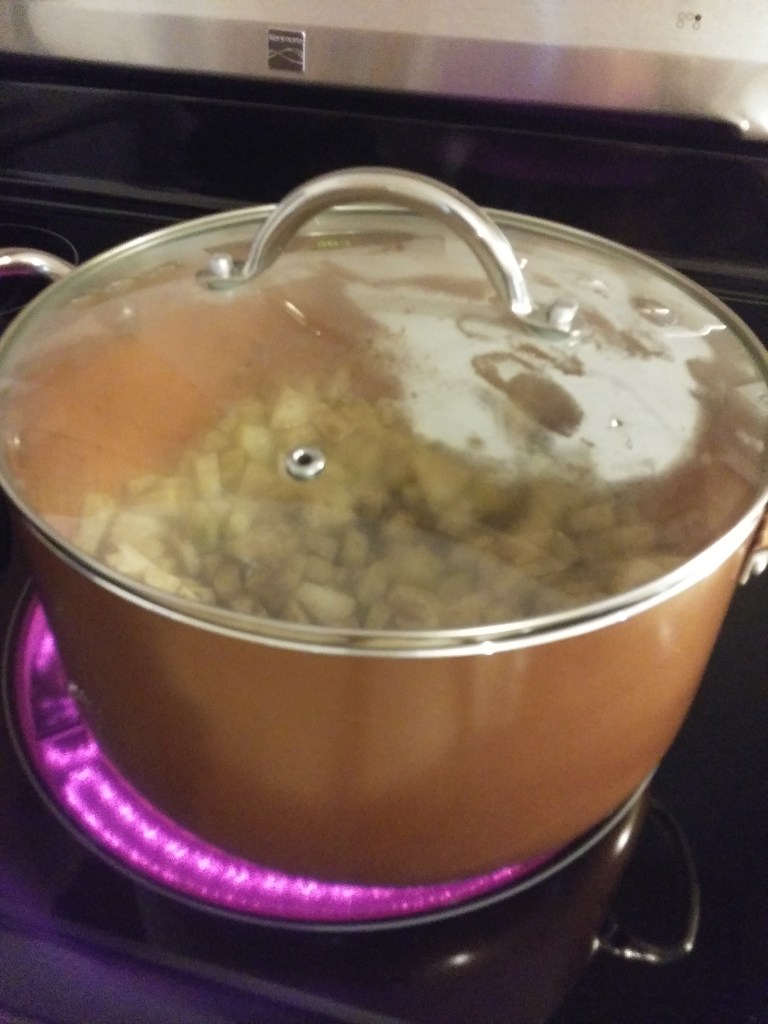


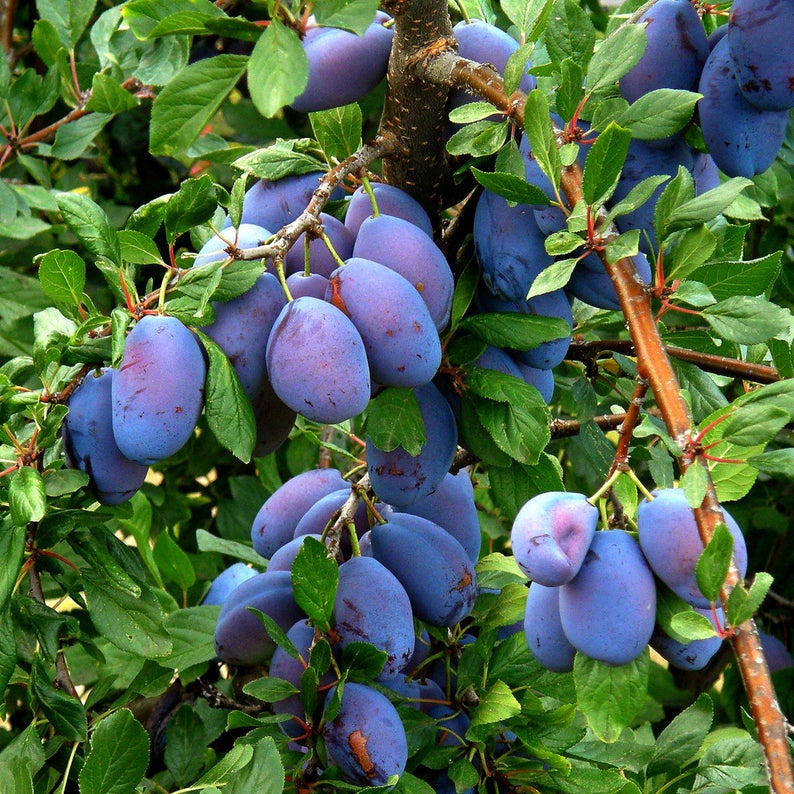


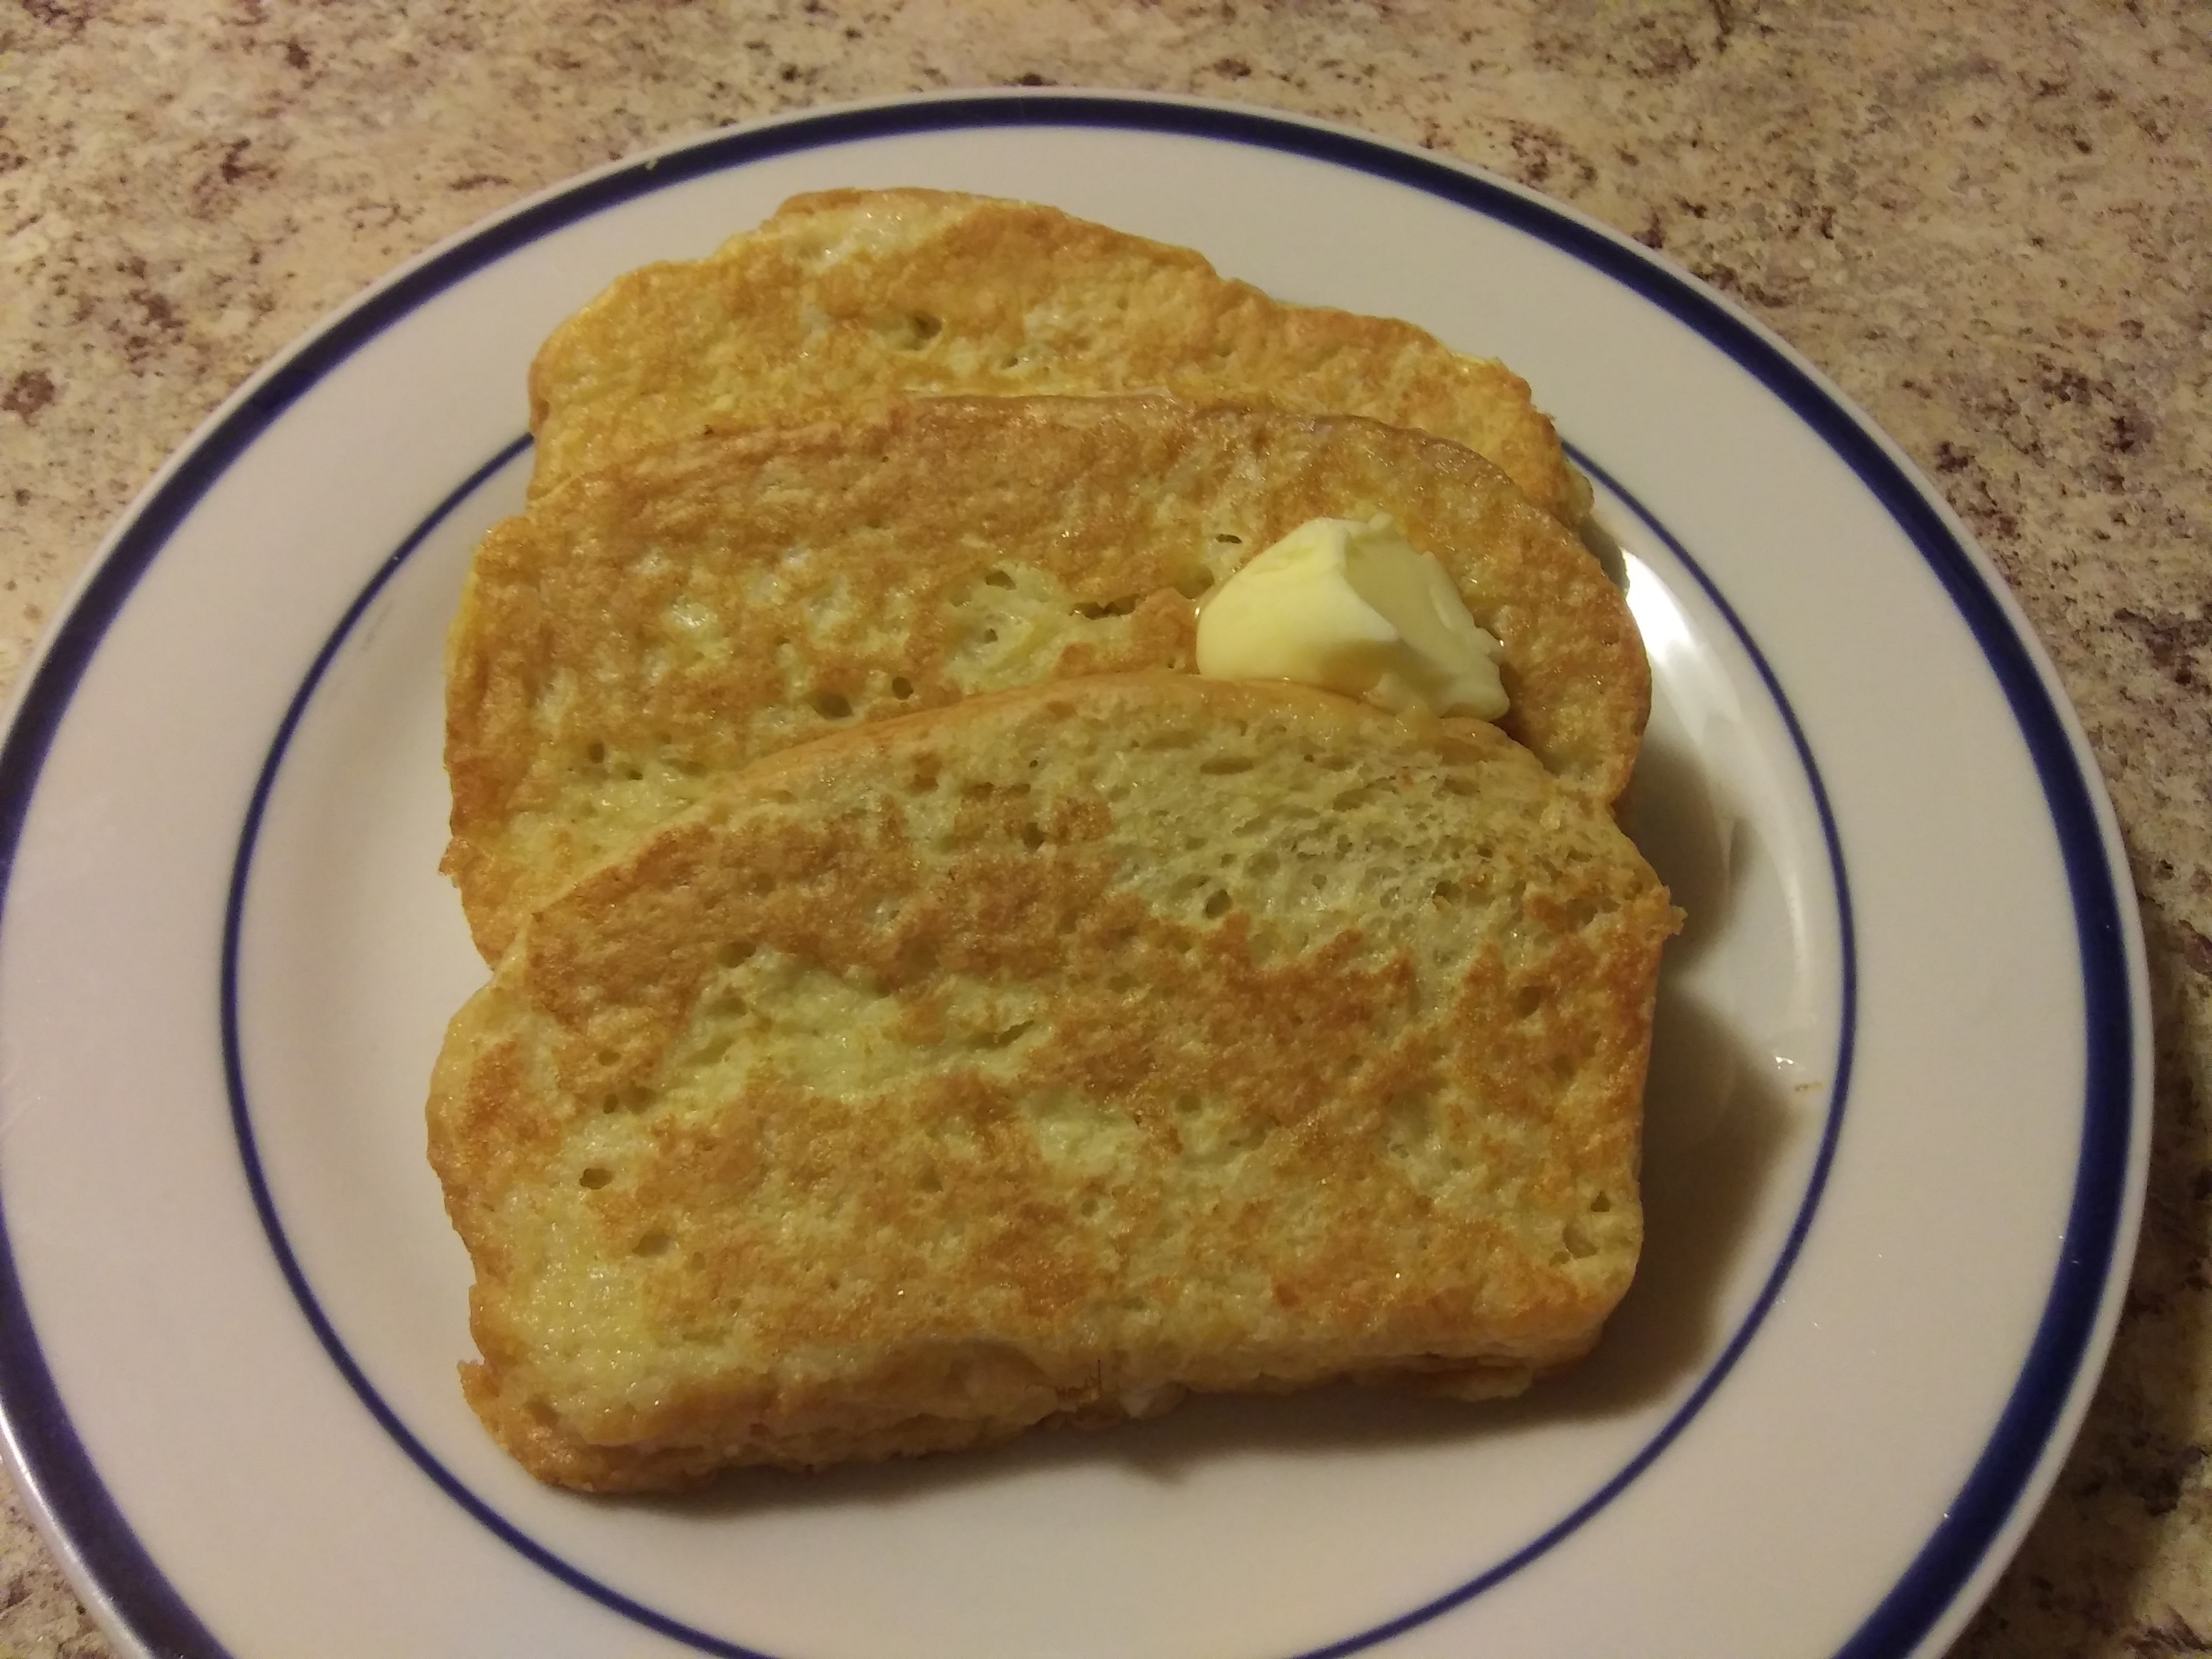


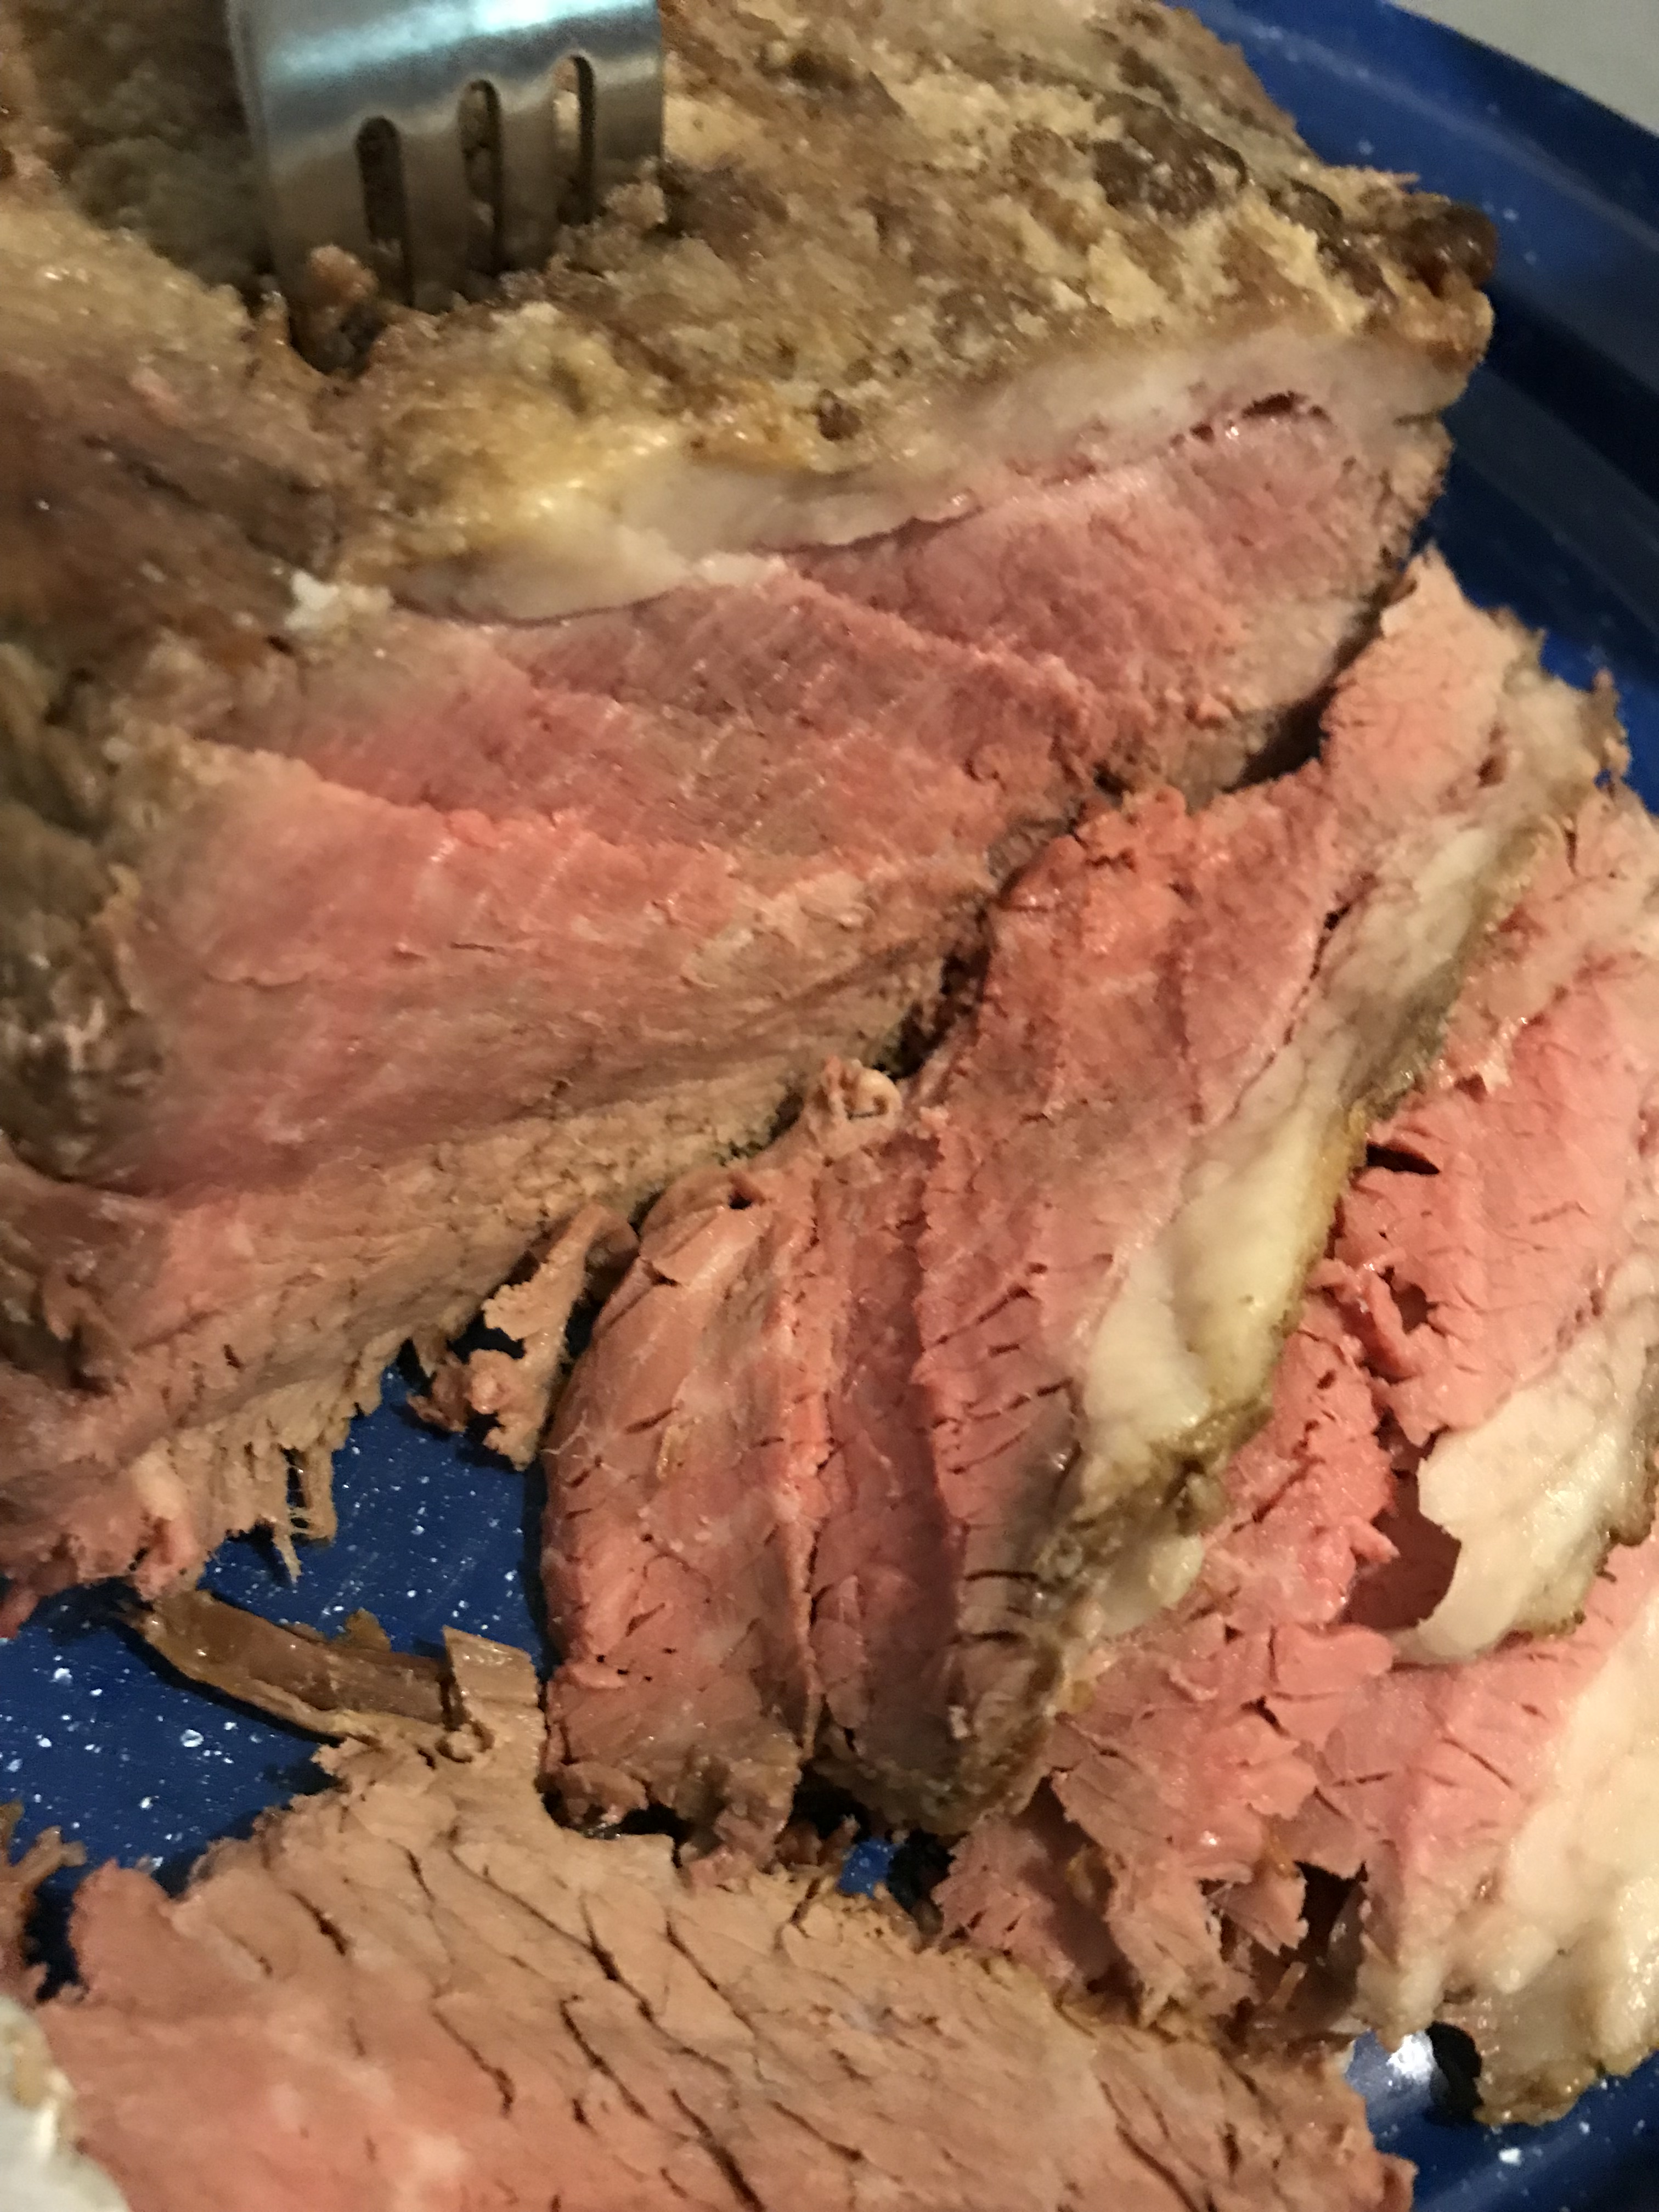 This juicy garlic smeared Tri-Tip Roast is the perfect meat for a gracious dinner, yummy brunch sandwich’s or a burrito.
This a great recipe for the BBQ Grill or pop it in the oven.
This juicy garlic smeared Tri-Tip Roast is the perfect meat for a gracious dinner, yummy brunch sandwich’s or a burrito.
This a great recipe for the BBQ Grill or pop it in the oven.


 Cool Down After Your Workout


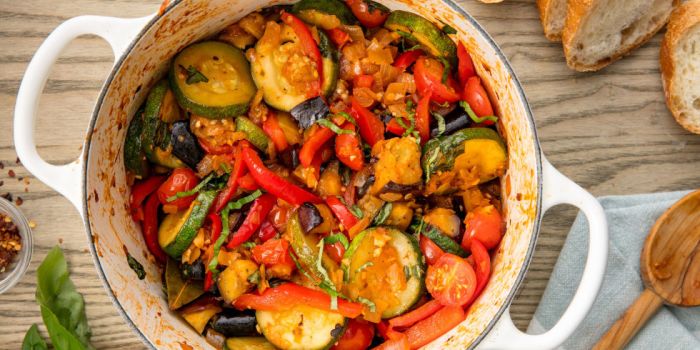


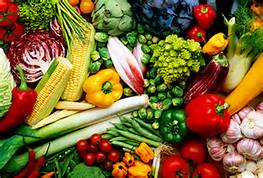 To strengthen your body’s ability to fight cancer, you need to eat what I ate:

 Replace processed, fake foods with these healthier clean eating foods.


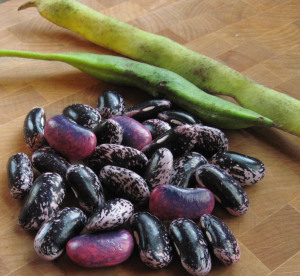


 The alluring burgundy mottled, chestnut-flavored Christmas Lima is part of Peru’s heirloom bean lineage. One can serve cooked limas as an appetizer, side dish or main course embellished with butter, garlic and fresh parsley.


 How do you think the Chinese survived for so many years? Still to this day they rely on Chinese Medicine, herbs, roots and other natural ingredients to make medicines.
 For an example is the Medical Marijuana medicine. Big Pharmaceutical companies have lobbied against any form of legalization. They are at their wits end because they cannot patent marijuana and they cannot come up with the absolute formula that works the same as the real thing.


 I’m really excited about this post because I’m sharing some really cool stuff about Vitamin C that many people do not know. Or maybe I’m wrong and everyone already knows this but me… We’ll see.


 #5 The Black Calypso bean, also called yin yang for its distinctive and stunning white and black markings, is an heirloom variety which originated from the Caribbean.


 #8 Cranberry Bean Vermont Cranberry, Known As “Borlotti” Beans.


 Place lid on pan, turn heat down to medium-high, continue boiling with lid on and steam vent closed on lid for 5 minutes.
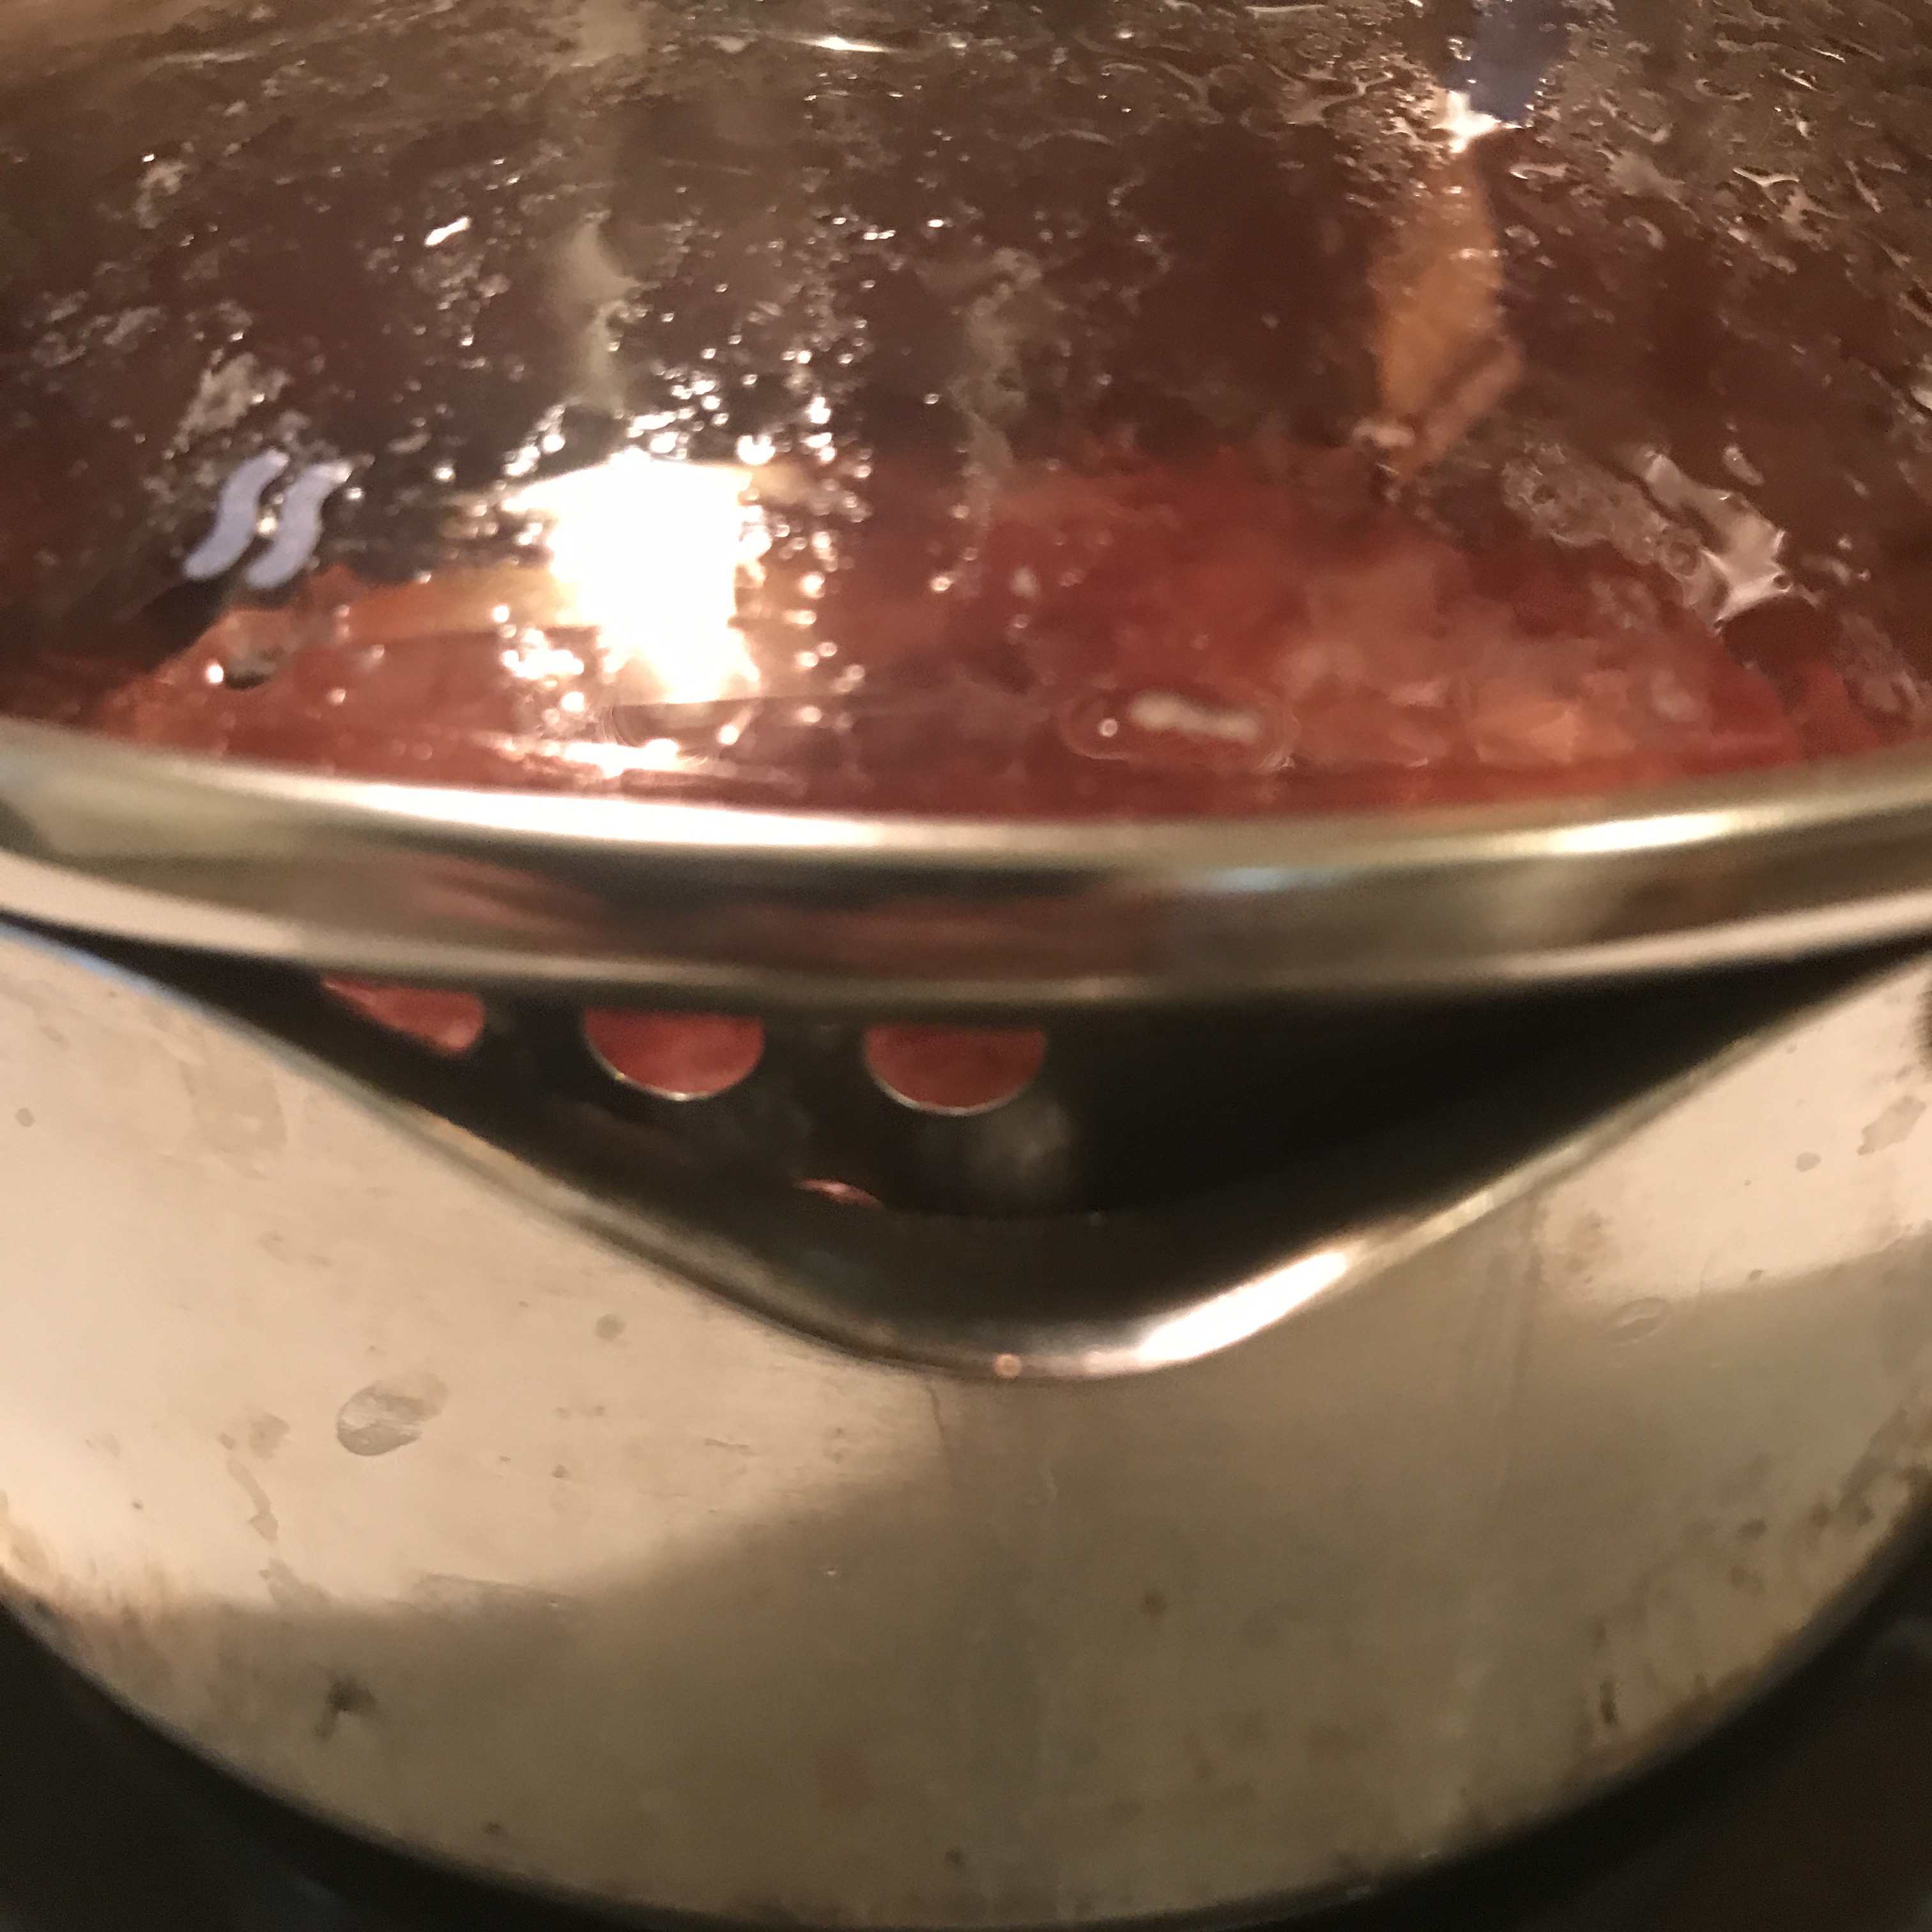 Turn lid to vent steam from pan
 Remove lid
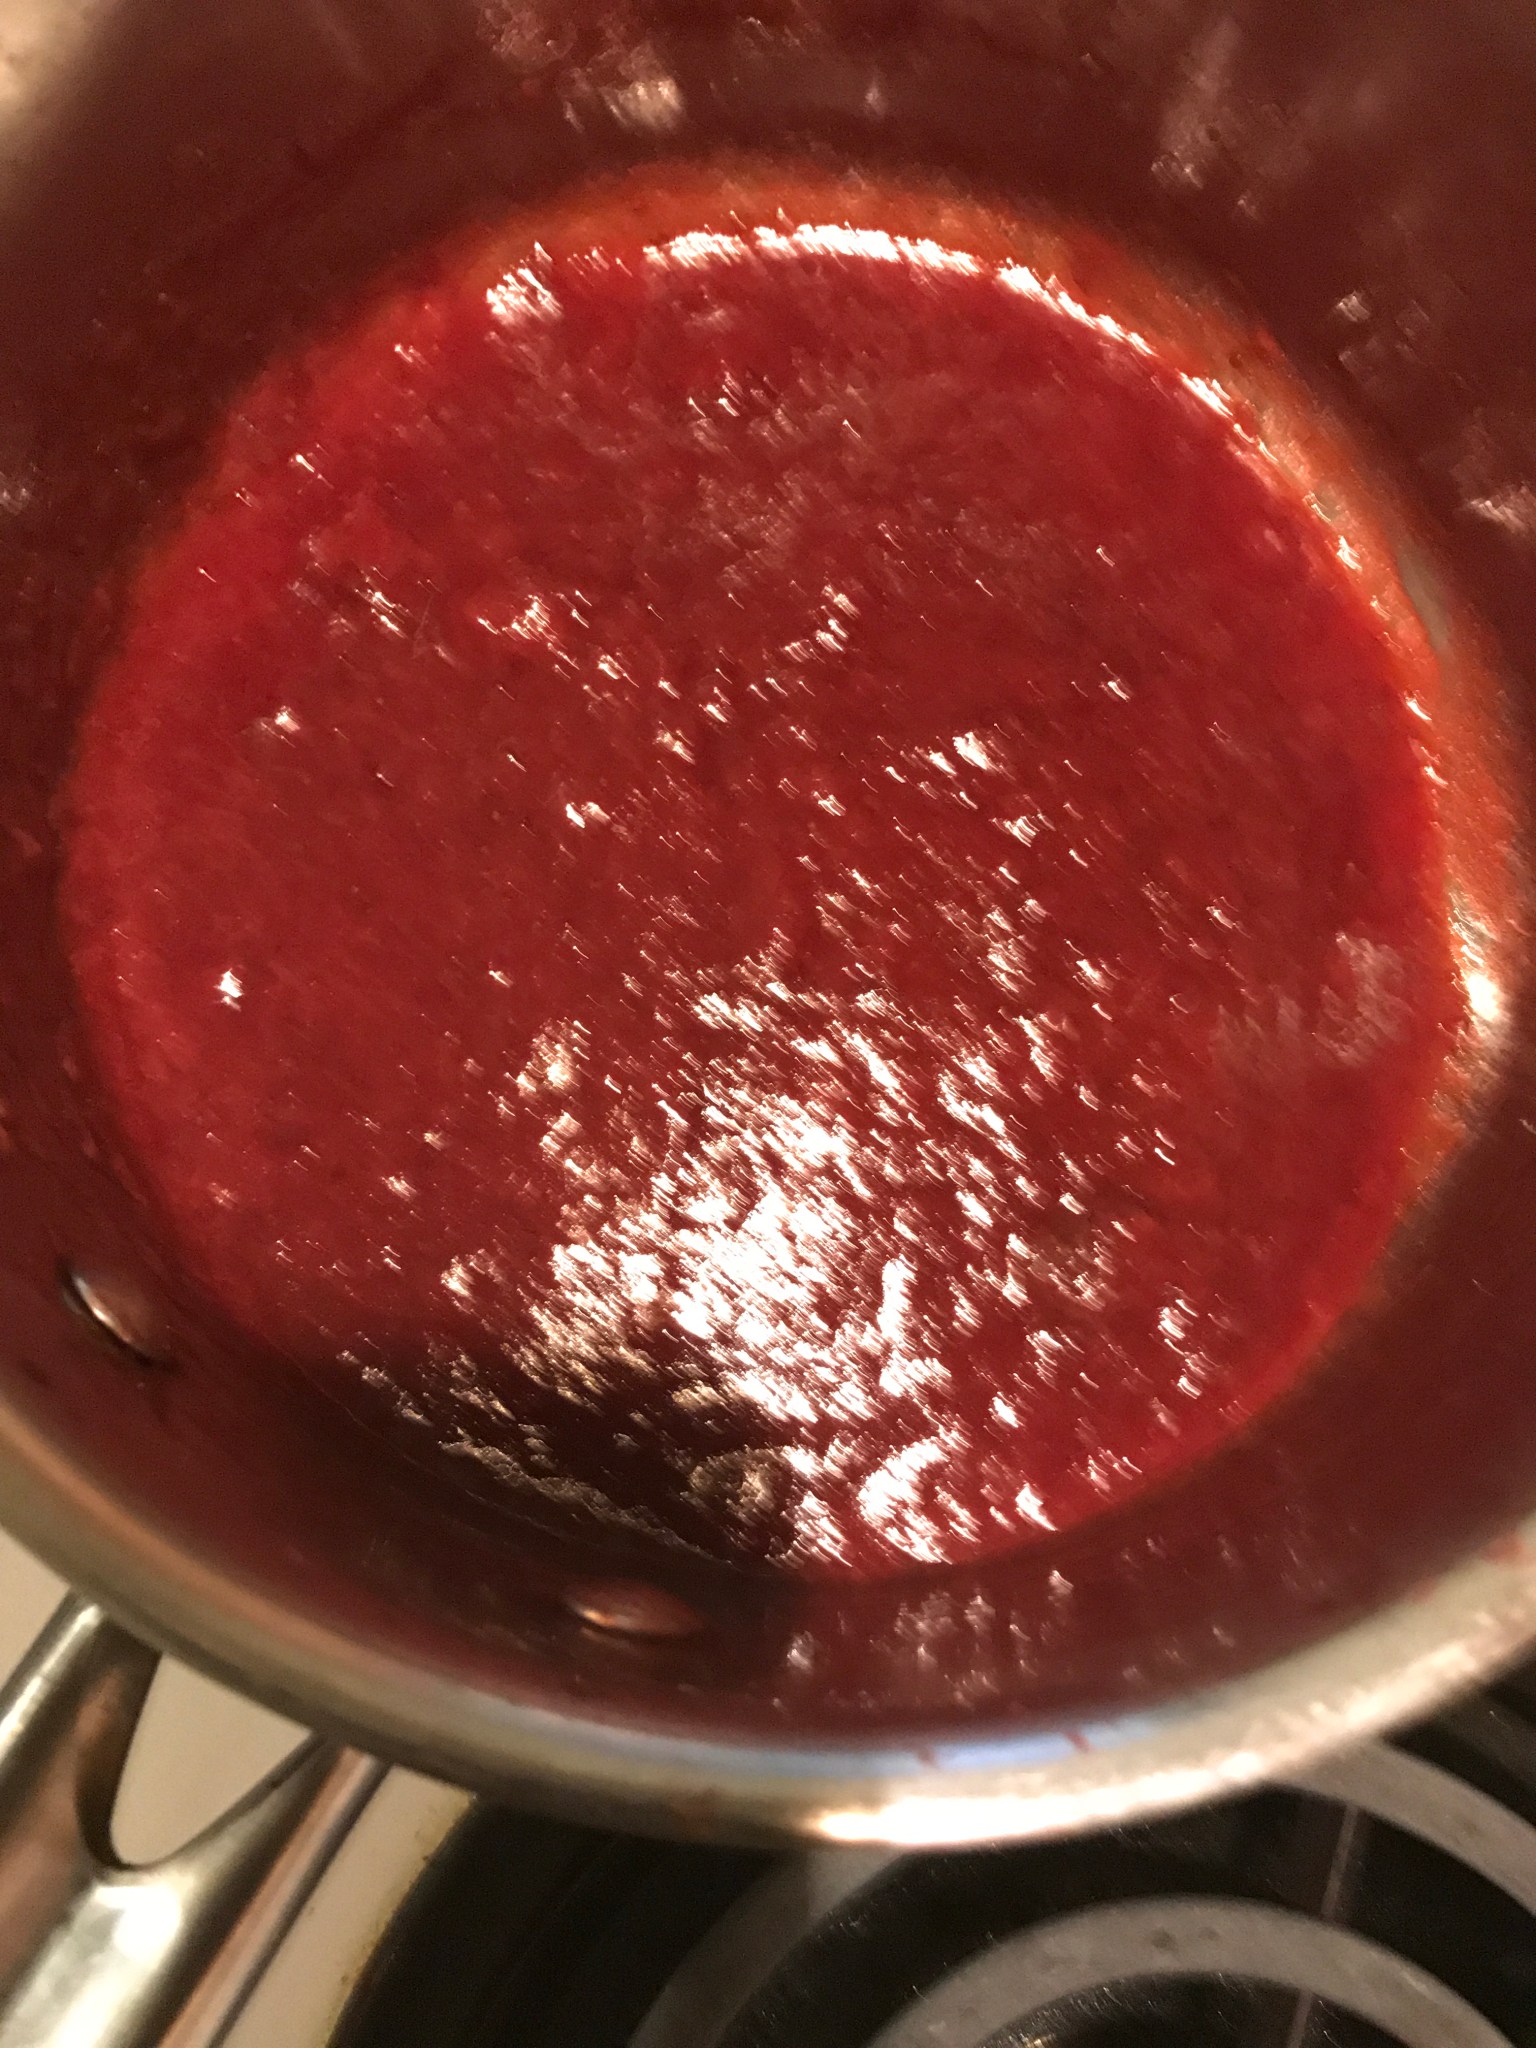 Turn your fire to very low and continue to stir the Strawberry Jam. The strawberries should be reducing quickly now.
 Let cool down in pan
 Spoon into your mason jar.


 #2 Jacobs Cattle Beans


 #1 Eye Of The Goat Beans
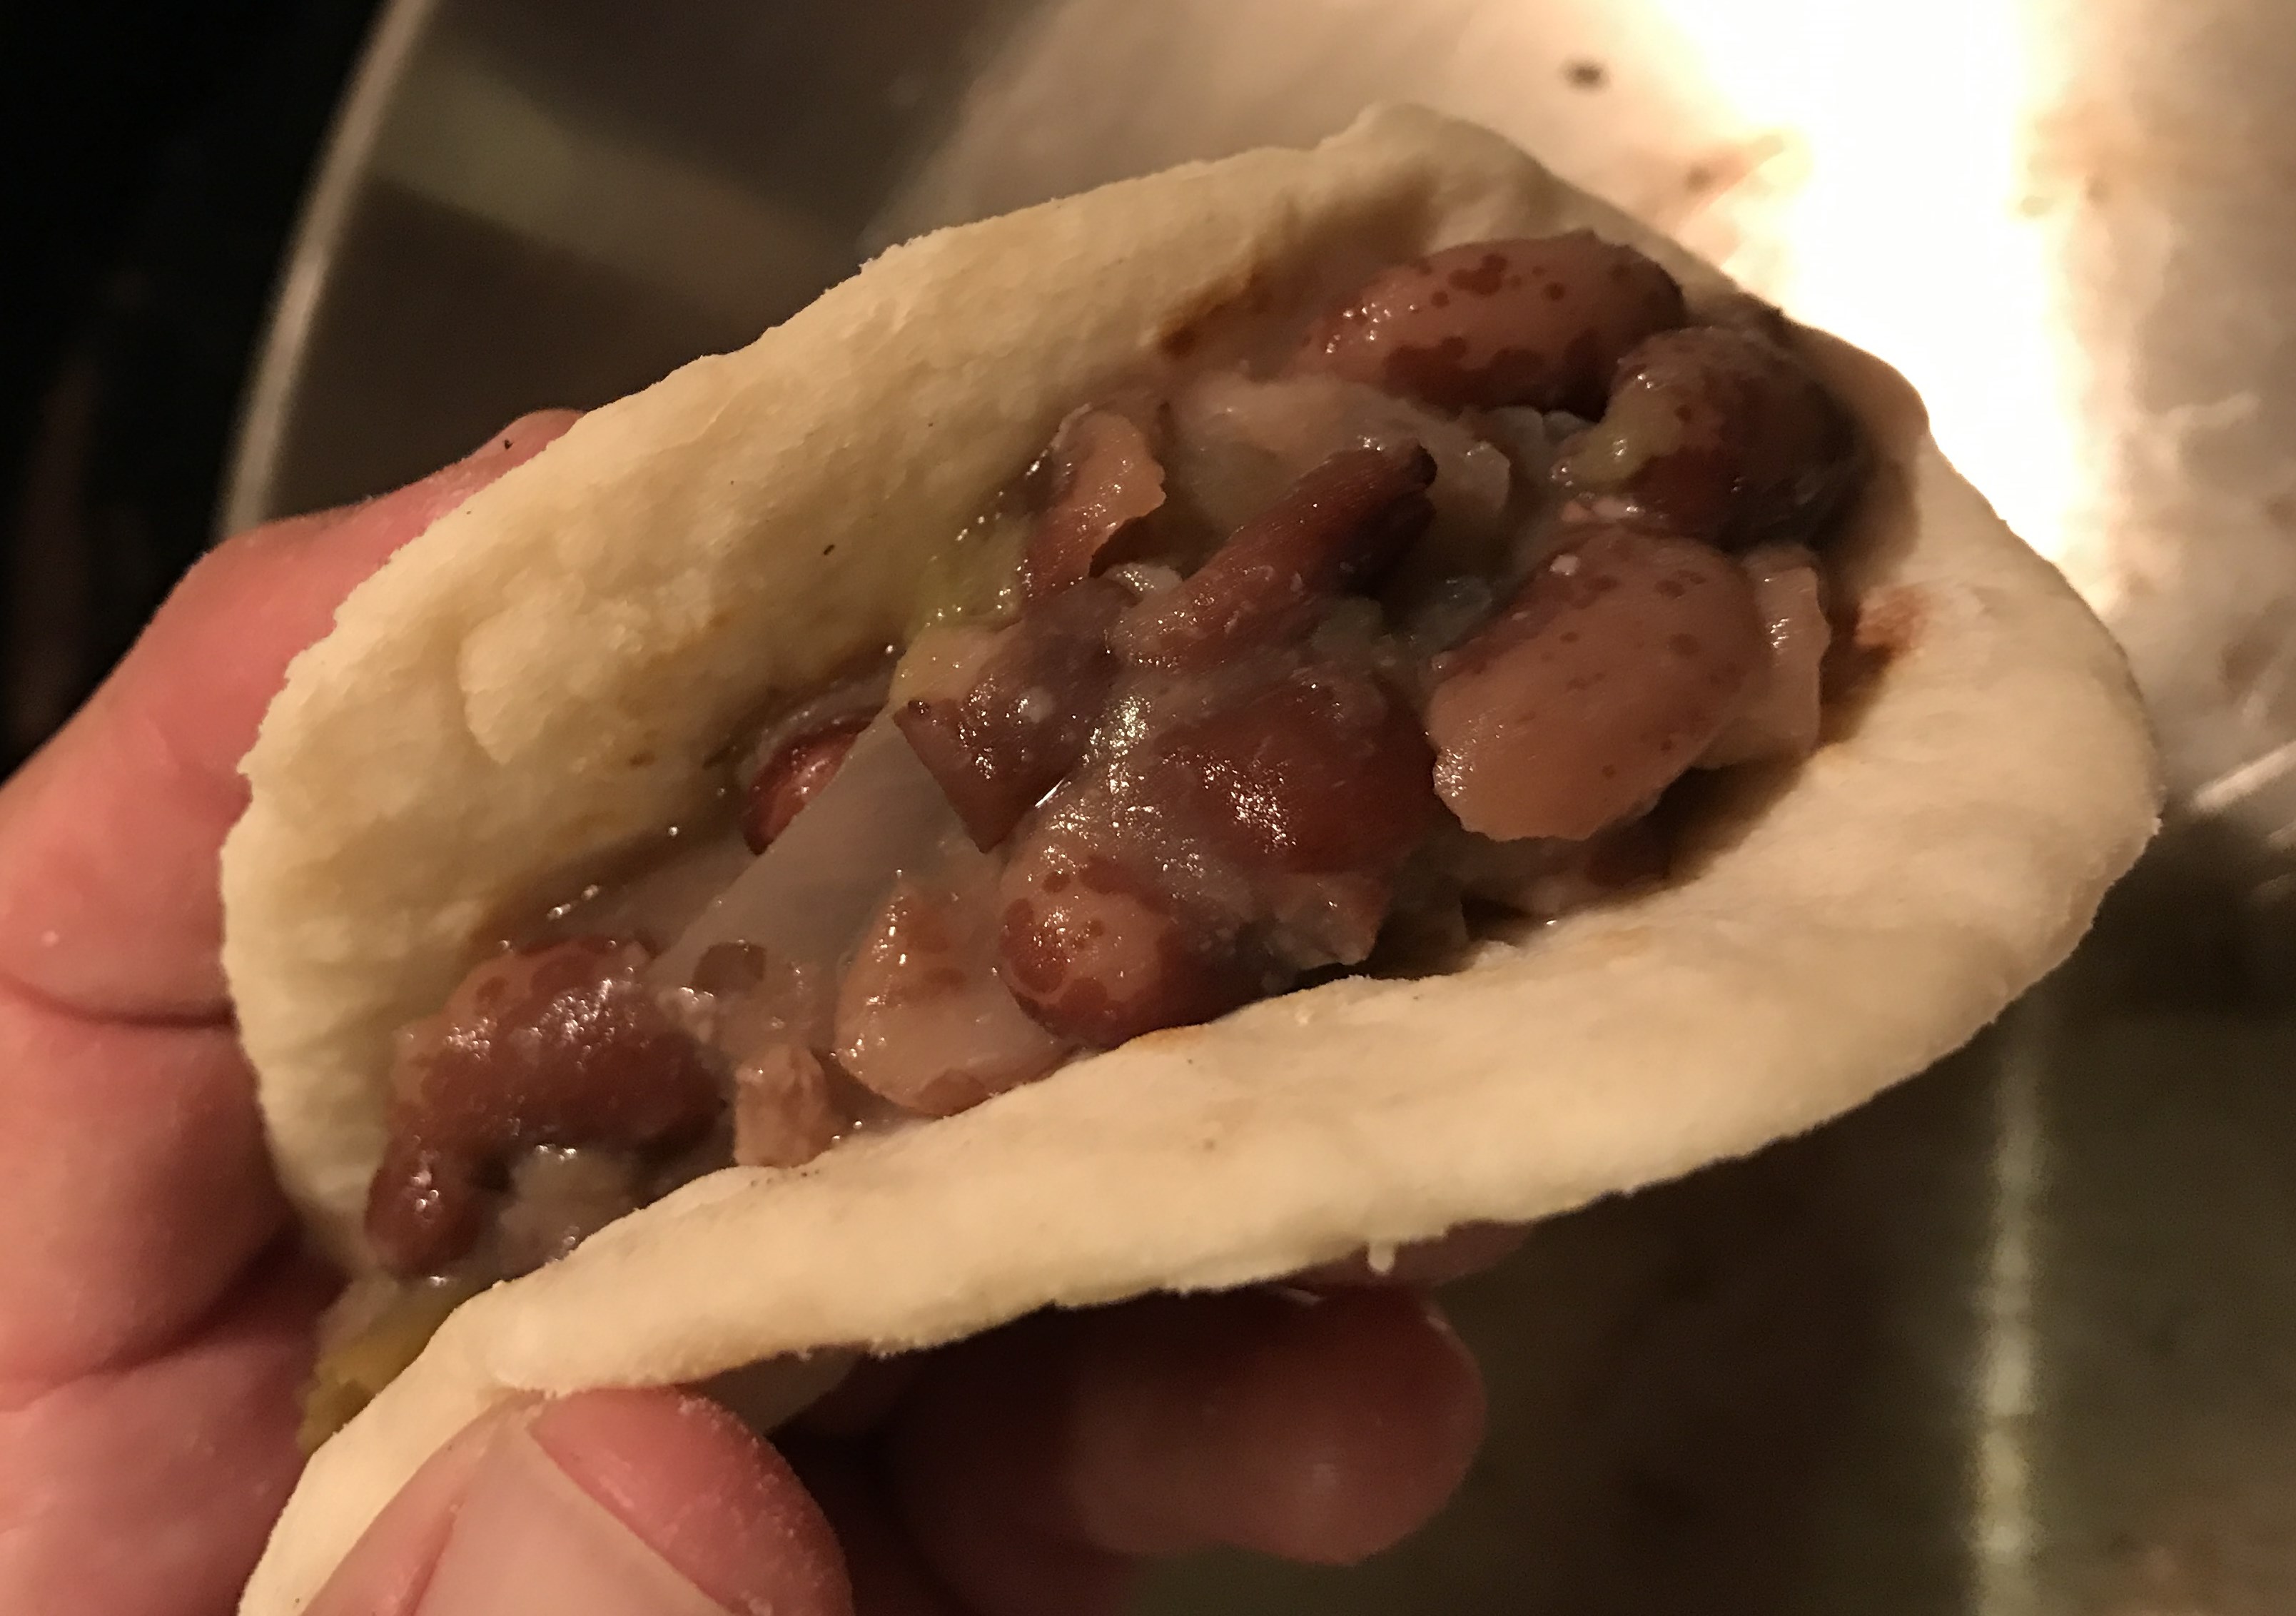 For this dish I also prepared a second recipe. I substituted Jacobs Cattle Beans in place the “Eye Of The Goat”. It complimented the dish very well. When you have several pounds of these beans, you have to experiment.


 Bake a fresh loaf of bread to go with this delicious meal.Spice it up and add some crushed red pepper.. Cooking In A Pot 101..

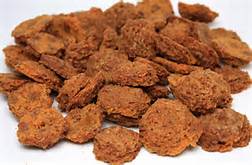


 You can eat more and still lose weight. It’s that easy!
