Micro shards of plastic are being found in the human brain. So this starts a question of how these microplastics are getting into the brains of … Continue reading Plastic Brain???→
Enjoy your very own fermented garlic. Very easy to achieve a wonderfully bold and full of flavor after just a few days.
#HomemadeFermentedGarlic #orgnatlifecom
Super easy recipe.
INGREDIENTS
1 cup Water filtered purified
3/4 teaspoon Sea Salt
This makes 1 cup of brine
Instructions
• Peel the garlic cloves, cut the stem end off. (hard end)
HomemadeFermentedGarlic #orgnatlifecom
• Place them in a clean jar. Fill the jar 3/4 full.
• Make your brine in a glass bowl or large jar. Exactly how much brine you’ll need will depend on the size of jar. You will need ¾ teaspoon of salt for each cup of filtered purified water.
HomemadeFermentedGarlic #orgnatlifecom
• Tighten the lid down. I use regular masón jars. And burp them every other day
HomemadeFermentedGarlic #orgnatlifecom
• Allow the jar to ferment for 5 days to 4 weeks.
• You will need to open the jar to allow the garlic to “burp” every couple of days to release the gases that build. You can check the water level at the same time to make sure that the water which forms the seal hasn’t evaporated.
• The color will change to a tan color. This is normal.
HomemadeFermentedGarlic #orgnatlifecom
• Make sure to taste it during the fermentation process. When it reaches a flavor that you like put it in the refrigerator. Use for all your special recipes and snacks.
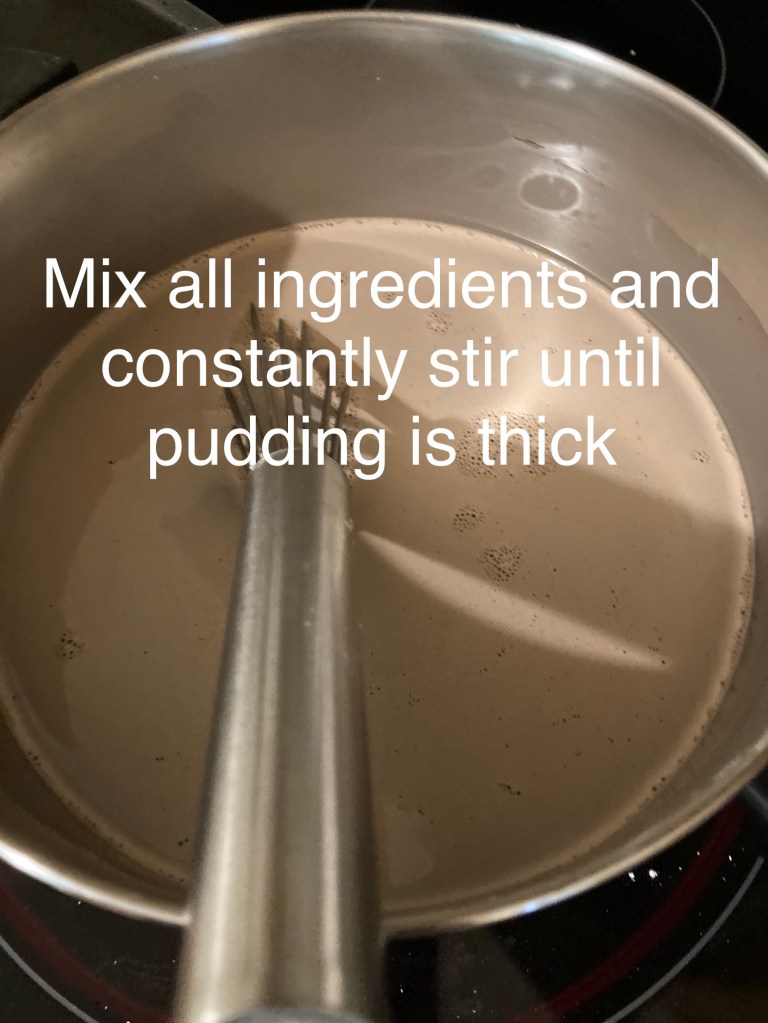
My favorite pudding recipe. It’s rich and creamy texture deserves a special mention.
Ingredients
1/2 cup White Sugar
3 tablespoons Unsweetened Cocoa Powder
1/4 cup Cornstarch
1/8 teaspoon Salt
2 3/4 cup Milk
2 tablespoons Butter
1 teaspoon Vanilla
Directions
Place dry ingredients in pan and mix together
Add milk, stir and leave it for 5 mins
Place pan on stove and turn heat to medium high and constantly stir until pudding is bubbling, turn heat to medium and continue stirring until pudding thickens
Remove from heat and add butter and vanilla and stir until ingredients are combined well
Take your leftover strawberry compote and turn it into something new.
Homemade Fresh Strawberry Shortcake Compote
You’ll find just how easy it is to make your own strawberry jam without all the extra sugar and junk your body does not need.
Yes trust me when I say less sugar and no preservatives does a body good.
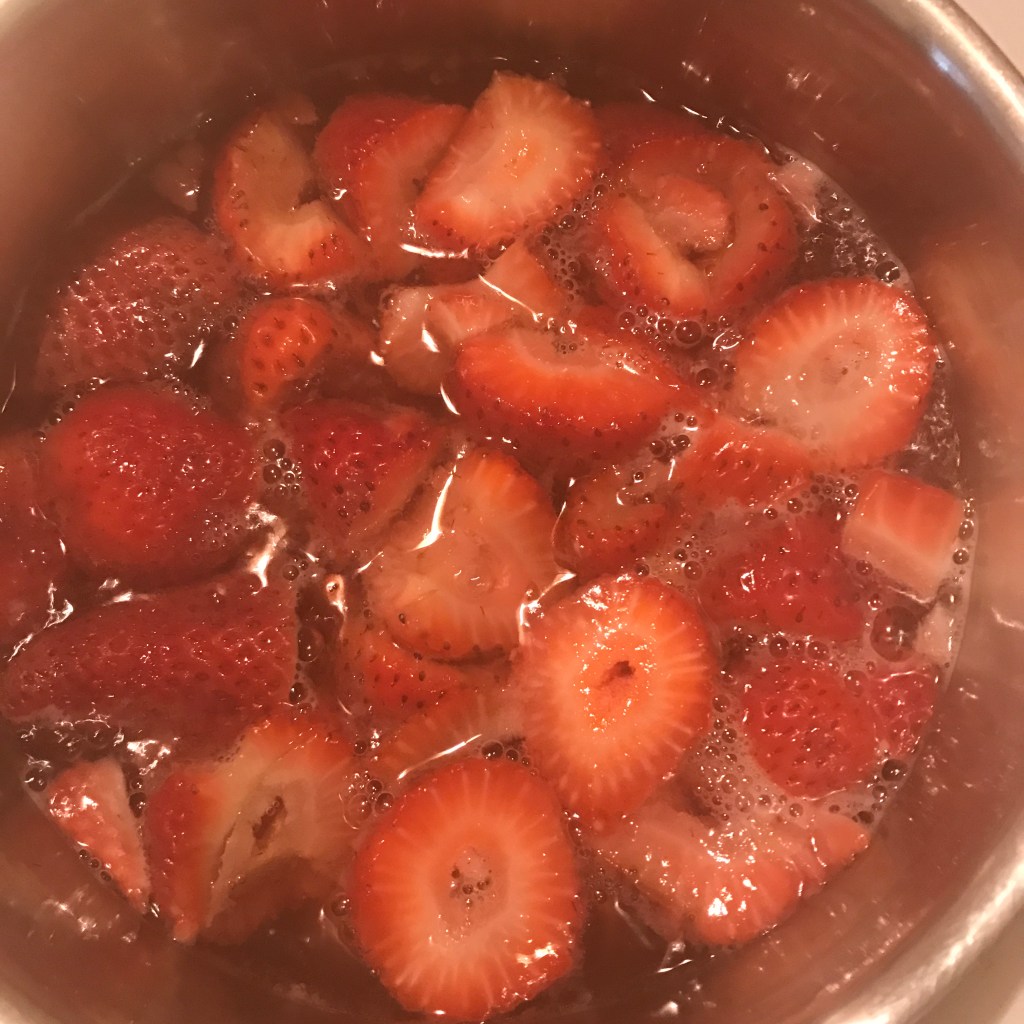
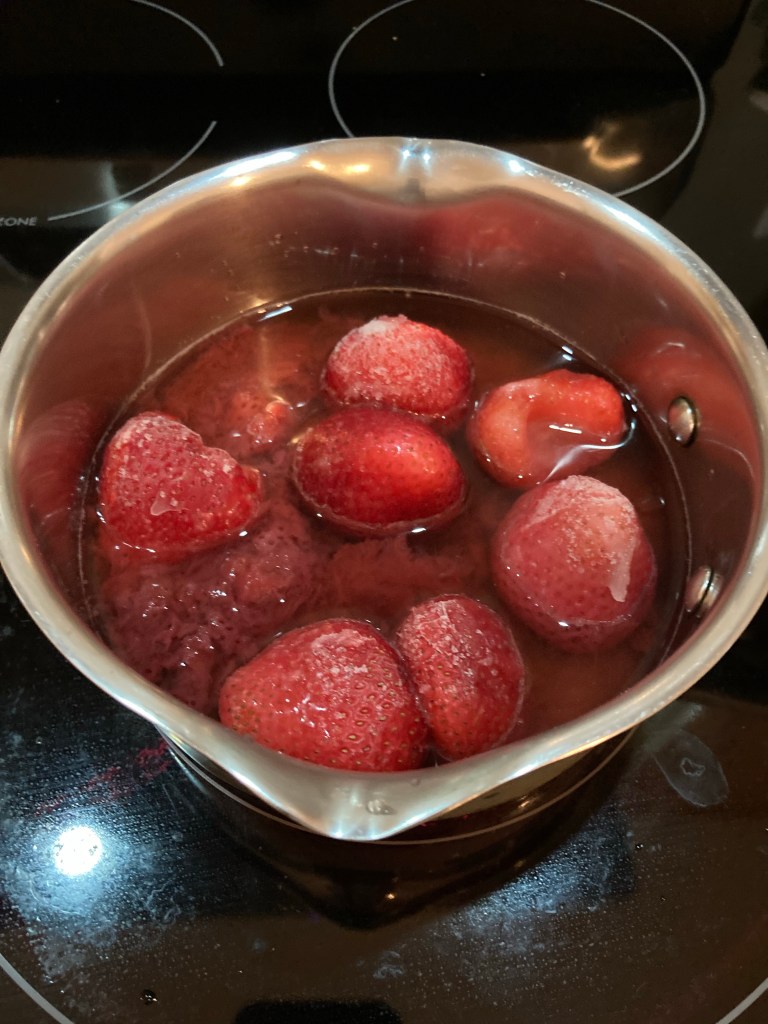
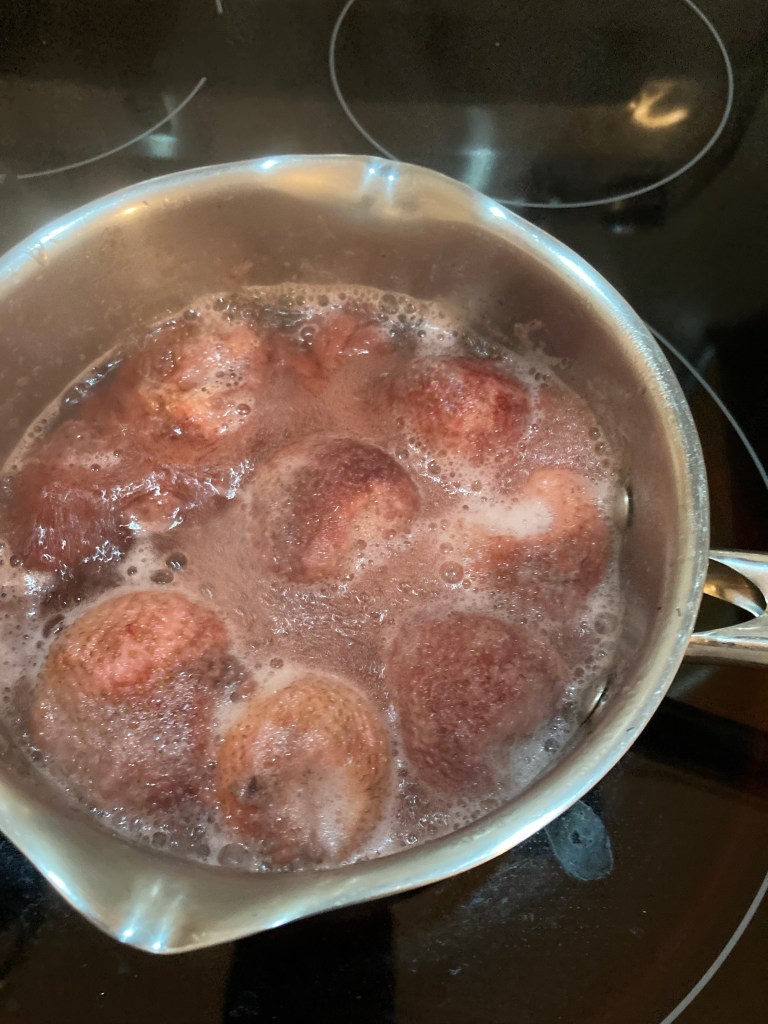
I had some leftover frozen strawberries from this past season. So I added the frozen strawberries to my compote and 1” inch of water above the strawberries and turn on the heat under my pan to high.
Bring to a full boil and reduce the heat to a slow simmer. It’s more about the flavors you are bringing out with the slower simmer.
At this point the house is smelling like a strawberry field at picking time. The sweet undeniable smells of hot summer days come rushing through my senses. I just want to throw open the windows and let the world have a whiff.
Once your strawberries puff up (15 to 20 minutes) you can remove the lid and smash the strawberries with a fork or potato masher. Depending on how chunky you want your jam.
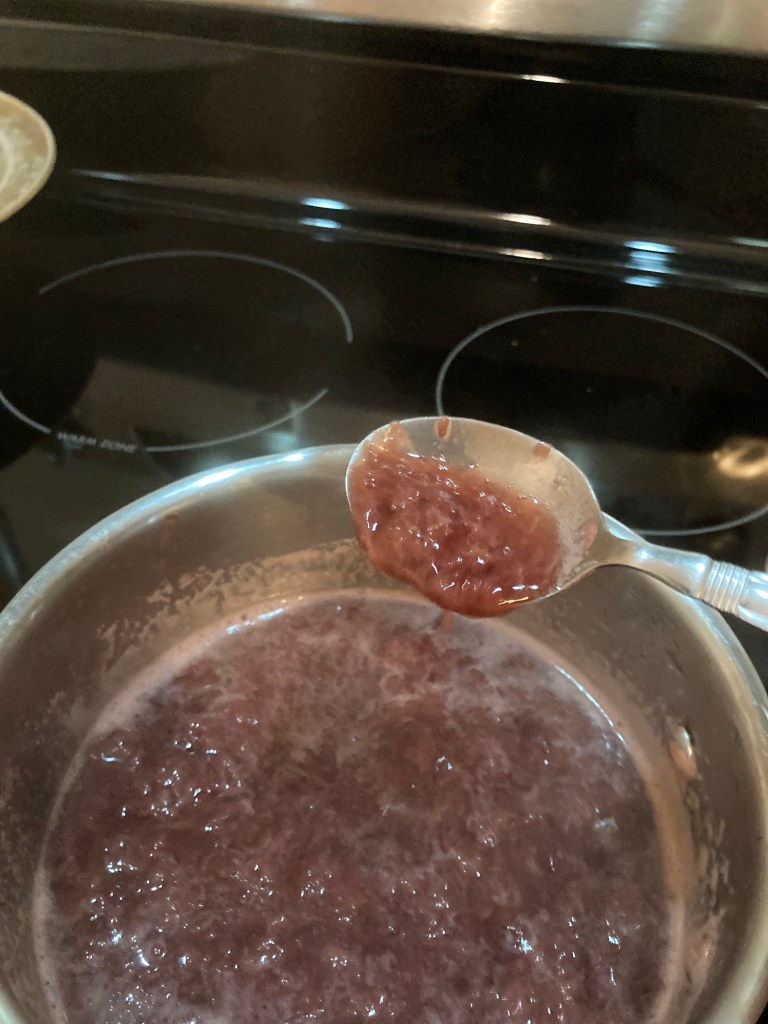
Make sure you continuously stir and watch the pot as they say. Jams are hard to clean up. Plus at this point you shouldn’t be using any heat that is going to make a boil. Simmer is tiny bubbles. Just like you see in champagne.
Tiny bubbles like champagne
Continue cooking without the lid on low heat to reduce the fluid. This might take up to an hour.
Still to much fluid. Keep reducing
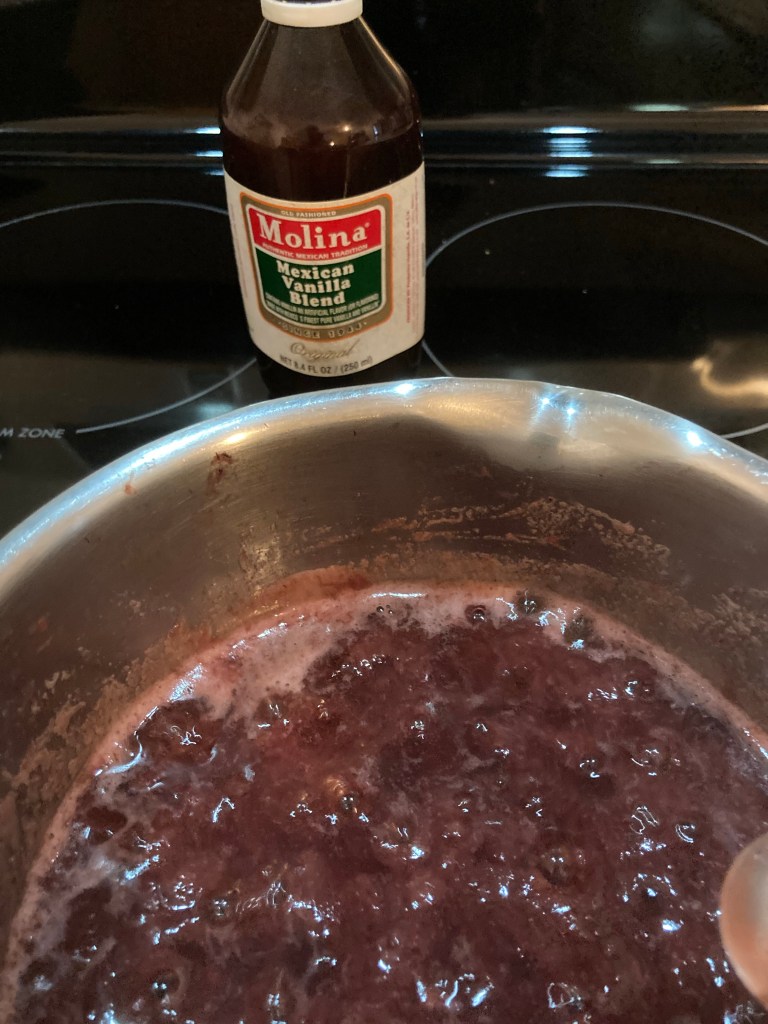
During this time you need to taste it for sweetness. You can add sugar or vanilla at this time if needed. Depending on how sweet your strawberry short cake compote was.
Once it is semi thick and sticks to your spoon with just a little bit of slide to it. It’s ready, you can turn the heat off and let it rest. It will continue to thicken on its own.
Strawberry jam is sticking to the spoon. Remove from heat.
Believe it or not strawberries have a natural pectin. So it will thicken all by its self.
Strawberry Jam is cooling down
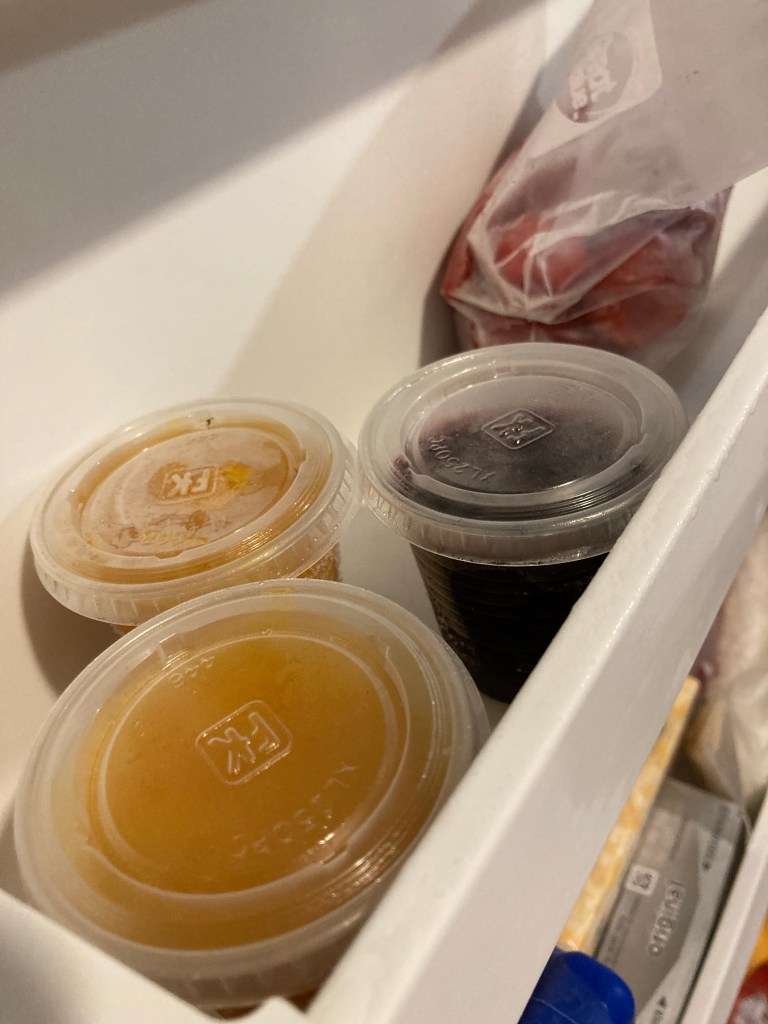
Add the cooled jam to your containers.
I put all my jams in 3 ounce containers with lids and I freeze them. That way I can have fresh strawberry jam or any other flavor anytime I want.
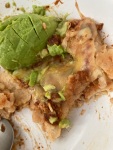
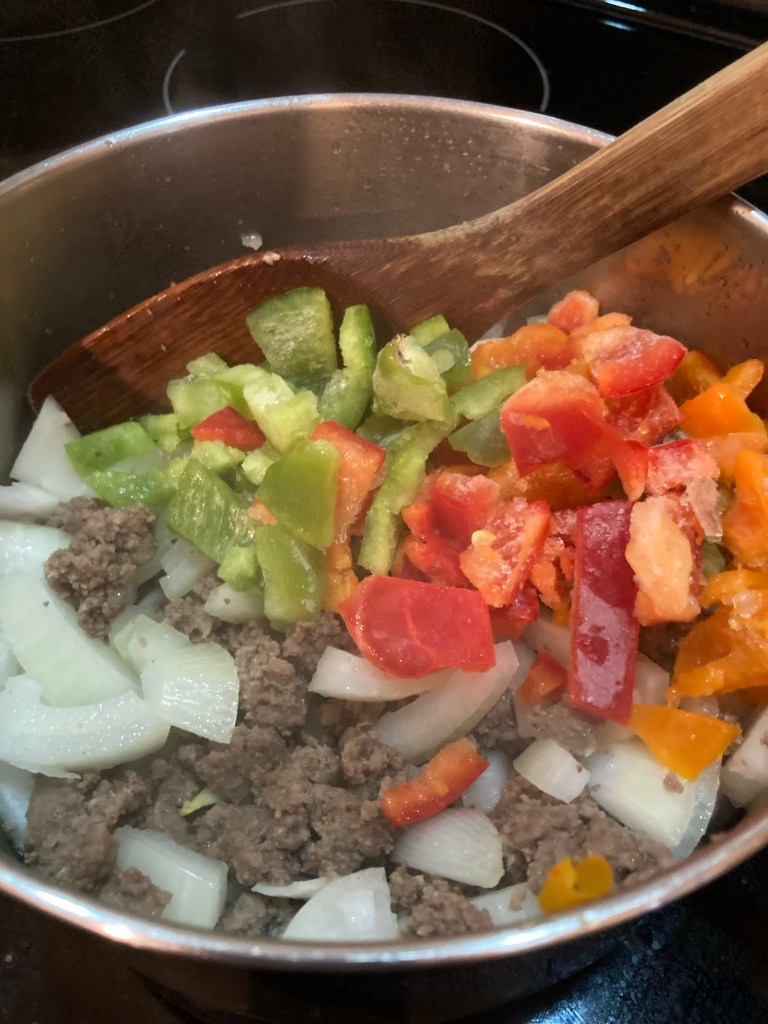
We are using spices and veggies instead of ketchup to flavor our yummy kid friendly and adult pleasing yummy homemade sloppy joes. No preservatives.
Add 1/4 of each green, red and yellow peppers 🫑 cut up into your choice of size and 1 onion. If your making this for kid’s you may want to dice the peppers and onion’s into very small pieces. I like 1” inch piece’s for adults. You can also purée in the blender for a smoother texture.
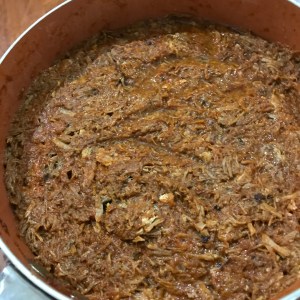
While the meat 🥩 is cooking cut up your veggies 🥗 and onions 🧅 .. Cook your meat 🥩 down and drain the grease.
Add your onion 🧅 and 🫑 peppers. Add 1 teaspoon salt.
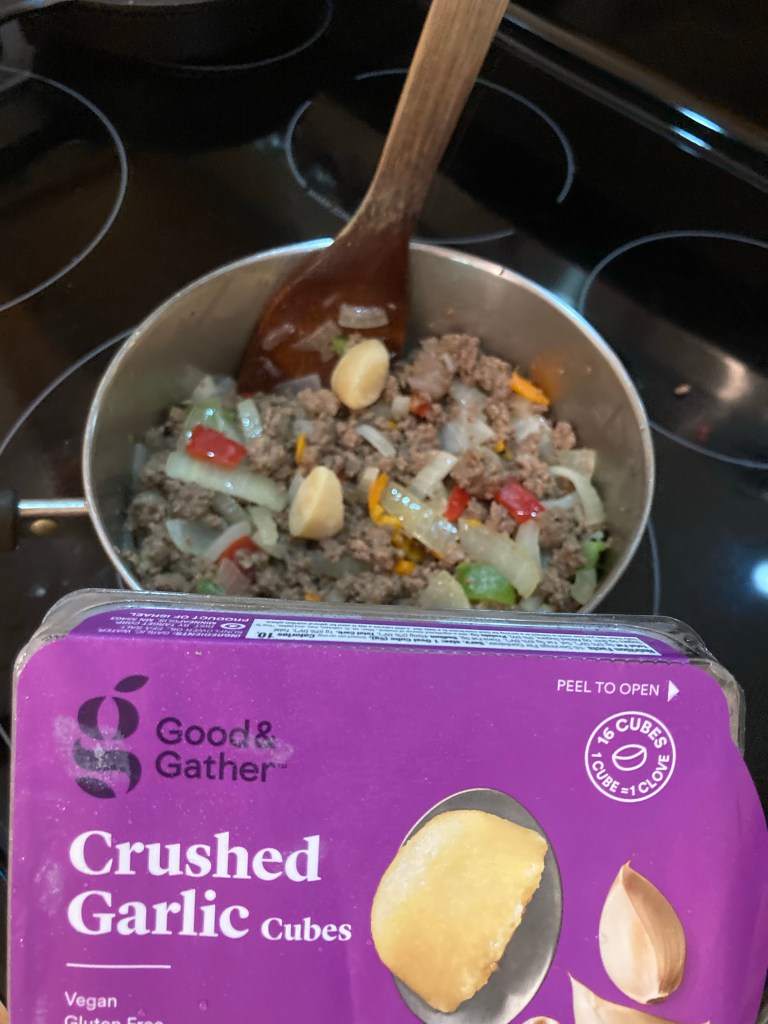
Add 2 Teaspoons of garlic. I use 2 of the frozen 5 gram cubes. ( 1 Teaspoon each cube ). Continue cooking
Cook down until soft and onion’s are translucent.
1 pound Hamburger
1 teaspoon Salt
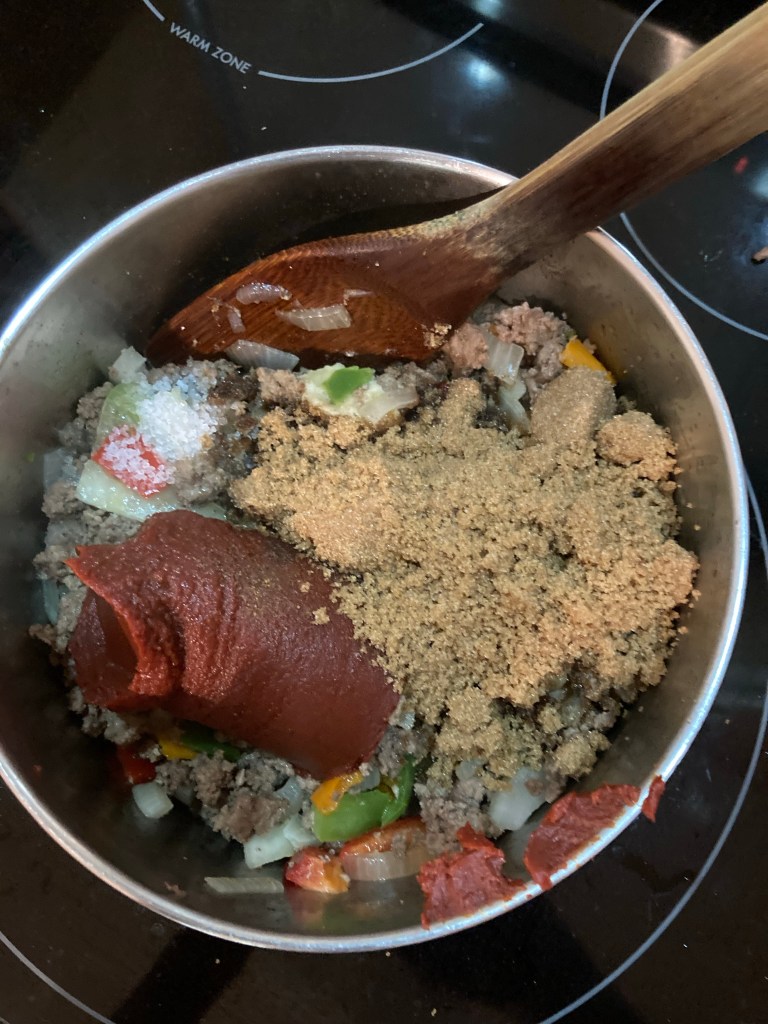
1 tablespoon White Sugar
1 teaspoon Celery Salt
1/2 cup Brown Sugar
1 tablepoon All Spice
1 can Tomato Paste 6 oz
1 1/2 cups Water
Adding water 1/2 cup at a time. Mix it up until all the water is gone.
Simmer for 45 minutes
You can adjust the serving size by increasing all the ingredients. This makes approximately 6 to 8 sandwiches.
Yummy ready to go
I toasted some fresh baked garlic pepper Jack cheese bread. It paired wonderfully. So buns for the kids and add cheese or a different bread for the adults.
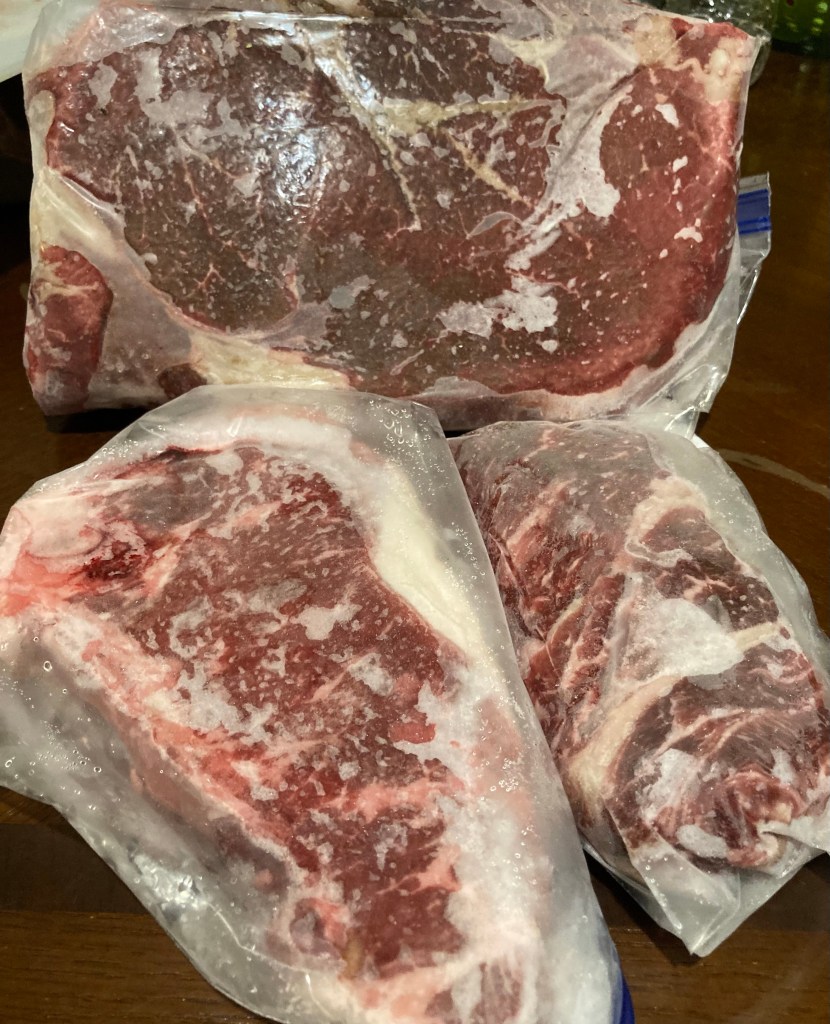
Fresh chopped hamburger meat from your own kitchen doesn’t get any better. You choose your choice of meat and start chopping.
Most hamburger meat is a combination of several cows. So if one of them has an infection the whole bunch that was just made is infected. This way you know this is one cow.
London broil, top sirloin or chuck roast. Your choice. Just remember to have some fat on the piece of meat. Flavonoids are in the rendered fat. Yummy
I like to cut mine up into very small chunks. I leave my meat semi thawed, it’s easier to cut.
You can also use this for your dogs. If you can afford a Little treat every now and then. Don’t cook it. Leave it raw and mix with some slightly cooked veggies.
Another mouth watering recipe for your Latin Food file.
My recipe is a combination of of 5 different meat filling recipes. I made them until I found one that I really liked. Now I have my wonderful creation. The masa recipe is off the back of the Tamal Mesca bag. Simple easy. The only difference is I tan and use my Lard, Manteca or Tallow warm to enhance the flavor of the masa. Instructions down below.
A tamale is a traditional Mesoamerican dish, made of masa or dough, which is steamed in a corn husk or banana leaf. The wrapping can either be discarded prior to eating or used as a plate. Tamales can be filled with meats, cheeses, fruits, vegetables, chilies, chocolate or any thing your heart desires, and both the filling and the cooking liquid may be seasoned with what ever your main ingredient is in your tamale..
If you are trying to decide what to make for a special occasion, holiday or Christmas we think you might enjoy a little spice and sweetness instead.
The secret to a good tamale is moisture. Lard and broth are key ingredients to achieve a smooth creamy flavorful masa.
There are several variations of the tamale. From breakfast, lunch, dinner or dessert. The tamale base masa is like a white bread recipe that you make your own by adding your favorite ingredients. Use your imagination and be creative.
Today we will be making:
Red Chili Pork Tamales
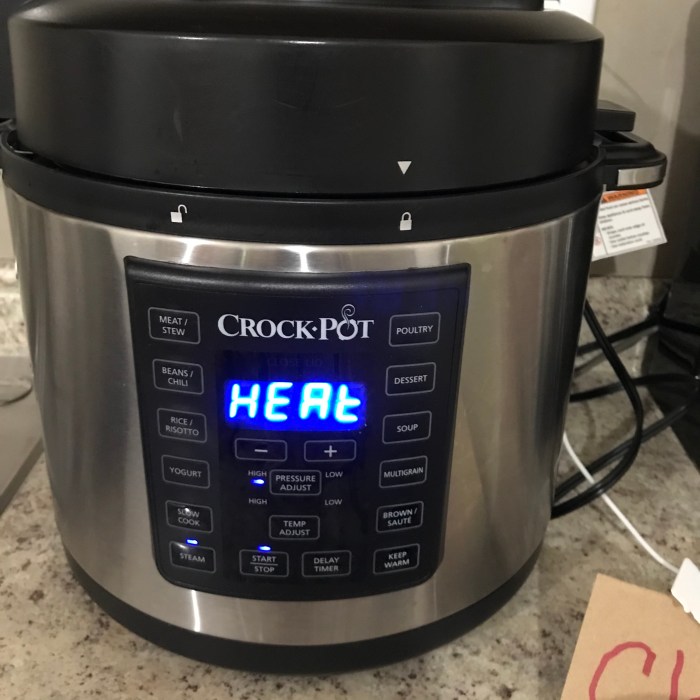
There are a few ways to Cook the Tamales. You can use a Pot with a wire rack to hold tamales out of water, Multi Cooker or Rice Cooker with a wire rack (45 min to 60 min) or a Crock Pot/ Slow Cooker function with wire rack (takes about 2 hours +or-). I use the “Steam” function on my Multi-Cooker by Crock-Pot for no less then 45 minutes to 80 minutes.
Prepare the Corn Husks by soaking them in a large pot with warm water. Make sure to separate each husk and clean thoroughly before you place them in the pot of warm water.
Preparing your filling is just as important as the masa. You need to pre cook your ingredients. Make sure you add enough moisture to your red chili sauce. This can be made ahead of time. I have made it when I had leftover pork and I just freeze it until I have time to make tamales.
RED CHILI PORK INGREDIENTS
Pork better if mixed parts like the butt, chops or loin ( fat and lean meats mixed)
1/2 cup water
1 can 10 oz. Enchilada sauce
10 dried red chili’s chopped in blender
1 Teaspoon cumin
1 Tablespoon salt
1 whole clove of garlic
1 onion
1 small bunch fresh cilantro (leaves only)
Rub pork with cumin and salt. Place all the ingredients in the multi cooker and stir. Select meat on the pressure cooker function. Cook until the pork is tender, approximately 90 minutes. Using slow cooker or pot on the stove method to cook your meat, at least 2- 3 hours until tender.
Open the multi cooker or pot and mix all ingredients together, break the meat down. Pork is broken down and shredded.
Place lid back on and slow cook for 2 hours.
After 1 hour check to make sure you have plenty of moisture if not add another cup of water and mix together.
Preparing Your Masa Its important to remember your liquid to dry ingredient ratio. It will be better if the masa is a little moist than dry.
VIDEO BELOW
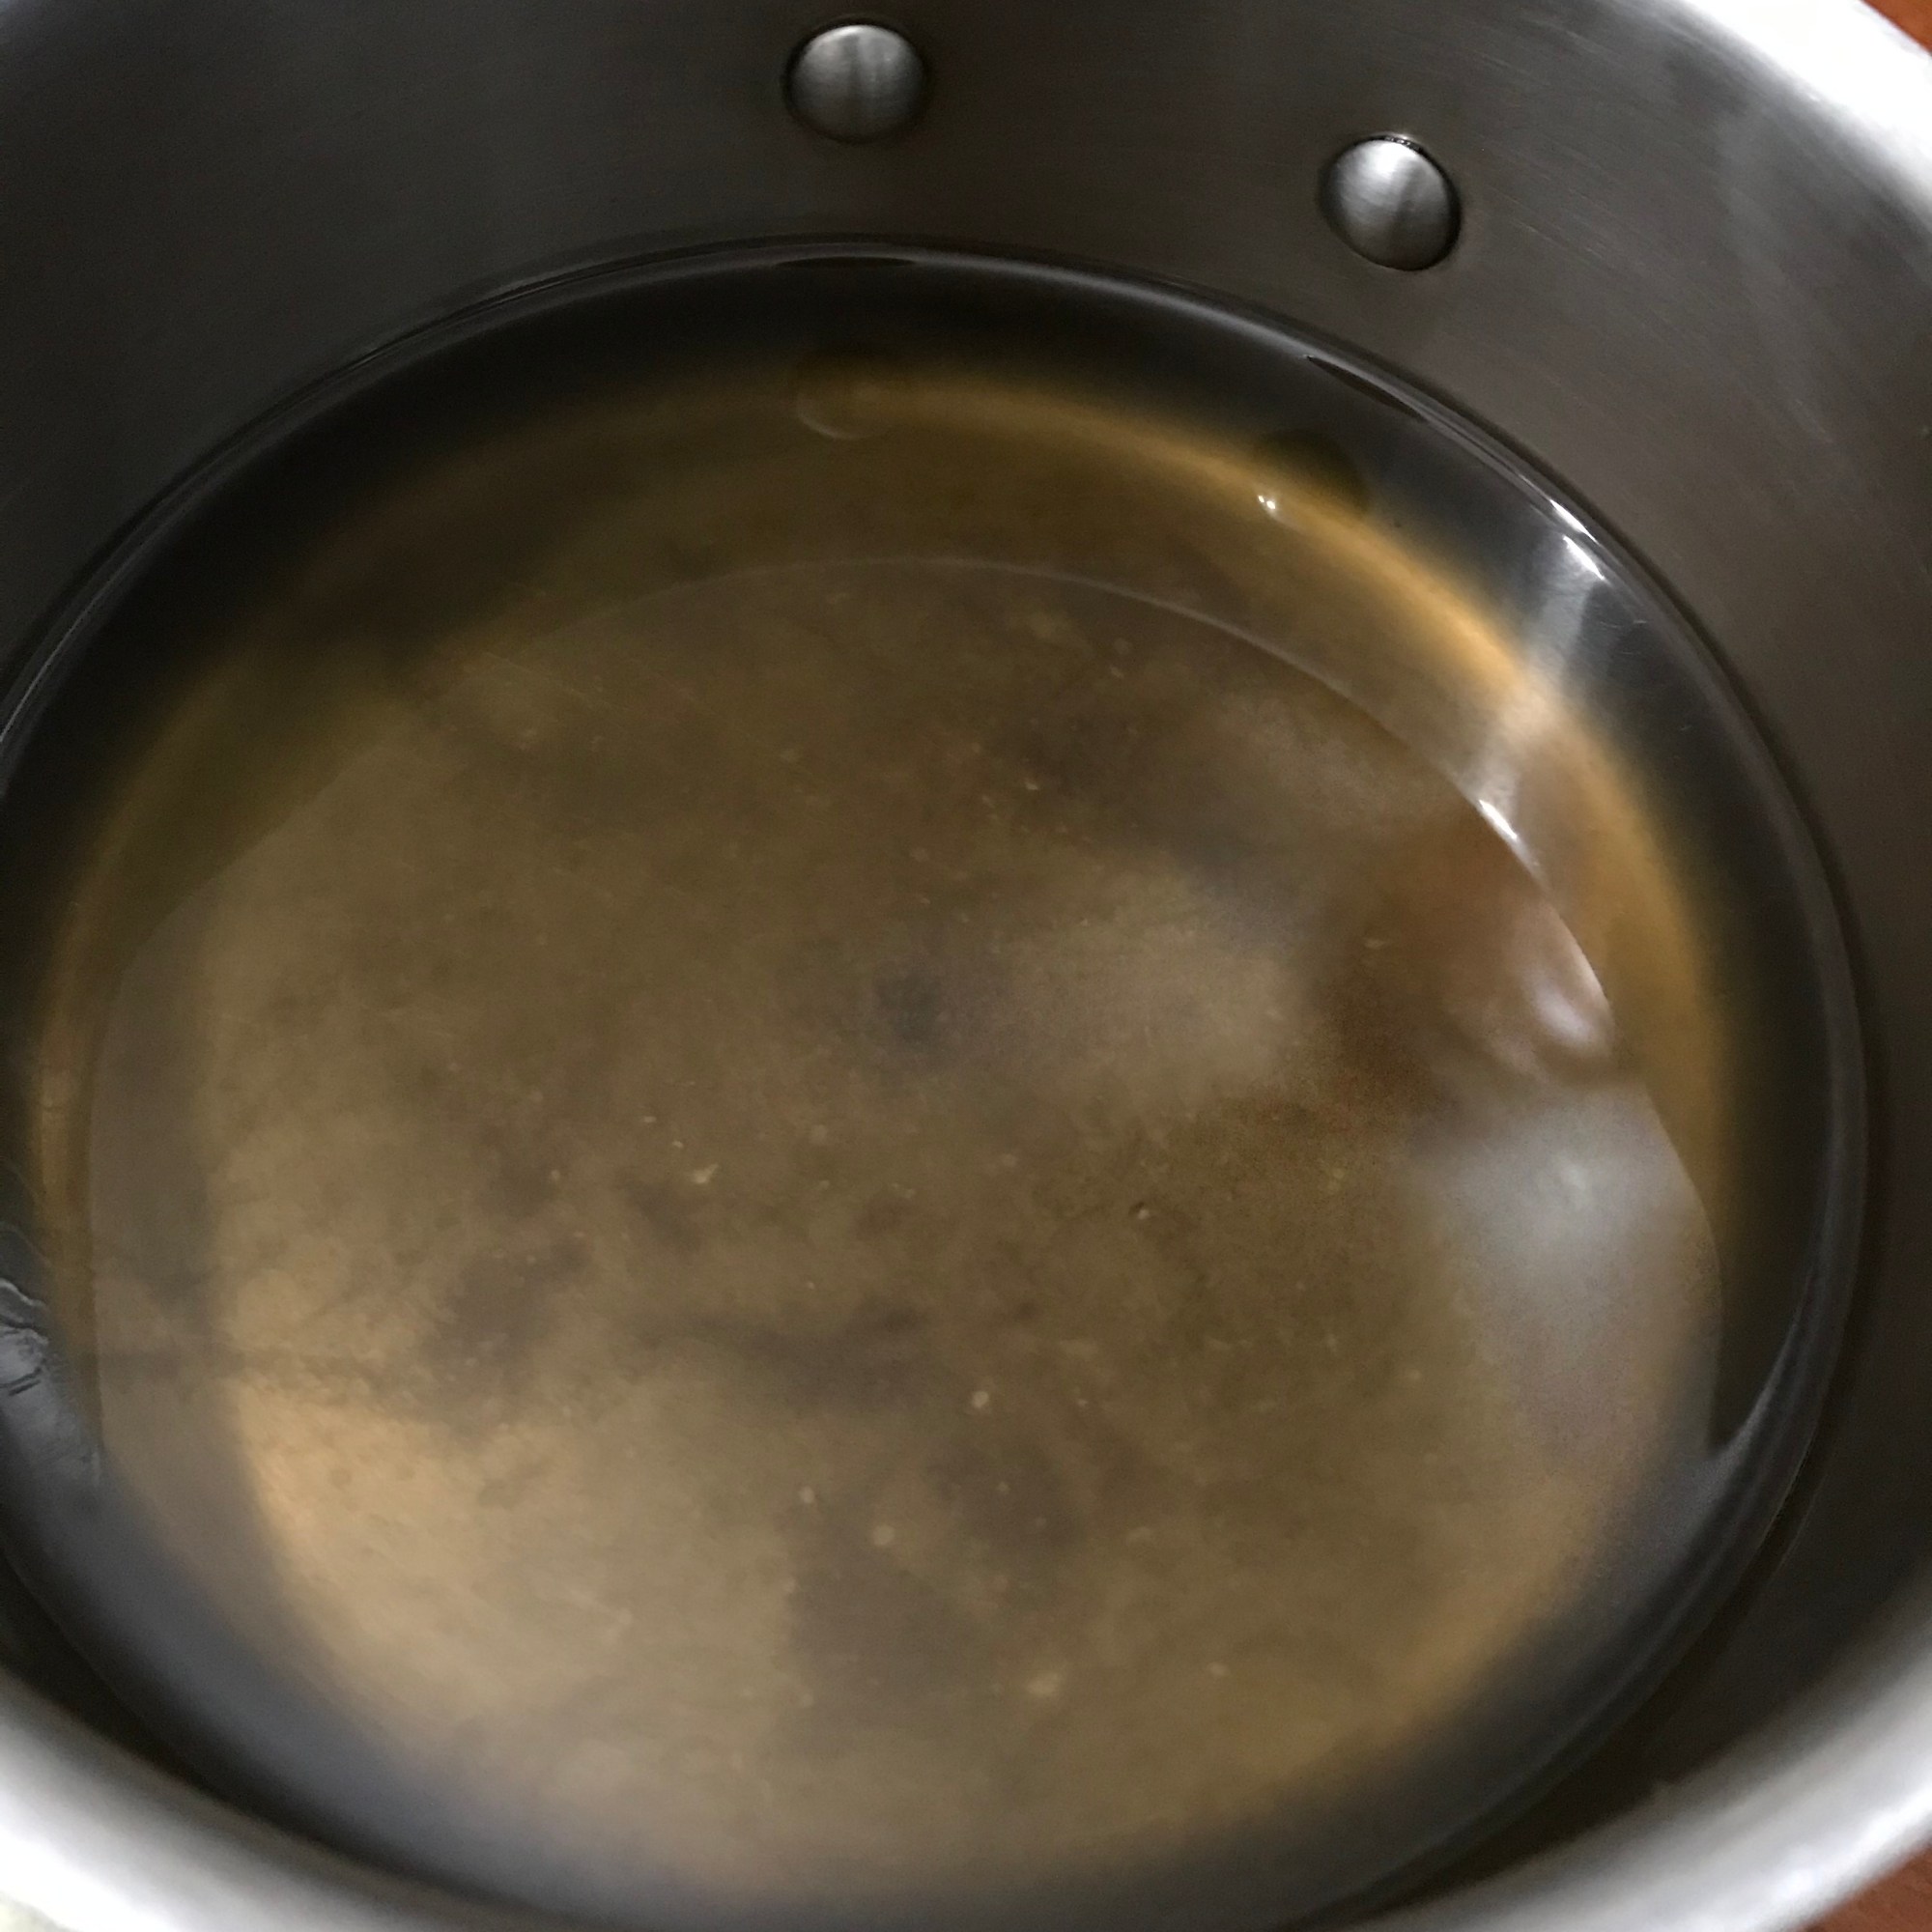
Lard, Manteca or Tallow oil must be tanned to bring out the flavor. By heating the Lard, Manteca or Tallow over medium heat for approximately 15 to 20 minutes. Make sure you watch the lard closely so it does not burn or start on fire. Be very careful handling the hot oil.
As you slowly heat the melted lard up to it will start to turn colors. From a clear liquid to a golden brown. Burn point is 420 degrees so watch it closely. The scent will become more appealing, It will actually smell like a tasty piece of meat. Just remember this aroma is the flavor to your masa. So if the aroma makes your mouth water for a juicy steak, it’s ready. Let it completely cool down to luke warm before using.
Speaking of your liquids. You can use the juices from your boiled meats after removing the fat content, which can be achieved by placing the cooled broth into the refrigerator for a few hours. You can also make your own vegetable or fruit broth to be used for your other tamales.
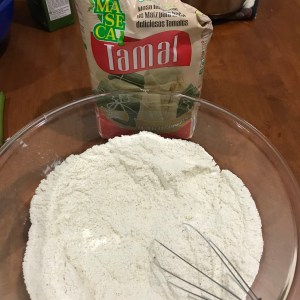
MASA INGREDEINTS
2 cups Tamal masa mix
2/3 cup Lard, Manteca or Tallow
1 1/3 cup Broth (beef, pork, chicken vegetable) your choice
1 teaspoon baking powder
1 teaspoon salt
DIRECTIONS
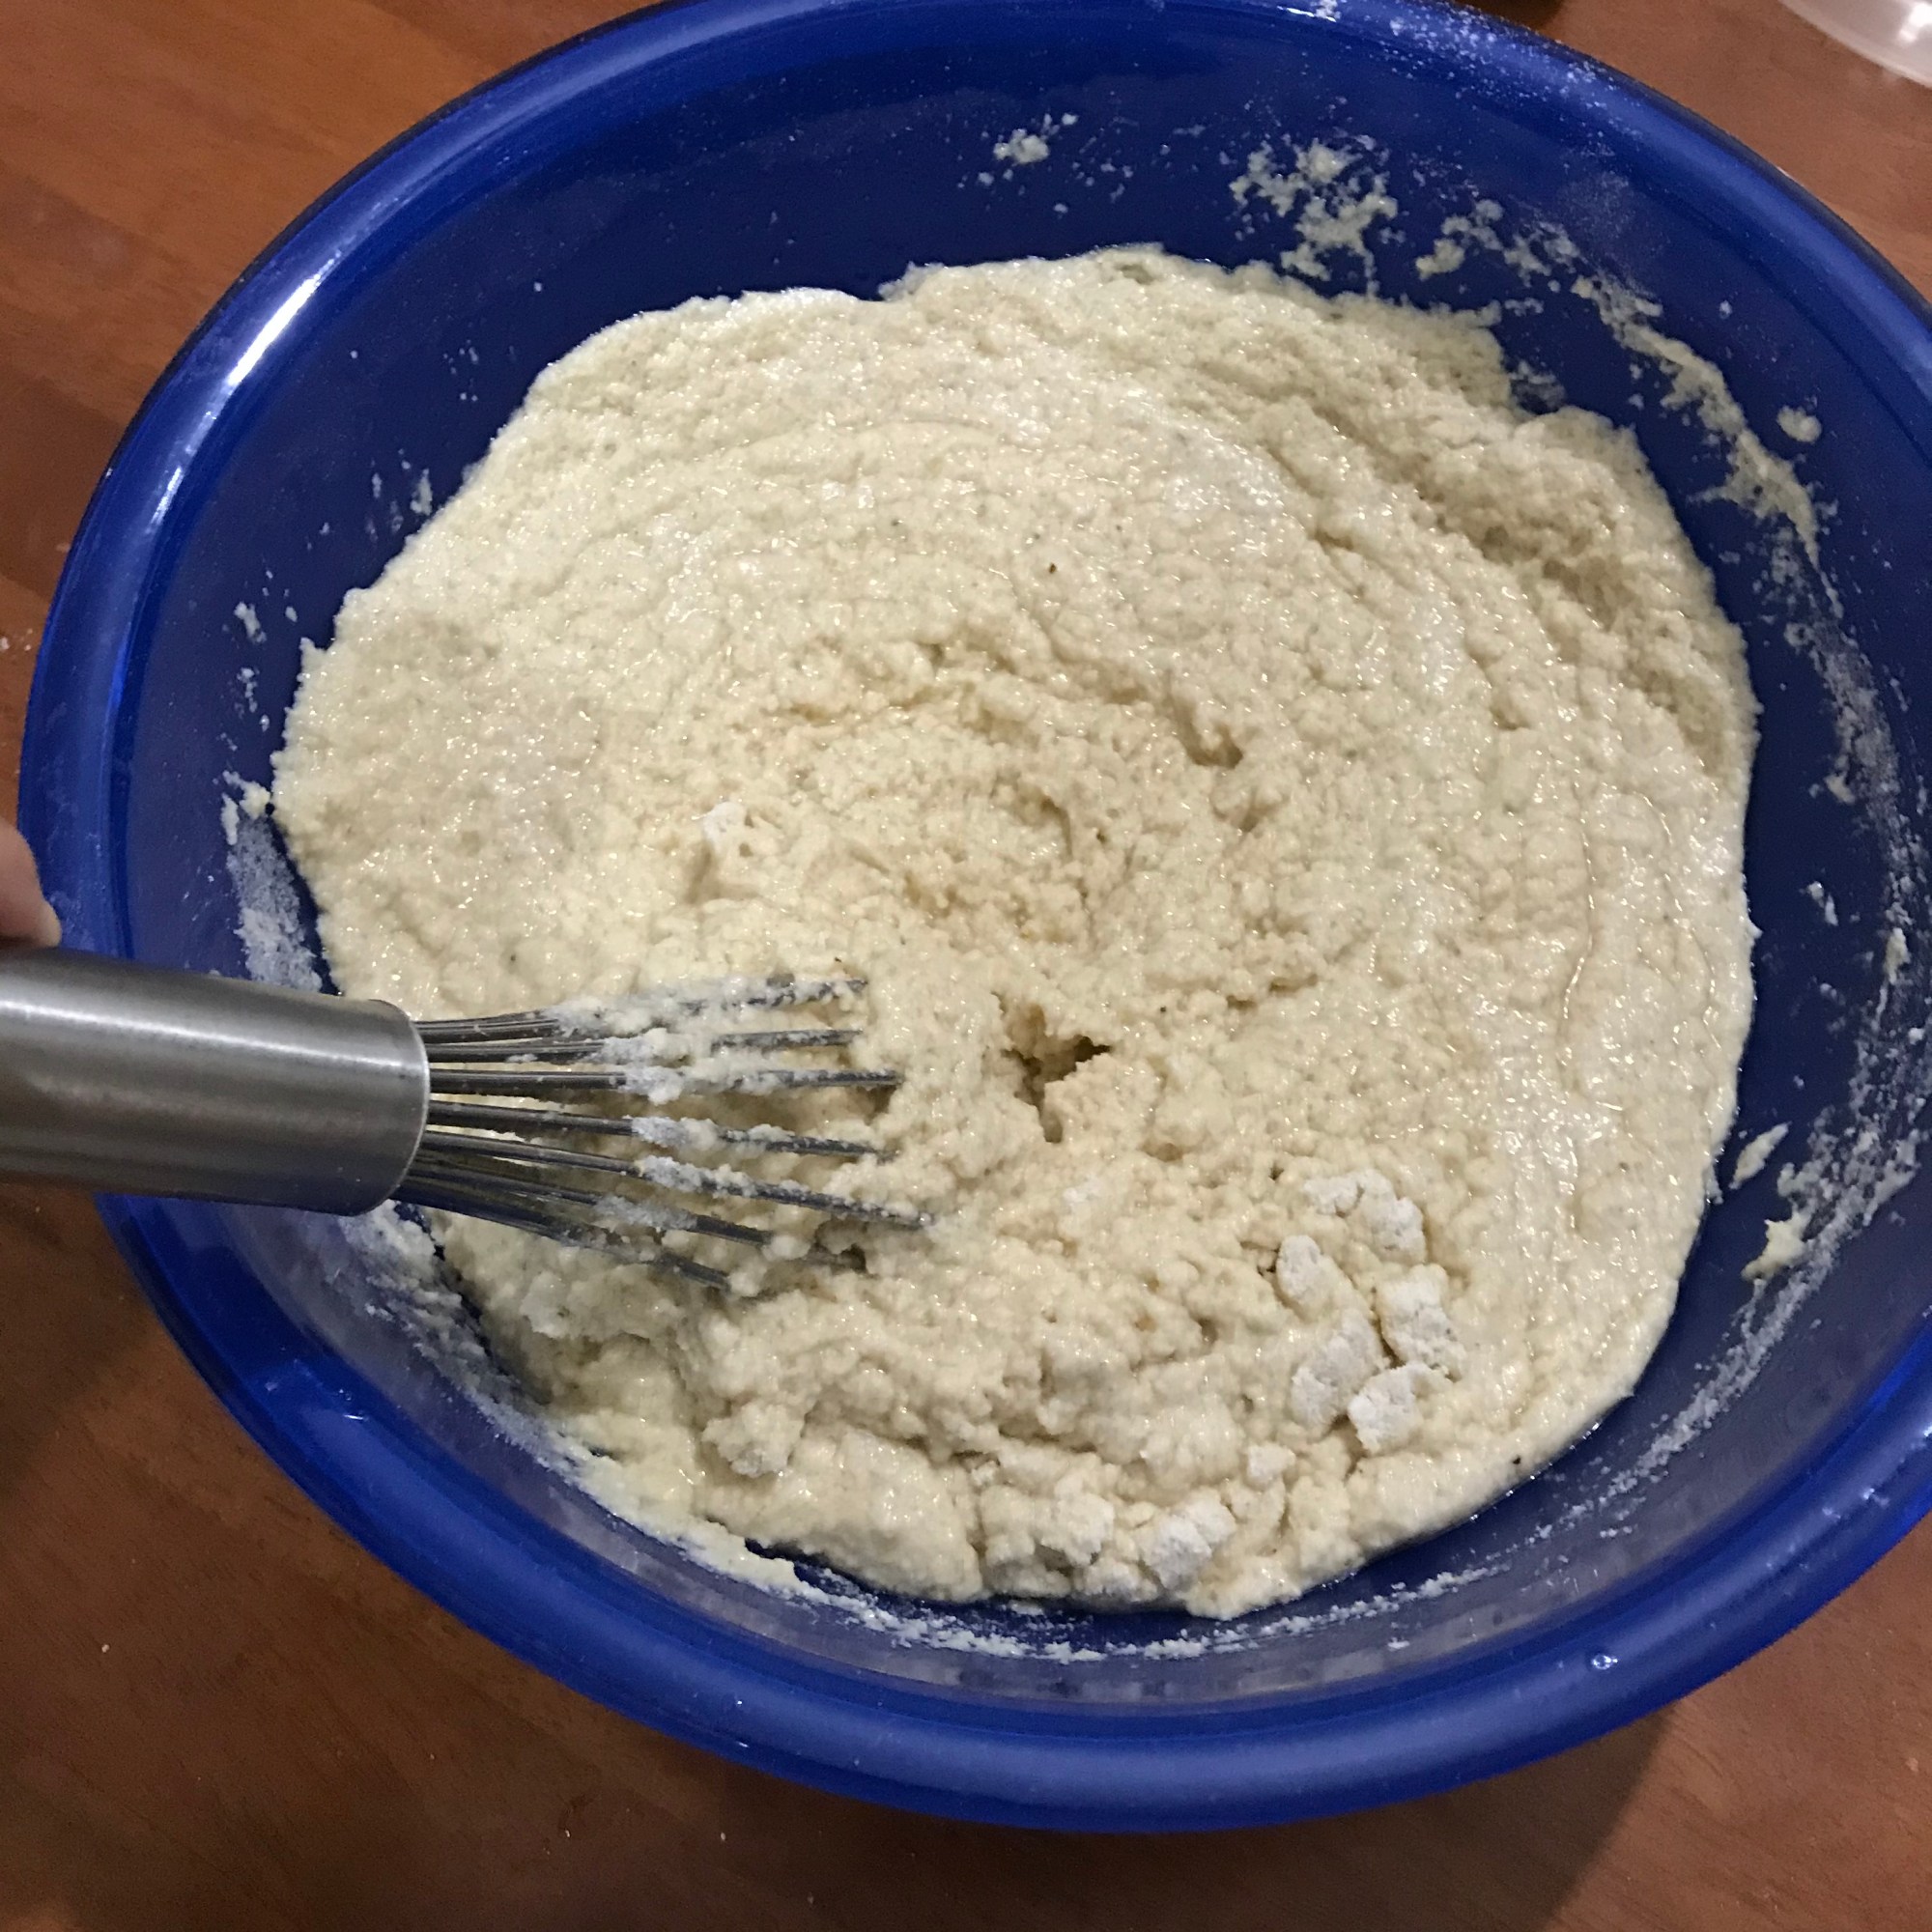
Mix your dry ingredients together (maseca flour, salt and banking powder) in a separate bowl and set to the side.
Add your lukewarm Lard, Manteca or Tallow to a separate large bowl for mixing. Slowly add 1/3 of maseca to the warm oil while gently stirring so the oil doesn’t splash. Continue adding 1/3 of the dry mix until it is mixed well and it is fluffy and light in texture. Cover with damp cloth or saran wrap for 15 minutes. It’s always better to use a larger bowl
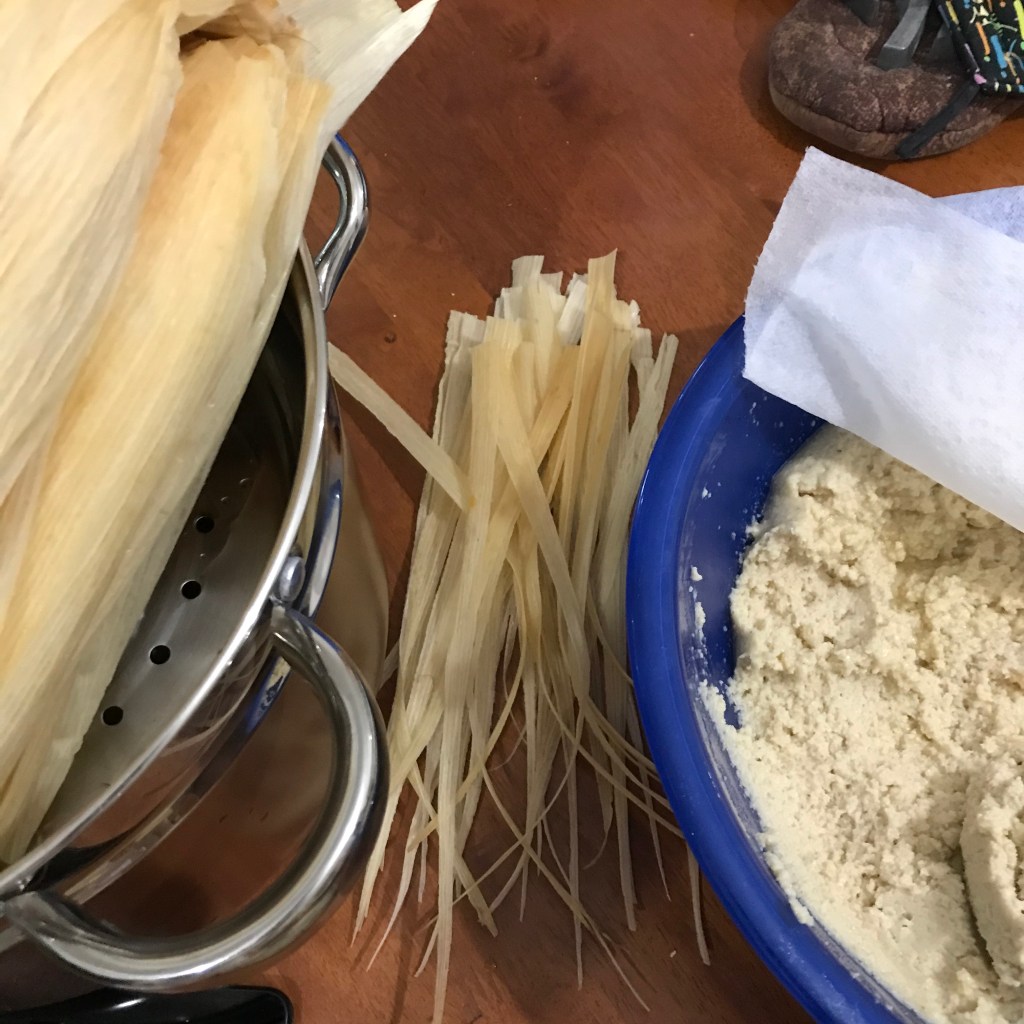
After 15 to 20 minutes your masa should be fully hydrated and ready to spread on your corn husks that have been soaking for an hour or longer in warm water.
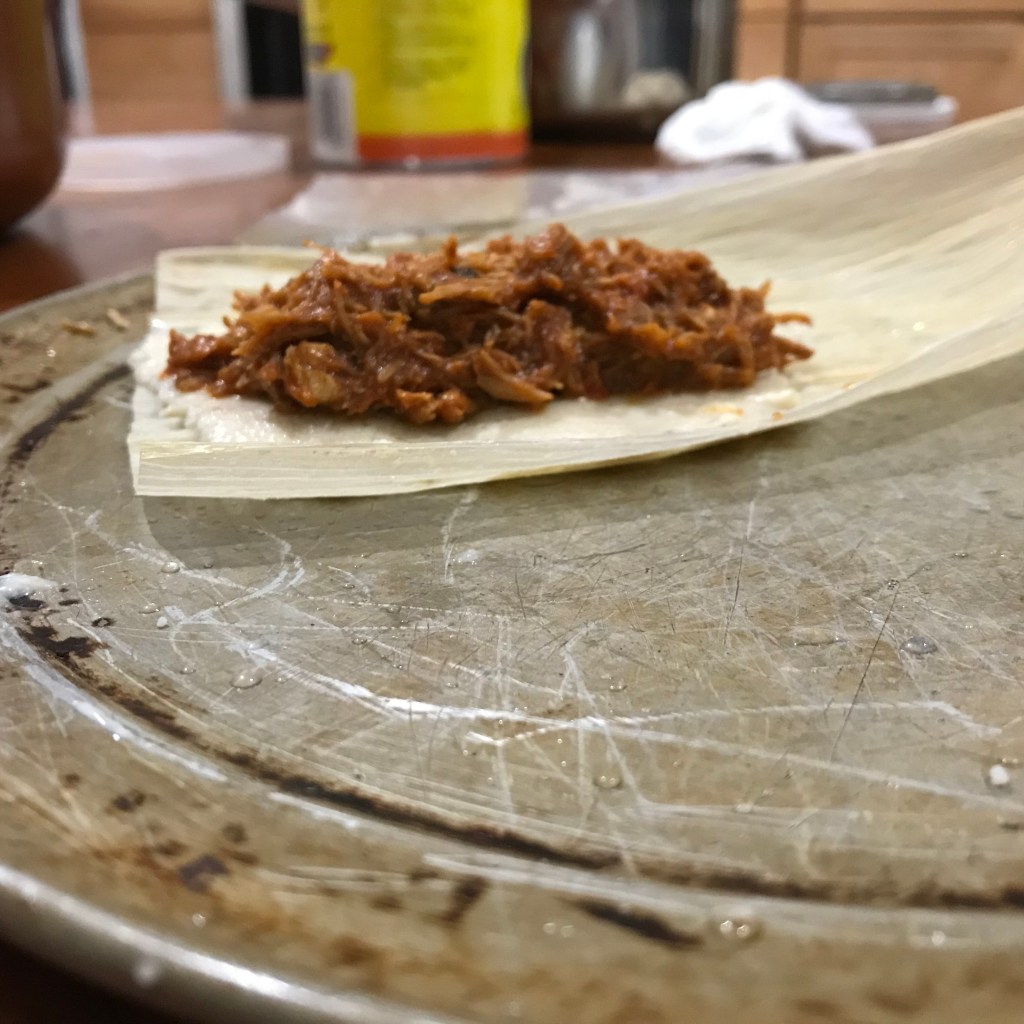
Gather all your ingredients husks, pork, masa and (extra sauce if needed). Make sure to pre-make your ties from smaller husks that wont be used to make the tamales. No waste here.
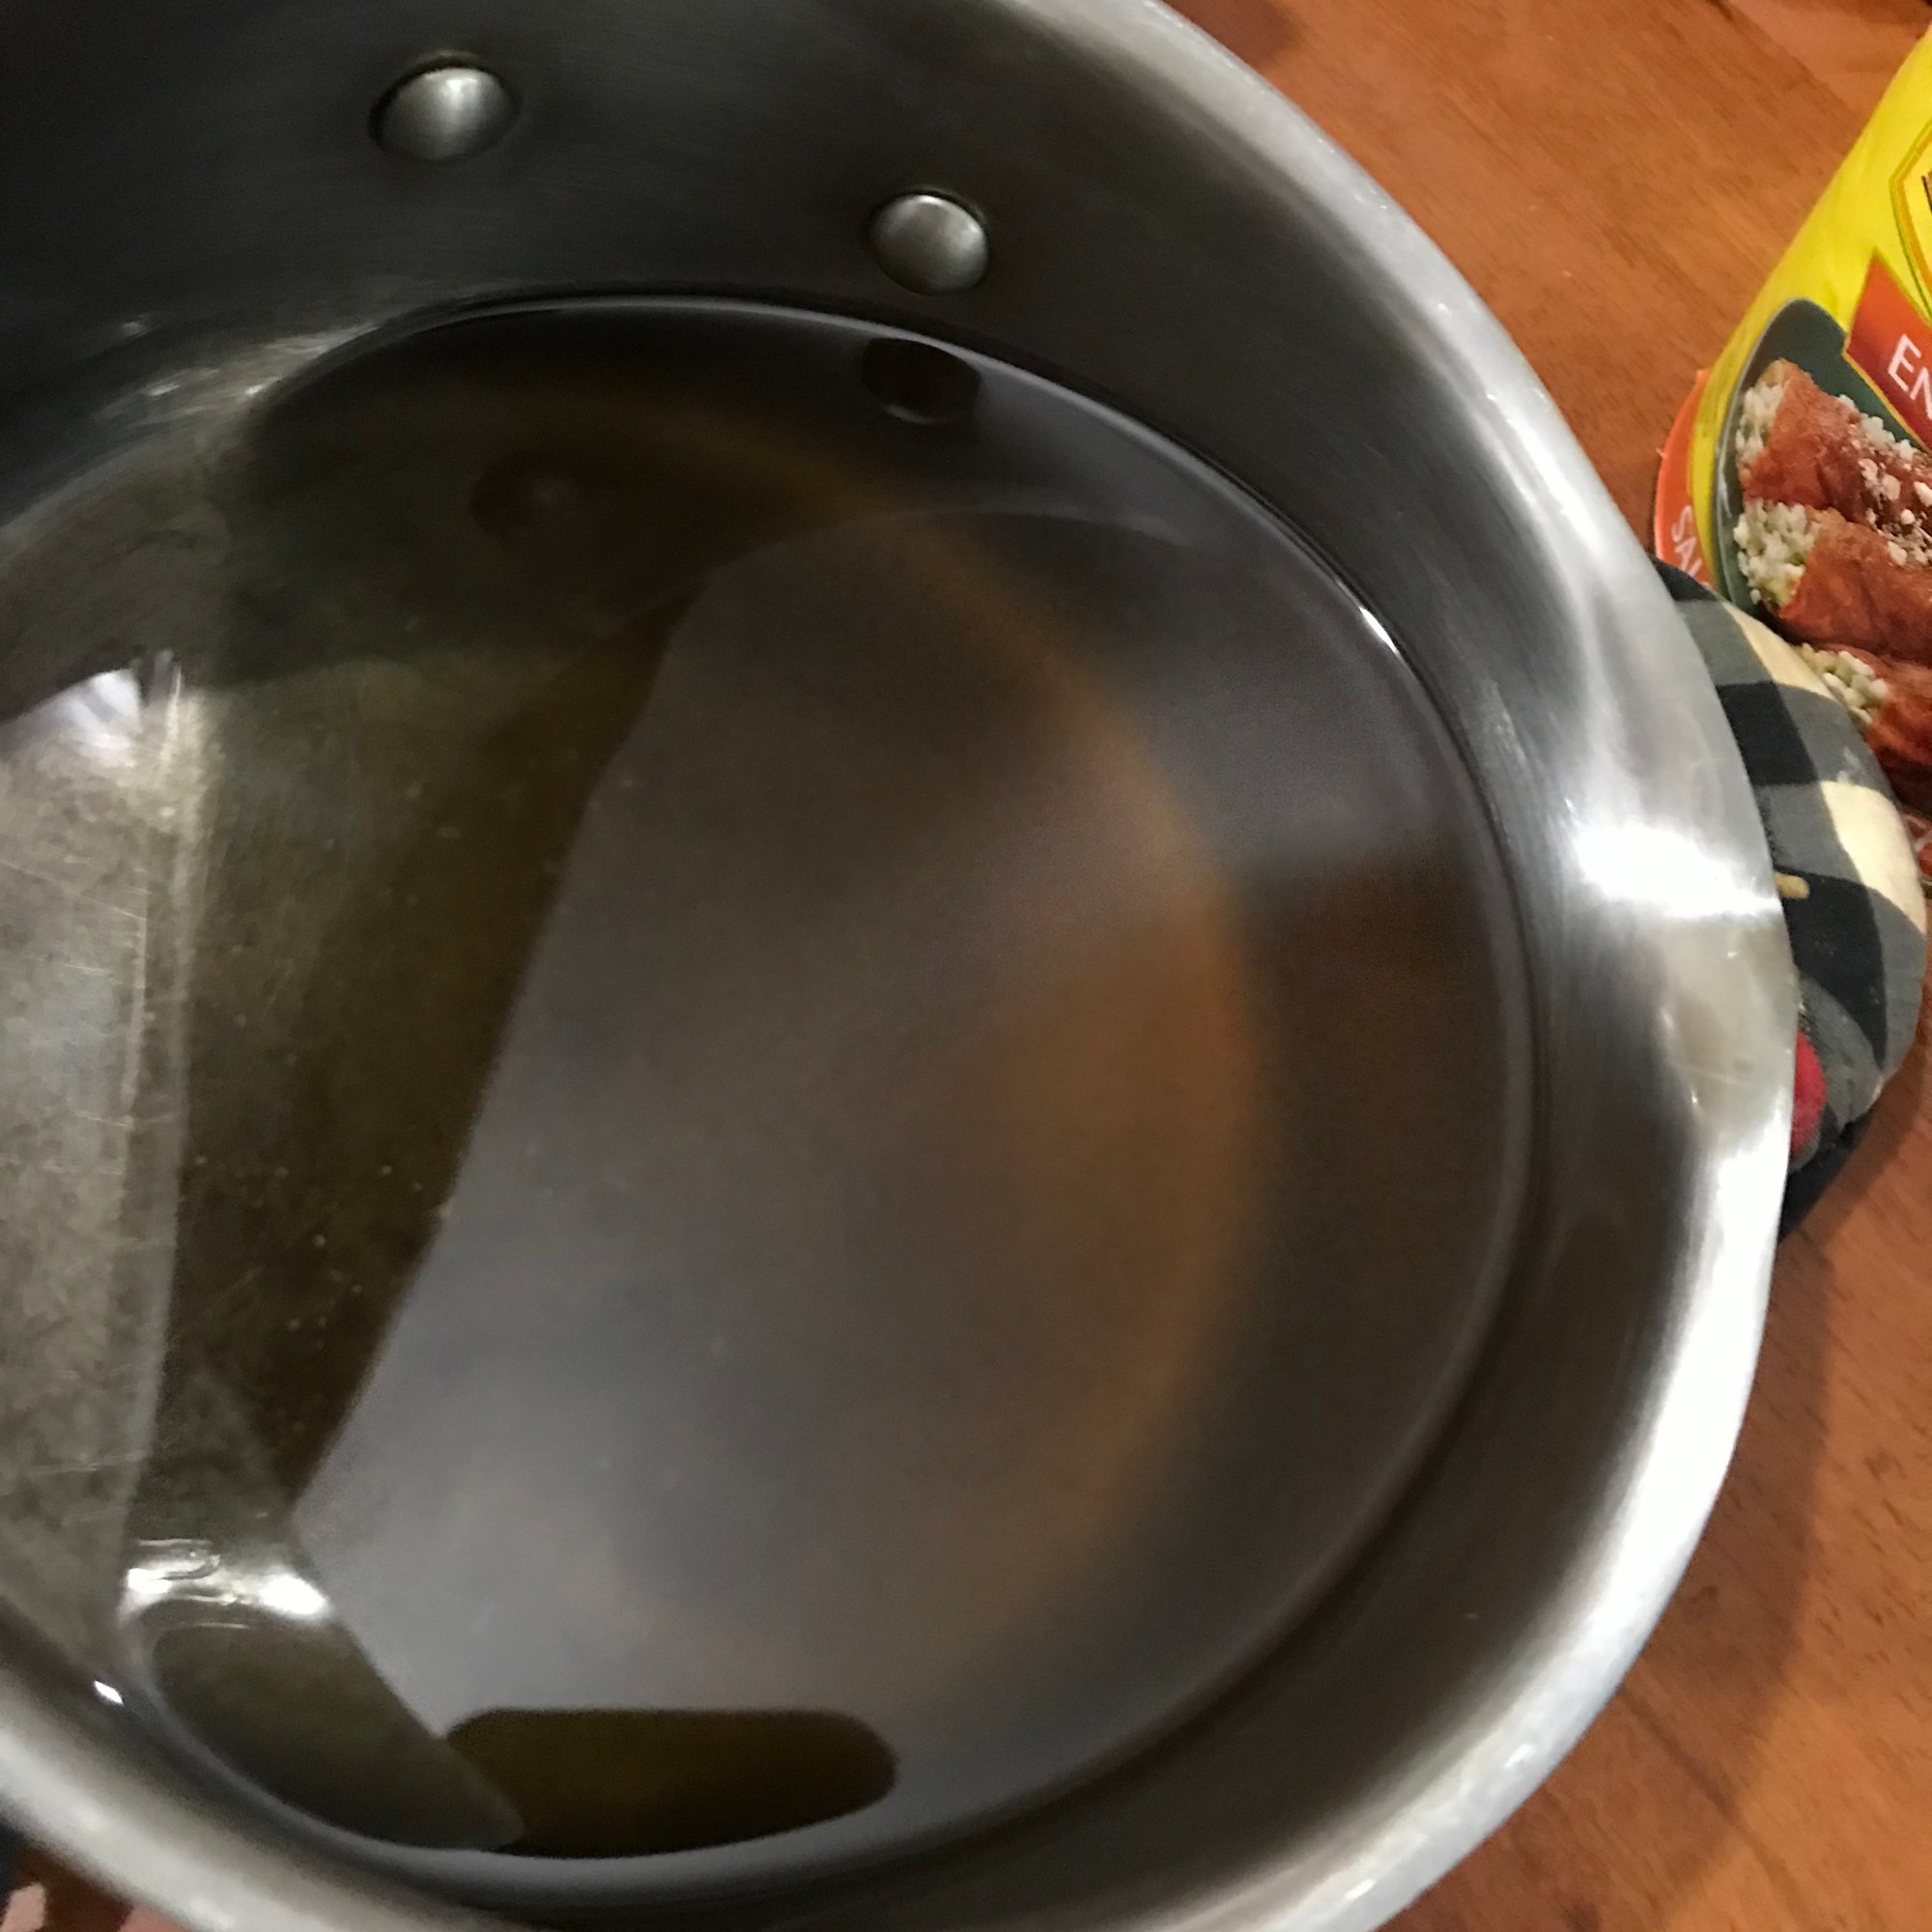
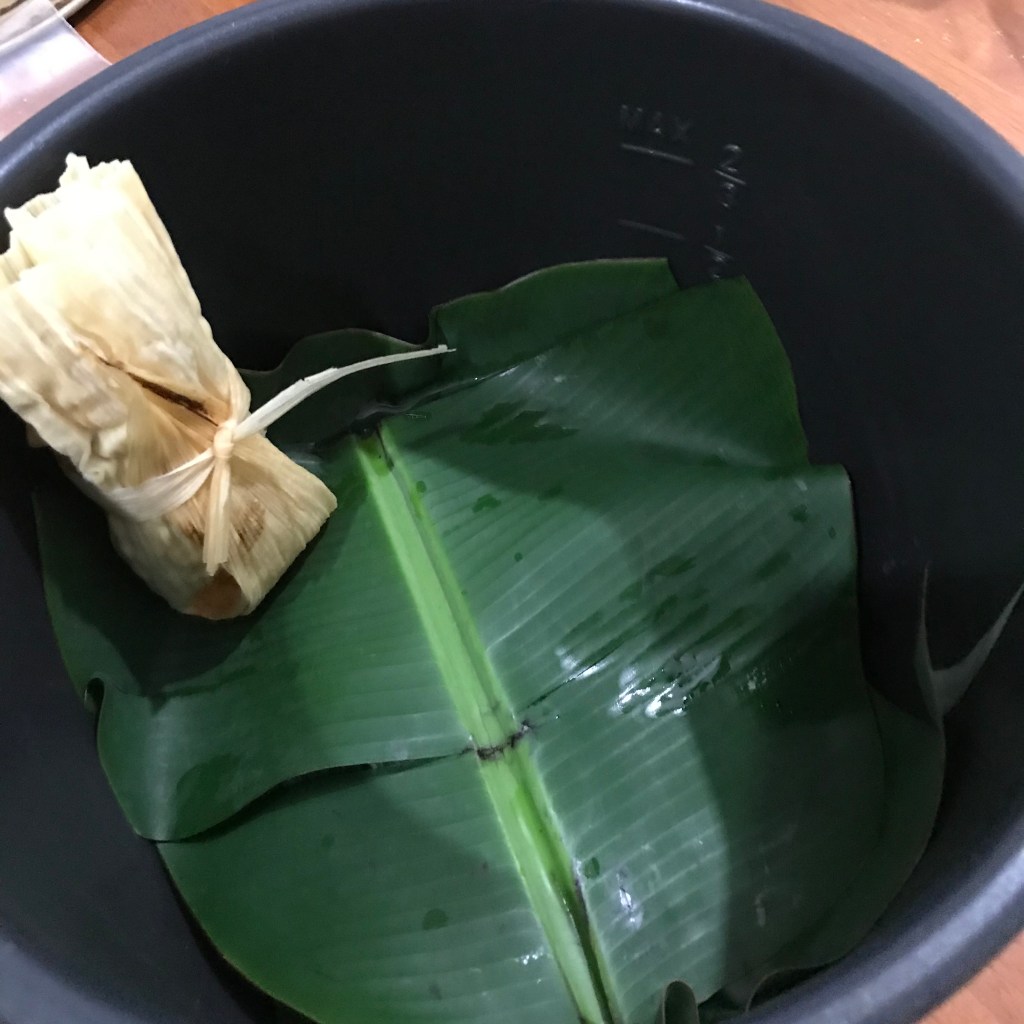
You need to line your pan in this order, #1 water, #2 wire rack and #3 moistened corn husks or banana leaf are last. The water should be right under the rack and not cover the rack or touch the tamales. Less is best and refill when needed. You can put a quarter or spoon in the bottom of the pan so when the water gets low it will sound the alarm so you can add more water. If you need to add water during cooking make sure to pour down the side of the pan so you don’t pour any water on your tamales. Make sure you put the husks or leaf back on top of the tamales. Close the lid and reset your time to finish them.
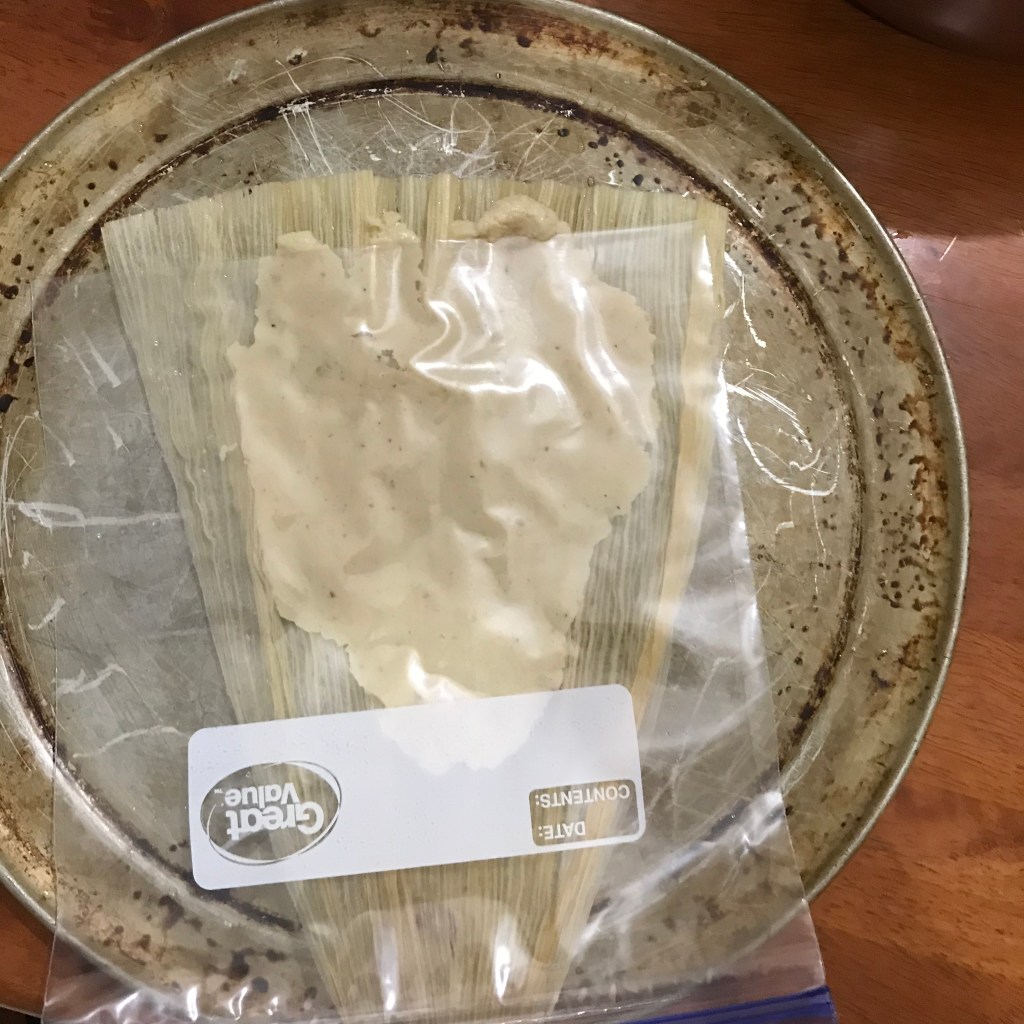
Making the Tamale. Place a corn husk on the plate. Place1 1/2 tablespoon of masa and place baggie or saranwrap over and gently even the dough out. Remove the plastic. Place 1 1/2 tablespoon of meat filling in the center and even it out on the masa. Place one side of the husk over the edge of meat and gently pull the husk away and place the other side of the masa on the edge of other and fold the other husk across and fold the bottom up and tie off. Place it in your pot and your on the way to a delicious meal you have created.
Place the tamales in the pan until full, place moist corn husks or banana leaf over the top. Place in Multi-Cooker or Rice Cooker and set to steam for 45 to 60 minutes or until masa has cooked all the way through. Test by taking one out and see if the masa is firm and easily pulls away from the corn husk. If not put the lid back on and cook for another 15 minutes and check again. Always add only 15 minutes each time you add time. If you are using a pan on the stove you just have to add more water at different intervals and watch it.
Disfruta de tu comida… Man`gia… Enjoy… Bon Appetit
Right on the kitchen counter till they start to hatch….
It usually takes 21 days for a chicken egg to fully incubate. A day is the full 24 hours after you put the egg in the incubator I tend to see external pipping (when the chick starts to break the egg) on day 19, but it can take up to 28 days in some cases.
It’s important to heat up the incubator for 24 hours before you put eggs in to ensure the temperature is correct and stays steady.
Choosing eggs to incubate. Make sure they are fresh and fertile. You have to have a rooster to fertilize the eggs. If you don’t have a rooster you might be able to finds some through your local newspaper or Farm Supply center.
Maintain a temperature between 100°-102° with a still air incubator and 99-99.5 with a forced air incubator. Keep your humidity between 40-50% days 1-18, then increase to 50%-60% on days 18-21. Turn your eggs at least 3 times a day from days 1-18, then don’t turn them at all on days 18-21.
Enjoy and have fun with different projects that enhance your life.
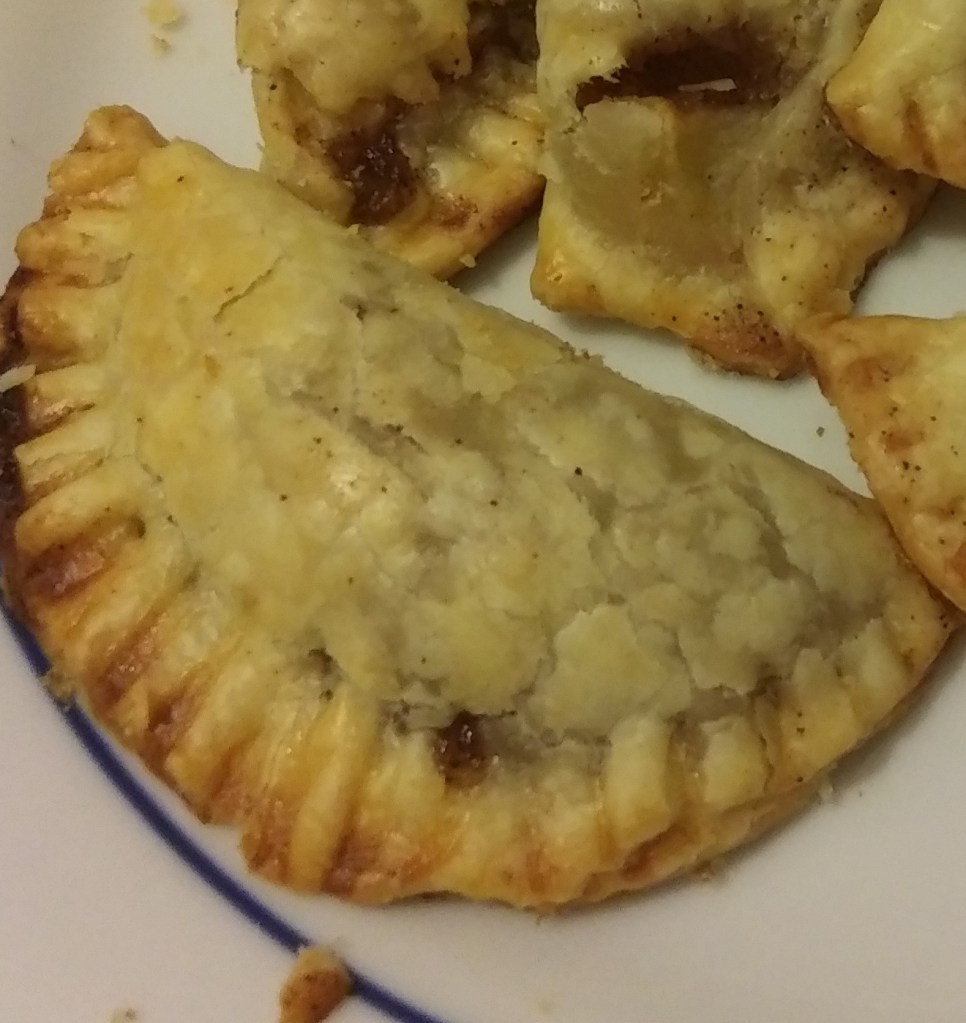
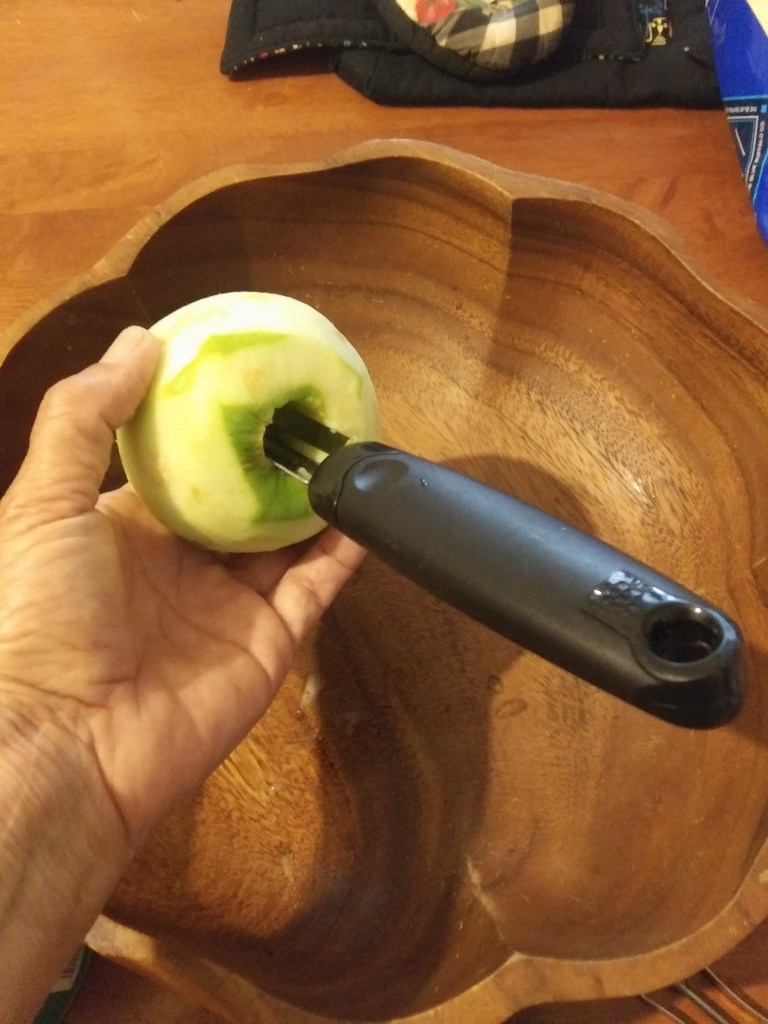
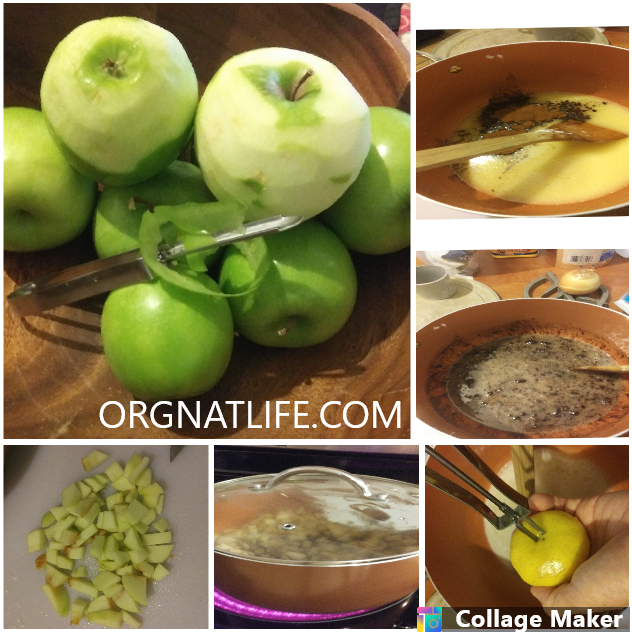
Yummy Sweet Empanadas filled with apples and cinnamon. Great to make for party appetizers or regular snack size for ice cream ala mode.
Apple Filling Instructions
Ingredients
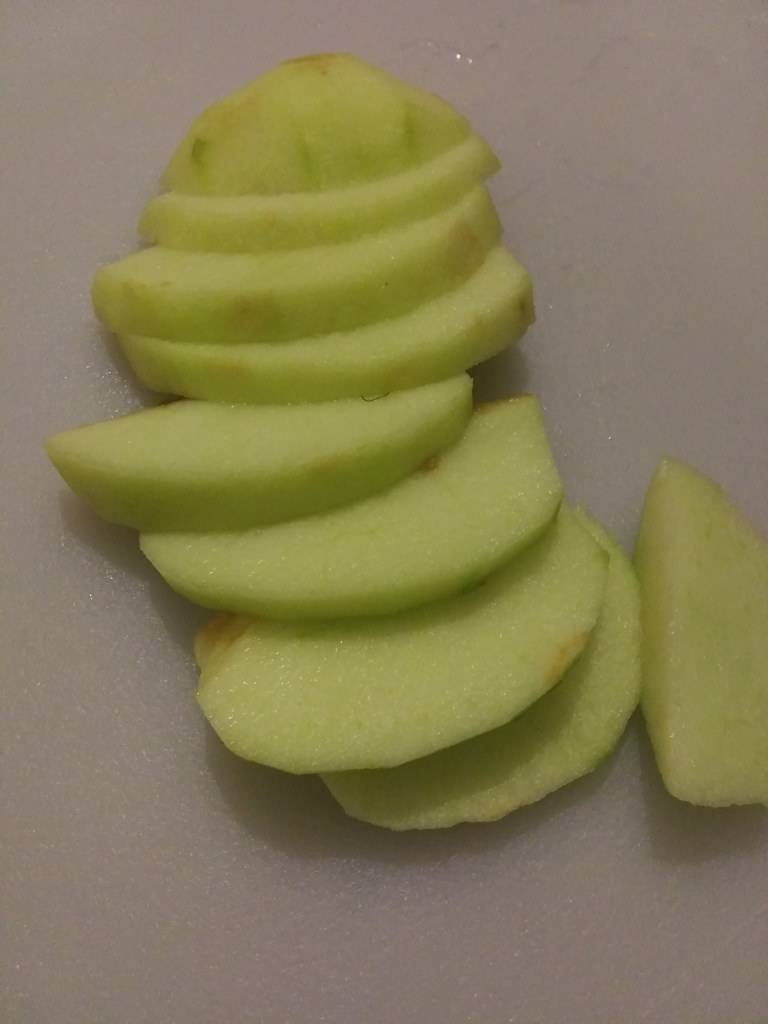
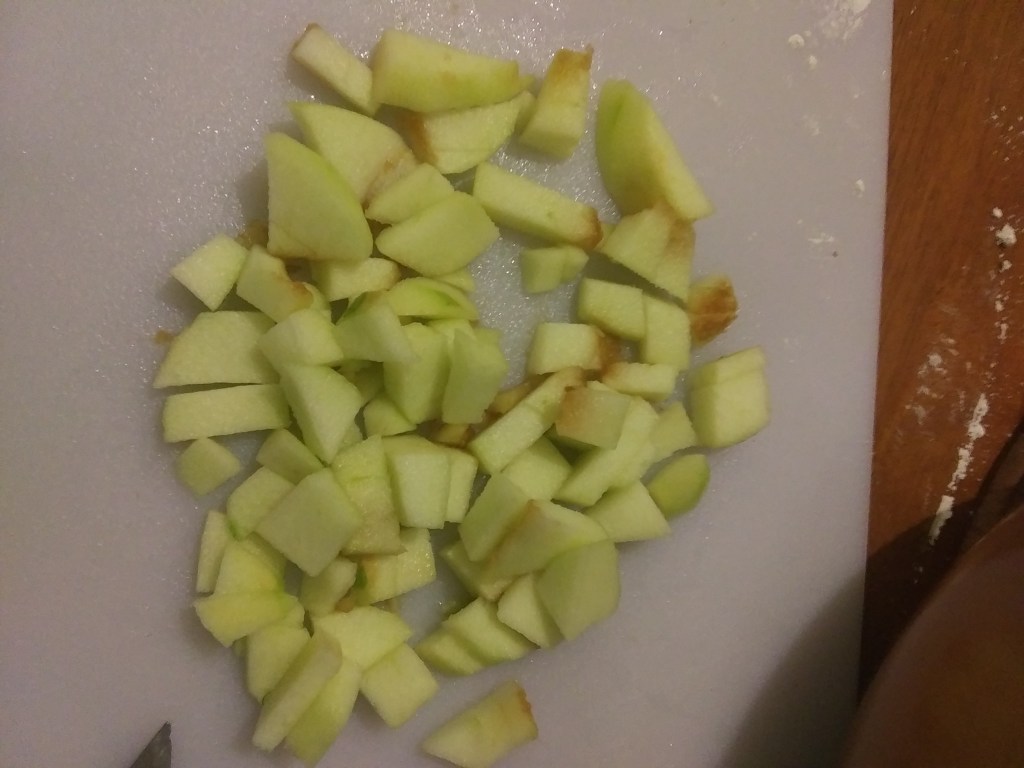
9 medium apples, peeled, cored and sliced
3 tablespoons lemon juice
1/2 cup water
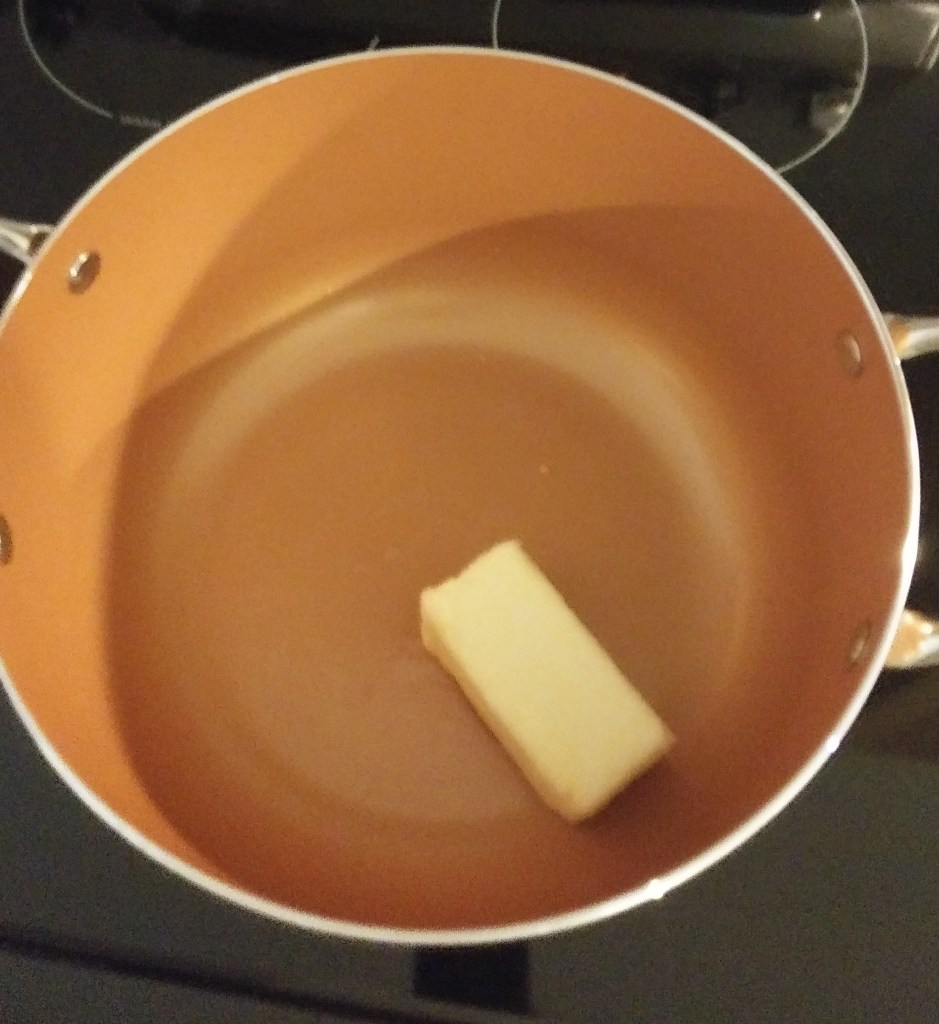
8 tablespoons salted butter (1 Cube/ Stick)
4 tablespoons cornstarch
1 cup granulated sugar
2 1/2 teaspoons ground cinnamon
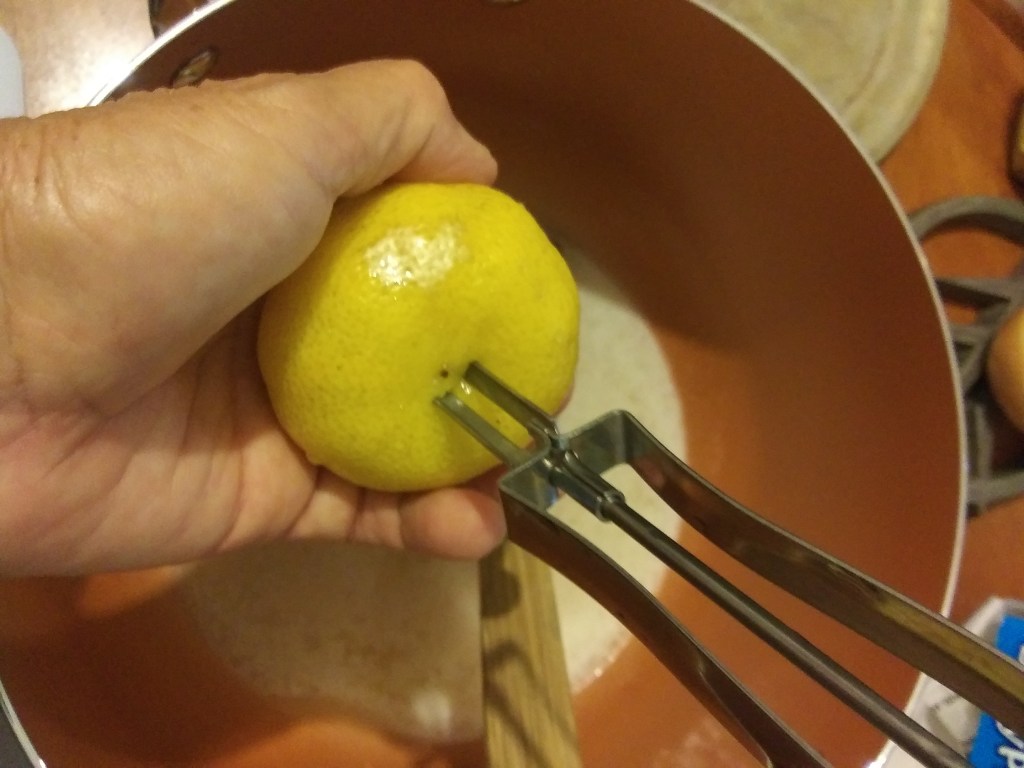
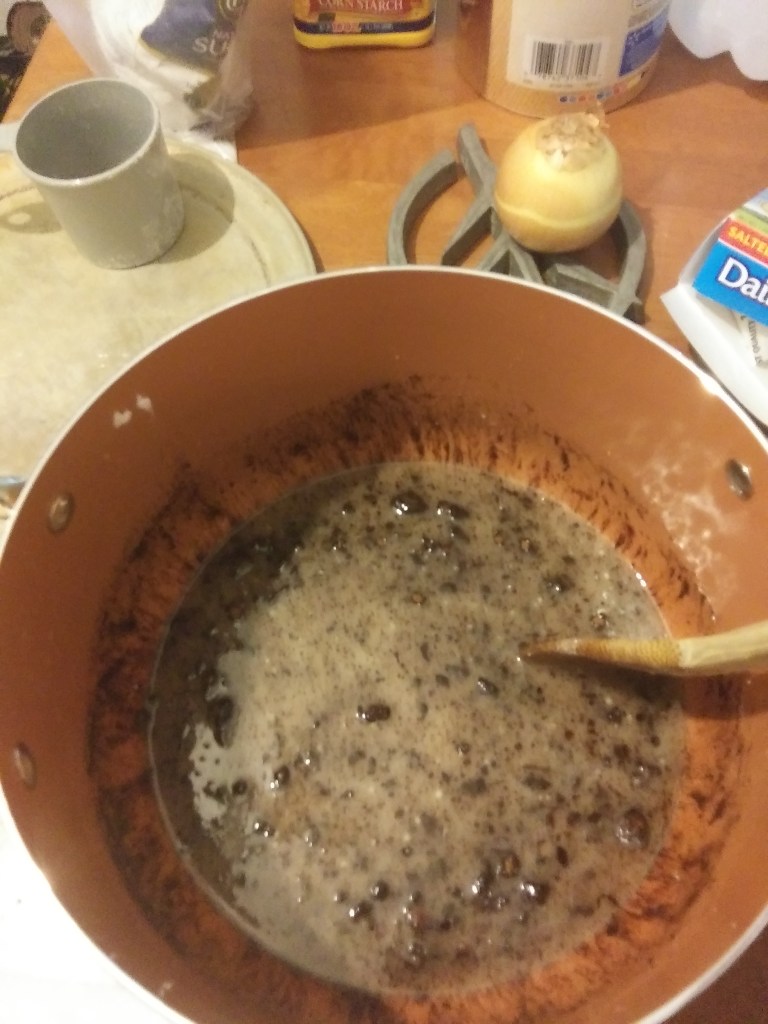
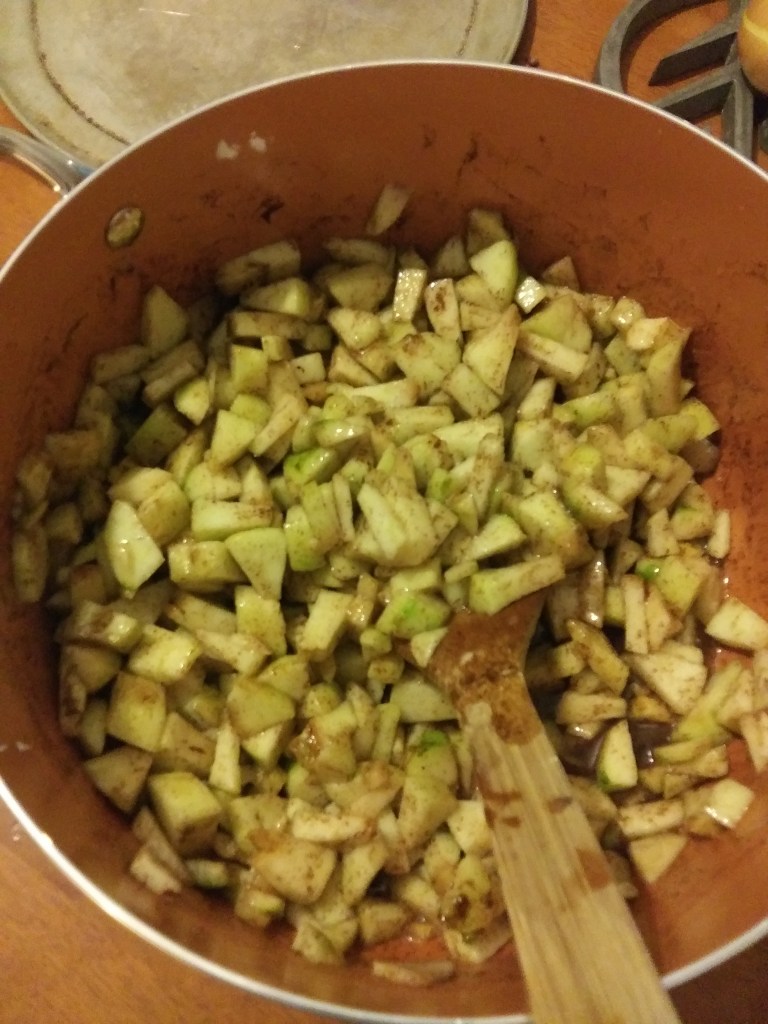
PEEL APPLESAPPLE CORERREMOVE THE APPLE CORESLICE IN HALF MAKE SURE ALL SEEDS AND CORE ARE REMOVED1/4″ SLICES FOR PIES OR SLICE FOR 1/4″ CUBES1/4″ CUBES FOR EMPANADASMELT 1 STICK OF BUTTERFRESH LEMON IS ALWAYS BEST IF YOU CANJUST USE THE PEELER TO MAKE A SLITSQUEEZE 3 TABLESPOONS OF LEMON JUICEADD INGREDIENTS ADD MORE INGREDIENTS AND STIRLET INGREDIENTS STAND FOR ABOUT 5 TO 10 MINUTESINGREDIENTS ARE MIXED.V AT THIS POINT IF YOU ARE MAKING PIES ADD MIXTURE TO PIE SHELLPLACE POT ON THE STOVE, BRING TO BOIL, LOWER HEAT, COOK FOR 5 MINUTES AND REMOVE AND LET COOL
Peel apples and remove core. Cut in Half and slice length wise 1/4″ thick,, after cut into 1/2 inch pieces.
Melt butter in saucepan remove pan from heat
Add lemon juice, sugar, cinnamon, cornstarch and water. Stir together until all is mixed. I let it sit for about 10 minutes so the cornstarch and sugar have a chance to dissolve really good.
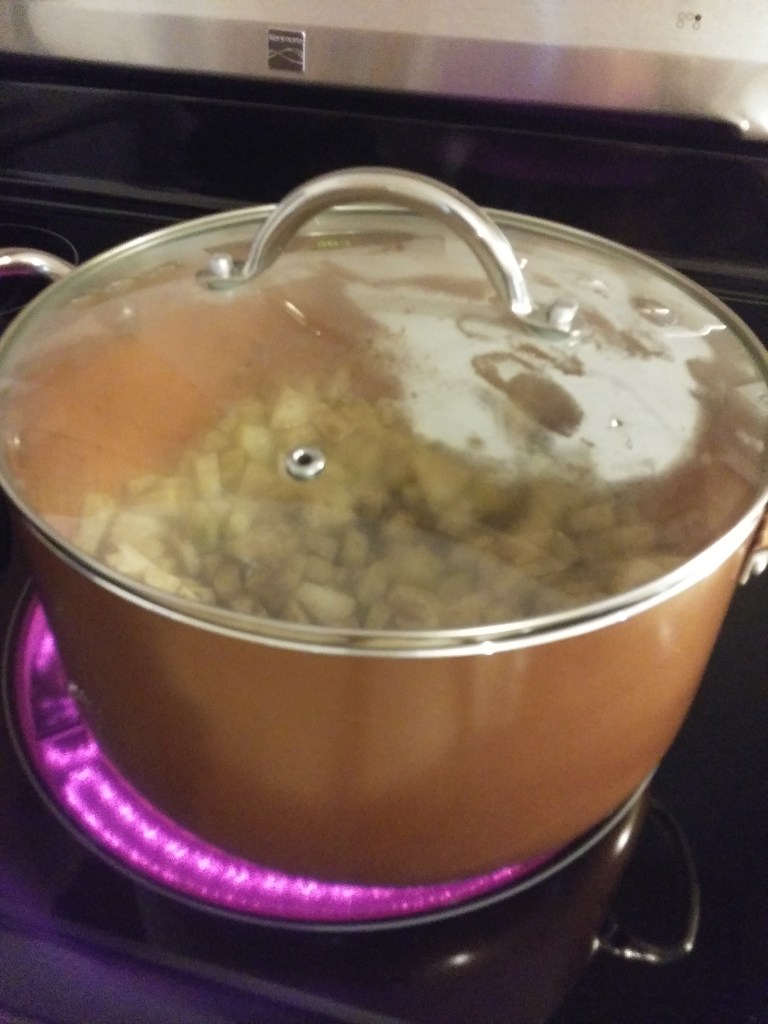
Bring covered pot to a boil and turn to medium heat. Simmer for 5 minutes while stirring frequently or until apples are al dente soft. Still Firm
Remove from heat and let cool. At least 2 hours, better if over night.
You can make this a few days ahead and refrigerator. Great to prepare and freeze or can it.
Pie Crust
You can buy already made pie crust dough in your stores refrigerated section by the cookie dough if you need it quickly.
I prefer the HOMEMADE DOUGH listed below.
Ingredients:
Dough only makes 1 dozen handy snack size and 20 small appetizer size
3 cups (375 g) all-purpose flour
1/2 teaspoon (2 ml) salt
2 teaspoons (10 ml) sugar
3/4 cups (185 ml) cold unsalted butter, cubed
1 egg
6-8 tablespoons (90-120 ml) cold water
Place all you ingredients in the food processor, bread maker or in a bowl and mix till dough is completely mixed.
Roll dough till 1/8″ thickness. Use Large Cookie, Biscuit cutter, coffee cup for appetizer size or medium sized cereal bowl to make large hand size. Lay on cookie sheet separated with plastic wrap and leave in refrigerator for 30 minutes or until firm
(This dough can be made up to 2 days ahead of time, just refrigerate or freeze the circles with wax paper in between.)
Fill Dough
Remove your dough from refrigerator
Fill circles with desired filling
Brush edges with water, fold over in half. Press edges together and crimp with fork. This ensures that the filling will stay inside.
Refrigerate them before baking or frying, especially if you’re making more than a dozen. Refrigerate for at least 20 minutes.
Baking Instructions
Preheat oven to 400 F
Remove from refrigerator
Arrange on a baking sheet lined with parchment paper or a really good non stick pan. Brush tops with egg wash, olive oil or butter if desired.
Bake small appetizer empanadas for 15-18 minutes or until golden brown; larger empanadas for 18-25 minutes or until golden.
Yummy Sweet apples and cinnamon. Great for making pies, party appetizers or handy snack size for Apple pie ice cream ala mode.
Apple Filling Instructions
Ingredients
9 medium apples, peeled, cored and sliced
3 tablespoons lemon juice
1/2 cup water
8 tablespoons salted butter (1 Cube/ Stick)
4 tablespoons cornstarch
1 cup granulated sugar
2 1/2 teaspoons ground cinnamon
PEEL APPLESAPPLE CORERREMOVE THE APPLE CORESLICE IN HALF MAKE SURE ALL SEEDS AND CORE ARE REMOVED1/4″ SLICES1/4″ CUBESMELT 1 STICK OF BUTTERFRESH LEMON IS ALWAYS BEST IF YOU CANJUST USE THE PEELER TO MAKE A SLITSQUEEZE 3 TABLESPOONS OF LEMON JUICEADD INGREDIENTS ADD MORE INGREDIENTS AND STIRLET INGREDIENTS STAND FOR ABOUT 5 TO 10 MINUTESONCE INGREDIENTS ARE MIXED you can place them in pie shell or go to the next step cooking for 10 minutes for empanadas or small tarts.PLACE POT ON THE STOVE FOR 10 MINUTES AND REMOVE AND LET COOL
Peel apples and remove core. Cut in Half and slice length wise 1/4″ thick,, after cut into 1/2 inch pieces.
Melt butter in saucepan remove pan from heat
Add lemon juice, sugar, cinnamon, cornstarch and water. Stir together until all is mixed. I let it sit for about 10 minutes so the cornstarch and sugar have a chance to dissolve really good.
At this pointif you are baking a pie just add the apple mixture into the pie shell and cover with top crust, pinch, make your slits and bake.Continue for empanada or small tarts that only bake for 10 to 20 minutes only.
Bring covered pot to a boil and turn to medium heat. Simmer for 10 minutes while stirring frequently or until apples are al dente soft. Still Firm
Remove from heat and let cool. At least 2 hours, better if over night.
You can make this a few days ahead and refrigerator. Great to prepare and can it.You can also freeze the cooked mixture.


 You can eat more and still lose weight. It’s that easy!
 Learn Effective Detoxification Methods.
 Chef Sherrie Angel “Slam Dunks” Thanksgiving !!!
 Here are 50 slamming recipes from around the world.
 If you find your having to much fun in the kitchen during the holidays, you need to plan ahead for a break away from the food and get some exercise.