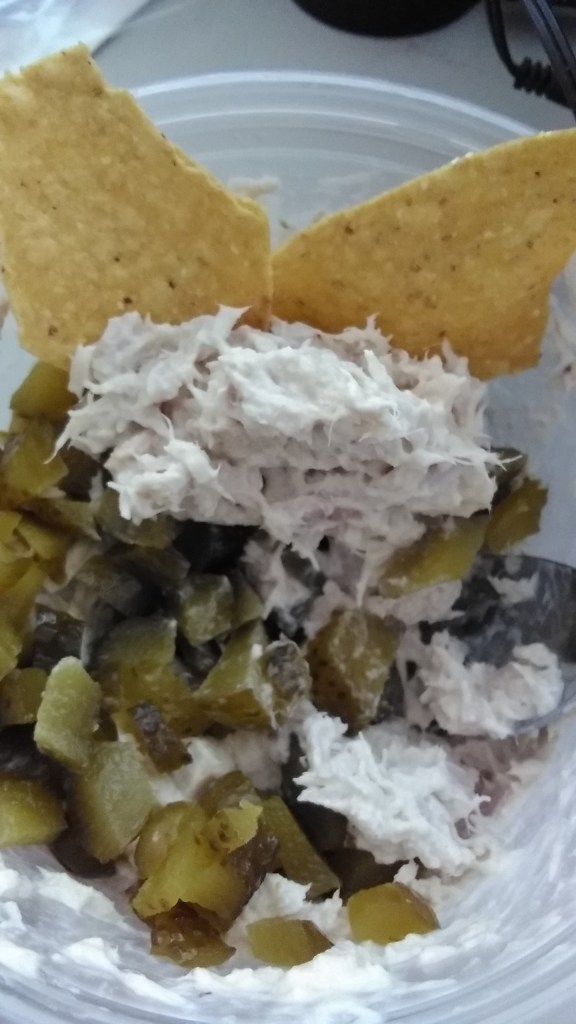
Super fast and easy recipe for this Cheesy Chicken Enchilada Pie with fresh red chili and cinnamon sauce.
Layer the tortilla on top of sauce. Place chicken and cheese and tortilla. Sauce chicken cheese tortilla sauce. Last layer is cheese on top of tortilla with sauce.
Ingredients
Chicken 🐓 cut into 1/4” small pieces
Tillamok mixed Mexican 🧀 cheeses
Corn Tortillas
Avocado
Blend all these ingredients together
20 Red chilis 🌶️
1 tablespoon Cinnamon
1 teaspoon Salt 🧂
1 teaspoon Sugar
1 teaspoon ground Cumin 🌱
1 onion Onion 🧅
1 Garlic 🧄
1 Tomato 🍅
1 tablespoon Olive oil 🫒
1 teaspoon Lime 🍋🟩 juice
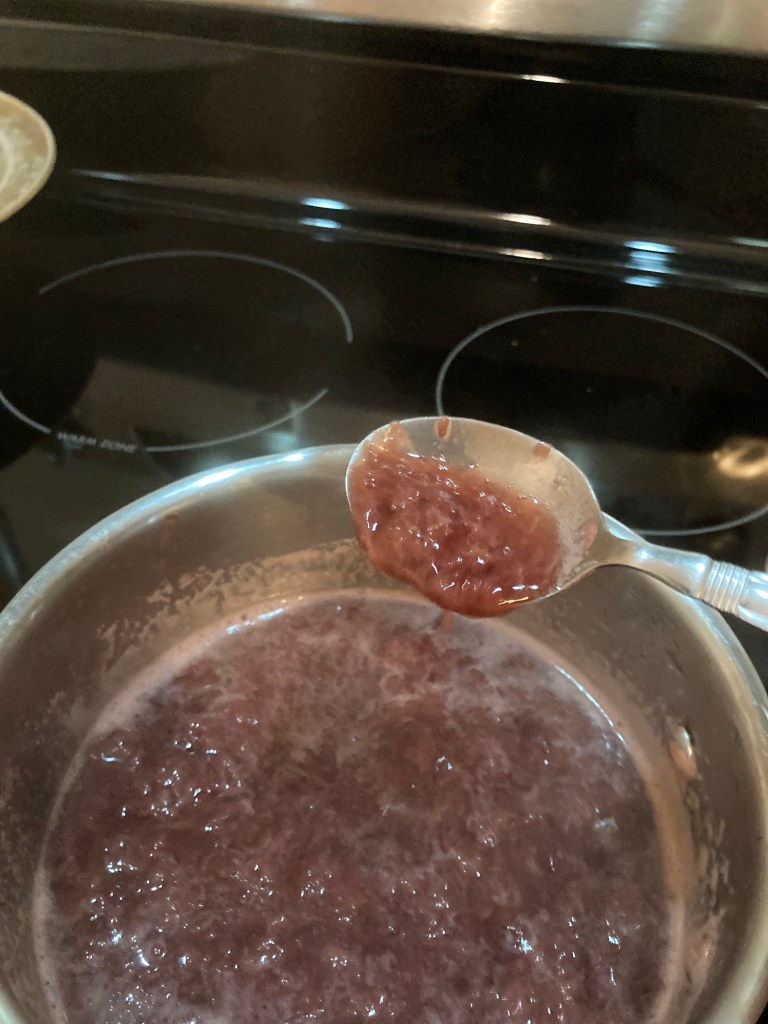
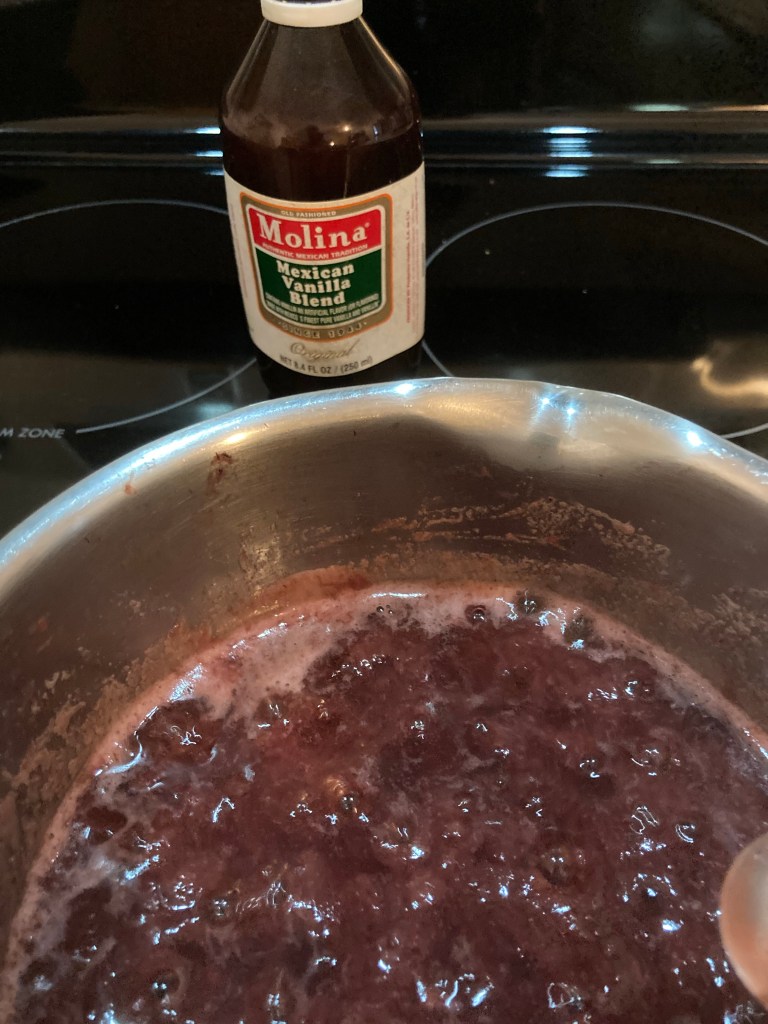
Place all this in blender. Place in sauce pan. Bring to full boil on medium heat. Boiled down to a thicker sauce about 20 minutes. Remove from heat and let cool down 1 hour.
Cheesy Chicken Enchilada Pie with fresh red chili and cinnamon sauce.
Micro shards of plastic are being found in the human brain. So this starts a question of how these microplastics are getting … Continue reading Plastic Brain???→
Micro shards of plastic are being found in the human brain. So this starts a question of how these microplastics are getting into the brains of … Continue reading Plastic Brain???→
Micro shards of plastic are being found in the human brain. So this starts a question of how these microplastics are getting into the brains of humans? … Continue reading Plastic Brain???→
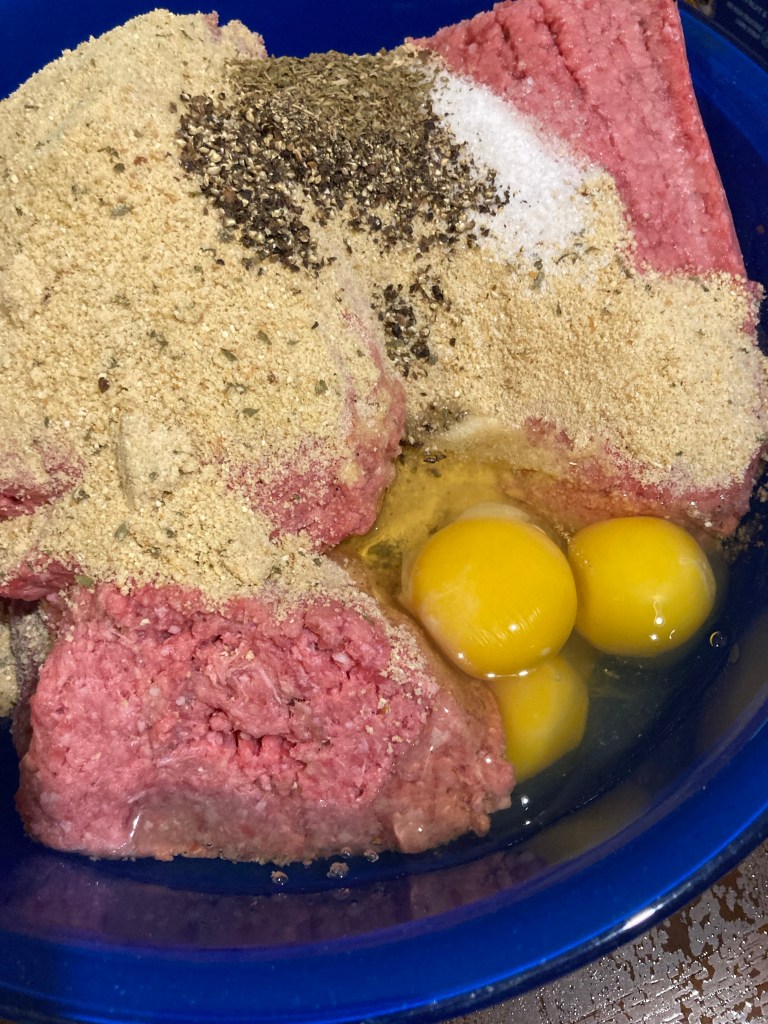
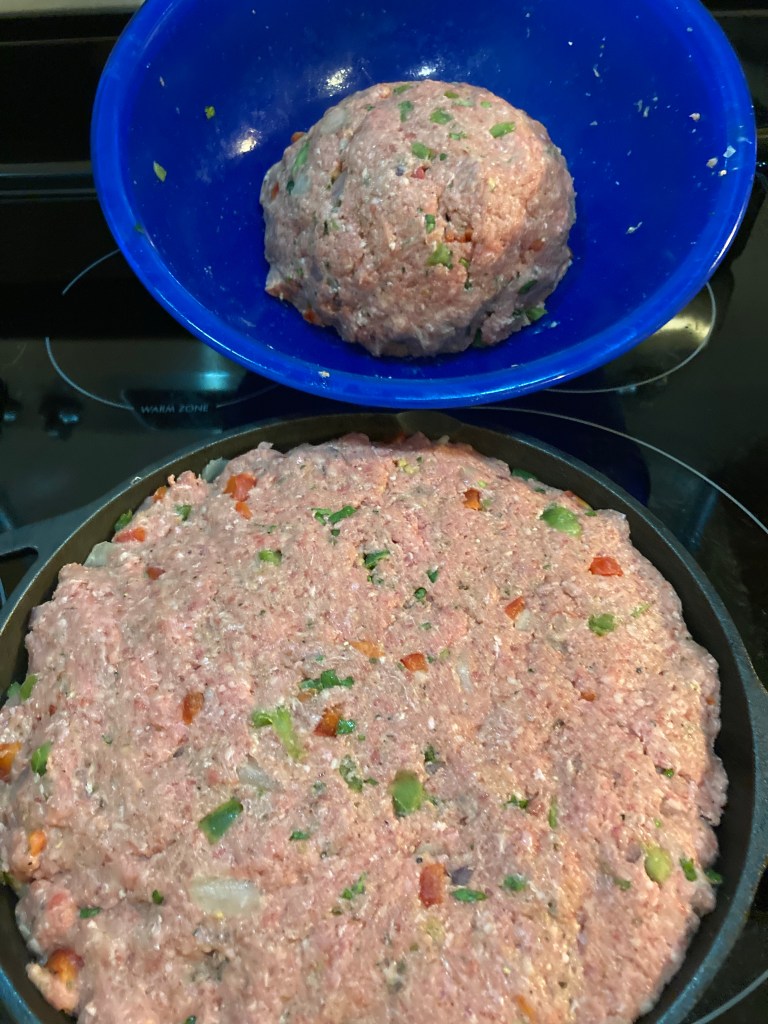
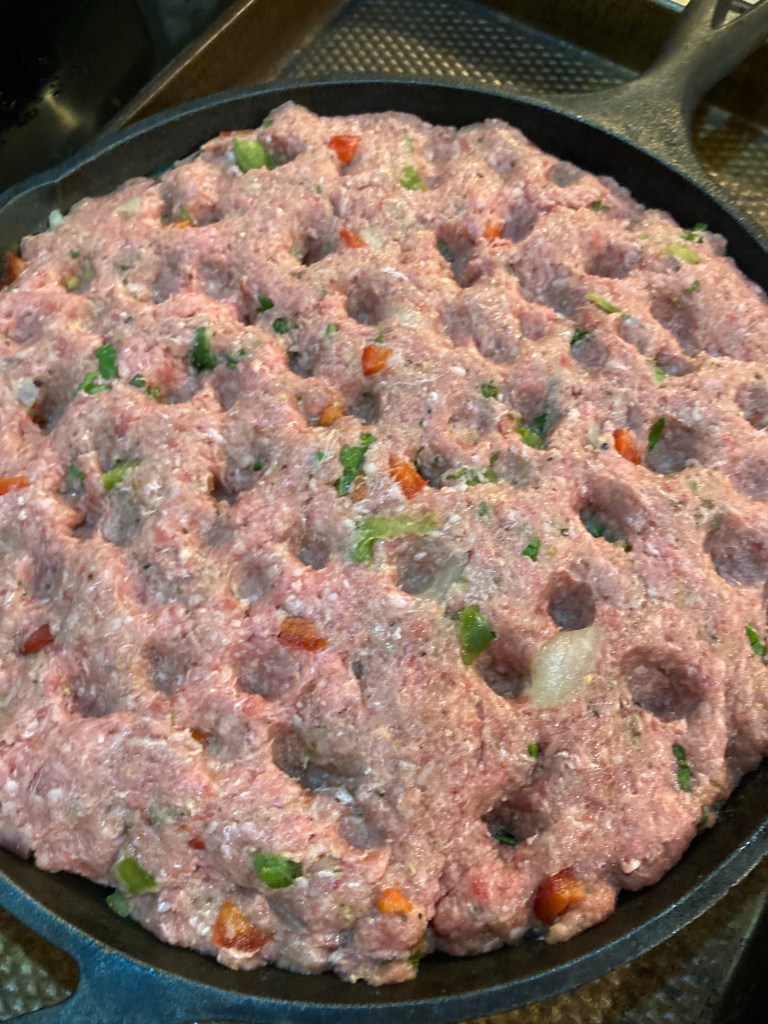
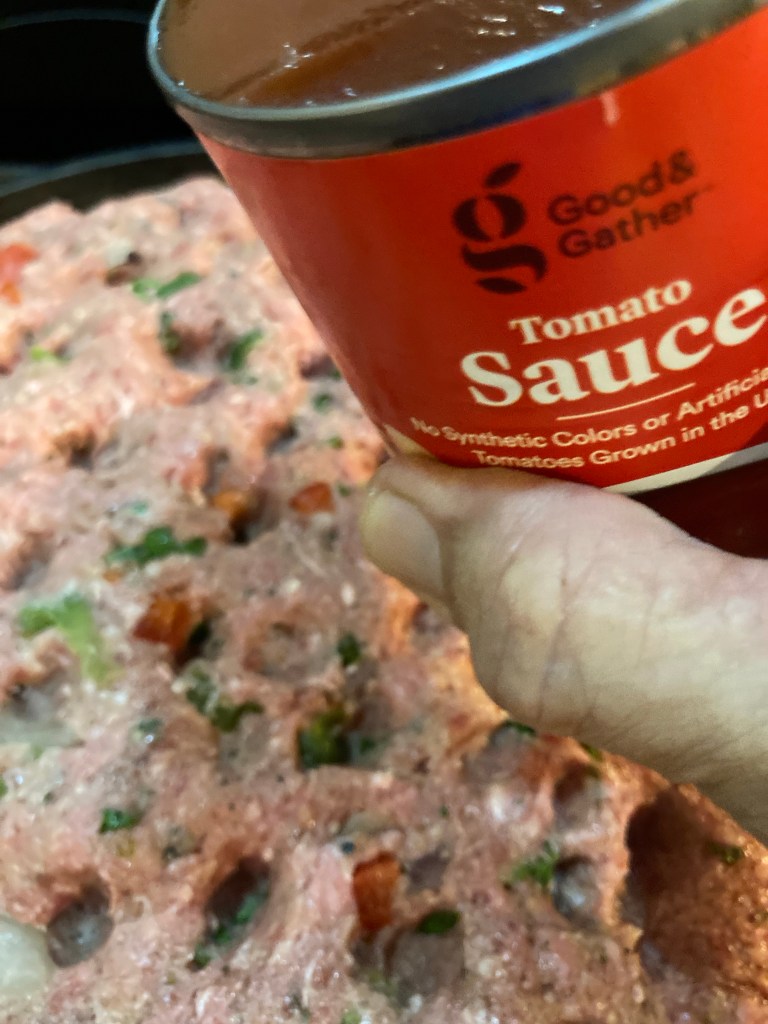
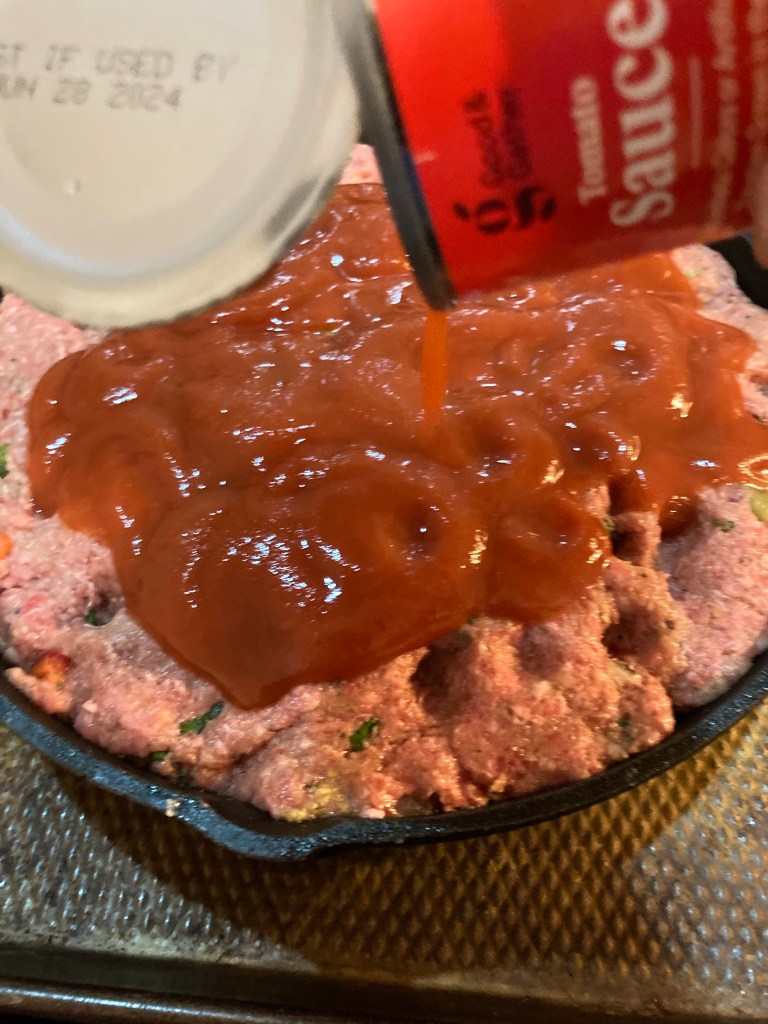
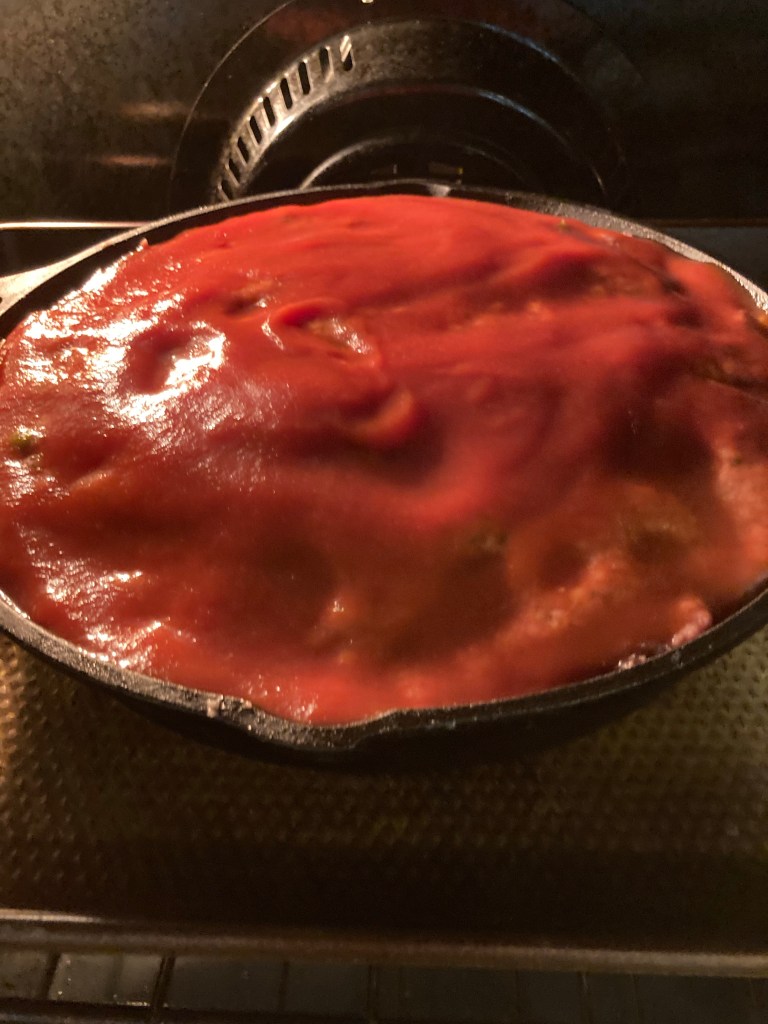
#homemade #meatloafPlace your hamburger into a large bowlI am using pre-seasoned Italian Bread CrumbsAdd salt, pepper, eggsAdd your veggiesRed and green pepper, green, red and yellow onions, Place ingredients into the pan or iron skillet Smooth out the meatloaf so it is evenPoke holes in the meatloaf with your fingersAll ready for the tomato sauce Use 6 ounces of tomato sauce Slowly pour the tomato sauceCover the meatloaf completely with tomato sauce Place into oven. Bake for 45 to 60 minutes
Enjoy your very own fermented garlic. Very easy to achieve a wonderfully bold and full of flavor after just a few days.
#HomemadeFermentedGarlic #orgnatlifecom
Super easy recipe.
INGREDIENTS
1 cup Water filtered purified
3/4 teaspoon Sea Salt
This makes 1 cup of brine
Instructions
• Peel the garlic cloves, cut the stem end off. (hard end)
HomemadeFermentedGarlic #orgnatlifecom
• Place them in a clean jar. Fill the jar 3/4 full.
• Make your brine in a glass bowl or large jar. Exactly how much brine you’ll need will depend on the size of jar. You will need ¾ teaspoon of salt for each cup of filtered purified water.
HomemadeFermentedGarlic #orgnatlifecom
• Tighten the lid down. I use regular masón jars. And burp them every other day
HomemadeFermentedGarlic #orgnatlifecom
• Allow the jar to ferment for 5 days to 4 weeks.
• You will need to open the jar to allow the garlic to “burp” every couple of days to release the gases that build. You can check the water level at the same time to make sure that the water which forms the seal hasn’t evaporated.
• The color will change to a tan color. This is normal.
HomemadeFermentedGarlic #orgnatlifecom
• Make sure to taste it during the fermentation process. When it reaches a flavor that you like put it in the refrigerator. Use for all your special recipes and snacks.
3 pieces Bacon crispy and chopped into small pieces.
Parmesano Cheese finely shredded
8 tablespoons Butter
1 teaspoon Salt
1 teaspoon Pepper
2 teaspoons Italian Seasoning
1/2 cup assorted Veggies (per person)
Pasta (your choice, I prefer a long thin noodle)
Steam your vegetables to al dente’. Remove and cool. Best if you have an ice bath to put the colander of hot vegetables in for 3 to 5 minutes. Remove and let drain completely.
#Creamy Garlic Chunky Vegetable Pasta with Shrimp
Peel your garlic. Smash and mince. I smash my garlic with my knife first and the skin comes off easily.
#garlic#mincedgarlic
Cook your bacon till crispy. I cook my bacon in the microwave between paper towels. Chop into small pieces. Add 2/3 to sauce and 1/3 for finished garnish.
#choppedbacon
Start your pasta water add 1 teaspoon salt to water and bring to boil add pasta, cook to al dente, drain and place to the side.
#orgnatlifecom
Add 5 tablespoon butter to pan and turn heat on to medium.
Add garlic to melted butter and stir well to coat. Continue stirring, turn fire to low. Sauté the garlic. For 10 minutes. Add a pinch of salt and continue cooking on low for 15 minutes. You will smell the flora aroma of the garlic. It’s finished.
Roasted garlic
Add the remaining 3 tablespoons of Butter and 2 teaspoons of Italian Seasoning. Stir well.
Heavy whipping cream
Add cream, salt and pepper. Stir well on medium high heat until boils. Turn heat to medium. Turn heat to low as cream thickens. Continue reducing until you bring it to a creamy consistency. Remove from heat.
Garlic sauce
Quickly add the pasta to the hot creamy garlic sauce. Combine gently. Add pasta with sauce to the bowl of vegetables. Garnish with bacon.
Creamy Garlic Chunky Vegetable Pasta with Shrimp
You can choose to add chicken, shrimp or steak for protein.
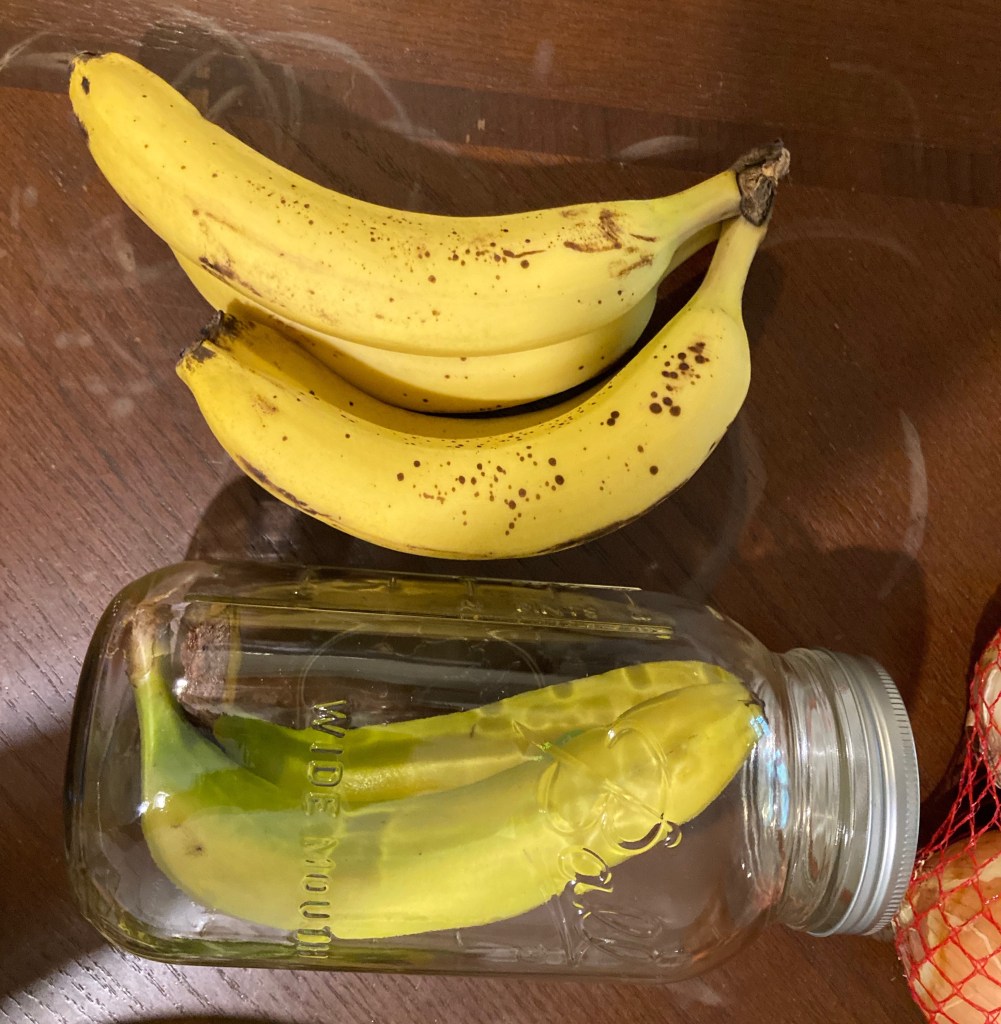
Well I wanted to see if storing fruit in mason jars really worked. It does and better than I thought.
Started on Monday March 6th today is the 11th. Almost 6 days and the mason jar of bananas are still green. Just starting to ripen.
#banana #masonjarfruitexperiment
Do not do bananas. They look green and you take them out within an hour they start to sweat and turn black. Within 4 hours total glossed over black.
#banana #masonjarbananaexperimentfailure 1
#banana #masonjarbananaexperimentfailure 2
#banana #masonjarbananaexperimentfailure 3
#banana #masonjarbananaexperimentfailure 4
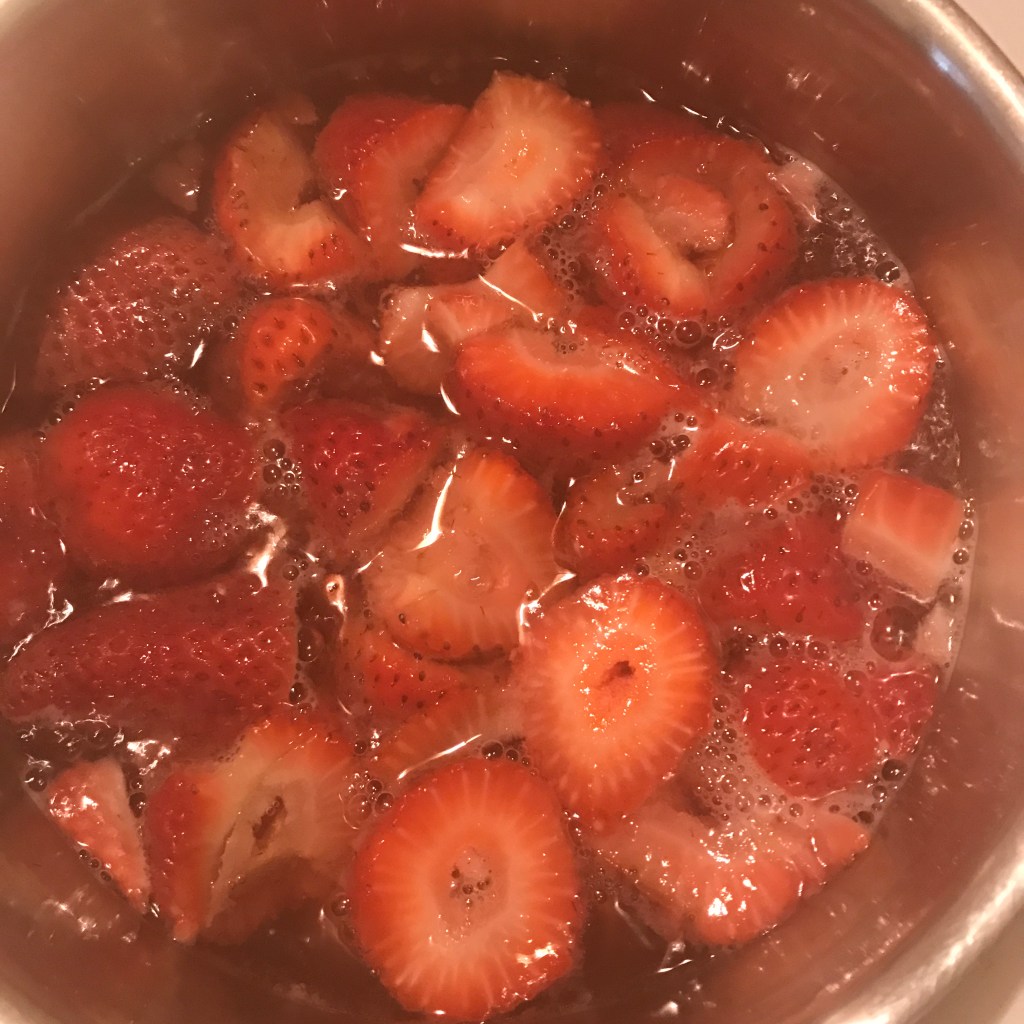
Im also trying the strawberries. 3 weeks ago I bought 16 ounce strawberries. Left them in the refrigerator for about a week or so. They were a little wilted and so I put them in the jar and it actually revived them for another week.
#MasonJarFruitExperiment #Strawberries
Today I bought 3 lbs of strawberries and I put them into the mason jars right away. Storing them in the refrigerator.
My favorite pudding recipe. It’s rich and creamy texture deserves a special mention.
Ingredients
1/2 cup White Sugar
3 tablespoons Unsweetened Cocoa Powder
1/4 cup Cornstarch
1/8 teaspoon Salt
2 3/4 cup Milk
2 tablespoons Butter
1 teaspoon Vanilla
Directions
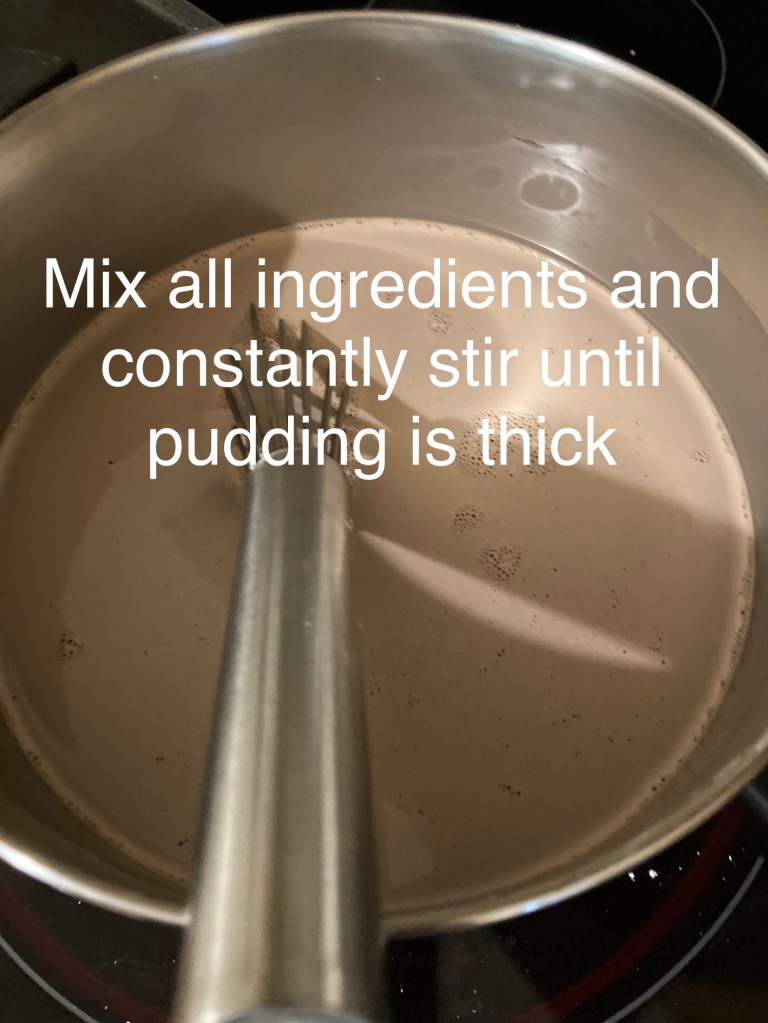
Place dry ingredients in pan and mix together
Add milk, stir and leave it for 5 mins
Place pan on stove and turn heat to medium high and constantly stir until pudding is bubbling, turn heat to medium and continue stirring until pudding thickens
Remove from heat and add butter and vanilla and stir until ingredients are combined well
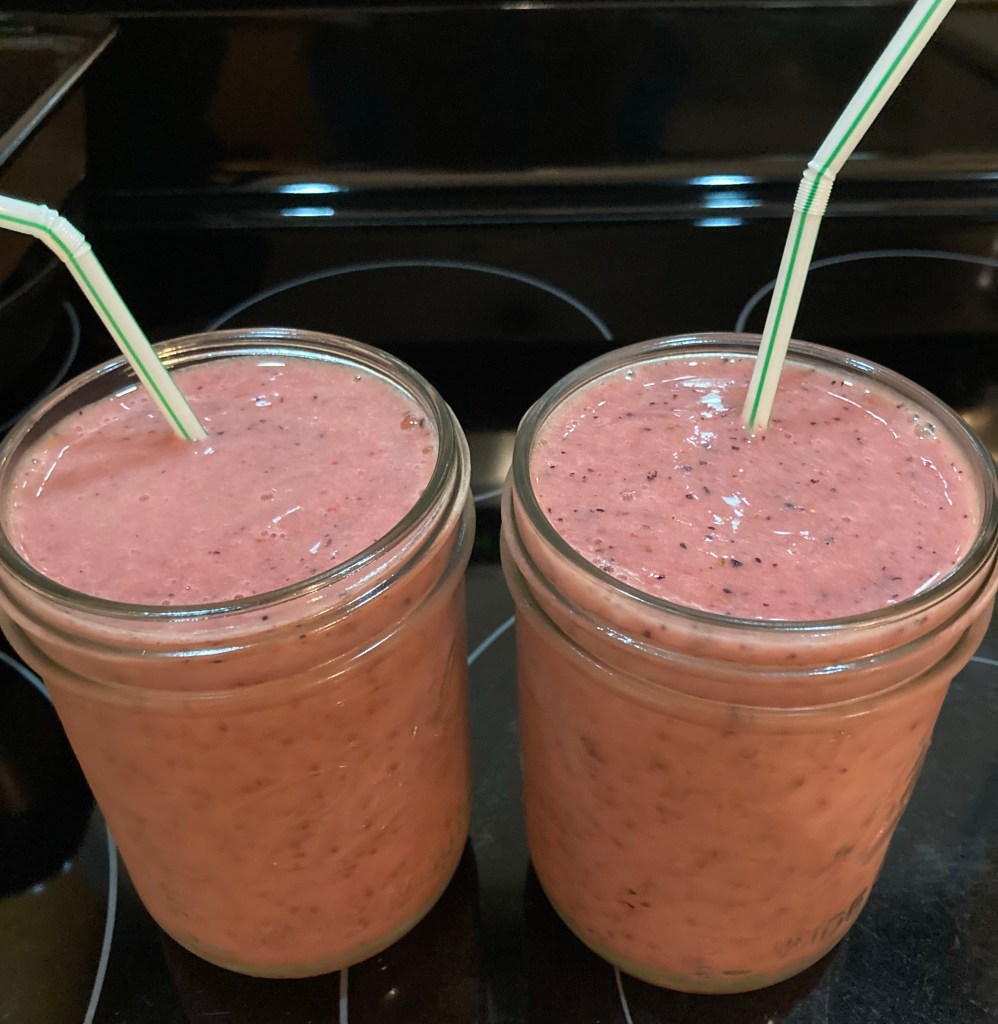
Add orange juice, banana, frozen strawberries and frozen blueberries to the blender in that order. Turn it to smoothie setting if you have. If not pulsate the blender on and off. After a few minutes turn on medium and stop it. Turn on to high until smooth.
Kitchen Appliance: Stove, Oven, knife, Slap-Chopper, Frying pan for oven use.
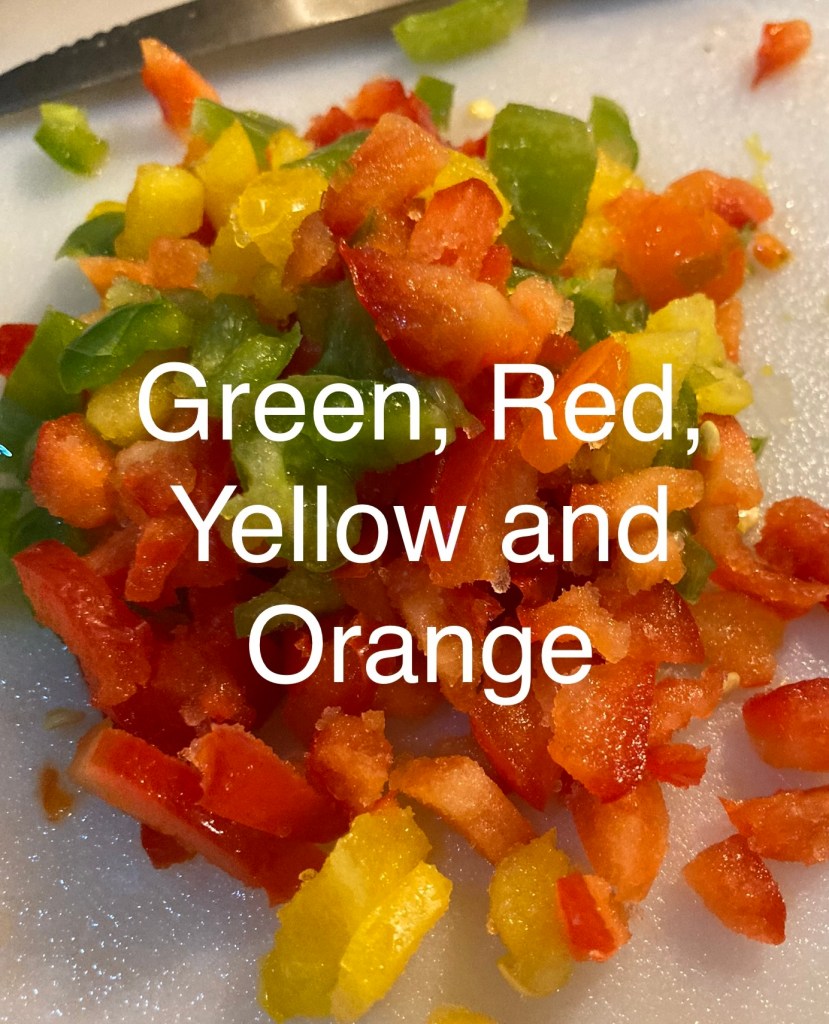
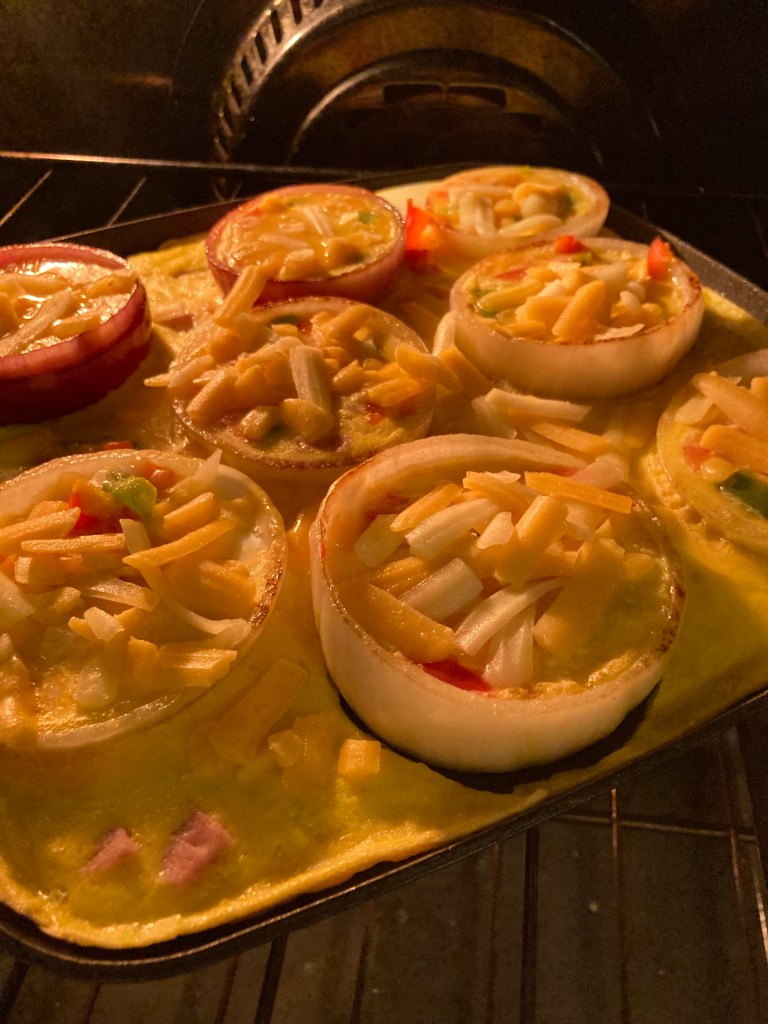
Onion rings with a Western Scramble in center
Ingredients
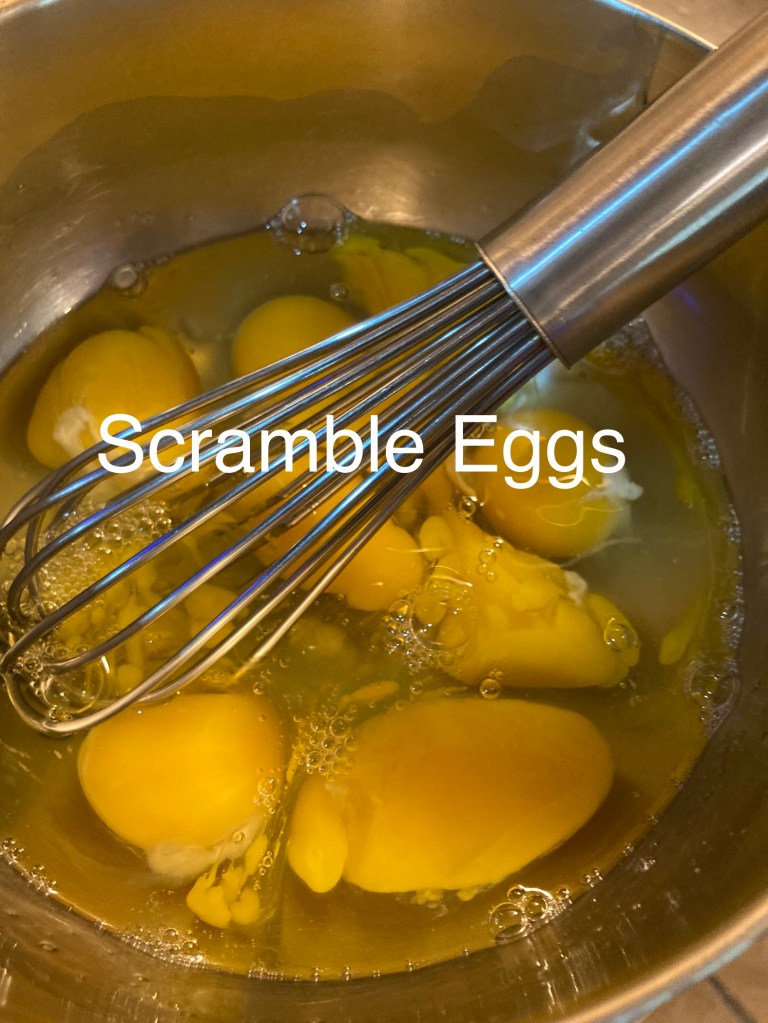
12 Eggs scrambled
Ham
Green, Red and Yellow Peppers
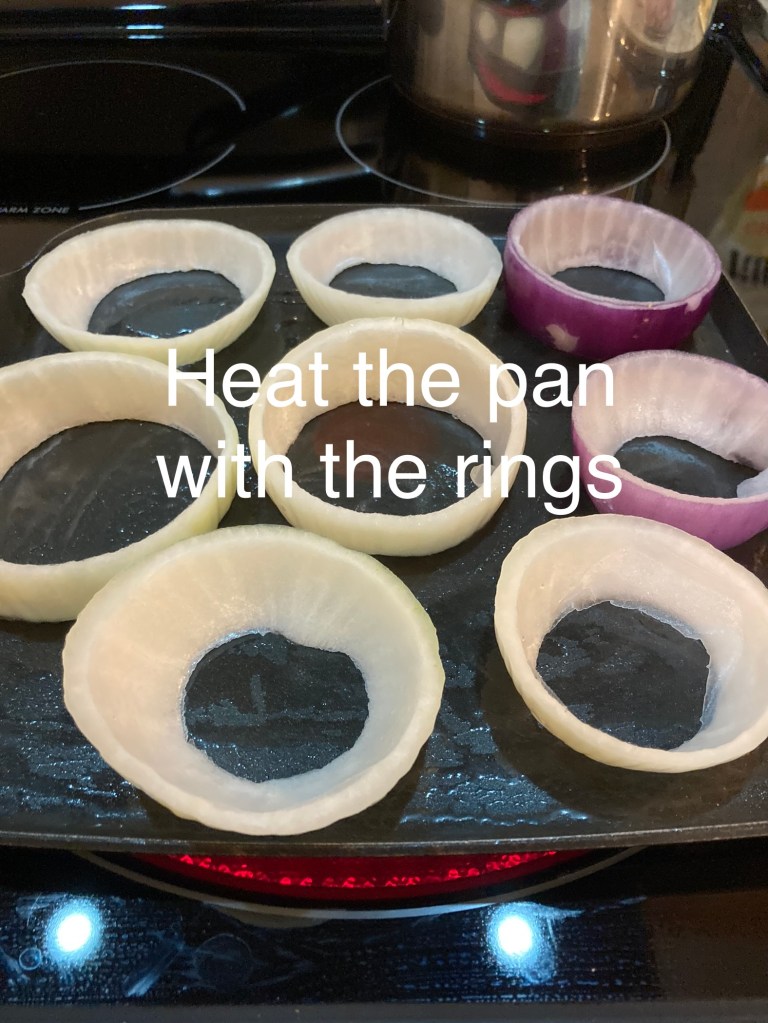
12 or more Onion Rings (medium size)
Butter
Cheese
Salt and Ground Pepper to taste
Directions
Cut your onion rings to 1″
Onions cut into 1” inch pieces
Cut Green, red and yellow sweet peppers into smal cubes
Lay them on paper towel to collect the liquid
Green, Red, Yellow and orange sweet peppers
Cut ham into small cubes
Cut ham into cubes
Crack 12 eggs and gently scramble in a bowl
Scramble eggs
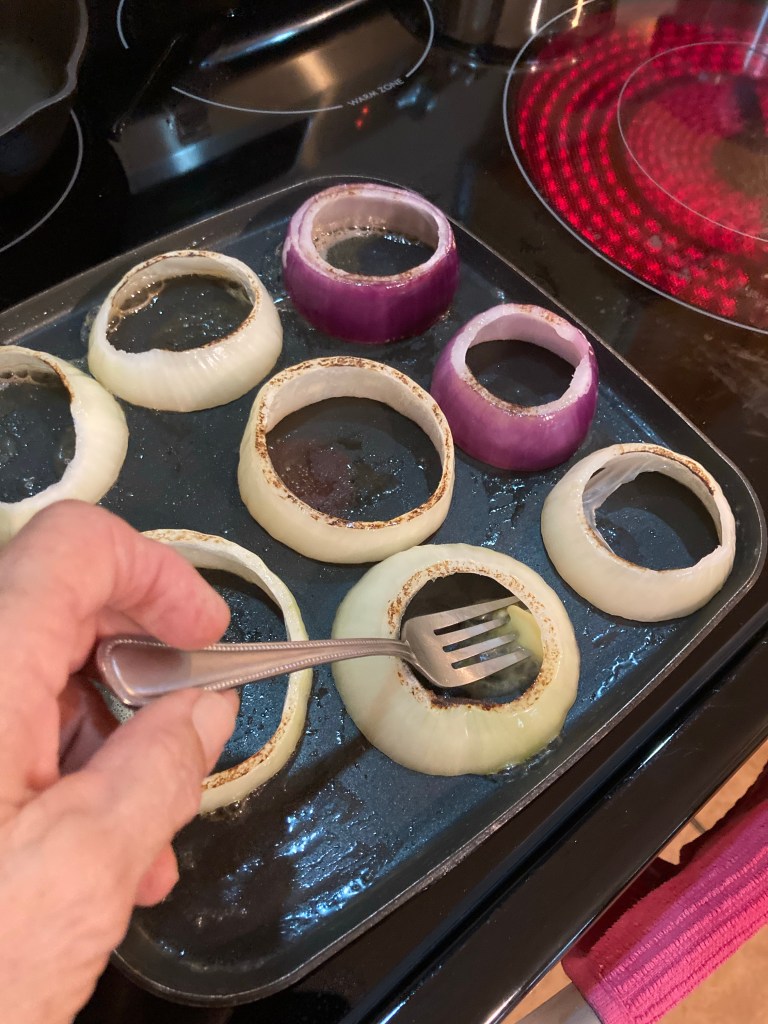
Melt your butter in frying pan on medium heat
Place the 1″ cut onion rings in your pan
Place the onion rings on pan and heat to medium
Flip onion rings over after a few minutes, put 1 tablespoon of butter in pan and flip back up.
Turn the onion rings over and add more butter
Place a scoop of egg in center of onion ring, add ham, green, red and yellow peppers and cheese.
Add by scooping egg into ring. It will leak out. Make sure your pan is hotPut in oven
Slide into the 400′ degree oven, bake for 5 minutes remove and add cheese. Put back in oven for 5 minutes, shake and test, if it jiggles put back in for 3 to 5 minutes, remove add salt and pepper.
Add cheese and place in oven for 5 minutes or less Yummy 😋 Western O-Rings
Now that everyone is blindly making treats for their pets. Sadly we must check human ingredients to make sure there are not any things that will harm them.
We are not checking the ingredients that companies are using.
Please educate yourself so your dog stays alive!!!
Please, it’s just not chocolate that can harm and possible cause death. There is a long list of ingredients you need to be aware of. Some you would never think would. I was shocked myself the first time I read it.
You could be creating other injuries to their organs by using these ingredients.
Xylitol
Avocado seed, skin, leaves
Grapes and raisins
Garlic?
Macadamia nut
Chocolate
Cooked bones
Caffeine
Leeks and onions
Alcohol
Salt
Baking soda
Baking powder
Citrus oil cold pressed
Essential oils
Dairy – like whip cream in a can
Cat Food
Bacon
Tobacco – Cigarettes – Cigars
Gelatin
Butylated Hydroxyanisole (BHA)
Butylated Hydroxytoluene (BHT)
Ethoxyquin (“Fish Meal”)
Propylene Glycol
Food Dyes
Rendered Fat
Pam / Vegetable sprays aerosols
Wheat Gluten
Meat By-products
Nutmeg
Peaches pits
Mustard
Raw dough
Unsweetened organic applesauce
If your going to use store bought applesauce please read the ingredients. The are 3 ingredients in this brand. Apples, water and ascorbic acid. This is perfect. No unknown hard to pronounce words.
Store bought ingredients sometimes have harmful ingredients. Most times not good ingredients for your dog.
If you don’t know if it’s ok for your dog as google or the internet. “Is it ok to give my dog Xylitol”.
Dr. Pradip Jamnadas talks about bread and the over use of non essential ingredients.
Dr. Pradip Jamnadas
Basic bread should have 5 ingredients. Flour, sugar, salt, water and yeast. Very little sugar equals 1 tablespoon maximum for 2 lbs of bread dough. Add all the butter and animal fat you want.
It’s what you buy that is adding the weight gain. Not what you are eating.
Have you forgotten to read labels. I know I sure did. Something we should be not be relaxed on. Now more than ever you need to read the ingredients list and ask yourself if all those extra ingredients really necessary. Seriously, some ingredients you can’t even pronounce. Why do you want that in your food?
So this is just what you need to listen to. Change your eating habits and see the difference. Feel the change in energy.
Take your leftover strawberry compote and turn it into something new.
Homemade Fresh Strawberry Shortcake Compote
You’ll find just how easy it is to make your own strawberry jam without all the extra sugar and junk your body does not need.
Yes trust me when I say less sugar and no preservatives does a body good.
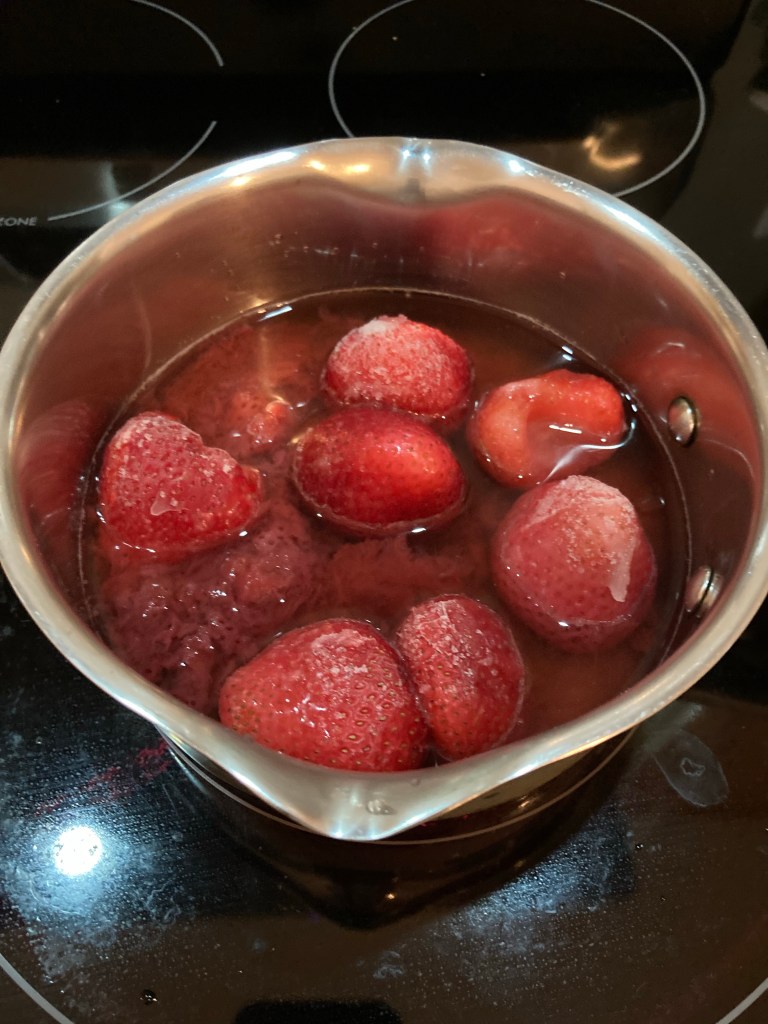
I had some leftover frozen strawberries from this past season. So I added the frozen strawberries to my compote and 1” inch of water above the strawberries and turn on the heat under my pan to high.
Bring to a full boil and reduce the heat to a slow simmer. It’s more about the flavors you are bringing out with the slower simmer.
At this point the house is smelling like a strawberry field at picking time. The sweet undeniable smells of hot summer days come rushing through my senses. I just want to throw open the windows and let the world have a whiff.
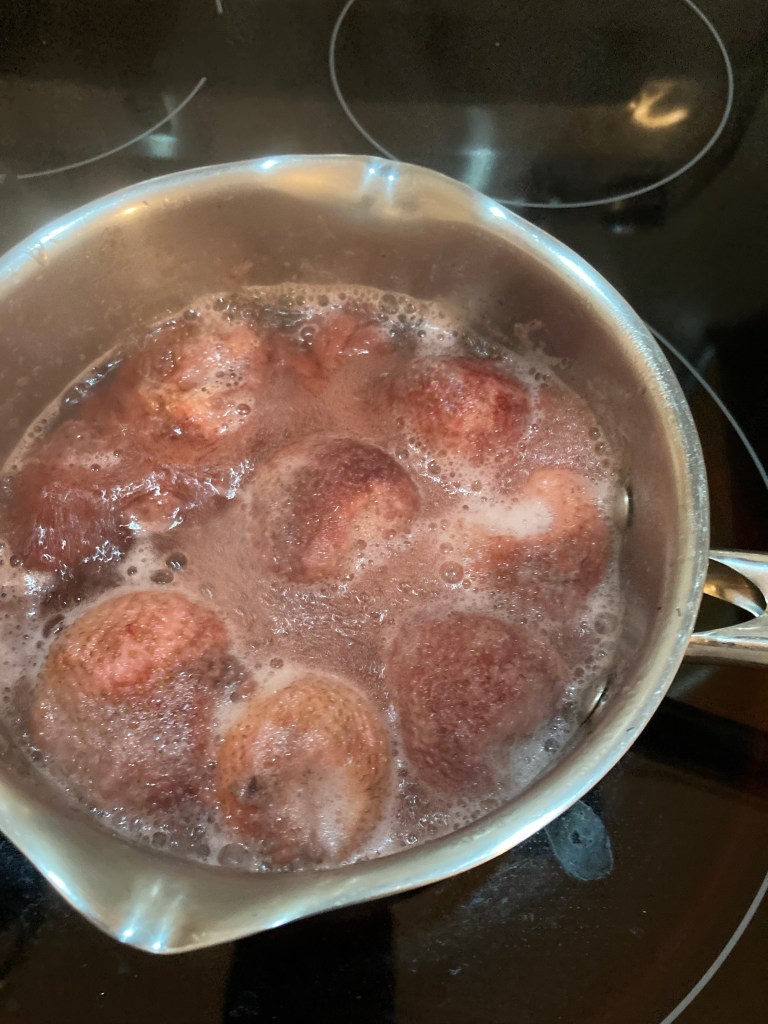
Once your strawberries puff up (15 to 20 minutes) you can remove the lid and smash the strawberries with a fork or potato masher. Depending on how chunky you want your jam.
Make sure you continuously stir and watch the pot as they say. Jams are hard to clean up. Plus at this point you shouldn’t be using any heat that is going to make a boil. Simmer is tiny bubbles. Just like you see in champagne.
Tiny bubbles like champagne
Continue cooking without the lid on low heat to reduce the fluid. This might take up to an hour.
Still to much fluid. Keep reducing
During this time you need to taste it for sweetness. You can add sugar or vanilla at this time if needed. Depending on how sweet your strawberry short cake compote was.
Once it is semi thick and sticks to your spoon with just a little bit of slide to it. It’s ready, you can turn the heat off and let it rest. It will continue to thicken on its own.
Strawberry jam is sticking to the spoon. Remove from heat.
Believe it or not strawberries have a natural pectin. So it will thicken all by its self.
Strawberry Jam is cooling down
Add the cooled jam to your containers.
I put all my jams in 3 ounce containers with lids and I freeze them. That way I can have fresh strawberry jam or any other flavor anytime I want.
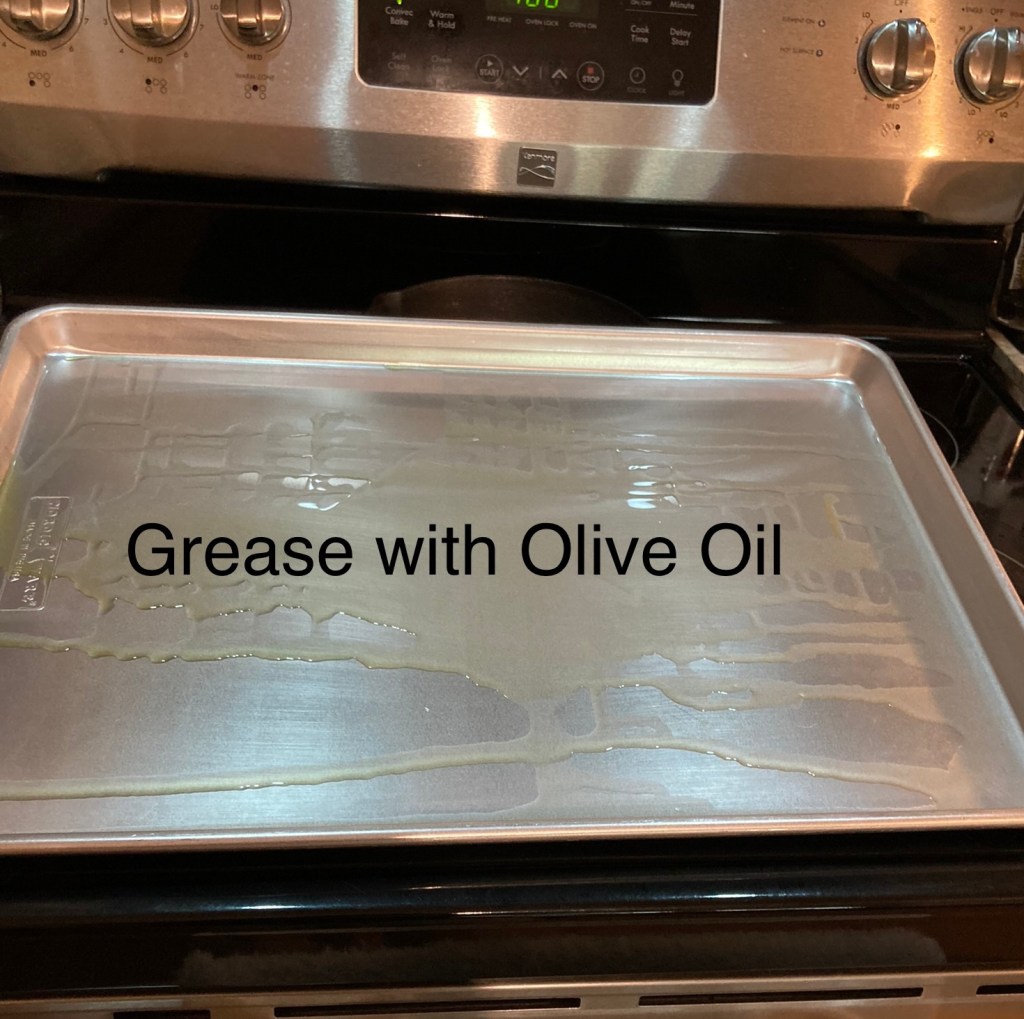
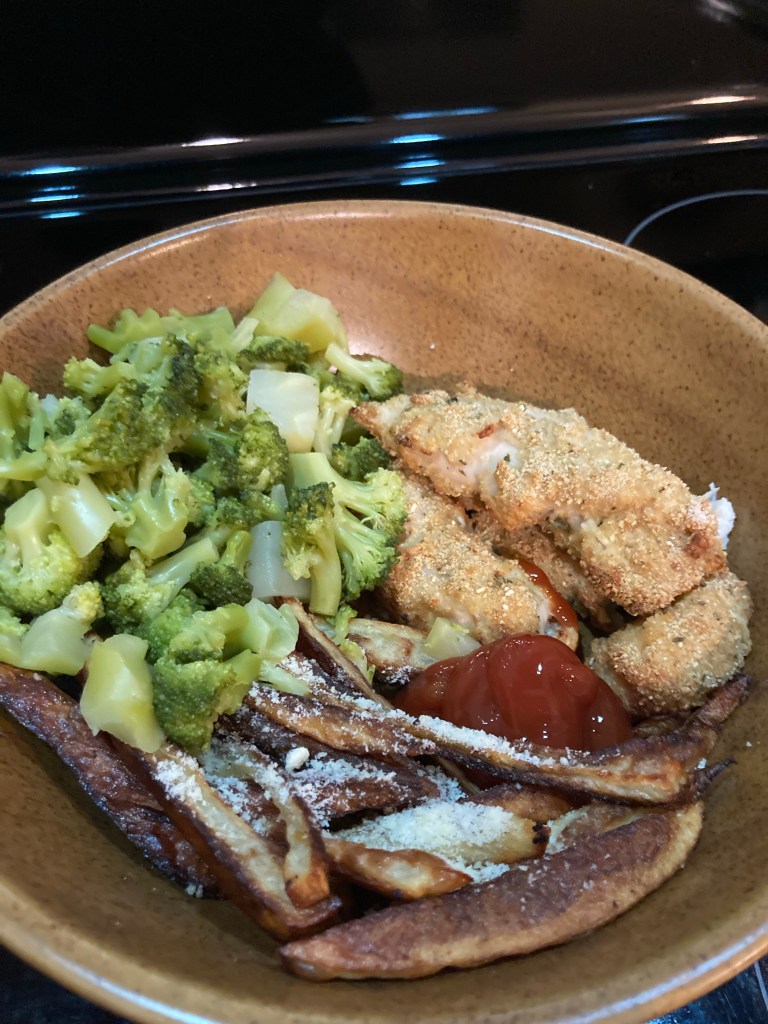
Great beginner level and a healthy option to fried foods. This recipe uses 1 tablespoon of healthy olive oil.
1 tablespoon Olive Oil coat entire pan. This pan is extra large cookie sheet type.
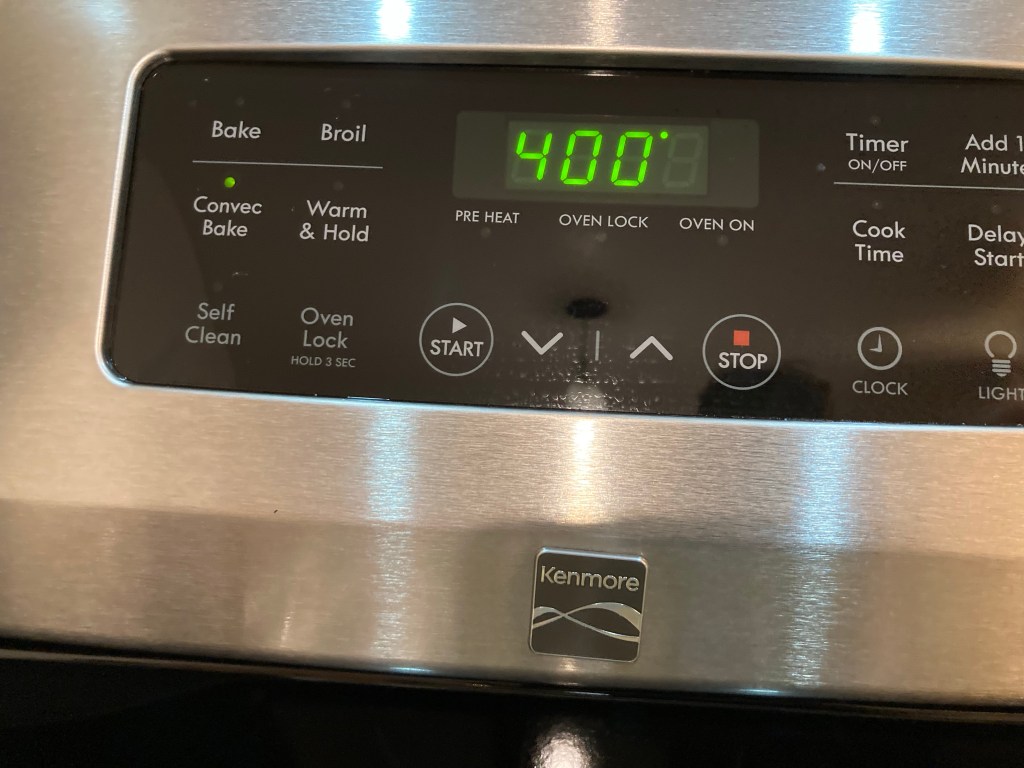
Turn on oven to 400’ degrees Fahrenheit. If you have a confection oven use that setting.
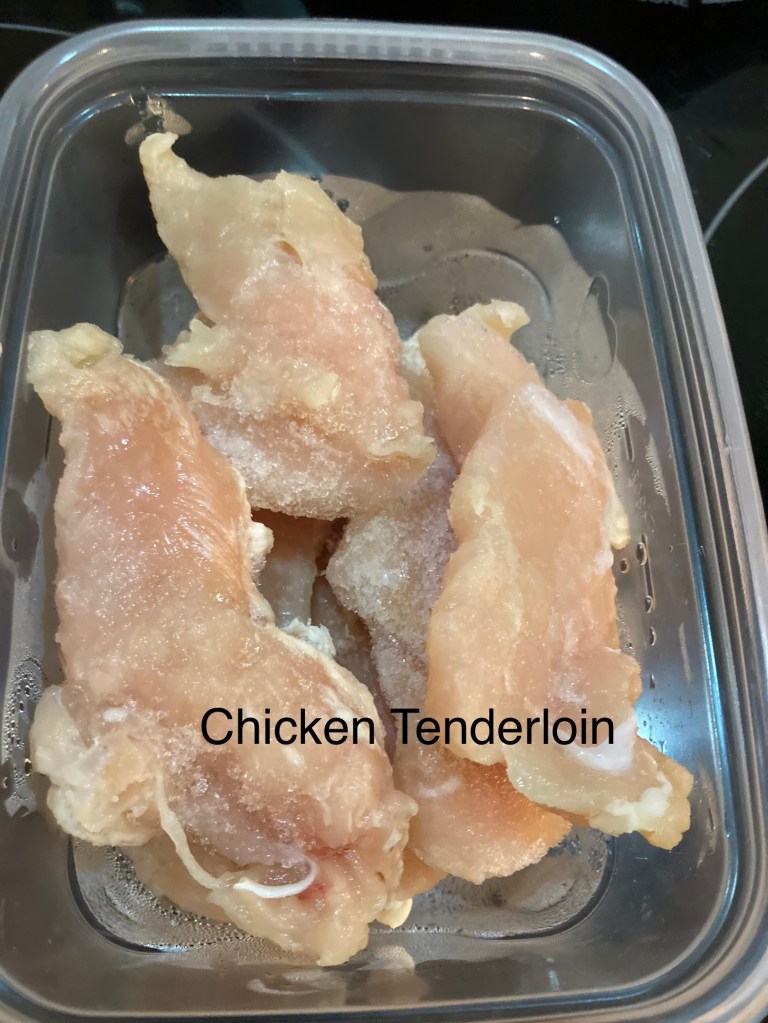
Defrost your chicken tenders
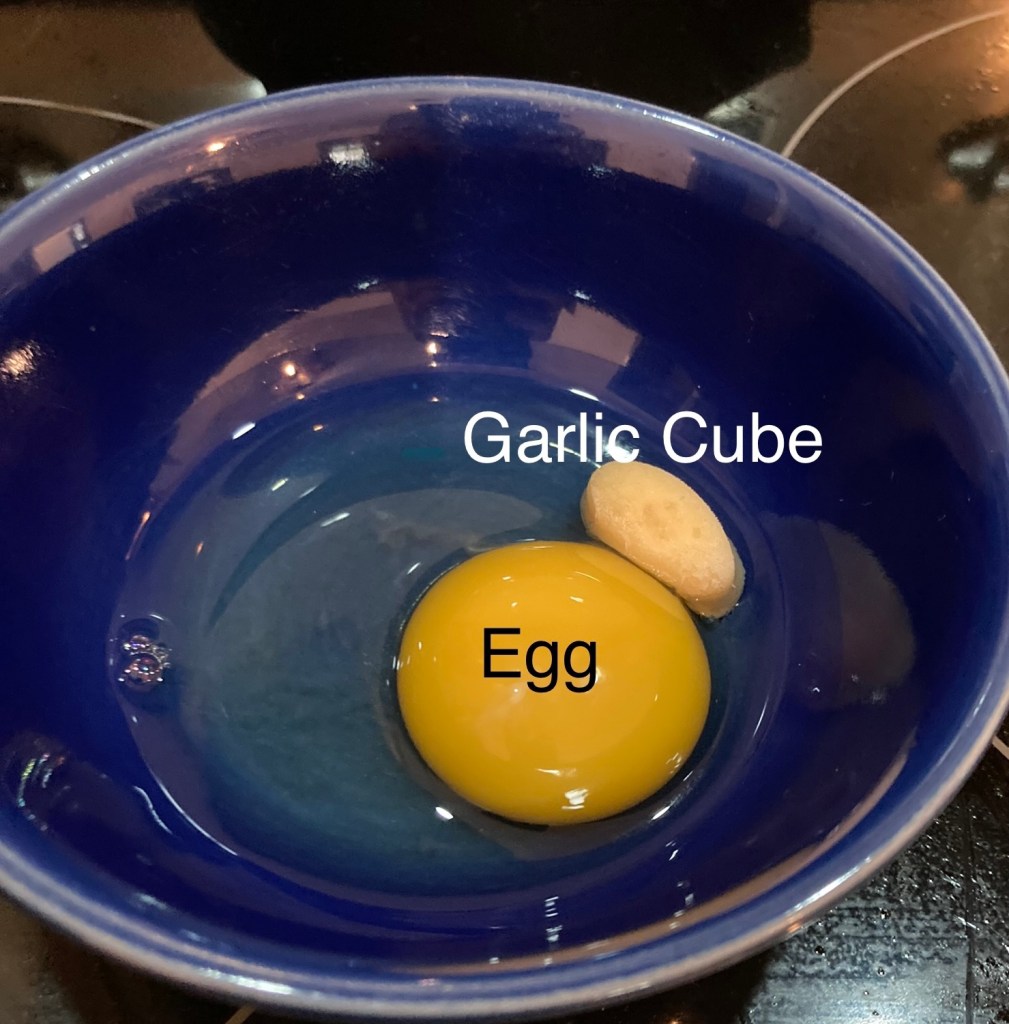
Cut your potatoes up and place in a bowl. Drizzle 1 teaspoon olive oil, 1 teaspoon garlic, 1/8 teaspoon salt and mix well. Place on your greased pan. I use the frozen Garlic cubes.
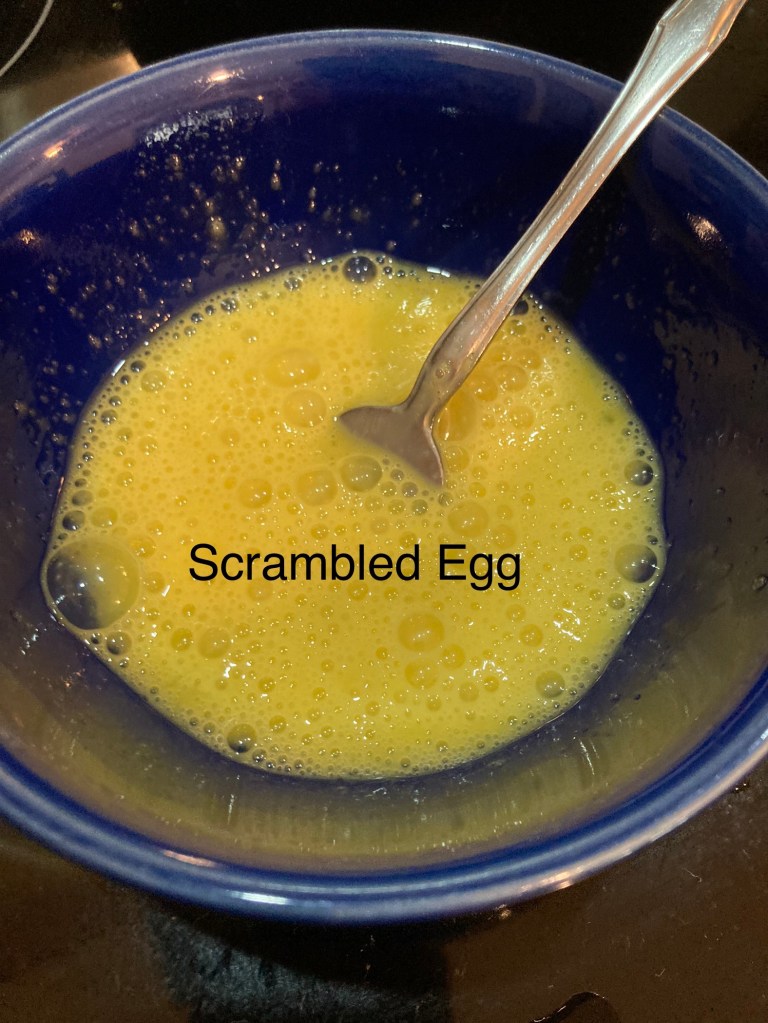
1 egg, 1 teaspoon garlic and scramble.
Scramble and scramble with fork.
Add 1/4 of Heavy Cream and mix well.
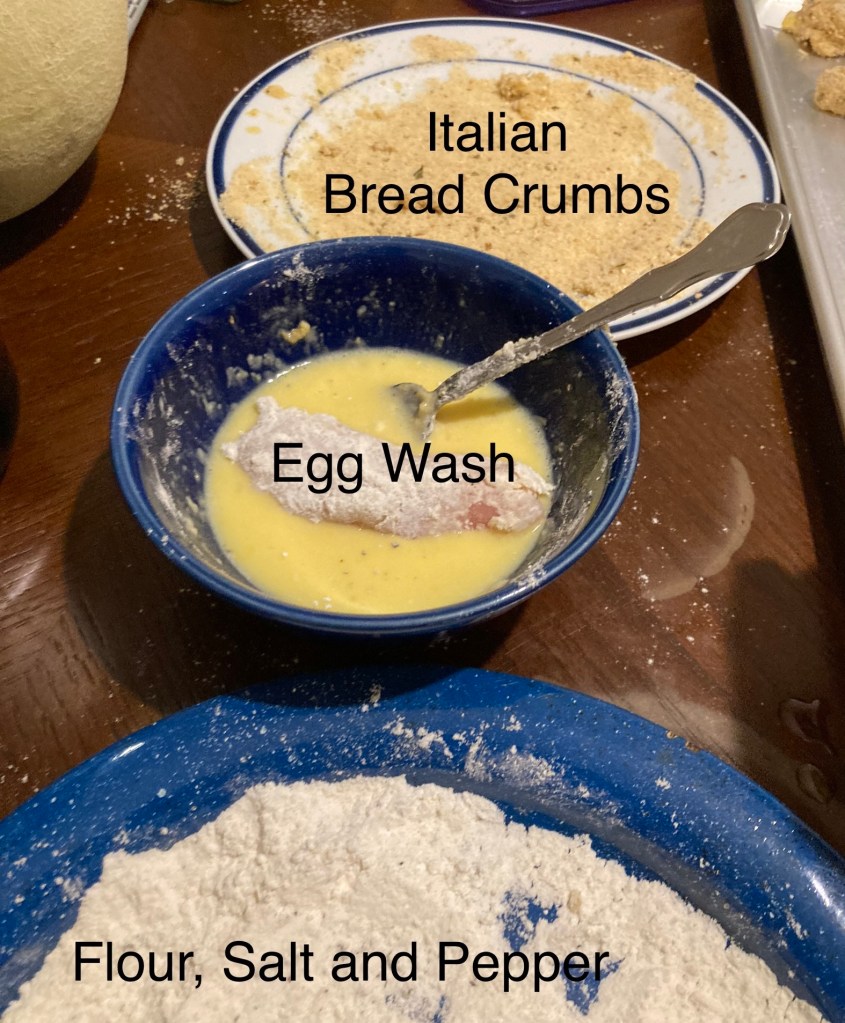
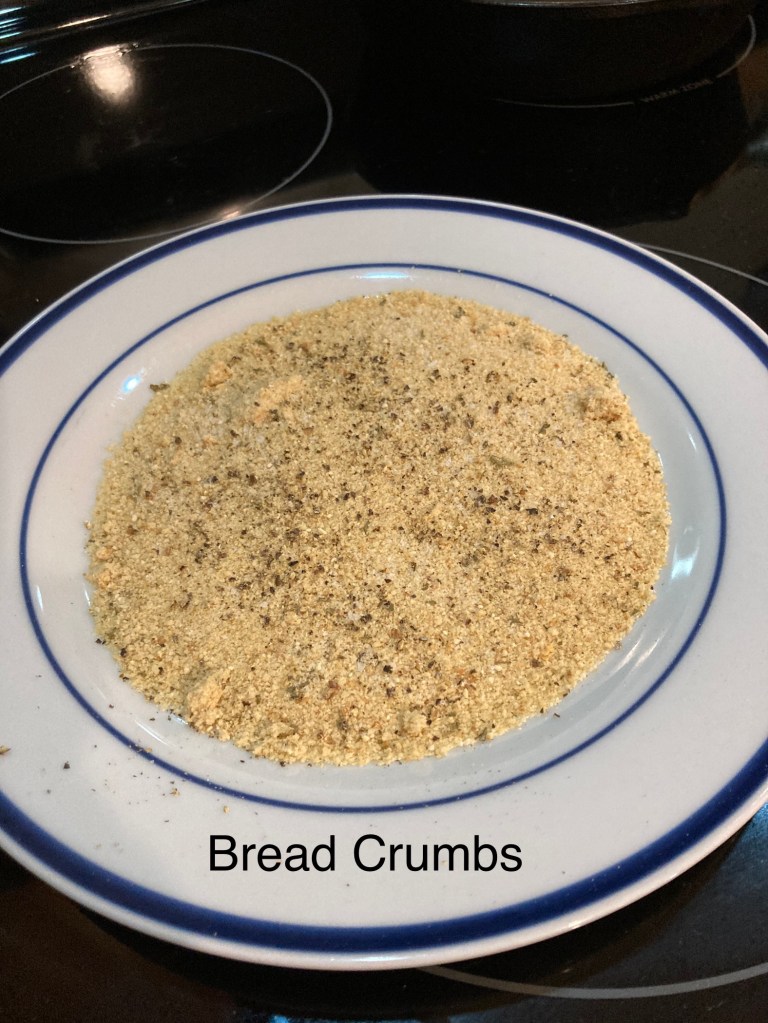
Roll your chicken in the flour, place in the egg wash and place in bread crumbs. Place on greased pan. Your fingers will get messy. You can use chop sticks or two forks and keep your hands clean.
Place the chicken tenderloins in the flour
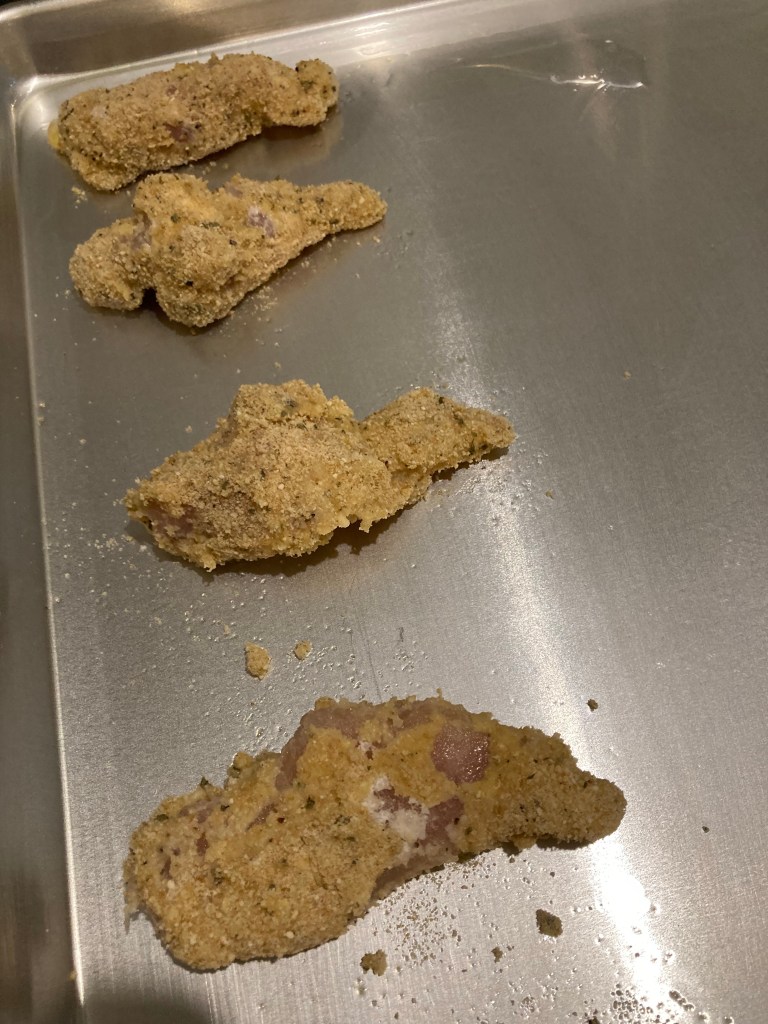
Place the chicken tenderloins in the egg wash and coat the chicken really good with the egg wash. Place the chicken in the bread crumbs and place on the pan.
Place chicken on pan
Place the pan on the middle rack for 20 minutes or until crispy brown. Remove from the oven.
Dish it up and add powered Parmesan cheese and salt to the fries.
Enjoy your easy oven fried chicken tenderloins and fries.
Staying home for New Years Eve. Are you wanting to try some tasty seafood to celebrate the new year.
Lobster tails are a great way to start the evening off. Easy to cook and fast. Serve it with a veggie, bread, baked potatoes and salad. All can be made ahead of time.
I boiled these and the cooking time was 4 minutes. Depending on the size time is 2 to 4 minutes. You can cook them frozen, but it is recommended to thaw. These lobsters pictured are the size of a soda can. I cooked them semi frozen for 4 minutes and they were perfectly cooked. Make sure to salt your water.
A little something about Karen Shaw Becker . She is the most followed veterinarian in the world, and for good reason. Dr Becker believes in a deliberate, common sense approach to creating and maintaining vibrant health for companion animals and an unconventional, integrative approach to addressing disease and re-establishing wellbeing in ill pets. This refreshing, proactive approach that intentionally focuses on creating or restoring wellbeing has been embraced by millions of pet lovers around the world.
We are excited to introduce Dr. Becker’s Forever Dog Bites. This unique one-of-a-kind treat was crafted by years of research that can be found in the newly released book, “The Forever Dog.”
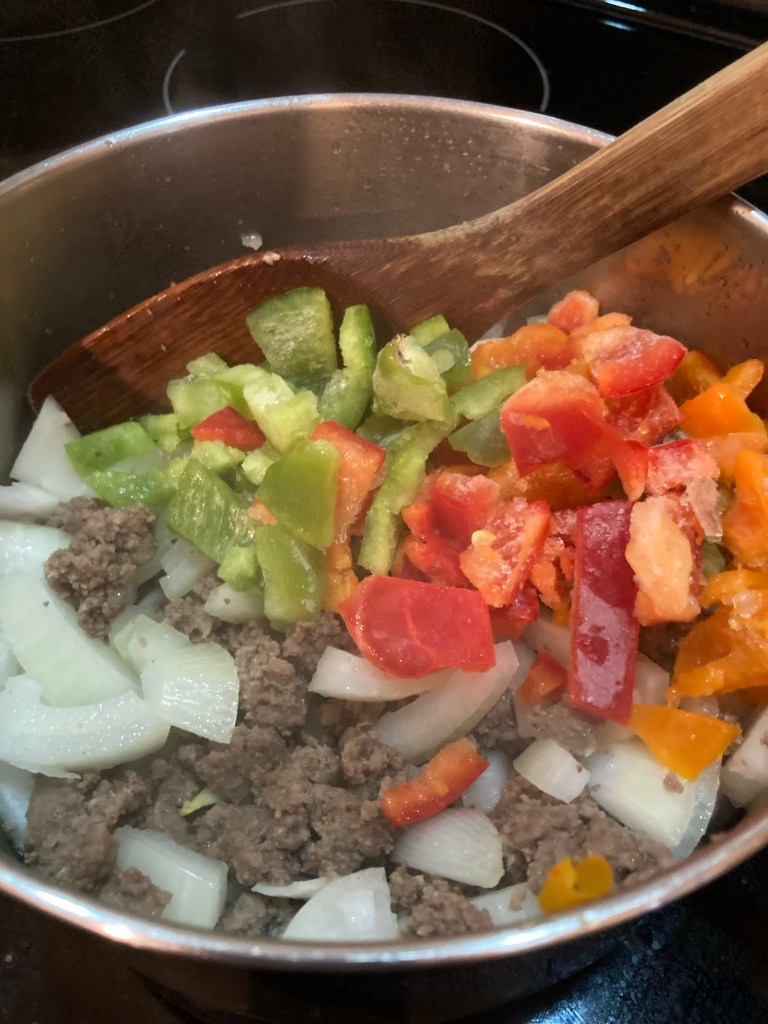
We are using spices and veggies instead of ketchup to flavor our yummy kid friendly and adult pleasing yummy homemade sloppy joes. No preservatives.
Add 1/4 of each green, red and yellow peppers 🫑 cut up into your choice of size and 1 onion. If your making this for kid’s you may want to dice the peppers and onion’s into very small pieces. I like 1” inch piece’s for adults. You can also purée in the blender for a smoother texture.
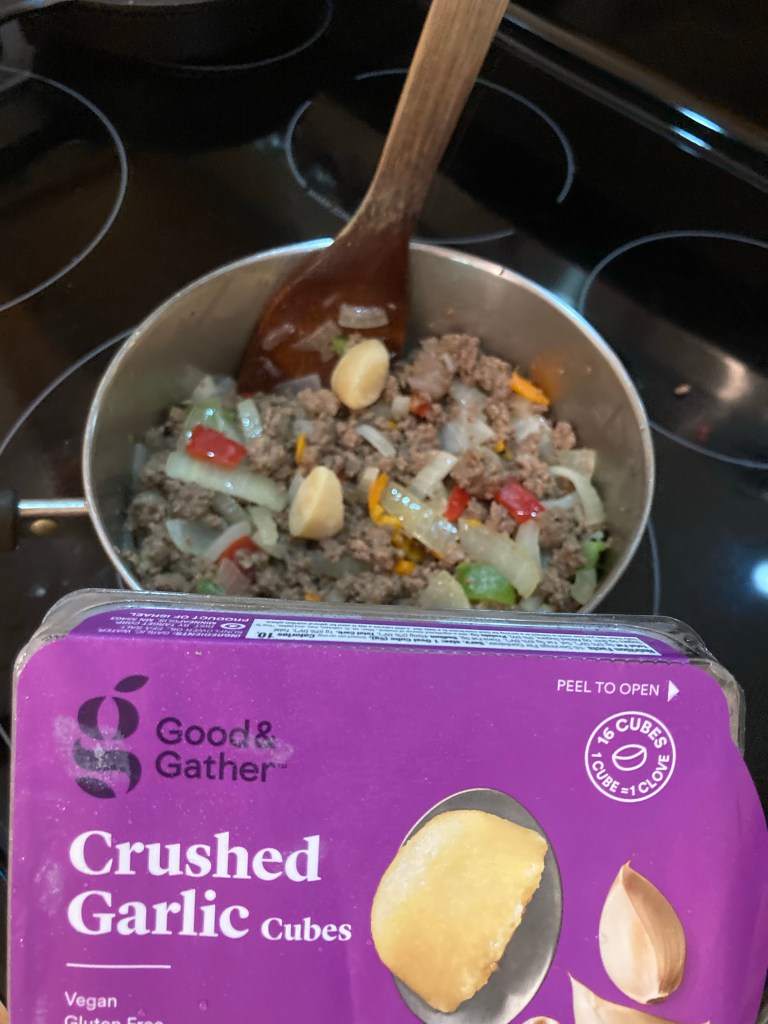
While the meat 🥩 is cooking cut up your veggies 🥗 and onions 🧅 .. Cook your meat 🥩 down and drain the grease.
Add your onion 🧅 and 🫑 peppers. Add 1 teaspoon salt.
Add 2 Teaspoons of garlic. I use 2 of the frozen 5 gram cubes. ( 1 Teaspoon each cube ). Continue cooking
Cook down until soft and onion’s are translucent.
1 pound Hamburger
1 teaspoon Salt
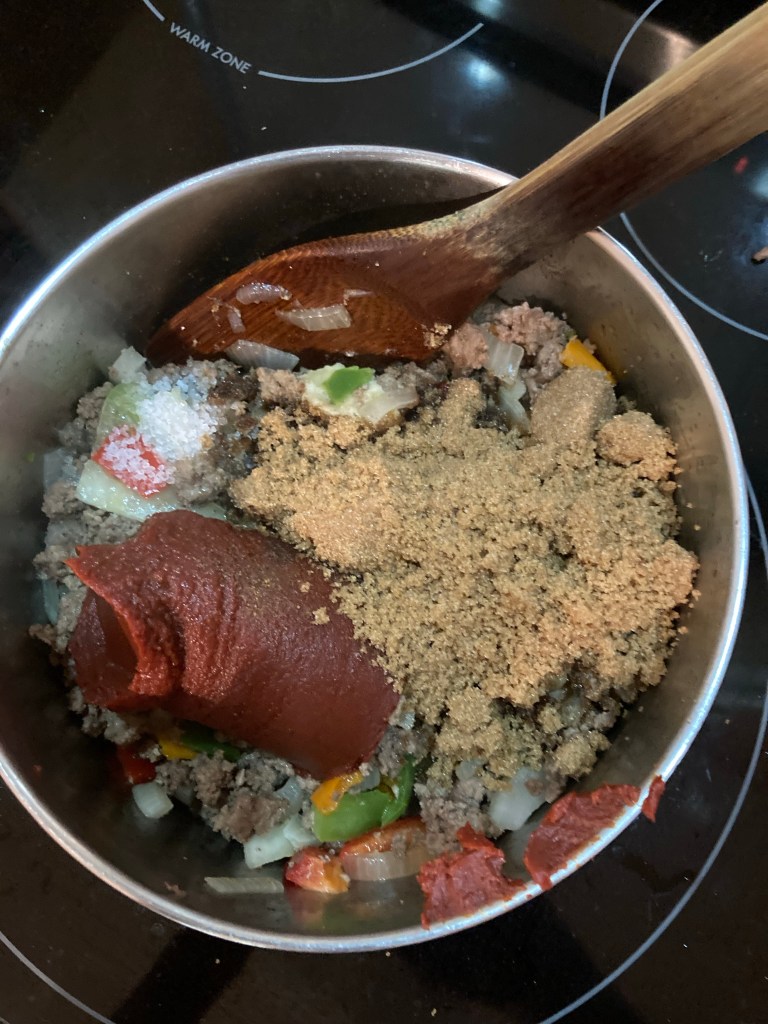
1 tablespoon White Sugar
1 teaspoon Celery Salt
1/2 cup Brown Sugar
1 tablepoon All Spice
1 can Tomato Paste 6 oz
1 1/2 cups Water
Adding water 1/2 cup at a time. Mix it up until all the water is gone.
Simmer for 45 minutes
You can adjust the serving size by increasing all the ingredients. This makes approximately 6 to 8 sandwiches.
Yummy ready to go
I toasted some fresh baked garlic pepper Jack cheese bread. It paired wonderfully. So buns for the kids and add cheese or a different bread for the adults.
SPAM® Figgy Pudding brings a blend of warm spices and seasonal ingredients that will be the star in many wintertime recipe favorites. With notes of cinnamon and nutmeg combined with fig and orange flavors, you’ll taste true holiday comfort that will have you caroling all season long.
The sauce on the pasta is a medley of vegetables that are light and tasty. The chicken thigh is oven fried and smothered in a sweet, tangy and slightly spicy sauce. These two compliment each other perfectly.
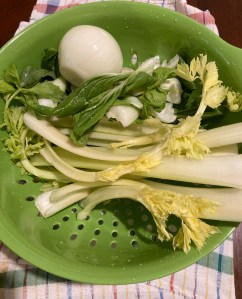
The vegetable ingredients are very simple. Baby Bok Choy x 2, Celery and 1 large Onion. This recipe is for beginners and more.
Here are your spices you will use. There is a recipe at the bottom for the BBQ Sauce.
Let’s Get Cooking!!!
I will be using my Multi-Cooker.
Multi cooker
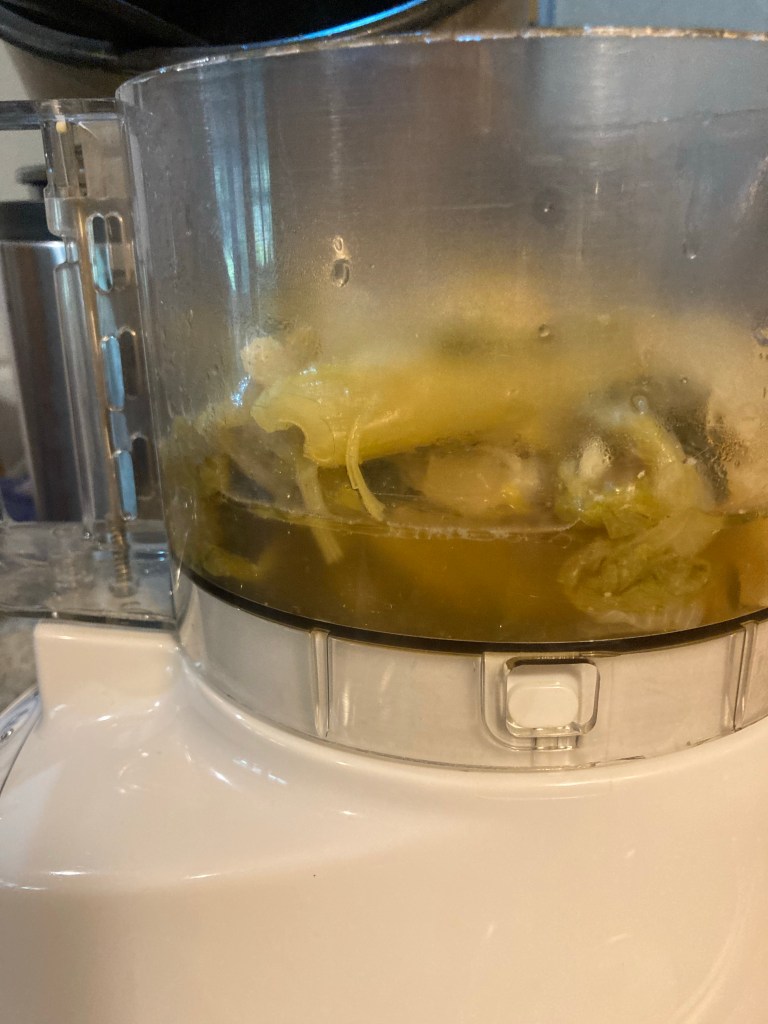
Make your chicken broth or you can buy it at the store. Place skinless, boneless chicken thighs with 1 cup of water. Cook for 45 minutes on poultry. I am making another chicken dish so I will be using fresh broth.
Remove the chicken and smaller pieces of chicken. Or pour the broth into your multi-Cooker or in large pan to accommodate all the veggies.
Wash the vegetables really good. Make sure you use the heart of the celery. It’s very sweet.
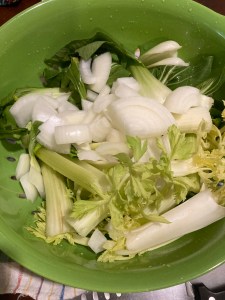
Chopped vegetables
Chop your vegetables so they can fit in cooker or your pan.
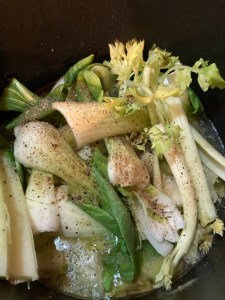
Place the vegetables in the pan
STOVE TOP or Multi-Cooker: Add spices salt, pepper, celery salt, 2 cloves garlic smashed and a splash of cumin. Stir it up really good so the spices will infuse into your vegetable with all the flavors of the spices. Close the lid and set the temp on your stove top on HIGH for 15 minutes. Turn down heat to medium for another 15 minutes or until vegetables are soft. Watch your pan so it doesn’t over heat. Remove from heat and let them cool down for 30 minutes.
Multi-Cooker
Set temperature on pressure cooker setting for SOUP for 30 minutes. Vegetables should be soft. Remove pan from cooker and let cool down for 30 minutes.
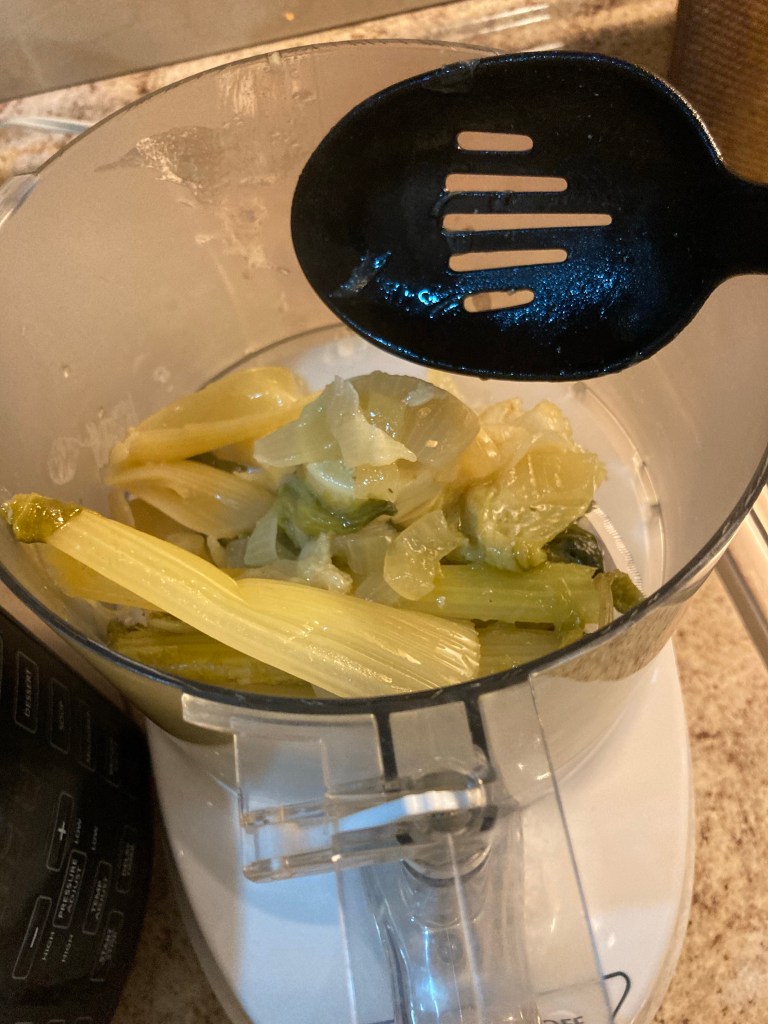
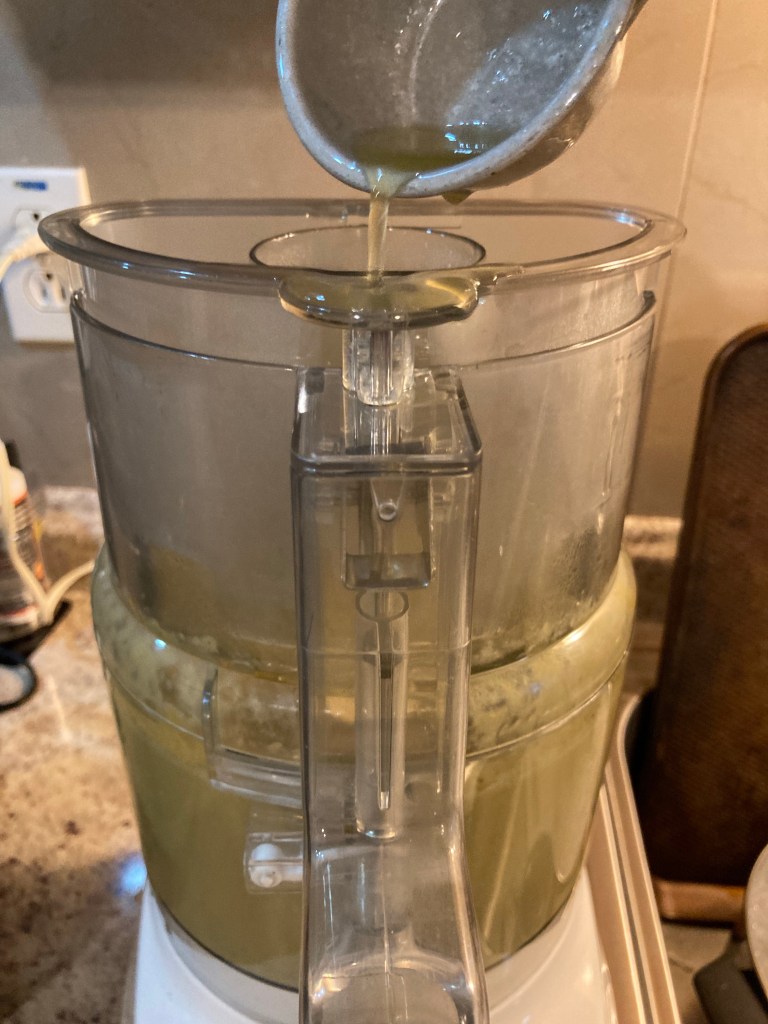
Food processor or blender
Place you veggies into food processor, 2 tablespoons butter and then a little bit of the broth about 1/2 cup. Pulse a few times and turn to on . Have the broth handy in case you need more. You want the sauce to be thick like spaghetti sauce.
Set the sauce to the side
Take 6 cups of water in a large pot bring to a boil. Add your choice of pasta and boil until aldente or to your preference.
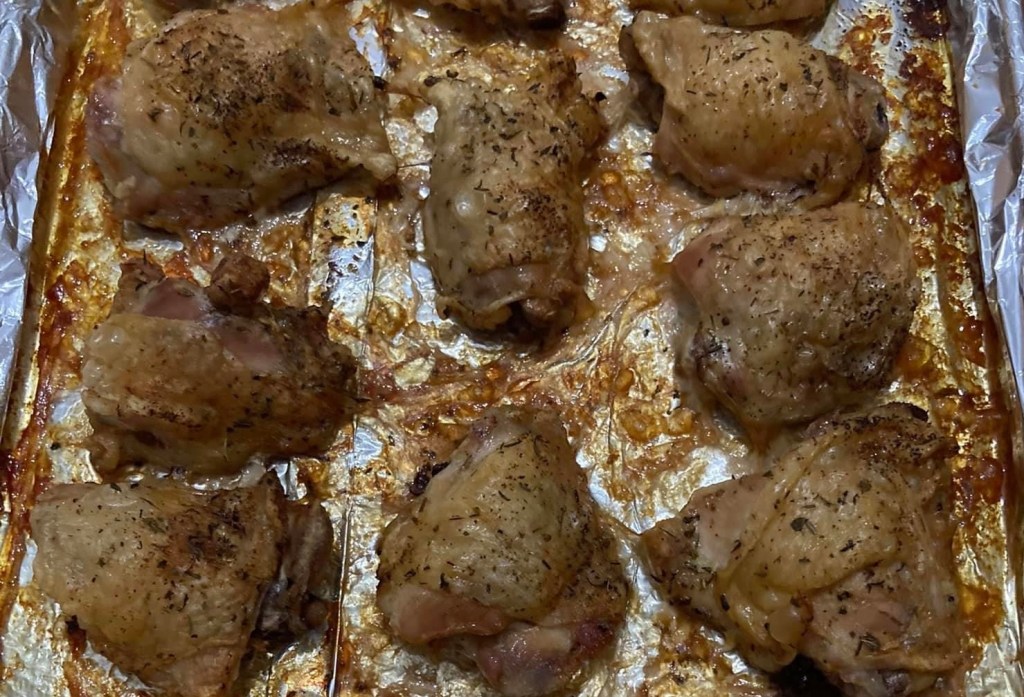
Oven Fried Chicken
Heat oven to 375 degrees F’
2 tablespoons olive oil
1 teaspoon salt
1 teaspoon pepper
Place above items in a large bowl. Make sure it’s all mixed up good
Place the chicken in the bowl. Rub mixture into the chicken with your hands
Take a greased cookie sheet and place the chicken directly in the pan or place foil down first
Cook for 45 minutes or until crispy brown. Remove from oven and drench in the BBQ sauce and serve with pasta.
2 Red Chilies soaked in 1/2 cup water over night (wear gloves when you handle the chilies) remove seeds and dice chilies thinly. Add the 1/2 cup of the chilie water to the pan.
1 Onion Large diced
2 Tablespoon Garlic minced
1 cup Dark Brown Sugar
1/4 cup White Sugar
3 tablespoons Vinegar
2 (6 ounce cans) Tomate Paste
1 Tablespoon Worshire Sauce
1 Tablespoon All Spice
1 Teaspoon Salt
1/4 cup Honey
DIRECTIONS
Wash and cut up your vegetables into small pieces
In a Large Pot 1 tablespoon Olive Oil bring to medium heat
Place the vegetables and sautee on medium heat until vegetables are wilted and soft. Add the garlic for the last 5 minutes. Stir frequently and dont burn them. Approxamently 20 minutes
Add the chicken broth bring to a boil reduce heat to simmer
Add tomatae paste and stir until dissolved
Add vinegar, brown sugar, white sugar, worshire, all spice, salt and honey
Stir until all is mixed together
Cover pan with lid slightly crocked to let steam out.
Cook down until very thick
2- 16 ounce wide mouth mason jars. Fill each one and leave at least 2″ from the top. Put the lid and seal on quickly so it will seal down good.
Let the BBQ sauce cool completely.
Put one in the freezer and the other you can refrigerate for up to 3 weeks.
*You can use a Slow Cooker or Multicooker with the Jam setting if you have. It’s easier and you dont have to worry bout burning it. You just use the brown/sautee setting for cooking vegatables and bring to boil.
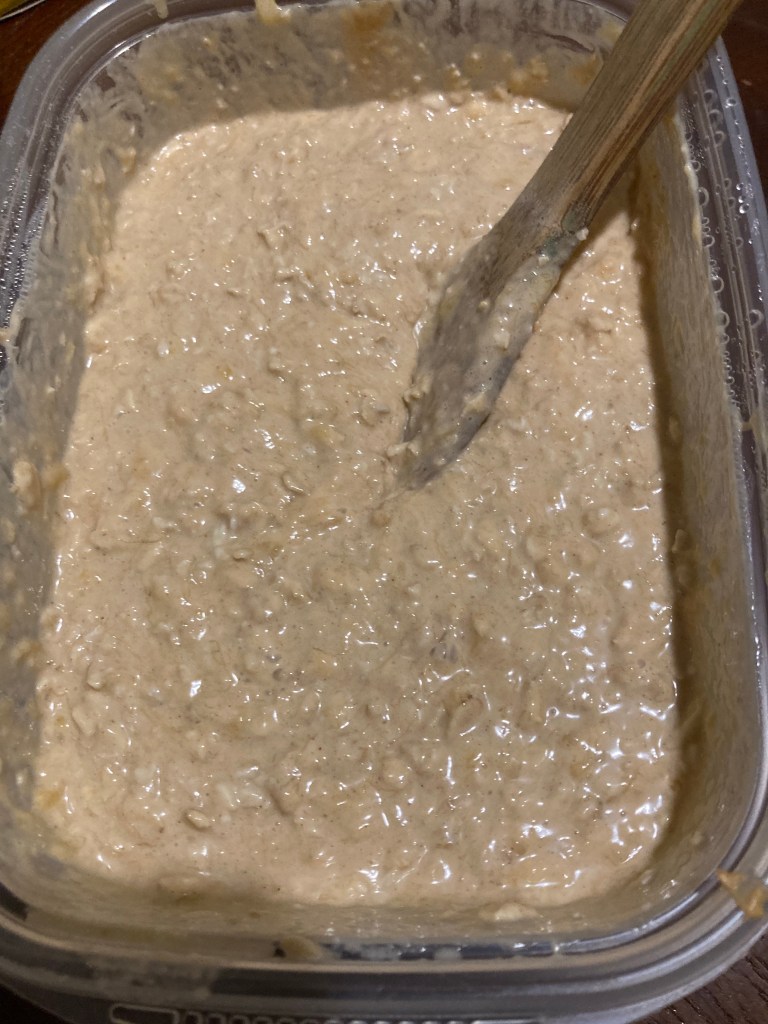
Just what my doggies ordered. They love these cookies. It’s healthy and nutritious.
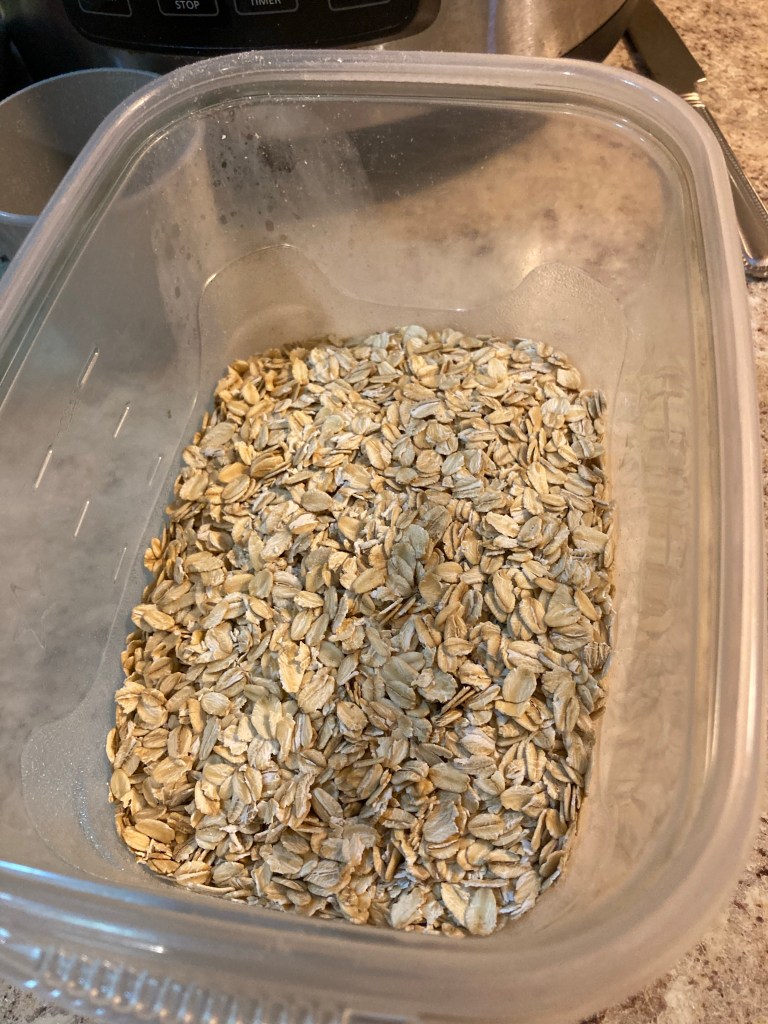
Banana, Peanut Butter Oatmeal cookies
INGREDIENTS
2 cups Oatmeal (soaked)
1/2” inch Water cover above oats
1 cup Banana
1/2 cup Peanut butter
2 cups All Purpose Flour
1 Tablespoon Olive oil
DIRECTIONS
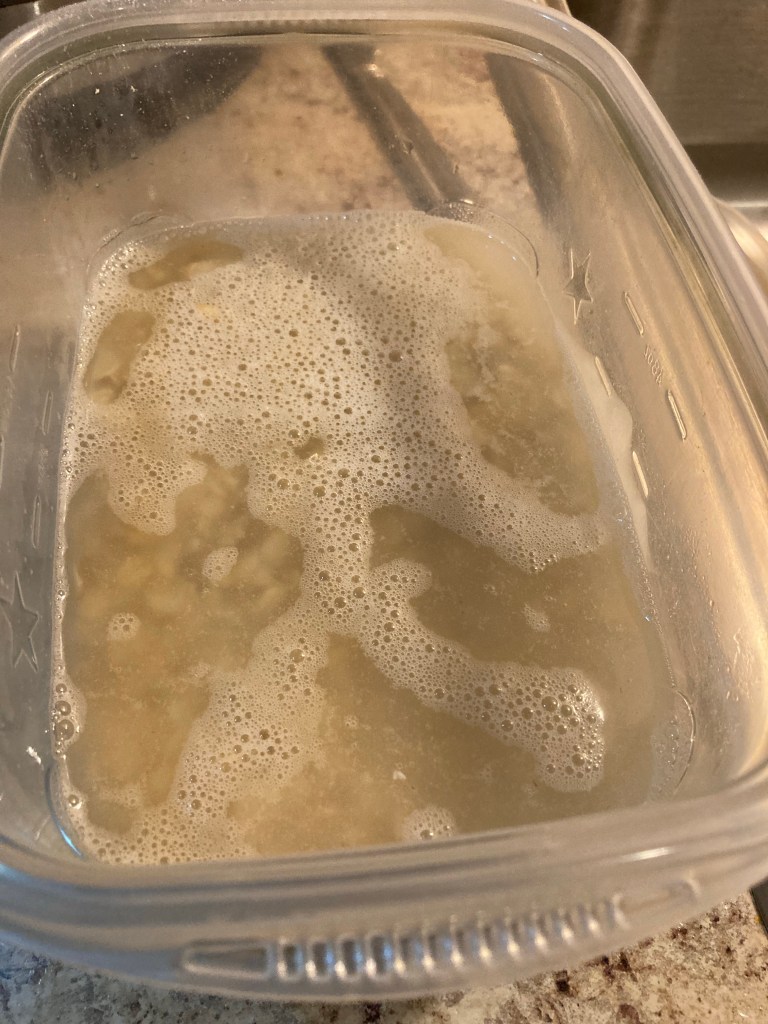
Place 2 cups oatmeal in container and cover 1/2 inch water over the top. Leave that set until almost all the water has been absorbed. About 1.5 hour
2 cups Oatmeal 1/2” inch water to cover oatmeal 1/2 “ inch water over oatmeal soaking 1 to 1.5 hours
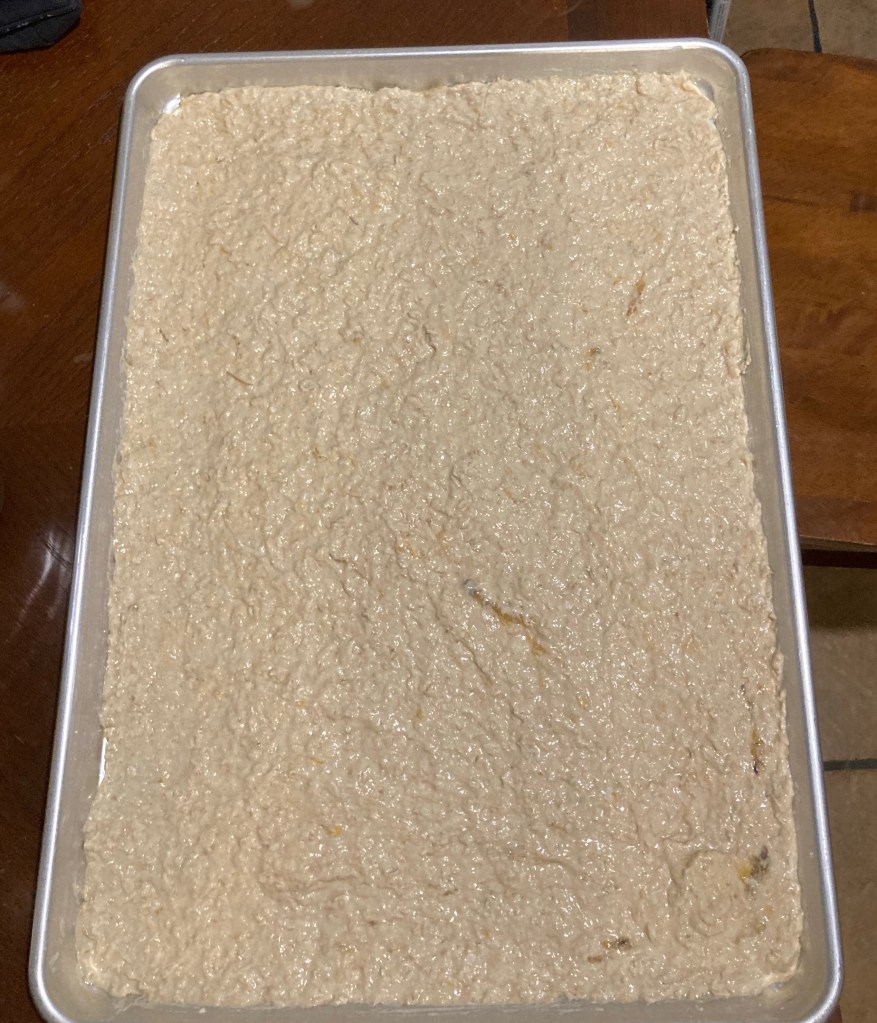
Heat oven to 350’ degree F. Grease 1” x 15”x 21” cookie sheet with the olive oil
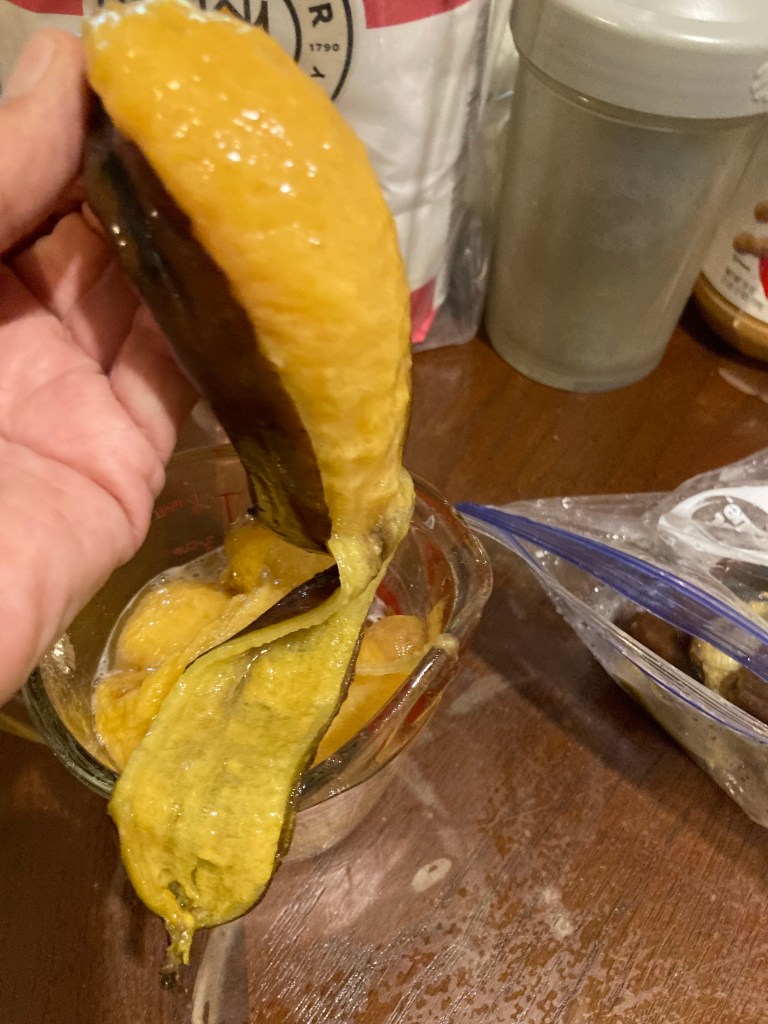
Frozen bananas to peelPeel banana’s Golden banana’s from my trees
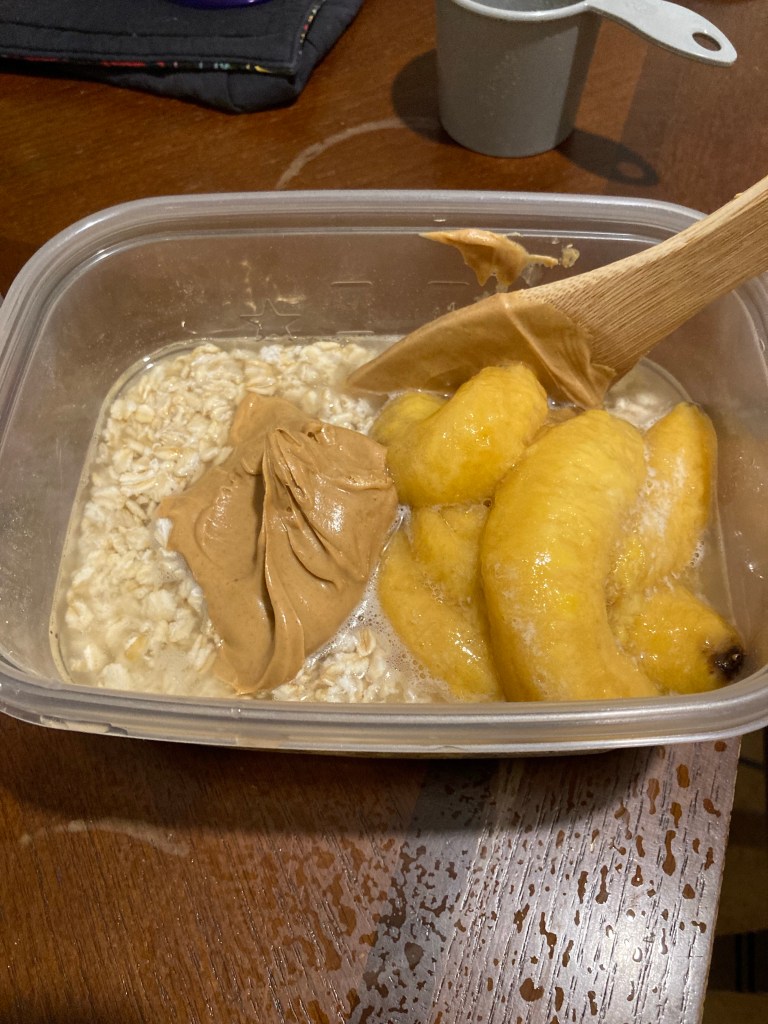
Place the banana, peanut butter and oatmeal.
Stir / Cream the ingredients together. Make sure all the bananas are mixed in good. You might want to mix the bananas prior to adding to the mix.
After getting those ingredients mixed time to add the flour.
Place the dough onto the cookie sheet and smooth out to thin layer.
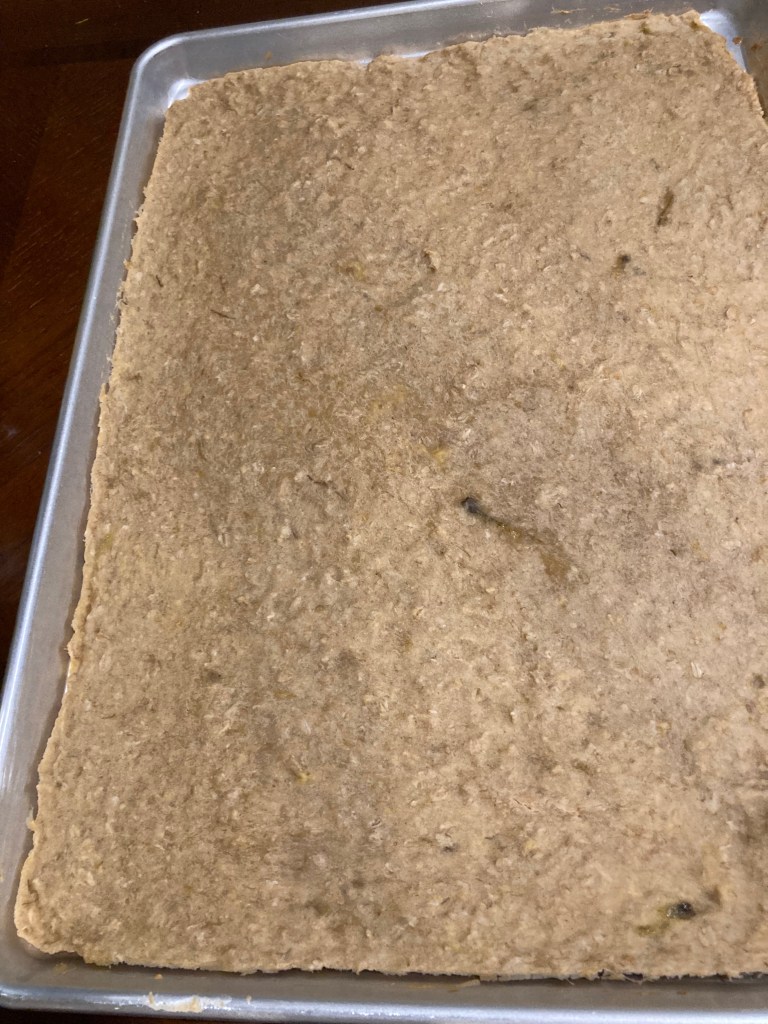
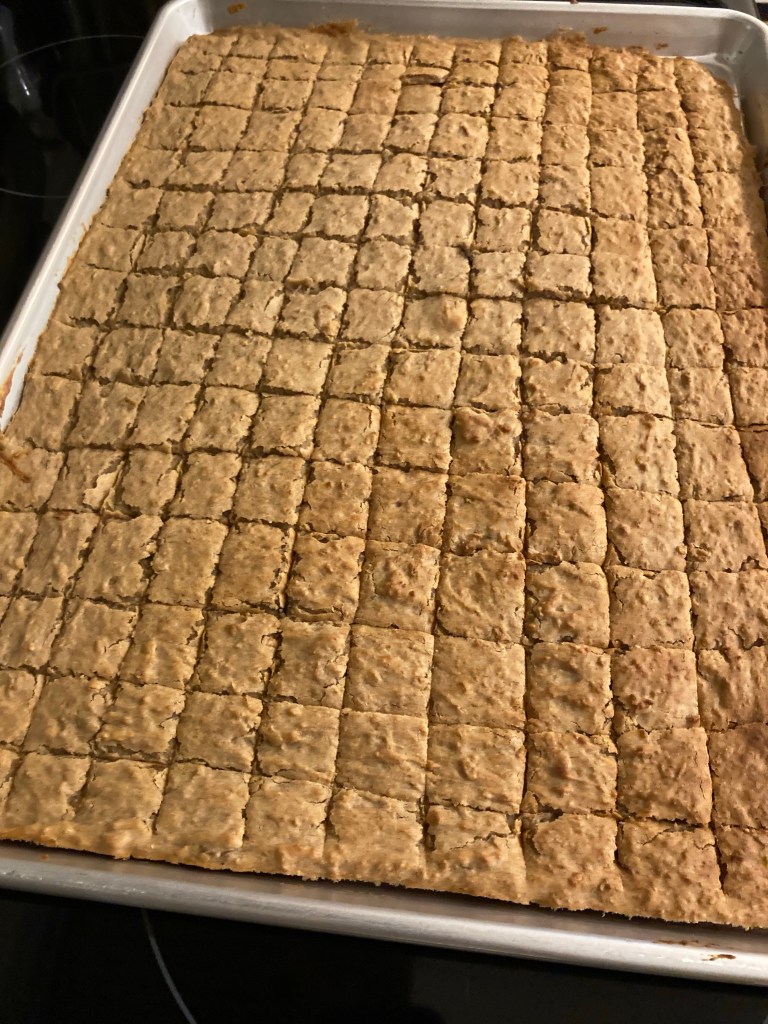
Place in oven on center rack for 30 minutes. take out of oven. The sides should be pulled away from pan. Get the pizza cutter and cut your squares. Turn oven off and put the pan back into the oven and let bake until cool. You can make the size of the cookie fit your dog. I have 4 dogs in various sizes. From 85 to 15 pounds. So my cookies are various sizes.
After 30 minutes remove from the oven
Cut your squares and put them back into the oven until completely cool.
Remove from oven after completely cool. Put into an airtight container and refrigerator. I have 4 dogs and this last 3 weeks. You can also freeze them and just take out what you need.
Your dogs will love them until the last cookie…
You can adjust this recipe to your dogs taste or yours. I ate one and i couldn’t taste the peanut butter. I did a second recipe with 1 1/2 cups of peanut butter. I can taste the peanut butter and my dogs could really smell their treats baking and waited by the kitchen door.
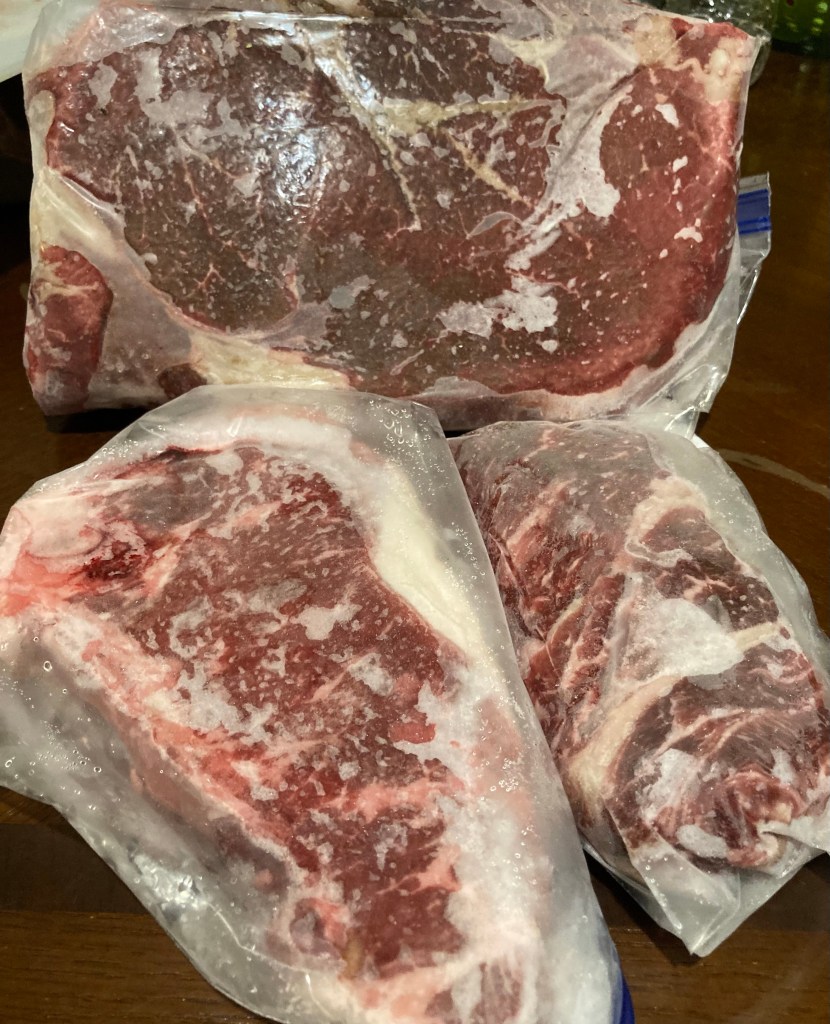
Fresh chopped hamburger meat from your own kitchen doesn’t get any better. You choose your choice of meat and start chopping.
Most hamburger meat is a combination of several cows. So if one of them has an infection the whole bunch that was just made is infected. This way you know this is one cow.
London broil, top sirloin or chuck roast. Your choice. Just remember to have some fat on the piece of meat. Flavonoids are in the rendered fat. Yummy
I like to cut mine up into very small chunks. I leave my meat semi thawed, it’s easier to cut.
You can also use this for your dogs. If you can afford a Little treat every now and then. Don’t cook it. Leave it raw and mix with some slightly cooked veggies.
1/2 cup butter room temperature (1 Stick Butter or 4 ounces) 1 cup sugar 1 teaspoon vanilla extract 2 eggs 1 3/4 cups all-purpose flour 2 teaspoons baking powder 1/2 teaspoon salt (you can omit if you used salted butter) 1/2 cup water 2 tablespoons powdered sugar (to sprinkle on cake before serving)
Preheat the oven to 375°F Grease 9″ x 9 cake pan with vegetable oil and flour Cream the butter, sugar and vanilla together in a large bowl. Add the eggs, one at a time, beating well after each addition. Add the water make sure it is at room temperature. Add the flour, baking powder and salt. Mix all together beating well. Spread a layer of the batter evenly into the pan. (use 3/4 of the batter) Spread the cinnamon apple fillings on top of the batter. Spread the left over batter on top of filling.
Bake 25 to 35 minutes. Test with tooth pick at 30 minutes Remove from oven cool on rack for at least 30 minutes Cut the length of cake and then cut your cake into 12 squares
Make a powder sugar glaze or lightly sprinkle powder sugar over top right before serving.
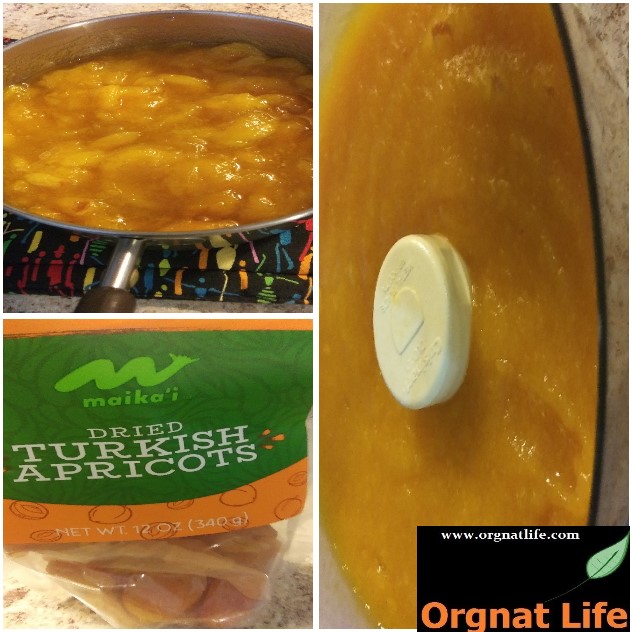
You can also make a paste with the raisins and walnuts. It becomes a very smooth buttery experience for the thinner pastry dough.
Dough Ingredients
1 cup Water
3/8 cup Milk (Whole)
3/4 Stick Butter (chopped into tiny pieces and evenly placed in the pan)
1 and 3/4 teaspoon Salt (on the Left side top corner of the pan)
4 cups Flour (in the center place a shallow divot to place yeast ans a little sugar)
2 tablespoons Sugar (on the bottom right corner and a small sprinkle in the divot maybe 1/4 teaspoon)(Real Sugar, No Substitute)( Trust me, it won’t hurt you)
2 and 1/4 teaspoons Active Dry Yeast ( place in pivot on top of sprinkled sugar)(NO QUICK YEAST) Old Fashion kind…
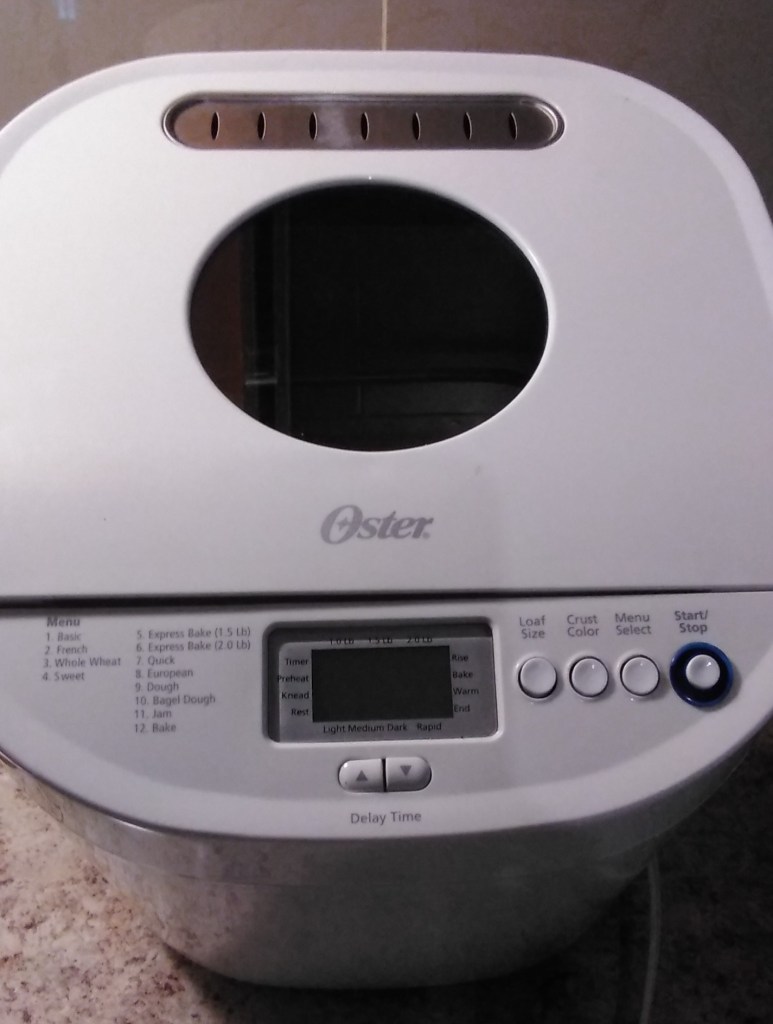
While your bread machine makes the dough get all your other ingredients together.
Soak the cup of raisins in 1/4 cup of warm water for at least 45 minutes. I just let them soak until my dough is ready. Drain and set aside. If you are using the raisin paste its better to make the paste a day ahead. Remove from refrigerator at least 2 hours prior. Must be at room temperature.
Prep Time: 10 minutes Cook Time: 10 minutes Total Time: 20 – 30 minutes Yield: 1 servings + Skill Level: Easy Kitchen Appliance: Food Processor, Stove, sauce pan and spatula
Raisin paste is always a good match for thinner dough, thumbprint cookies or cinnamon rolls if the dough is thinly rolled and its more of a delicate pastry. The raisin paste is great for Filo, buttery, croissant Doughs.
Ingredients
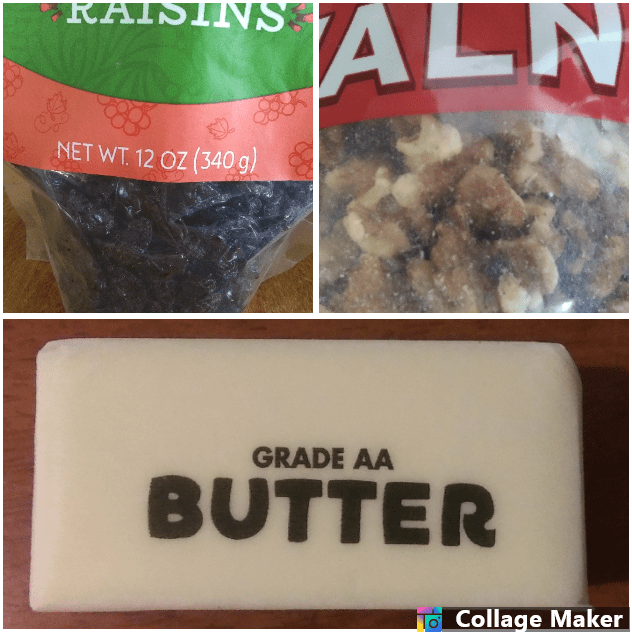
1 Cup Raisins
1/4 to 2/3 cup Water (enough to cover raisins)
1/2 stick Butter
2 tablespoons Sugar
2 tablespoons Cinnamon
Directions
Add the Raisins and water into the saucepan and place on stove
Bring to a boil and turn down fire.
Simmer for 10 minutes
Remove from heat and add the butter, cinnamon and sugar.
Stir until the sugar dissolves
Use you spatula to remove everything and place into the food processor.
Make sure it processes to a smooth texture.
Take your spatula and remove all the paste into a container with a lid.
Set in refrigerator until ready to use.
Its better to make the paste a day ahead or even a few days. Remove from refrigerator at least 2 hours prior to use. Must be at room temperature so it spreads evenly like butter. This is awesome on toast in the morning.
I am using some left over Apple Cinnamon filling from the empanadas that I made for Christmas breakfast. I had made a large batch of Apple Cinnamon Filling and put 2 big tubs in the freezer for later. Enough for 2 deep dish pies.
Butter Pastry Crust for Sweet and Savory Pies (2 crusts)
Ingredients
2 1/2 cups all-purpose flour, plus extra for rolling
1 cup (2 sticks or 8 ounces) unsalted butter, very-cold, cut into 1/2 inch cubes
Check the website for complete recipe and pictures.
At one time I had the good fortune to live near a remarkable Jewish Bakery. They created the most eye catching flavorful desserts I had ever seen or tasted. When I moved out of the area and realized I no longer had access to some of my favorites; I decided it was time to start creating my own. One of these fabulous treats was Prune Danish. Now many people just are not into prunes always seeing them as simply a source of fiber for regularity. However, their flavor complements the flaky pastry crust that surrounds them. Prunes are NOT just for fiber any more! And so let me entice you to try making what you see above and enjoying the aroma and flavor of your own freshly baked Prune Danish! Below are two versions you may follow. The Puff Pastry and Lekvar Prune Butter are what yielded the photo above. BUT you can also create your own prune filling and use a softer pastry as will be detailed in what follows. Mix, match and try what you will as they will still taste great. Let us begin with the Puff pastry: 2 1/2 sticks cold unsalted butter 1/2 cup cold tap (or bottled) water 1 tsp salt 2 cups all purpose flour 1/2 tsp vanilla 1/8 tsp Cardamom (ground)
Measure the water, add the salt and vanilla, stir to dissolve and set aside. Cut up butter into small size chunks ( I cut 1/2 inch pats then split those into four) Place flour and cardamom into bowl of food processor with METAL blade (not dough blade) Add about 1/2 stick’s worth of the cut up butter and pulse 12 times for one second each Add remaining butter and long pulse twice to incorporate (5 seconds each) Add water and pulse three or four times until dough forms a rough ball. Flour your work surface (I use a large wooden pastry board) and scrape dough out of processor onto the floured surface. Shape dough into a rough rectangle and place between two LARGE sheets of plastic wrap (OR you could use waxed paper). Roll dough into a 12X18 inch rectangle Peel away top plastic then invert dough onto floured work surface Peel away second plastic then fold dough in thirds on the width so as to end up with a 6X18 inch rectangle. Fold one side in then the other overlapping. Roll up dough from a six inch side making sure the end is on the bottom. Press dough into a a square, wrap in plastic and refrigerate one hour.
Pastry number two is a softer one:
1 8oz. brick of cream cheese 3 sticks of butter (salted) 3 cups all purpose flour 1/8 tsp cardamom 1 tsp vanilla
Place 3 cups flour and 1/8 tsp cardamom into food processor with metal blade Cut up butter into smaller chunks (cut 1/2 inch pats then cut each into 4) Cut up Cream cheese into rough chunks as well Add butter to processor and pulse until four and butter combine roughly Add cream cheese and vanilla and pulse until the dough comes together CAREFULLY remove from processor and work with your hands into a ball Place in a bowl and cover with plastic wrap then into the fridge for one hour.
Those are the two dough options. Both taste good.
As to the prune filling – well I really like the Simon Fischer Lekvar Prune Butter in the18oz jar. I have bought it on Amazon. It is Natural and tastes really good. I have even spread it on English muffins for breakfast. They sell the jars as a pack of 6 which is okay as they will last you a while. They also sell 17oz in a pack of 3 but you pay shipping so the six pack is a better value. Try this stuff it is REALLY good. I used to use the Solo Prune Filling in the can until my grocery store stopped carrying it. Now I realize they did me a favor as that one was nowhere near as good as Simon Fischer.
IF you feel REALLY ambitious and would rather make your own prune filling then here goes MY version.
2 cups pitted prunes 1/2 cup dark raisins 1 cup Brandy (or if you do not like using alcohol use boiling water) 3/4 cup mild honey 1/8 tsp salt 1 tsp grated Orange Peel (fresh grated or from the jar) (I use a Microplane to get very fine fresh orange and lemon peels. If you do not have one GET one – they are wonderful.)
Put prunes and raisins into a container or bowl and pour on brandy (or boiling water). Stir well and cover with container lid or plastic wrap. (Brandy gives a great flavor and the alcohol will cook out anyway). Allow fruit to soak overnight Place softened fruit into food processor with metal blade Add peel and salt and pulse three or four times Add honey and run processor until well mixed and smooth Do not worry if mixture seems thin as you are going to refrigerate this overnight and it will firm up at that time.
Notice I do NOT cook the prunes as do many recipes. I do not like the taste or texture. The alcohol in the Brandy really plumps and tenderizes the fruit. Boiling water will do okay but not as good as Brandy!
NOW whichever dough you have made you will cut into four equal parts. That is if you like your Danish LARGE with lots of filling – as I DO! If you want smaller ones then by all means divide further. The techniques are the same regardless so YOU decide.
For the Puff Pastry roll each part of dough on Floured surface until you have a 6″X6″ square. (That is for the four LARGE size as shown above) For the soft pastry instead of flour you will coat your work surface with a mixture of 1 cup confectioners sugar and 1 cu granulated sugar. Mix them up together and use like flour on work surface to roll out dough.
Puff Pastry:
For the two front danish in the photo which are the standard looking type, look at the 6X6 square from one point so you see what is like a diamond shape. I use a Tablespoon and a teaspoon to load the filling down the center of the diamond leaving an inch at either “tip”. I use quite a bit of prune in each because I like it that way and the bakery I once frequented did the same. NOW you will fold the two SIDE tips inwards so they overlap over the prune filling (just like you see in the photo above.) Also curl up the other two end points making a sort of ridge which will help keep any filling from running out. This is for the standard look. Use a large flat spatula to lift the danish from the work surface on to your baking sheet. I use a standard cookie sheet which is lined with a Silpat. You can buy Silpat (or silicone) liners on Amazon OR when they have them Costco sells a set for a LOT cheaper. I always have TWO silpat lined cookie sheets for when I make cookies.
The other fancier danish starts out the same with the square but now you look at it AS a square and load the filling down the center leaving an inch at either end. Next you will use a sharp knife to slice the dough into strips coming no closer to the filling than a half inch. Like a lattice you will fold first one “flap” then its opposing over the filling so they overlap. Just look at the picture above and you can see what I am trying to describe. I like the look of these for some reason.
Use the “square/diamond” instructions above only coat your surface with the mix of confectioners and granulated sugars. I would NOT try the overlapping strips with this softer dough. You might end up with a mess. In both cases place cookie sheet with pastries into the fridge while the oven preheats to 350. Before placing in oven either spray top surface of pastries LIGHTLY with PAM (and please use the original as it has the best taste) OR separate out an egg white and whip it up with a whisk until it is more liquid. Brush this on the tops of the pastries if you wish. I prefer the PAM as I do not like the added egg taste. Start out setting your timer at fifteen minutes and then check every five minutes after that until pastry is golden brown as above. DO NOT leave and do NOT forget to check. Every oven is different and there is no way to be exact with timing. Just go by smell and sight to judge when these are done.
Remove from oven leave ten minutes then transfer to cooling racks. Enjoy!
So there it is, another great recipe for the use of healthy prunes.
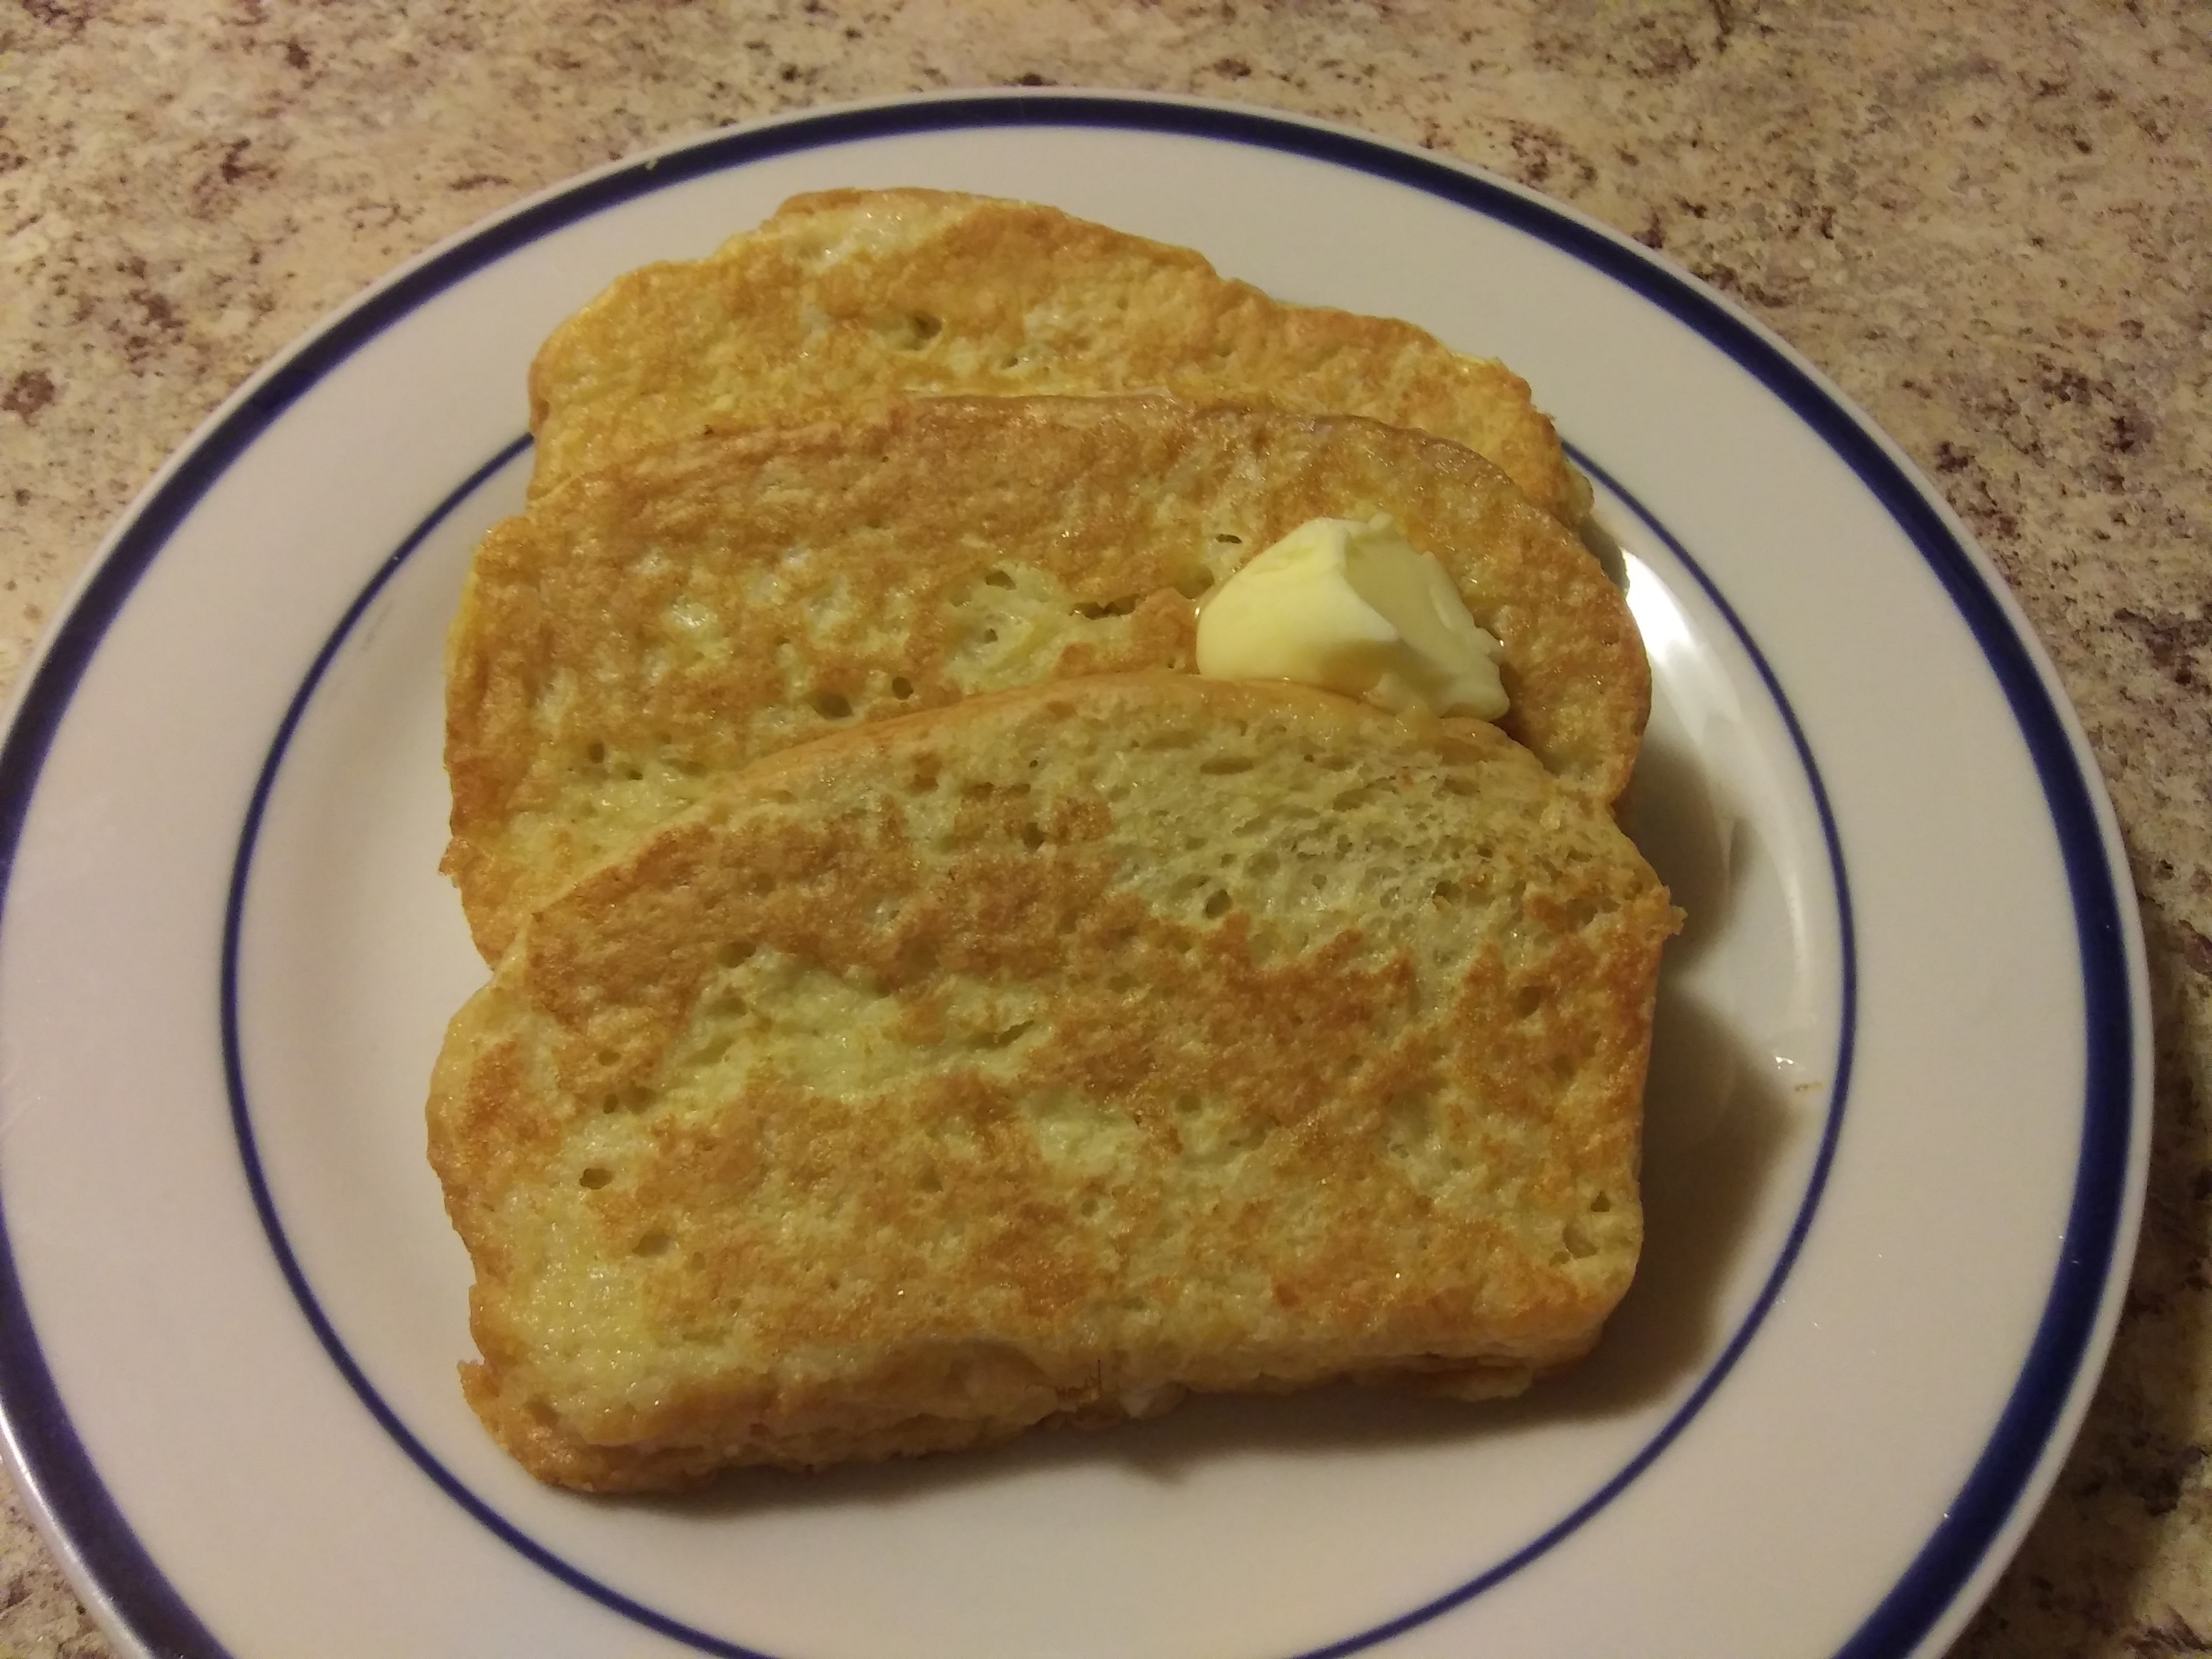
1 egg per 3 slices of bread (Day old bread is great to use, make sure nice healthy slice.)
3 tablespoons of water
Vegetable oil
Griddle or Skillet
Heat your Griddle or Skillet to a medium heat.
Beat the eggs and water until combined.
Place each slice of bread gently into the egg bath making sure both sides are coated well.
Place on to hot greased griddle or pan and repeat.
Cook for 2 minutes and flip. Total time is about 4 minutes. Slowly cook until lightly brown on both sides. Don’t rush or you will have mushy French Toast and that’s gross.
Lightly butter each slice and serve with warm syrup or fruit.
Use you imagination for the toppings. You can also make Savory and Zesty French Toast for lunch or dinner.
I don’t put sugar or cinnmon in my egg mix. There is enough in the syrup. I’d rather add some cinnamon to the syrup and slightly warm it and serve on the side. This way you are not serving a plate of sugar. Make it so diabetics can enjoy. Make it fun and add some choices of fruit, whip cream or what ever. Simple and less sugar.
I made a loaf of bread wth the buttery dinner roll left over dough a few weeks before. I took the loaf from the freezer… This was a wise move to use this bread. This recipe just melts in your mouth.
This summer brought a bumper crop of tomatoes. With all the sunshine the vegatable garden had a big burst with the long summer days.
6 large Tomato
1 bunch Cilantro
1 bunch Green Onion
1 medium Sweet Onion
8 sections Garlic
Salt To Taste
1/4 cup Lime Juice (Fresh is best)
1 Serrano pepper ( for spicy leave the seeds in and just thinly slice the pepper. Take the seeds out and put just a few in for a nice medium to cool temperature of spicy.)
This recipe is simple and easy. Best of all no preservatives, no extra sugar and no extra yeast.
If you ever wonder why you are eating so little but gaining so much. It’s the quality of your food. If you are constantly consuming your meals from boxes, cans and the frozen meals off the shelf of the market. There lies your problem. Garbage in, Garbage weight you will gain.
This is fresh hot delicious food you will enjoy eating and your body will thank you…
Total Time: 1 hour 15 mins
Ingredients:
12 ounce can Tuna (drained)
2 cups frozen Peas (if you don’t like Peas, Pick them out, It gives a special sweetness to the casserole)
3/4 stick Butter
1/2 teaspoon Salt
1 teaspoon Salt (No it’s not a Typo)
1 teaspoon ground Black Pepper
2 tablespoons Flour
2 1/2 cups Whole Milk or Cream (590 ml)
1/2 cup Gouda Cheese
1/2 Monterey Jack
13″ x 9″ x 4″ casserole dish with lid or foil
Butter your casserole dish
Take a 1 teaspoon of the butter and grease the entire 13″ x 9″ x 4″ or any dish with similar dimensions. Glass preferred.
Take a mason jar or any jar with a lid:
Add Pepper, Salt, Flour and Milk or Cream. And shake till all the flour is combined and smooth. You may want to shake for a few minutes and let rest and return in 10 minutes and shake some more. Take the remaining butter throw it in a pan along with your rue and warm over stove constantly stirring until steam arises from surface. Remove from Heat.
Boil your water add the 1 teaspoon salt after the water boils. Place Peas in first make sure water is still boiling. Add the Pasta in and boil for 10 minutes stirring occasionally. Drain, Place drained Pasta and Peas into the casserole dish. Take the flour rue and stir for a few minutes and make sure there are no lumps. Pour over Pasta and stir gently until all pasta and peas are thoroughly covered in the rue. Place cheese evenly over the pasta one at a time so it is evenly covered with both cheeses.
BAKE AT 350 Degrees for 20 minutes or until cheese is slightly brown. Cover with lid or foil and continue to cook for 25 minutes, Remove from oven and let sit for 15 minutes and serve.
This is fantastic if you want to freeze small portions for later. Frozen dinners with no preservatives or extra sodium you don’t need.
In the 1967 my cousins and I built a tree house in the plum tree and we watched the Disneyland fireworks. We use to play army in the orange groves. Using the oranges as hand grenades and drinking the juice when we were thirsty. I can remember waking up in the morning to fresh strawberries on the kitchen table. Plums picked fresh from the tree. Sunday we would go to my grandmothers house and she had apricot’s, Apples and some other fruits in her yard.
July 17, 1955: Disneyland opening aerial. In foreground is the still-unfinished Santa Ana Freeway. The Harbor Blvd. intersection is on extreme right.
We were surrounded by fruits and vegetables. No matter if we were walking to school or to the store fields and orchards every where. Disneyland and Knotts Berry Farm were surrounded by Orchards and fields.
Agriculture is one of the prominent elements of the state’s economy: California leads the nation in the production of fruits, vegetables, wines and nuts. The state’s most valuable crops in 2019 are cannabis, nuts, grapes, cotton, flowers, and oranges. California produces the major share of U.S. domestic wine. Also grown carrots, lettuce, tomatoes, onions, and broccoli.
Orange Groves: In the late 1880s, California citrus growers began organizing themselves into cooperatives, with the goal of increasing profits by pooling their risk and increasing their collective bargaining power with jobbers and packers. The economic depression that began in 1893 worsened farmers’ situations, and intensified their desire to self-organize to their own benefit.
In 1893, P.J. Dreher and his son, the “father of the California citrus industry” Edward L. Dreher (1877–1964), formed the Southern California Fruit Exchange in Claremont, a small college town near Los Angeles. It originally represented only growers of oranges: in 1896 lemon growers joined as well.[3] The exchange soon included growers and groves in Riverside in Riverside County, Pomona and San Dimas in Los Angeles County, and Santa Paula, Saticoy, Fillmore, Rancho Sespe, Bardsdale and Piru in Ventura County; by 1905, the group represented 5,000 members, 45% of the California citrus industry, and renamed itself the California Fruit Growers Exchange. In 1952, it changed its name to Sunkist Growers, Inc.
Strawberry Fields: The strawberry Festival in Garden Grove California was started in 1958. The festival became and has always been a charitable event benefiting local organizations. In the past 50 years over $4.5 million has been donated to hundreds of non-profits.
Avocado Groves: The Hass avocado had one of its first commercial successes at the Model Grocery Store on Colorado Street in Pasadena, California, where chefs working for some of the town’s wealthy residents bought the new cultivar’s big, nutty-tasting fruit for $1 each, a very high price at the time (equivalent to $14 in 2018).
Almond Trees: Almonds arrived in California in the 1700’s when Jesuit missionaries from Spain brought them as food and later planted them in their coastal missions. Eventually, settlers found that the nut grew much better in the inland areas of the state, away from the cool coastal fog. In the past 30 years, California’s almond yield has quadrupled, covering more than half a million acres in the lush San Joaquin, Fresno and Sacramento valleys. Today: Almonds are California‘s top agricultural export and largest tree nut crop in total dollar value and acreage. They also rank as the largest U.S. specialty crop export.
Cannabis: Is leading the agricultural market financially in 2019 with Billions being made yearly by the growers. It’s a cash crop unlike no other. It is now being offered on the stock market.
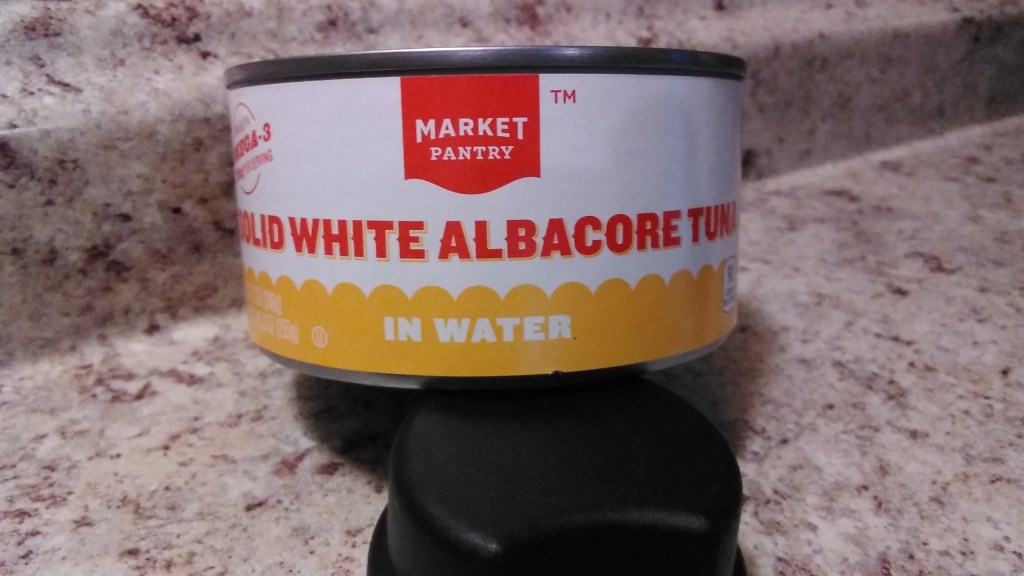
Tuna Review: Target Market Pantry Solid White Albacore in Water
12 ounce can of Dolphin Safe $2.79 on SALE $1.99 (Hawaii) This is a good deal for the price. Most of the 12 ounce cans of tuna from the “Big” markets are of lesser quality compared to your name brands. So far this is one is good quality. Name brands prices run any where from $5.99 to $14.99 for a 12 ounce can. I am sure it is cheaper for other states.
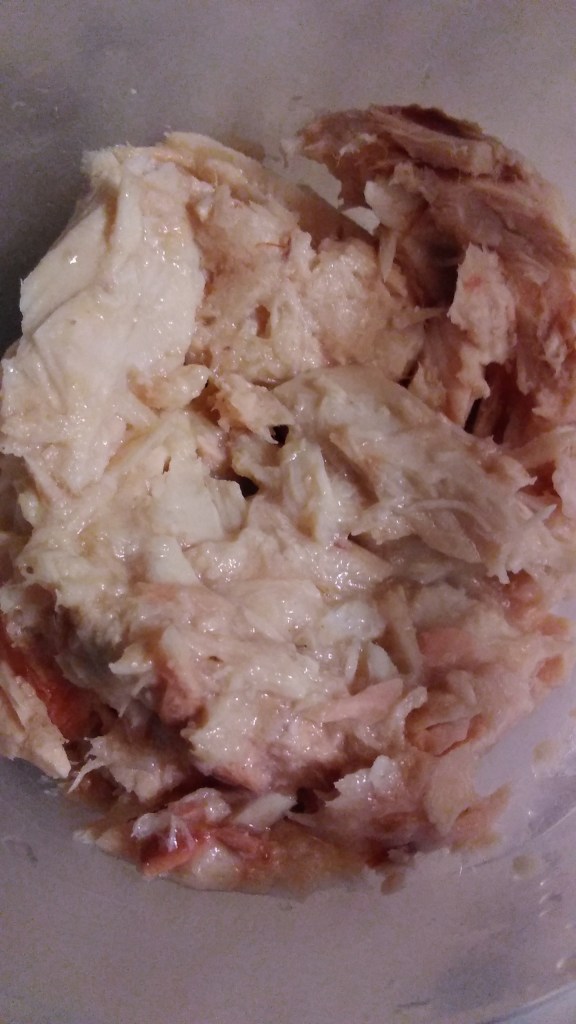
“Hey my tuna tastes like Vegetables”…Just kidding..
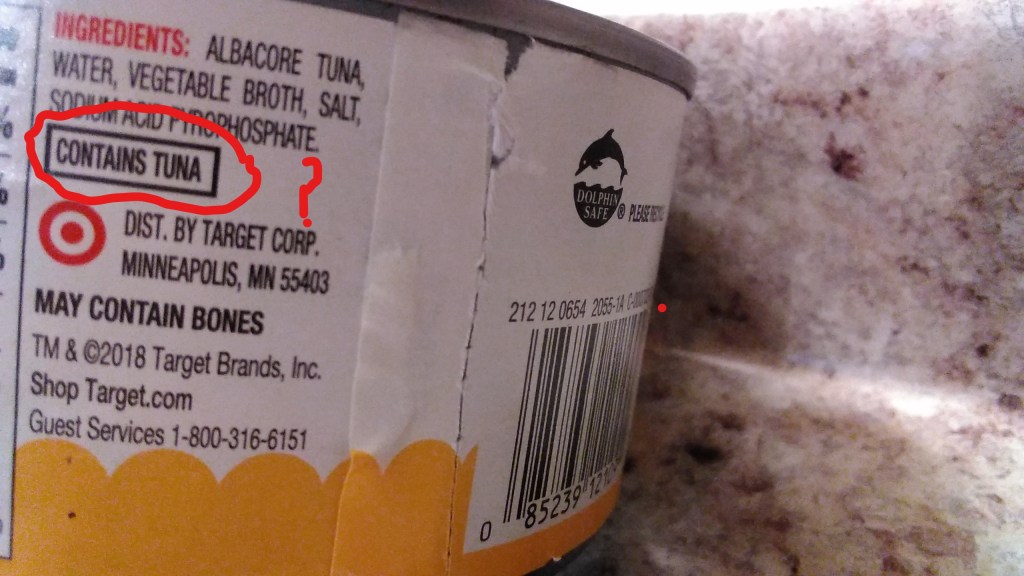
Not sure why the ingredients include vegetable brooth when it says in water? I thought we wanted it to taste like tuna?
Ingredients vary from manufacture. This can contains: Albacore Tuna, Water, Vegetable Broth, Salt, Sodium Acid Pyrophosphate. May also contain Bones.
It does not say what country it was processed or caught in. Mystery fish are becoming more prevalent in our society. Not all Tuna is alike… It does say it CONTAINS TUNA… Hahahahaha. Actually I thought it was a very good tuna for the price.
CONTAINS TUNA … Seriously it’s a can of TUNA
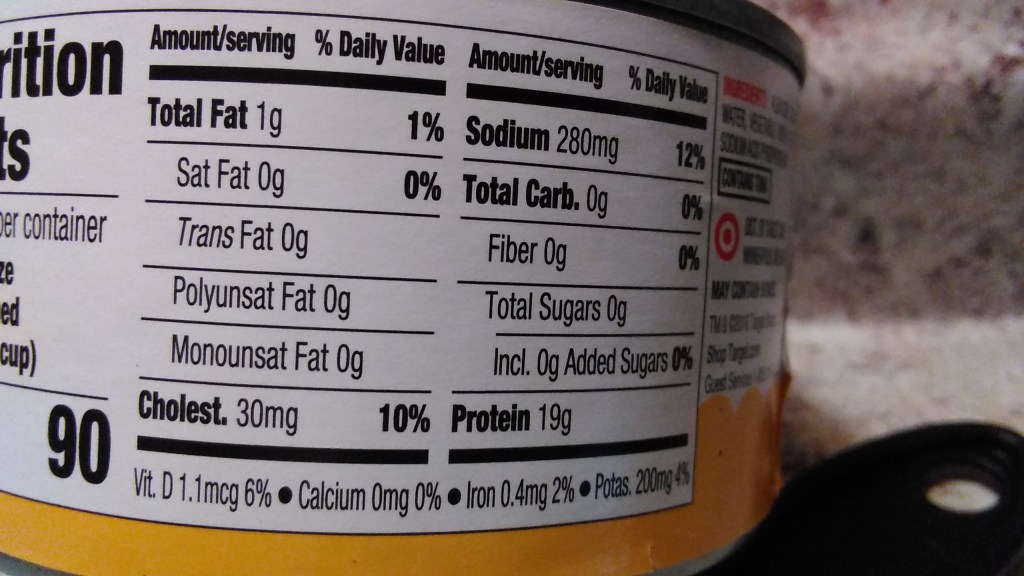
Nutrition Facts:
There are 3 servings per can. I add pickles and Mayo so I get more like 5 servings… I love sweet gherkin pickles. OOohhhh So Yummy!! Ok back to the facts.
90 Calories per serving when drained. A Healthy 1/3 cup of Tuna per serving.
Wow I did not realize tuna had Cholesterol. Each serving of this Tuna has 30 mg. I thought we ate tuna to lower our Cholesterial? Now I am confused.
It says it only has 1 Gram of Fat. Which fat? It does not say. But you do get a touch of Potassium 200mg, Vitamin D 1.1 mcg and Iron 0.4mg.
Sodium is at 280mg. No Carbs, No Fiber, No sugars and No Added Sugars.
Great News 19 grams of Protein and 220 mg per serving of DHA & EPA OMEGA-3 are present.
The good thing with Target’s Brand, Market Pantry Solid White Albacore Tuna is that there is no Soy added. Bumble Bee Tuna adds Soy and is about $4 more a can here.
If you are adding Mayo and Or Pickles get the nutritional information from the labels on the containers and watch those calories bump up. Don’t forget the bread, crackers or what ever vessel your delivery will be to your mouth has to be counted. Slimmest delivery system is a spoon… Zero calories.
Cinnamon Rolls with Walnuts You can make this recipe in no time. Very easy and all so yummy.
By Orgnat Life
This yummy recipe is so simple a beginner could achieve 5 STARS first time. Wait there’s is an “IF”.. That is, if you have a bread maker. Most of the models make dough.
I always encourage everyone to get a bread maker. If you are going to make bread and rolls regularly, let the bread maker do the hard work for you.
You can purchase Bridgford Frozen dough at the store, but that defeats the purpose of making your own… NO PRESERVEATIVES… So which ever you choose to fit your life style.
This recipe makes 1.5 lb of dough or 15 large rolls. This is a basic dough recipe for your creative adventures in baking rolls and breads.
Level: Intermediate Yield: 12 servings Total Time: 2 hours 30 mins Cook Time: 30 minutes
Utensils: Bread Maker, rolling pin or a sturdy water glass, measuring cup, measuring set, 2 spoons, sharp knife, 13″ x 9″ pan and something to roll your dough out on. I use a large pizza pan with a small rolling pin.
Dough Recipe If you are using a bread maker place ingredients in container as follows. ⦁ 1 cup Water ⦁ 4 tablespoons Butter cut into tiny pieces ⦁ 1 and 1/2 teaspoons Salt ⦁ 3 cups Unbleached Flour (regular if that is all you have) ⦁ 1 tablespoon sugar ⦁ 2 teaspooons active dry yeast Set menu on bread amker to dough. Depending on your bread maker 90 minutes approximately
If you are using frozen dough it will take about 60 to 90 minutes to thaw. Follow directions on package. You can thaw the dough out in your refridgerator over night if baking in the morning. Bring the dough to room tempreture. Once your dough is ready you can follow the directions below.
Ingredients for Filling ⦁ 1 to 1.5 sticks Butter ⦁ Sugar ⦁ Cinnamon sprinkel to taste ⦁ Walnuts (finely chopped)
While you are waiting on your dough, remove 1.5 sticks of butter from refrigerator so it can soften up. After the butter is soft use up to 1/4 stick of butter and heavily spread butter on pan bottom and sides with a spoon. Cut up 1 to 1 1/2 sticks of cold butter into small pieces and cover the bottom of your pan evenly with the butter. Take 1/4 cup of sugar and lightly sift over the butter. Set that to the side.
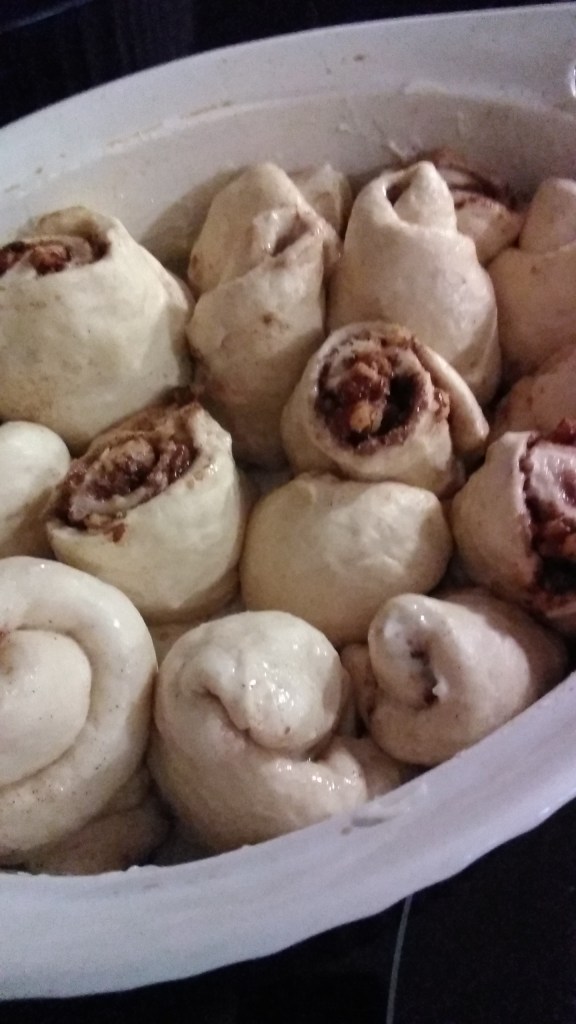
As soon as your dough is ready / proofed take it out and knead it one more time. I butter my hands and knead without flour. ⦁ Split it into 4 even sections. ⦁ Roll out 1 section so it is about 1/8″ thick or less. No bigger or you will end up with a doughy roll. ⦁ Butter the dough slightly. ⦁ Sprinkel 3 tablespoons sugar over dough. ⦁ Sprinkel your cinnamom. I like mine a little heavy but I like cinnamon. You can experiment with each section you roll out so in the end you will know what is a good coverage of cinnamon for you. ⦁ Sprinkel your fine chopped Walnuts to taste or make without nuts. ⦁ Take the dough at the edge and start to roll the dough up into a log shape and cut into 3. Place into your pan.
Leave at least 1″ more or less in between each roll. Cover with dish cloth and let rise for 30 minutes or until double to triple the size.
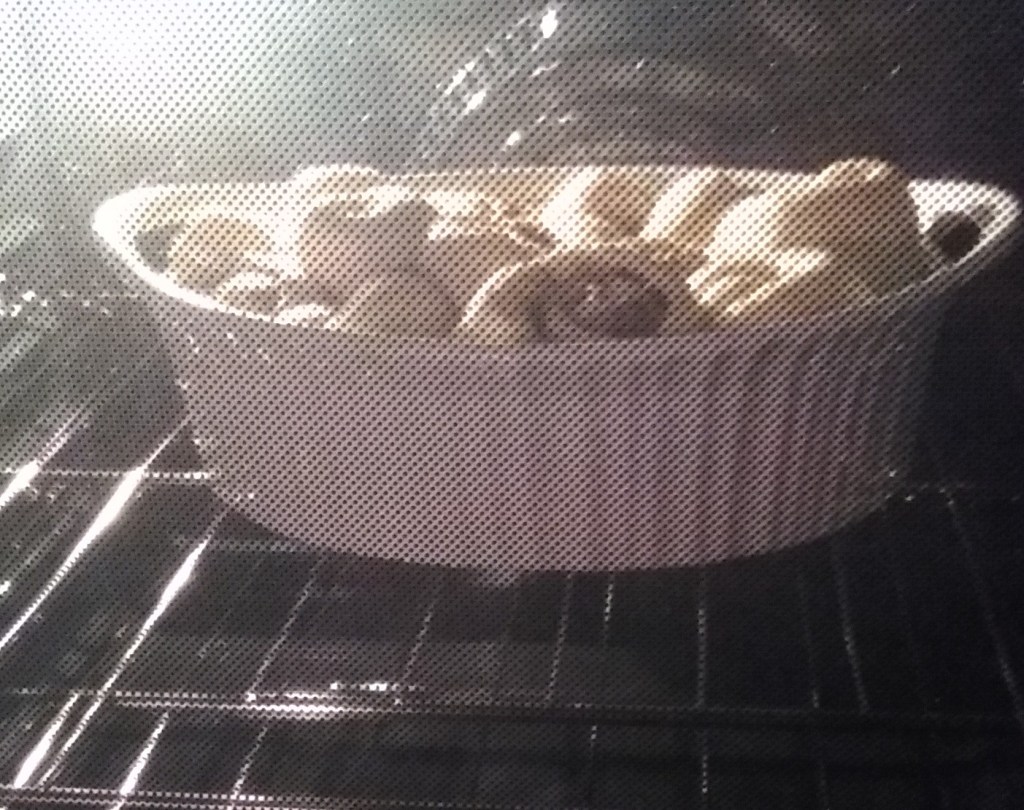
Preheat oven to 350′ degrees prior to cooking Make sure you have at least 4″ inches of room around the rolls, if not, lower the rack.
Cook for 30 minutes in the center of the oven.
Take out of oven let set for 5 minutes. Take a plate or plastic container to size and place on top of pan and flip it over. Leave the pan on top for 5 minutes. Lift pan off and let cool for 15 to 20 minutes.
ENJOY
Please Leave your comments below and let us know how you liked it.
Time consumption of grocery shopping… I am actually having anixety because I have to dedicate a few more hours to my grocery shopping now. Taking my mobile phone in so I can check the ingredients on the labels. Where have the days gone when you could going shopping for an hour or so. Putting our trust in the manufactors of our food products is really become a risky business. Reading labels these days has become a spelling bee, because of the additives. Processed foods have so many additives. In my view food has become unhealthy and toxic.
So many questions I have to ask myself and to remember them all is taxing my brain. It use to be so simple. What is the experation date?
Not only additives but dangerous listeria and E.coli. We need to ask what country is this being processed, made or grown in? Has this item or is it on a recall list? https://www.recalls.gov/
Checking everything is a BIG time consumming task.
Check your labels and look up all the ingredients you don’t know. If you are going to buy any boxed, processed, frozen or fresh meat . I try not to buy pre-packaged foods but sometimes you don’t have a choice. I know you say “no time”. I have found a few ways to curb cooking time.
I bought a bread maker and I now make my own bread. I eat good bread all the time. Unbleached Flour, Salt, Sugar, Butter, Water and only 2 teaspoons of yeast per 2 pounds of dough that I cook in my oven. You can let the bread maker make 1 LB loaves of bread quickly while you do something else. It just turns out a little heavier than I like sometimes. I use those loaves for yummy french toast. But my yeast is cut by 2\3 and so is the sugar compared to store bought bread. Best of all no preservatives.
Don’t get me wrong. I still buy dry pasta and rice. I have no time to make fresh pasta. I occaionally have bought the fresh made pasta at the store. But that comes with preservestives also. Soon I hope to try and make my own. It’s very simple and you can make the dough in a bread maker or food processor. Fresh pasta is a simple homemade treat with a pasta press machine. Endless pasta recipes. So come back for yummy pasta recipes in a few months. Till then check out these Italian Grandmas for recipes. https://youtu.be/wKOgzfgI48c
Let your machines do the work while you enjoy the benefits of a healthy product made by you.
Making meals from “real” food really can be super easy. I bought a Multi Cooker / Pressure cooker and I drop in frozen meat, veggies and seasonings. You’ll have pleanty of time to take a shower or get the kids into the tub. 30 to 45 minutes later you have a meal.
You can prepare most of your veggies ahead of time. You could make it for a whole week while you watch tv. Just put them in a container and refrigerate or freeze them. Or if you must buy frozen vegtables. READ the ingrediant label. Some have preservatives.
Check out my recipes for the bread maker and plain old simple recipes for a healthier life style. BLOG
Having Vegetarian friends over and you don’t know what to cook…
VEGGIE 911 to the rescue!!!
HELP!!!!! Friday night get together with vegetarian friends and you have No Idea what to cook. Not only will you be eating pretty clean, but the health benefits of reducing meat and processed food products from your diet will help your health tremendously.
Sometimes we really need to clean our systems out and the best way I know is to go Vegetarian. Just adding a few meals a week that are meatless will improve your overall health by 35%. If you are one of those people who live off of microwave and/or boxed foods your health will improve 100% just from making your own meals from scratch.
It’s 411 to your 911 situations. Getting stuck without a can opener is no problem when you know this little life hack survival trick. In minutes you can be enjoying your ravioli or tuna sandwich. It’s no joke when you are hungry and you forgot to put a can opener in your gear.
First video shows you how to open the can with a spoon. I tried this and it works. You might want to wear a pair of garden gloves to cushion your hand. Be very careful of sharp edges. Quarter way through the can I was really missing my P38 opener….
You don’t want to be caught by surprise in a disaster. Make sure you have at least the basic items. Flashlight, Battery-powered or hand-crank radio (NOAA Weather Radio, if possible), Extra batteries, First aid kit, Medications (7-day supply), Multi-purpose tool
Sanitation and personal hygiene items, Copies of personal documents (medication list and pertinent medical information, proof of address, deed/lease to home, passports, birth certificates, insurance policies), Cell phone with chargers, Family and emergency contact information and good old Extra cash. Not your ATM or credit cards the machines may not be working.
Second video shows you how to open a can on the concrete. For me being a woman and older this was easier than the spoon trick.
It is always better to be prepared ahead of time.
Today we showed you two ways to open a can of food in case you can’t find your “John Wayne”. I always keep a “John Wayne”, P38 (military can opener) on my key ring, in the glove box of my car and a few in my survival gear. You do not want to starve while you wait out the disaster.
Being prepared means being equipped with the proper supplies you may need in the event of an emergency or disaster. Keep your supplies in an easy-to-carry emergency preparedness kit that you can use at home or take with you in case you must evacuate.
At a minimum, you should have the basic supplies listed below:
first-aid-chart-for-survival
Water: one gallon per person, per day (3-day supply for evacuation, 2-week supply for home) Food: non-perishable, easy-to-prepare items (3-day supply for evacuation, 2-week supply for home).
Flashlight [Available on the Red Cross Store]
Battery-powered or hand-crank radio (NOAA Weather Radio, if possible) [Available on the Red Cross Store]
Extra batteries
First aid kit [Available on the Red Cross Store]
Medications (7-day supply) and medical items
Multi-purpose tool
Sanitation and personal hygiene items
Copies of personal documents (medication list and pertinent medical information, proof of address, deed/lease to home, passports, birth certificates, insurance policies)
Cell phone with chargers
Family and emergency contact information
Extra cash
Emergency blanket [Available on the Red Cross Store]
Map(s) of the area Get Prepared this Season
Consider the needs of all family members and add supplies to your kit. Suggested items to help meet additional needs are:Medical supplies (hearing aids with extra batteries, glasses, contact lenses, syringes, etc)
Baby supplies (bottles, formula, baby food, diapers)
Games and activities for children
Pet supplies (collar, leash, ID, food, carrier, bowl)
Two-way radios
Extra set of car keys and house keys
Manual can opener
Additional supplies to keep at home or in your survival kit based on the types of disasters common to your area:Whistle
N95 or surgical masks
Matches
Rain gear
Towels
Work gloves
Tools/supplies for securing your home
Extra clothing, hat and sturdy shoes
Plastic sheeting
Duct tape
Scissors
Household liquid bleach
Entertainment items
Blankets, pillows, sheets
Once again we are at that time of year when everyone tries to express themselves through food. We are showing you 3 very different ways to do Turducken. So on to the video, how to stuff a duck down a turkey’s throat. Break out the roaster it’s time for fun. To start we will need the Turkey and the duck. Video #1 starts now
Ok that look’s very tasty. I can’t wait to try it. Very good chum having a good time preparing.
Now our next video is a triple Turducken you could say. I found it to be interesting and would love to try it.
That was a lesson on twisting my tongue. That was the BIG 3Ducken…
TER FUCKEN DUCKEN IT”S DONE… I hope you enjoyed the 3 amazing ways to make Turducken / Turfucken.
Pumpkin Rolls for Thanksgiving and Christmas… Yummy
Chef Sherrie Angel “Slam Dunks” Thanksgiving this year with her Pumpkin Dinner Rolls. Creamy smooth texture that melts in your mouth. Bite after bite you can taste every spice layered across your pallet correctly.
Let’s not forget about the star of the day. Juicy seasoned to perfection turkey with chicken sausage gravy & all the sides to complete the meal.
I made my dough in the bread maker, but i have added instructions for making it by hand.
Risen twice and then baked to perfection. But we will give the directions for old school mixing in a bowl.
Chef Sherrie Angel… Rocks the Kitchen with Pumpkin Rolls
INGREDIENTS
1/2 cup warm Whole Milk
1/4 cup Honey
1/4 cup salted Butter
2 1/4 teaspoons Active Dry Yeast
1 can (15 oz) Canned Pumpkin
1 Egg
1 1/2 teaspoon salt
5 cups Flour
DIRECTIONS
Place milk , 1 teaspoon honey and whisk together. Sprinkle yeast on top, set to the side for 5 minutes.
In a large bowl combine and mix together the remaining ingredients. Add the milk mixture and start mixing. Dough will be wet. If the dough is extremely wet you can add some flour, but the dough should remain sticky. Don’t add to much flour at once, a little at a time until you can handle to dough.
After you have the dough mixed together remove from the bowl to a floured surface so you can knead the dough. Knead for 15 minutes.
Lightly butter a bowl and place the dough inside and cover with Saran Wrap. Allow the dough to rise. It should be doubled in size. About 1 1/2 to 2 hours.
Remove dough from bowl. You can use a pastry mat / board, greased surface or parchment paper to use for your work area.
Divide the dough into 4 pieces so it’s easier to handle. Cut the dough into 24 pieces. Grease or butter your hands and roll the dough inward into balls. Place the pieces into a greased pan or pans. Depending on what you have handy.
Cover pans with a kitchen towel and allow the rolls to rise to double or triple the size. About 1 1/2 to 2 hours.
About 30 minutes before the rolls are finished rising turn the oven on to 375 degrees F.
Bake the rolls for 25 – 30 minutes or until golden.
Remove from the oven. Brush the tops of rolls with butter. Let the rolls cool in the pans for 10 minutes. Remove rolls and place on wire rack. These rolls can be served warm or at room temperature.
If needed you can make these a day ahead, so you can concentrate on all the other dinner items.
You can eat more and still lose weight. It’s that easy!
It seems natural: You want to, so you do a diet slash-and-burn, eating less and thinking about food more. The usual result also seems pretty natural: You feel denied, so you give up. Repeat as diet fads come and go. Enough already!
Why not eat more for weight loss and weight maintenance, instead of less? If your schedule does not allow you to exercise, it’s even more important to change your intake values. If your body does not recognize the food as a value, it turns it into FAT… Read through all the articles and see if it makes sense to you. Start to change the inside of you. Read the labels. This will be the most vital part about living healthy. Juicing is an excellent way to intake healthy vitamins and minerals. With the a Juicer you will be able to make healthy juices while still eating a healthy diet.


 You can eat more and still lose weight. It’s that easy!
