Prep Time: 10 minutes Cook Time: 10 minutes Total Time: 20 – 30 minutes Yield: 1 servings + Skill Level: Easy Kitchen Appliance: Food Processor, Stove, sauce pan and spatula
Raisin paste is always a good match for thinner dough, thumbprint cookies or cinnamon rolls if the dough is thinly rolled and its more of a delicate pastry. The raisin paste is great for Filo, buttery, croissant Doughs.
Ingredients
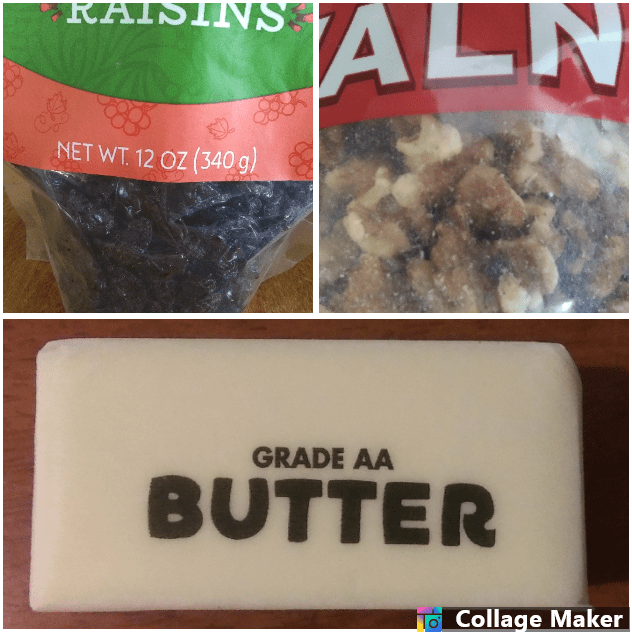
1 Cup Raisins
1/4 to 2/3 cup Water (enough to cover raisins)
1/2 stick Butter
2 tablespoons Sugar
2 tablespoons Cinnamon
Directions
Add the Raisins and water into the saucepan and place on stove
Bring to a boil and turn down fire.
Simmer for 10 minutes
Remove from heat and add the butter, cinnamon and sugar.
Stir until the sugar dissolves
Use you spatula to remove everything and place into the food processor.
Make sure it processes to a smooth texture.
Take your spatula and remove all the paste into a container with a lid.
Set in refrigerator until ready to use.
Its better to make the paste a day ahead or even a few days. Remove from refrigerator at least 2 hours prior to use. Must be at room temperature so it spreads evenly like butter. This is awesome on toast in the morning.
Prep Time: 60 minutes Yield: 1 pie crust 9″ or 10″ inch Skill Level: Easy beginner Kitchen Appliance: Food Processor
Best Pie Crust buttery flakey
This pie crust can be used for sweet or savory pies. Its light and flakey.
Butter and Shortening Crust
Ingredients for one double-crust 9 inch or 10 inch pie:
2 1/2 cups all purpose flour
1 teaspoon salt
2 Tablespoons sugar
3/4 cup (a stick and a half) unsalted butter, chilled, cut into 1/4 inch cubes
1/2 cup of all-vegetable shortening (8 Tbsp)
6-8 Tablespoons ice water
Make the dough: Combine flour, salt, and sugar in a food processor; pulse to mix. Add the butter and pulse 4 times.
Add shortening in tablespoon sized chunks, and pulse 4 more times. The mixture should resemble coarse cornmeal, with butter bits no bigger than peas.
Sprinkle 6 tablespoons of ice water over flour mixture. Pulse a couple times. If you pinch some of the crumbly dough and it holds together, it’s ready.
If the dough doesn’t hold together, keep adding water, a teaspoon at a time, pulsing once after each addition, until the mixture just begins to clump together.
Form disks: Remove dough from machine and place in a mound on a clean surface.
Divide the dough into 2 balls and flatten each into 4 inch wide disks.
Do not over-knead the dough!
Dust the disks lightly with flour, wrap each in plastic, and refrigerate for at least an hour, or up to 2 days before rolling out.
Roll out the dough: After the dough has chilled in the refrigerator for an hour, you can take it out to roll. If it is too stiff, you may need to let it sit for 5-10 minutes at room temperature before rolling.
Sprinkle a little flour on a flat, clean work surface and on top of the disk of dough you intend to roll out.
Using a rolling pin, apply light pressure while rolling outwards from the center of the dough.
Every once in a while you may need to gently lift under the dough (a pastry scraper works great for this) to make sure it is not sticking.
You have a big enough piece of dough when you place the pie tin or pie dish upside down on the dough and the dough extends by at least 2 inches all around.
Place into pie dish: When the dough has reached the right size, gently fold it in half. Lift up the dough and place it so that the folded edge is along the center line of the pie dish. Gently unfold. Do not stretch the dough.
Trim edges: If you are only making a single crust pie, use a pair of kitchen scissors to trim the dough to within 1/2 inch of the lip of the dish. Tuck the overhang underneath itself along the edge of the pie dish. Use your fingers in a pinching motion, or the tines of a fork to crimple the edge of the pie crust.
If you are making a double crust pie, roll out the second disk of dough. Gently place onto the top of the filling in the pie. Use a kitchen scissors to trim the overhang to an inch over. Fold the edge of the top piece of dough over and under the edge of the bottom piece of dough, pressing together. Finish the double crust by pressing against the edges of the pie with your finger tips or with a fork.
Make vents in top: Use a sharp knife to cut vents into the top of the pie crust, so the steam has a place to escape while the pie is cooking.
Optional Before scoring, you may want to paint the top of your crust with an egg wash (this will make a nice finish).
Egg Wash
A lovely coating for a pie can be achieved with a simple egg wash.
1 Tbsp heavy cream, half and half, or milk
1 large egg yolk
Beat egg yolk with cream and brush on the surface of the pie with a pastry brush.
This pie crust can be used for sweet or savory pies. Its light and flakey.
2 1/2 cups all-purpose flour, plus extra for rolling
1 cup (2 sticks or 8 ounces) unsalted butter, very-cold, cut into 1/2 inch cubes
1 teaspoon salt
1 teaspoon sugar
6 to 8 tablespoons ice water
Mix flour, sugar, and salt: Put flour, sugar, and salt into the bowl of a food processor and pulse a couple times to mix.
Add butter, half at a time, pulsing several times after each addition: Add about half of the butter to the food processor and pulse several times. Then add the rest of the butter and pulse 6 to 8 times until the largest pieces of butter are about the size of large peas.
Slowly add ice water: Sprinkle the mixture with about 1/4 cup of ice water (make sure there are no ice cubes in the water!) and pulse again. Then add more ice water, a tablespoon at a time, pulsing once or twice after each addition until the dough just barely begins to hold together.
You know that the mixture is ready if when you pinch some of the crumbly dough together with your fingers, it holds together. Be cautious with the amount of water you add, too much and the crust will be tough.
Make two dough disks: Carefully empty the crumbly dough mixture from the food processor on to a clean, dry, flat surface. Gather the mixture in a mound.
Divide the dough mixture into two even-sized mounds. Use your hands and knead each mound just enough to form each one into a disk. Do not over-knead! Kneading develops gluten which will toughen the dough, not something you want in a pastry crust. You should just knead enough so that the dough holds together without cracks.
If you started with cold butter you should be able to see small chunks of butter speckling the dough. This is a good thing. These small bits of butter will spread out into layers as the crust cooks so you have a flaky crust!
Sprinkle each disk with a little flour, wrap each one in plastic wrap, and refrigerate for one hour or up to 2 days.
4 Remove dough from refrigerator and let sit for a few minutes: Remove one crust disk from the refrigerator. Let sit at room temperature for 5-10 minutes in order to soften just enough to make rolling out a bit easier.
5 Roll out dough, place in pie dish: Roll out with a rolling pin on a lightly floured surface to a 12-inch circle; about 1/8 of an inch thick. As you roll out the dough, check if the dough is sticking to the surface below. If necessary, add a few sprinkles of flour under the dough to keep the dough from sticking.
Carefully place onto a 9-inch pie plate. Gently press the pie dough down so that it lines the bottom and sides of the pie plate.
Use a pair of kitchen scissors to trim the dough to within 1/2 inch of the edge of the pie dish.
Preheat oven to: See chart below
6 Add filling to the pie.
7 Roll out second disk, place on top of filling: Roll out second disk of dough, as before. Gently place onto the top of the filling in the pie.
Trim excess dough with kitchen shears, leaving a 3/4 inch overhang. Fold the edge of the top piece of dough over and under the edge of the bottom piece of dough, pressing together.
Flute edges using thumb and forefinger or press with a fork.
Score the top of the pie with four 2-inch long cuts, so that steam from the cooking pie can escape. You can be creative and cut small slit designs such as leaves or stars from a couple of spots or a circle.
When you are all finished make sure you always egg wash the top crust. Gives it a nice sheen and golden brown to the pies.
BAKING
Baking instructions for different types of fillings is very important. It can range depending on the type, depth of the pie, is it single or double crust? You will have to look up the directions for each one.
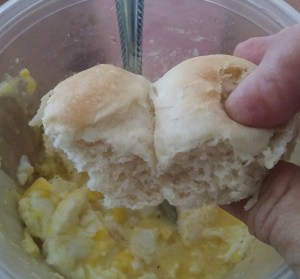
This recipe makes light and airy buttery dinner rolls easily and quick. Place your ingredients into the bread machine and go do something else while the machine processes the dough to a beautiful smooth texture. This recipe will make enough dough to make 48 regular rolls or 24 small size sandwhich rolls (not pictured). Or like I always do is make a pan of 18 rolls, 1 LB loaf and 6 sandwhich rolls from 2 LB’s of dough. Add all the ingreidients to pan as follows. Remember Liquid always goes first when using a bread machine. Always put your ingredients in their perspective places in the pan and you will always have perfect dough.
Ingredients
3/8 cup Water
1 cup Milk (Whole) room temperature
3/4 Stick Butter (chopped into tiny pieces and evenly placed in the pan)
1 and 3/4 teaspoon Salt (on the Left side top corner of the pan)
4 cups Flour (in the center place a shallow divot to place yeast and a little sugar)
2 tablespoons Sugar (on the bottom right corner and a small sprinkle in the divot maybe 1/4 teaspoon)(Real Sugar, No Substitute)( Trust me, it won’t hurt you)
3 Tablespoons Powdered Milk
2 and 1/4 teaspoons Active Dry Yeast ( place in pivot on top of sprinkled sugar)(NO QUICK YEAST) Old Fashion kind…
Once your timer goes off on your bread machine to signal your “DOUGH” is finished, remove pan of dough from machine and place it at work station.
Set your machine on “DOUGH” and go do something else.
On your work surface place your pans that you will use to cook your rolls.
Grease your pans lightly and your hands completely. I just use vegetable oil.
Remove a 1″ ball of dough for regular rolls or 2 1/2″ inches for larger rolls.
Place your rolls 1\4″ apart in pan. Set in warm area to rise for 25 to 45 minutes. Check after 25 minutes. Best if at least twice to 3 times original size or more.
at 25 minutes preheat your oven on 350 degrees
Place your pan in the oven on the center rack
Cook for 20 minutes or until lightly brown tops
Do Not Over Cook… Check through glass door of oven after 15 minutes. DO NOT OPEN OVEN DOOR at 15 minutes unless tops are brown then remove them. If not, check at 20 minutes. Remove and let cool at least 10 minutes.
As you gain more confidence at baking bread you will be able to lightly knock on the rolls and know they are done… Cooking is amazing once you get going. So every time you bake bread and the timer goes off knock lightly with your finger tip of nail on top of rolls “FLICK” it in the center. They will be crispy on the crust. You will hear a clear tone when they are done. Keep baking, you will see…
You can also freeze any extra dough. Just make the size of dough lay them on a cookie sheet and freeze and remove place in a baggie and take them out of freezer as you want. Easy simple.
Other tasty treats you may want to try with this dough are:
Bearclaws (Almond paste with a lite glaze)
Fried Apple fritters (Apples and Cinnamon wrapped up and sprinkled with glaze)
Peaches n Cream (Fried Bread with Peach compote with a dab of Vanilla Ice Cream)