The ketogenic diet is all about eating the right foods in the right proportions. When you get it right, it’ll trigger your body to start burning stored fat.
Is it a Diet or is it a Lifestyle change? That’s the question… Are you seeking to medically repair an illness or weight loss permantely.
In the 1920’s it was medically introduced to treat epilepsy in children. Today it helps diabetics regulate their blood sugar levels. It’s also being introduced to cancer patients for weight control.
Yes, you can use it as a diet method and loose the weight you need and go back to the same old lifestyle. But, by returning to sugar and yeast you are creating a YO-YO diet lifestyle. It’s better to try and balance a nutrious diet.
What foods can you eat?
Ewoldt says:
nuts
seeds
full-fat cheese and other dairy products
plain Greek yogurt
non-starchy and fibrous vegetables
oils
along with smaller amounts of meats, eggs and fish, become keto diet mainstays.
You’ll need to sharply limit carbohydrates
bread and baked goods
sweets
pasta
breakfast cereals
starchy vegetables like potatoes, sweet potatoes
corn and peas
beans
fruit
beer
Does it really work for weight loss?
Yes — but that answer comes with a qualifier. It takes two to three weeks on the diet to start fat burning (ketosis) in the body. So, don’t expect instant results. Some studies have shown that adhering to low- or very-low-carbohydrate ketogenic diets helps people lose weight. However, long term there is little difference between a ketogenic diet and a higher carbohydrate diet.
Ketogenic diet for Epilepsy
The ketogenic diet is a high-fat, adequate-protein, low-carbohydrate diet that in medicine is used primarily to treat difficult-to-control epilepsy in children and now for adults.
The diet forces the body to burn fats rather than carbohydrates. Normally, the carbohydrates contained in food are converted into glucose, which is then transported around the body and is particularly important in fueling brain function.
However, if little carbohydrate remains in the diet, the liver converts fat into fatty acids and ketone bodies. The ketone bodies pass into the brain and replace glucose as an energy source.
An elevated level of ketone bodies in the blood, a state known as ketosis, leads to a reduction in the frequency of epileptic seizures.
Around half of children and young people with epilepsy who have tried some form of this diet saw the number of seizures drop by at least half, and the effect persists even after discontinuing the diet.
Some evidence indicates that adults with epilepsy may benefit from the diet, and that a less strict regimen, such as a modified Atkins diet, is similarly effective.
Check the website for complete recipe and pictures.
At one time I had the good fortune to live near a remarkable Jewish Bakery. They created the most eye catching flavorful desserts I had ever seen or tasted. When I moved out of the area and realized I no longer had access to some of my favorites; I decided it was time to start creating my own. One of these fabulous treats was Prune Danish. Now many people just are not into prunes always seeing them as simply a source of fiber for regularity. However, their flavor complements the flaky pastry crust that surrounds them. Prunes are NOT just for fiber any more! And so let me entice you to try making what you see above and enjoying the aroma and flavor of your own freshly baked Prune Danish! Below are two versions you may follow. The Puff Pastry and Lekvar Prune Butter are what yielded the photo above. BUT you can also create your own prune filling and use a softer pastry as will be detailed in what follows. Mix, match and try what you will as they will still taste great. Let us begin with the Puff pastry: 2 1/2 sticks cold unsalted butter 1/2 cup cold tap (or bottled) water 1 tsp salt 2 cups all purpose flour 1/2 tsp vanilla 1/8 tsp Cardamom (ground)
Measure the water, add the salt and vanilla, stir to dissolve and set aside. Cut up butter into small size chunks ( I cut 1/2 inch pats then split those into four) Place flour and cardamom into bowl of food processor with METAL blade (not dough blade) Add about 1/2 stick’s worth of the cut up butter and pulse 12 times for one second each Add remaining butter and long pulse twice to incorporate (5 seconds each) Add water and pulse three or four times until dough forms a rough ball. Flour your work surface (I use a large wooden pastry board) and scrape dough out of processor onto the floured surface. Shape dough into a rough rectangle and place between two LARGE sheets of plastic wrap (OR you could use waxed paper). Roll dough into a 12X18 inch rectangle Peel away top plastic then invert dough onto floured work surface Peel away second plastic then fold dough in thirds on the width so as to end up with a 6X18 inch rectangle. Fold one side in then the other overlapping. Roll up dough from a six inch side making sure the end is on the bottom. Press dough into a a square, wrap in plastic and refrigerate one hour.
Pastry number two is a softer one:
1 8oz. brick of cream cheese 3 sticks of butter (salted) 3 cups all purpose flour 1/8 tsp cardamom 1 tsp vanilla
Place 3 cups flour and 1/8 tsp cardamom into food processor with metal blade Cut up butter into smaller chunks (cut 1/2 inch pats then cut each into 4) Cut up Cream cheese into rough chunks as well Add butter to processor and pulse until four and butter combine roughly Add cream cheese and vanilla and pulse until the dough comes together CAREFULLY remove from processor and work with your hands into a ball Place in a bowl and cover with plastic wrap then into the fridge for one hour.
Those are the two dough options. Both taste good.
As to the prune filling – well I really like the Simon Fischer Lekvar Prune Butter in the18oz jar. I have bought it on Amazon. It is Natural and tastes really good. I have even spread it on English muffins for breakfast. They sell the jars as a pack of 6 which is okay as they will last you a while. They also sell 17oz in a pack of 3 but you pay shipping so the six pack is a better value. Try this stuff it is REALLY good. I used to use the Solo Prune Filling in the can until my grocery store stopped carrying it. Now I realize they did me a favor as that one was nowhere near as good as Simon Fischer.
IF you feel REALLY ambitious and would rather make your own prune filling then here goes MY version.
2 cups pitted prunes 1/2 cup dark raisins 1 cup Brandy (or if you do not like using alcohol use boiling water) 3/4 cup mild honey 1/8 tsp salt 1 tsp grated Orange Peel (fresh grated or from the jar) (I use a Microplane to get very fine fresh orange and lemon peels. If you do not have one GET one – they are wonderful.)
Put prunes and raisins into a container or bowl and pour on brandy (or boiling water). Stir well and cover with container lid or plastic wrap. (Brandy gives a great flavor and the alcohol will cook out anyway). Allow fruit to soak overnight Place softened fruit into food processor with metal blade Add peel and salt and pulse three or four times Add honey and run processor until well mixed and smooth Do not worry if mixture seems thin as you are going to refrigerate this overnight and it will firm up at that time.
Notice I do NOT cook the prunes as do many recipes. I do not like the taste or texture. The alcohol in the Brandy really plumps and tenderizes the fruit. Boiling water will do okay but not as good as Brandy!
NOW whichever dough you have made you will cut into four equal parts. That is if you like your Danish LARGE with lots of filling – as I DO! If you want smaller ones then by all means divide further. The techniques are the same regardless so YOU decide.
For the Puff Pastry roll each part of dough on Floured surface until you have a 6″X6″ square. (That is for the four LARGE size as shown above) For the soft pastry instead of flour you will coat your work surface with a mixture of 1 cup confectioners sugar and 1 cu granulated sugar. Mix them up together and use like flour on work surface to roll out dough.
Puff Pastry:
For the two front danish in the photo which are the standard looking type, look at the 6X6 square from one point so you see what is like a diamond shape. I use a Tablespoon and a teaspoon to load the filling down the center of the diamond leaving an inch at either “tip”. I use quite a bit of prune in each because I like it that way and the bakery I once frequented did the same. NOW you will fold the two SIDE tips inwards so they overlap over the prune filling (just like you see in the photo above.) Also curl up the other two end points making a sort of ridge which will help keep any filling from running out. This is for the standard look. Use a large flat spatula to lift the danish from the work surface on to your baking sheet. I use a standard cookie sheet which is lined with a Silpat. You can buy Silpat (or silicone) liners on Amazon OR when they have them Costco sells a set for a LOT cheaper. I always have TWO silpat lined cookie sheets for when I make cookies.
The other fancier danish starts out the same with the square but now you look at it AS a square and load the filling down the center leaving an inch at either end. Next you will use a sharp knife to slice the dough into strips coming no closer to the filling than a half inch. Like a lattice you will fold first one “flap” then its opposing over the filling so they overlap. Just look at the picture above and you can see what I am trying to describe. I like the look of these for some reason.
Use the “square/diamond” instructions above only coat your surface with the mix of confectioners and granulated sugars. I would NOT try the overlapping strips with this softer dough. You might end up with a mess. In both cases place cookie sheet with pastries into the fridge while the oven preheats to 350. Before placing in oven either spray top surface of pastries LIGHTLY with PAM (and please use the original as it has the best taste) OR separate out an egg white and whip it up with a whisk until it is more liquid. Brush this on the tops of the pastries if you wish. I prefer the PAM as I do not like the added egg taste. Start out setting your timer at fifteen minutes and then check every five minutes after that until pastry is golden brown as above. DO NOT leave and do NOT forget to check. Every oven is different and there is no way to be exact with timing. Just go by smell and sight to judge when these are done.
Remove from oven leave ten minutes then transfer to cooling racks. Enjoy!
So there it is, another great recipe for the use of healthy prunes.
This recipe is simple and easy. Best of all no preservatives, no extra sugar and no extra yeast.
If you ever wonder why you are eating so little but gaining so much. It’s the quality of your food. If you are constantly consuming your meals from boxes, cans and the frozen meals off the shelf of the market. There lies your problem. Garbage in, Garbage weight you will gain.
This is fresh hot delicious food you will enjoy eating and your body will thank you…
Total Time: 1 hour 15 mins
Ingredients:
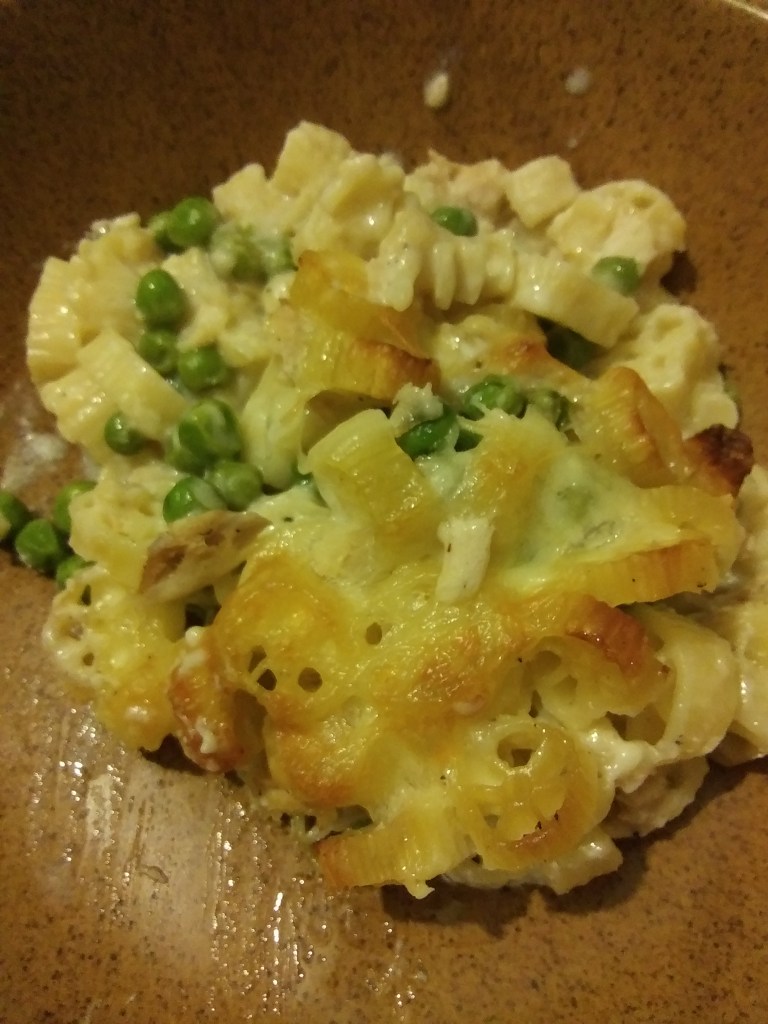
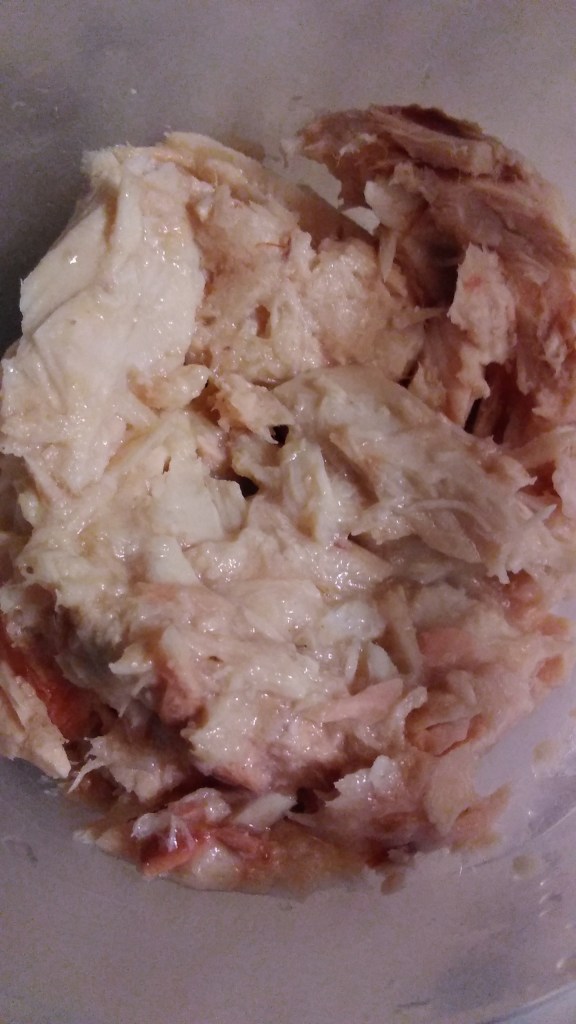
12 ounce can Tuna (drained)
2 cups frozen Peas (if you don’t like Peas, Pick them out, It gives a special sweetness to the casserole)
3/4 stick Butter
1/2 teaspoon Salt
1 teaspoon Salt (No it’s not a Typo)
1 teaspoon ground Black Pepper
2 tablespoons Flour
2 1/2 cups Whole Milk or Cream (590 ml)
1/2 cup Gouda Cheese
1/2 Monterey Jack
13″ x 9″ x 4″ casserole dish with lid or foil
Butter your casserole dish
Take a 1 teaspoon of the butter and grease the entire 13″ x 9″ x 4″ or any dish with similar dimensions. Glass preferred.
Take a mason jar or any jar with a lid:
Add Pepper, Salt, Flour and Milk or Cream. And shake till all the flour is combined and smooth. You may want to shake for a few minutes and let rest and return in 10 minutes and shake some more. Take the remaining butter throw it in a pan along with your rue and warm over stove constantly stirring until steam arises from surface. Remove from Heat.
Boil your water add the 1 teaspoon salt after the water boils. Place Peas in first make sure water is still boiling. Add the Pasta in and boil for 10 minutes stirring occasionally. Drain, Place drained Pasta and Peas into the casserole dish. Take the flour rue and stir for a few minutes and make sure there are no lumps. Pour over Pasta and stir gently until all pasta and peas are thoroughly covered in the rue. Place cheese evenly over the pasta one at a time so it is evenly covered with both cheeses.
BAKE AT 350 Degrees for 20 minutes or until cheese is slightly brown. Cover with lid or foil and continue to cook for 25 minutes, Remove from oven and let sit for 15 minutes and serve.
This is fantastic if you want to freeze small portions for later. Frozen dinners with no preservatives or extra sodium you don’t need.
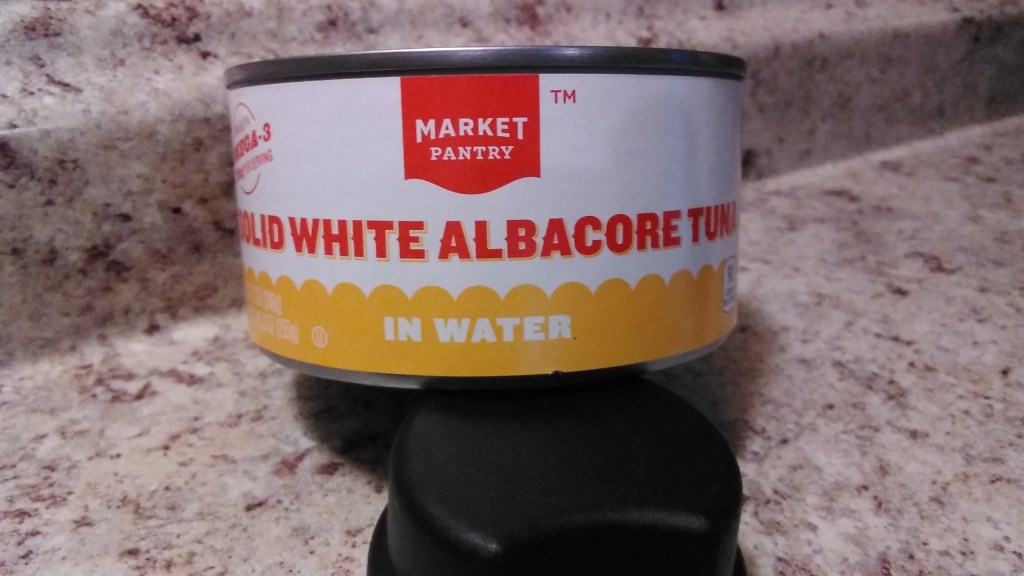
Tuna Review: Target Market Pantry Solid White Albacore in Water
12 ounce can of Dolphin Safe $2.79 on SALE $1.99 (Hawaii) This is a good deal for the price. Most of the 12 ounce cans of tuna from the “Big” markets are of lesser quality compared to your name brands. So far this is one is good quality. Name brands prices run any where from $5.99 to $14.99 for a 12 ounce can. I am sure it is cheaper for other states.
“Hey my tuna tastes like Vegetables”…Just kidding..
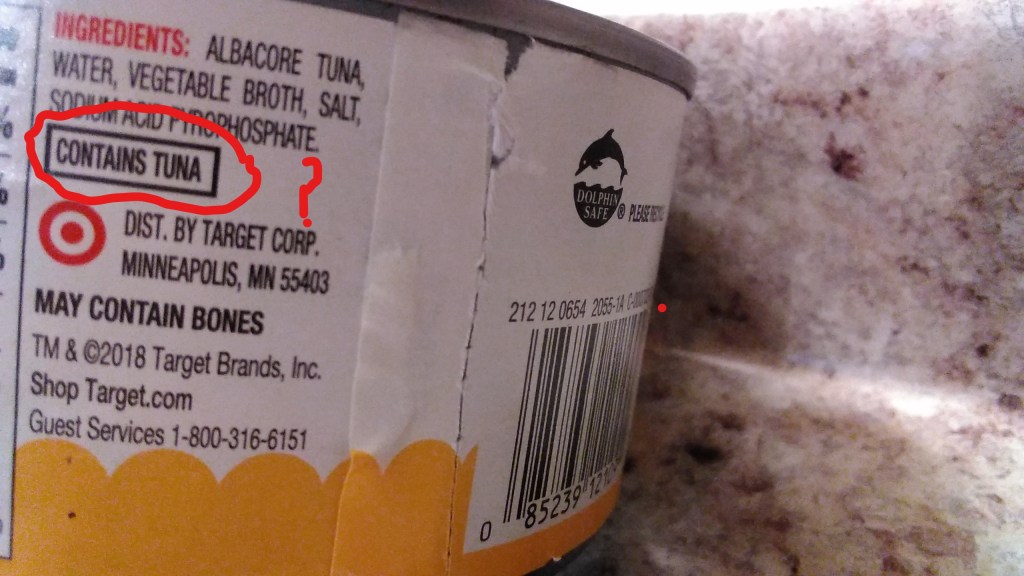
Not sure why the ingredients include vegetable brooth when it says in water? I thought we wanted it to taste like tuna?
Ingredients vary from manufacture. This can contains: Albacore Tuna, Water, Vegetable Broth, Salt, Sodium Acid Pyrophosphate. May also contain Bones.
It does not say what country it was processed or caught in. Mystery fish are becoming more prevalent in our society. Not all Tuna is alike… It does say it CONTAINS TUNA… Hahahahaha. Actually I thought it was a very good tuna for the price.
CONTAINS TUNA … Seriously it’s a can of TUNA
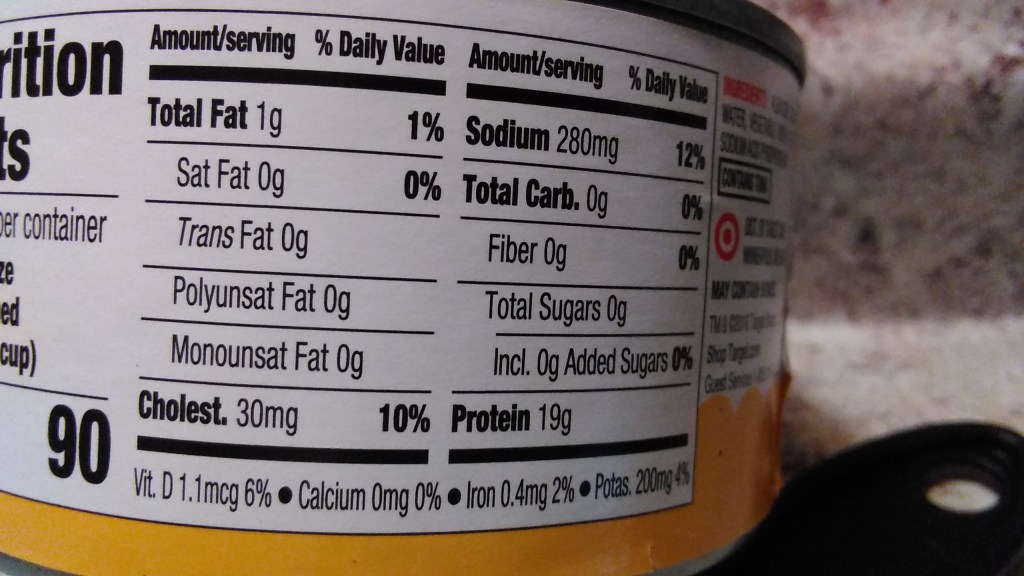
Nutrition Facts:
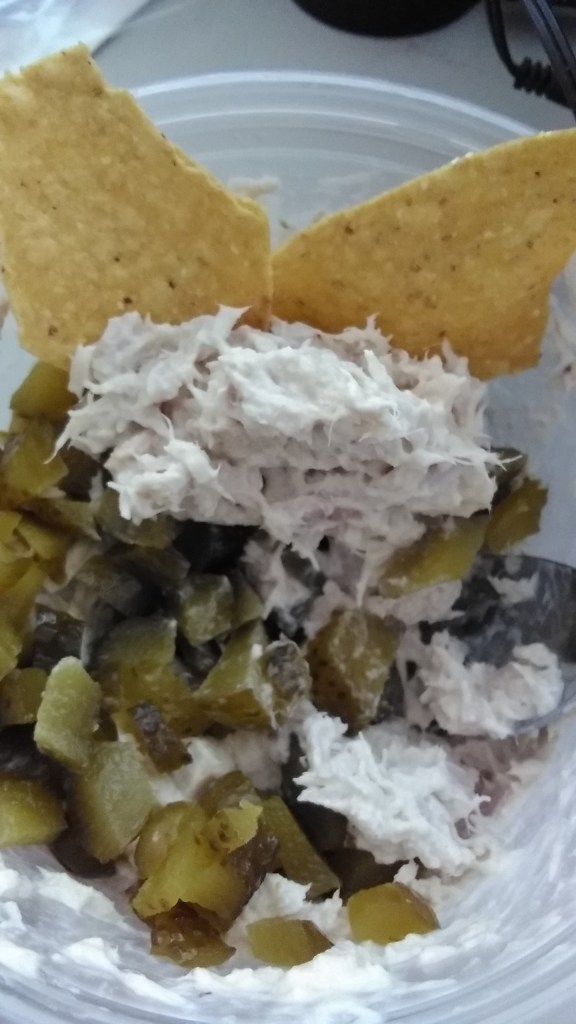
There are 3 servings per can. I add pickles and Mayo so I get more like 5 servings… I love sweet gherkin pickles. OOohhhh So Yummy!! Ok back to the facts.
90 Calories per serving when drained. A Healthy 1/3 cup of Tuna per serving.
Wow I did not realize tuna had Cholesterol. Each serving of this Tuna has 30 mg. I thought we ate tuna to lower our Cholesterial? Now I am confused.
It says it only has 1 Gram of Fat. Which fat? It does not say. But you do get a touch of Potassium 200mg, Vitamin D 1.1 mcg and Iron 0.4mg.
Sodium is at 280mg. No Carbs, No Fiber, No sugars and No Added Sugars.
Great News 19 grams of Protein and 220 mg per serving of DHA & EPA OMEGA-3 are present.
The good thing with Target’s Brand, Market Pantry Solid White Albacore Tuna is that there is no Soy added. Bumble Bee Tuna adds Soy and is about $4 more a can here.
If you are adding Mayo and Or Pickles get the nutritional information from the labels on the containers and watch those calories bump up. Don’t forget the bread, crackers or what ever vessel your delivery will be to your mouth has to be counted. Slimmest delivery system is a spoon… Zero calories.
Sometimes we forget there are so many healthy benefits to the all natural olives. Support’s a healthy heart and blood sugar, soothes worn down Joints, increases energy levels, skin looks younger, helps brain function and helps distrubute an over all healthy body.
Cheaper or more expensive does not matter. #1 The Quality level of the olive and where it was grown, not “Processed or Made”… “It’s All About The Soil the Olive is Grown in. Just like the grapes that fine wines are made from. Price does not always guarantee a great bottle of wine. We all know the pungent smell of vinegar means the wine has gone bad. But you may not realize you have a bad bottle of olive oil unless it is seriously rancid.
This weeks special. Book now and save $$$$. Promotion ends October 1, 2019
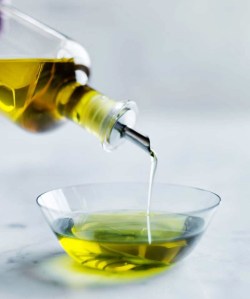
Here is a little secret you need to know before you buy the next bottle of olive oil.
Best Buy Date, Toss it out the window.
Olive oil only has a 3 year window for shelf life from the date the olives were picked, not BEST BY. Try and find an olive oil that has a “DATE: Harvested, Picked or Processed”date stamp rather than “Best By”… Buy only those and no other for assured quality. You may have to look online rather than the store.
It has been said that “America is the worlds dumping ground for rancid and defective olive oil”.Most Americans don’t even realize what a rancid olive oil taste like.
When olive oil goes rancid it develops something called free radicals that attack your system. Leaving you vuldrabule to sickness, premature aging and weight gain.
Once you find the correct brands to use, try and use all of it within 6 months. Better if you can use it within 2 to 3 months.